RabbitMQ是流行的開源消息隊列系統,用erlang語言開發。
安裝(Windows):
Windows:
首先需要安裝 Erlang環境
官網:
http://www.erlang.org/
Windows版下載地址:http://www.erlang.org/download/otp_win64_17.3.exe
Linux版: 使用yum安裝
安裝模塊 pip install pika
Linux(centos7):
安裝都是需要Erlang環境的。
wget

rpm -Uvh erlang-solutions-1.0-1.noarch.rpm

rpm --import http://packages.erlang-solutions.com/rpm/erlang_solutions.asc

yum install erlang
erlang 安裝完成後,開始安裝rabbitmq。
從官網下載(http://www.rabbitmq.com)rpm包;
rpm -ivh rabbitmq-server-3.4.1-1.noarch.rpm  #安裝

service rabbitmq-server start  #啓動

chkconfig rabbitmq-server on   #開機自啓動

#編輯配置文件
cp /usr/share/doc/rabbitmq-server-3.4.1/rabbitmq.config.example /etc/rabbitmq/rabbitmq.config
vim /etc/rabbitmq/rabbitmq.config

   %% The default "guest" user is only permitted to access the server
   %% via a loopback interface (e.g. localhost).
   %% {loopback_users, [<<"guest">>]},
   %%
   %% Uncomment the following line if you want to allow access to the
   %% guest user from anywhere on the network.

    {loopback_users, []}  #將改行取消註釋,即允許遠程用戶訪問。
開啓web界面管理工具
rabbitmq-plugins enable rabbitmq_management  #開啓web界面管理工具

systemctl restart  rabbitmq-server.service #重啓服務
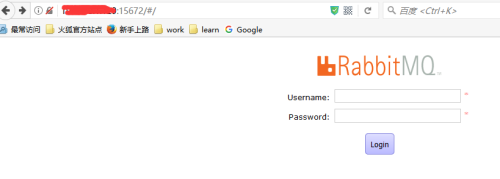
界面如圖所示,默認端口爲15672.
默認用戶名和密碼均爲 guest
默認網頁是不允許訪問的,需要增加一個用戶修改一下權限,代碼如下:
添加用戶:rabbitmqctl add_user tanx tanx
添加權限:rabbitmqctl set_permissions -p "/" tanx ".*" ".*" ".*"
修改用戶角色rabbitmqctl set_user_tags tanx administrator
然後就可以遠程訪問了,然後可直接配置用戶權限等信息。
set_permissions [-p vhost] {user} {conf} {write} {read}
vhost
The name of the virtual host to which to grant the user access, defaulting to /.
user
The name of the user to grant access to the specified virtual host.
conf
A regular expression matching resource names for which the user is granted configure permissions.
write
A regular expression matching resource names for which the user is granted write permissions.
read
A regular expression matching resource names for which the user is granted read permissions.
rabbitmq常用命令
add_user <UserName> <Password>
delete_user <UserName>
change_password <UserName> <NewPassword>
list_users
add_vhost <VHostPath>
delete_vhost <VHostPath>
list_vhostsset_permissions [-p <VHostPath>] <UserName> <Regexp> <Regexp> <Regexp>
clear_permissions [-p <VHostPath>] <UserName>
list_permissions [-p <VHostPath>]
list_user_permissions <UserName>
list_queues [-p <VHostPath>] [<QueueInfoItem> ...]
list_exchanges [-p <VHostPath>] [<ExchangeInfoItem> ...]
list_bindings [-p <VHostPath>]
list_connections [<ConnectionInfoItem> ...]
2.python代碼
先來一段簡單的代碼實現
producter端
#!/usr/bin/env python
import pika

connection = pika.BlockingConnection(pika.ConnectionParameters(
               'localhost'))
channel = connection.channel()

#聲明queue
channel.queue_declare(queue='hello')

#n RabbitMQ a message can never be sent directly to the queue, it always needs to go through an exchange.
channel.basic_publish(exchange='',
                      routing_key='hello',
                      body='Hello World!')
print(" [x] Sent 'Hello World!'")
connection.close()
customer端
#_*_coding:utf-8_*_
__author__ = 'Alex Li'
import pika

connection = pika.BlockingConnection(pika.ConnectionParameters(
               'localhost'))
channel = connection.channel()


#You may ask why we declare the queue again  we have already declared it in our previous code.
# We could avoid that if we were sure that the queue already exists. For example if send.py program
#was run before. But we're not yet sure which program to run first. In such cases it's a good
# practice to repeat declaring the queue in both programs.
channel.queue_declare(queue='hello')

def callback(ch, method, properties, body):
    print(" [x] Received %r" % body)

channel.basic_consume(callback,
                      queue='hello',
                      no_ack=True)

print(' [*] Waiting for messages. To exit press CTRL+C')
channel.start_consuming()
