mariaDB
MariaDB 是MySQL的一個分支,從MySQL被甲骨文收購之後開發的一個替代品,目前全部兼容MySQL。
MariaDB 是一個採用 Maria 存儲引擎的 MySQL 分支版本,是由原來 MySQL 的作者 Michael Widenius 創辦的公司所開發的免費開源的數據庫服務器。
由於滿MySQL被Oracle收購後的日漸封閉與緩慢的更新,衆多Linux發行版逐漸拋棄了這MySQL數據庫,而轉向了MariaDB
CentOS 7/RHEL7中,默認已經不再提供mysql的安裝源,取而代之的是mysql的原開發者另起爐竈開發的mariadb數據庫,不僅完全兼容mysql而且比mysql更加強大。
首先安裝mariadb
#yum –y install mariadb mariadb-server
拷貝配置文件(注意:如果/etc目錄下面默認有一個my.cnf,直接覆蓋即可)
cp /usr/share/mysql/my-huge.cnf /etc/my.cnf
啓動mariadb服務並開機自動運行
Mariadb數據庫仍然默認使用tcp 3306端口。
打開防火牆服務
安裝完後,開始設置Mariadb數據庫
#/usr/bin/mysql_secure_installation
輸入上述命令後,按照提示操作
NOTE: RUNNING ALL PARTS OF THIS SCRIPT IS RECOMMENDED FOR ALL MariaDB
SERVERS IN PRODUCTION USE! PLEASE READ EACH STEP CAREFULLY!
In order to log into MariaDB to secure it, we'll need the current
password for the root user. If you've just installed MariaDB, and
you haven't set the root password yet, the password will be blank,
so you should just press enter here.
Enter current password for root (enter for none): 安裝後默認沒有root密碼,直接回車
OK, successfully used password, moving on...
Setting the root password ensures that nobody can log into the MariaDB
root user without the proper authorisation.
Set root password? [Y/n] Y
New password: 輸入root的新密碼
Re-enter new password: 新密碼確認
Password updated successfully!
Reloading privilege tables..
... Success!
By default, a MariaDB installation has an anonymous user, allowing anyone
to log into MariaDB without having to have a user account created for
them. This is intended only for testing, and to make the installation
go a bit smoother. You should remove them before moving into a
production environment.
Remove anonymous users? [Y/n] 刪除匿名用戶 Y
... Success!
Normally, root should only be allowed to connect from 'localhost'. This
ensures that someone cannot guess at the root password from the network.
Disallow root login remotely? [Y/n] 關閉root遠程登錄 Y
... Success!
By default, MariaDB comes with a database named 'test' that anyone can
access. This is also intended only for testing, and should be removed
before moving into a production environment.
Remove test database and access to it? [Y/n] 刪除test數據庫 Y
- Dropping test database...
... Success!
- Removing privileges on test database...
... Success!
Reloading the privilege tables will ensure that all changes made so far
will take effect immediately.
Reload privilege tables now? [Y/n] 確定以上所有操作 Y
... Success!
Cleaning up...
All done! If you've completed all of the above steps, your MariaDB
installation should now be secure.
Thanks for using MariaDB!
或執行mysqladmin爲MariaDB數據庫賬戶root設置密碼
Mariadb安裝完畢後,管理員用戶是root密碼默認爲空,可以執行mysqladmin設置賬戶密碼
如何重設管理員賬戶root的密碼
情況1:在已知mariadb數據庫的ROOT用戶密碼的情況下,修改密碼的方法:
1、 在SHELL環境下,使用mysqladmin命令設置:mysqladmin –u root –p password “新密碼”回車後要求輸入舊密碼
2、 在MariaDB[(none)]>環境中,使用update命令,直接更新mysql庫user表的數據,不過改完之後需要刷新:
update mysql.user set password=password(‘新密碼’) where user=’root’;
flush privileges;
注意:mariadb的sql語句要以分號”;”結束
3、 在MariaDB[(none)]>環境中,使用grant命令,修改root用戶的授權權限。
grant all on *.* to root@’localhost’ identified by ‘新密碼’;
4、 在MariaDB裏面,可以使用 set password重置
情況2:如查忘記了MariaDB數據庫的ROOT用戶的密碼,又如何做呢?方法如下:
1、 關閉當前運行的mariadb服務程序:
2、 使用mysqld_safe腳本以安全模式(不加載授權表)啓動mariadb服務
/usr /bin/mysqld_safe --skip-grant-table &
3、 使用空密碼的root用戶登錄數據庫,重新設置ROOT用戶的密碼
#mysql -u root
MariaDB[(none)]>Update mysql.user set password=password(‘新密碼’) where user=’root’;
MariaDB[(none)]> flush privileges;
到此Mariadb安裝並設置完畢,接下來可以測試一下:執行mysql命令連接mariadb數據庫
如何更改mariadb默認的數據文件存儲目錄
mariadb默認的數據文檔存儲目錄爲/var/lib/mysql
要想將默認創建目錄改成/data,需要一下操作:
1、創建/data目錄
#mkdir /data
2、把mariadb服務停掉:
#systemctl stop mariadb.service
3、把/var/lib/mysql整個目錄複製到/data
#cp -r /var/lib/mysql/* /data/
這樣就把MySQL的數據文檔複製到了/data下
4、編輯mariadb的配置文檔/etc/my.cnf
在[client]下添加:
把原來的socket=/var/lib/mysql/mysql.sock,前邊加#註釋掉,添加socket=/data/mysql.sock(以防有問題再改回來)。
在[mysqld]下添加:
把原來的socket=/var/lib/mysql/mysql.sock,前邊加#註釋掉,添加socket=/data/mysql.sock(以防有問題再改回來)。
datadir =/data/ (這行沒有,需要自己加上)
保存後退出。
#chown -R mysql:mysql /data
5、重新啓動mariadb服務
systemctl start mariadb.service。
注:在my.cnf文件中添加skip-networking=1表示數據庫只能被 localhost 訪問。
skip-networking 只允許通過一個套接字文件(Unix/Linux系統)或通過命名管道(Windows系統)進行本地連接,不允許ICP/IP連接; 這提高了安全性,但阻斷了來自網絡的外部連接和所有的Java客戶程序(Java客戶即使在本地連接裏也使用TCP/IP)。
現在可以開始用mariadb了,先看看基本的命令操作
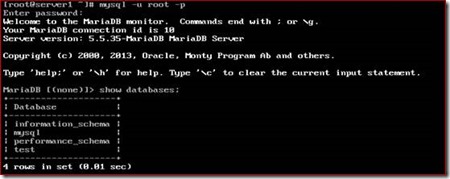
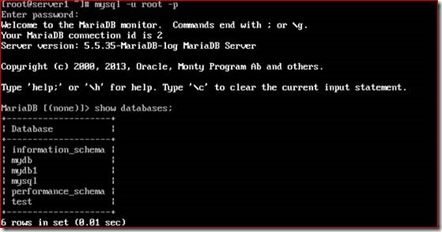
顯示數據庫
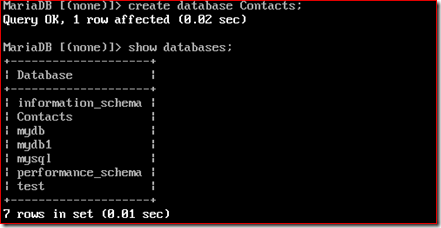
創建數據庫
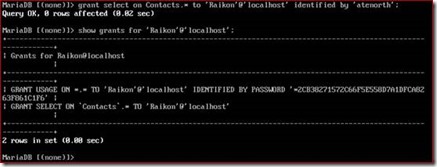
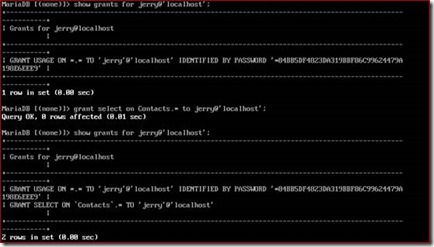
創建數據庫用戶並授予權限
如果要撤銷權限可以使用revoke命令
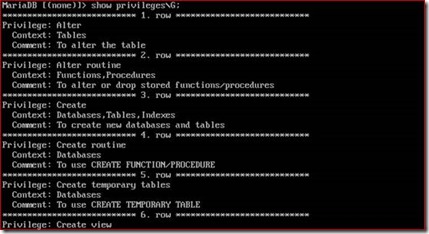
注:所有的權限可以通過show priviledges\G 顯示
還可以通過下面的方式創建用戶並授予權限
查看當前登錄用戶。
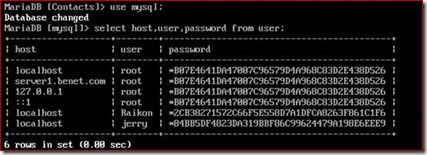
查看一下mysql數據庫裏面的user表
進入數據庫
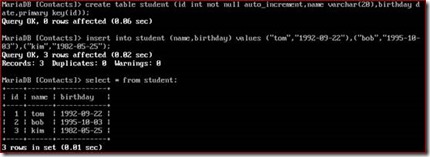
創建一個表,指定主鍵和各字段的名字類型,並向表中插入數據。
更新數據
複製一張表
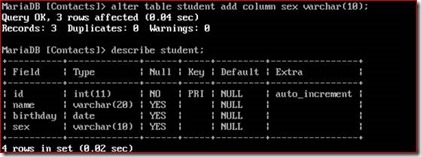
更改表的結構,增加一個字段
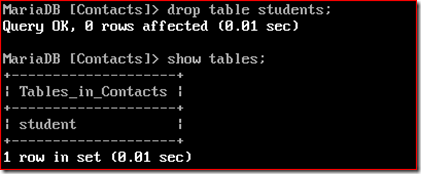
刪除表
創建另外一張表,和第一張表綁定主鍵外鍵,級聯刪除
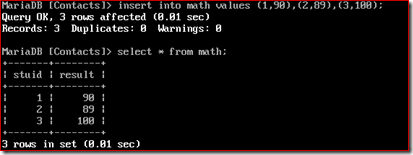
插入數據
做個簡單的多表查詢
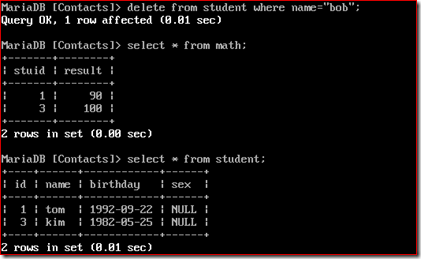
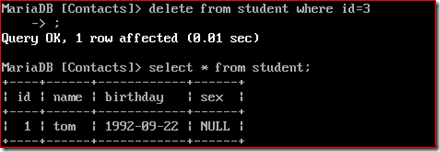
從主表裏面刪除一行數據,確認級聯刪除有效
最後,看看數據庫的備份和還原
Mariadb數據庫的備份分爲:冷備和熱備
冷備份就是直接備份 /var/lib/mysql下面的數據庫文件了(如cp、tar、dump、dd等)
熱備可以通過 mysqldump實現,mysqldump 比較常用的,比較適合備份少量數據。可以實現遠程備份表,數據庫。
命令格式:
#mysqldump –u root –p [密碼] [options] [數據庫名] [表名] > /備份路徑/備份文件名
備份整個數據庫
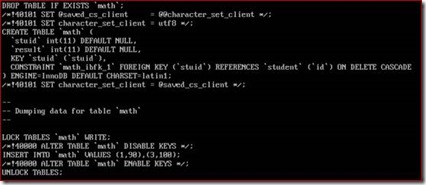
查看一下這個生成的sql文件,本質是先刪除現有表,然後創建一個新的,然後插入數據
備份數據庫中指定的表
備份所有數據庫
恢復數據庫
模擬破壞數據
用備份還原數據
驗證:
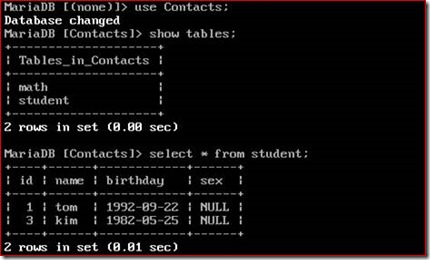
查看數據是否恢復,如下圖所示:
有關mariadb的其他備份工具可以查詢相關資料


