组件名:Netflix Eureka
作用:支撑微服务的自注册、自发现,提供负载均衡能力
开发环境使用IDEA,jdk1.8
一、搭建eureka服务
1.新建maven项目,配置pom.xml文件
<parent>
    <groupId>org.springframework.cloud</groupId>
    <artifactId>spring-cloud-starter-parent</artifactId>
    <version>Camden.SR7</version>
</parent>
<dependencies>
    <dependency>
        <groupId>org.springframework.cloud</groupId>
        <artifactId>spring-cloud-starter</artifactId>
    </dependency>
    <dependency>
        <groupId>org.springframework.cloud</groupId>
        <artifactId>spring-cloud-starter-eureka-server</artifactId>
    </dependency>
</dependencies>
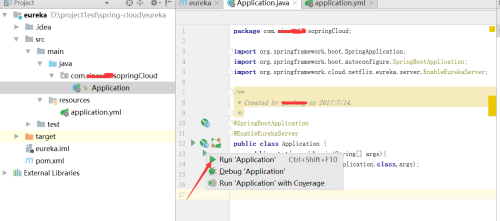
2.新建启动类
@SpringBootApplication
@EnableEurekaServer
public class Application {
    public static void main(String[] args){
        SpringApplication.run(Application.class,args);
    }
}
3.新建配置文件application.yml
server:
  port: 1000
eureka:
  instance:
    hostname:  localhost
  client:
    register-with-eureka: false
    fetch-registry: false
spring:
  application:
    name: eureka-server
4.启动(启动类)
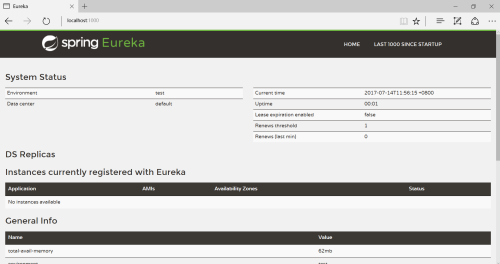
5.访问 eureka:http://localhost:1000/
erueka服务器启动成功,目前还未有服务注册
二、搭建服务提供方
1.新建maven项目,配置pom.xml文件
<parent>
    <groupId>org.springframework.cloud</groupId>
    <artifactId>spring-cloud-starter-parent</artifactId>
    <version>Camden.SR7</version>
</parent>
<dependencies>
    <dependency>
        <groupId>org.springframework.cloud</groupId>
        <artifactId>spring-cloud-starter</artifactId>
    </dependency>
    <dependency>
        <groupId>org.springframework.cloud</groupId>
        <artifactId>spring-cloud-starter-eureka-server</artifactId>
    </dependency>
</dependencies>
2.创建Application启动类,提供/hello服务
@Configuration
@ComponentScan
@EnableEurekaClient
@EnableAutoConfiguration
@RestController
public class Application {
    @RequestMapping(value = "hello",method = RequestMethod.GET)
    public String hello(){
        return "你好,世界";
    }
    public static void main(String[] args){
        new SpringApplicationBuilder(Application.class).web(true)
                .run(args);
    }
}
3、新建application.yml配置文件
eureka:
  client:
    serviceUrl:
      defaultZone: http://localhost:1000/eureka/
spring:
  application:
    name: feign-client-test-001
server:
  port: 2000
查看路径id展示,需要添加配置
eureka:
  client:
    serviceUrl:
      defaultZone: http://admin:admin123@localhost:1000/eureka
  instance:
    prefer-ip-address: true
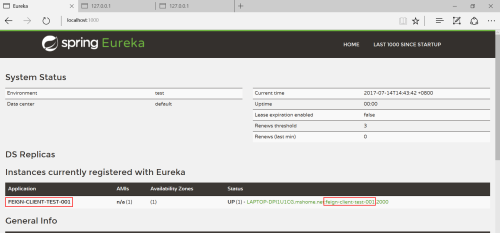
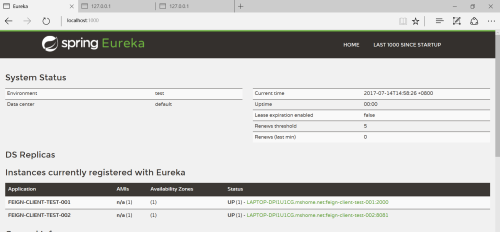
4、运行,查看之前Erueka服务端的页面,FEIGN-CLIENT-TEST-001在注册中心变为了大写这个注意下
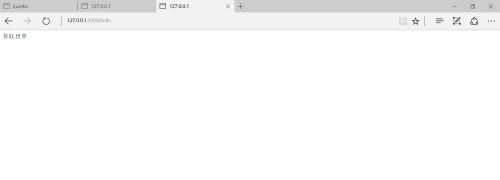
5、访问:http://127.0.0.1:2000/hello
三、搭建服务消费方
使用@FeignClient注解
Feign is a declarative web service client. It makes writing web service clients easier.
如上是Spring Cloud文档中对于Feign的定义,结合之前的两篇博文,在这里我们就可以吧Feign简单的理解为用户(前端)可以直接接触到的REST接口提供者。在Feign中,我们可以方便的访问和使用意已经在Erueka服务器中注册过的服务了。
1、建立maven工程,配置pom.xml文件
<parent>
    <groupId>org.springframework.boot</groupId>
    <artifactId>spring-boot-starter-parent</artifactId>
    <version>1.5.2.RELEASE</version>
    <relativePath/> <!-- lookup parent from repository -->
</parent>

<properties>
    <project.build.sourceEncoding>UTF-8</project.build.sourceEncoding>
    <project.reporting.outputEncoding>UTF-8</project.reporting.outputEncoding>
    <java.version>1.8</java.version>
</properties>

<dependencies>
    <dependency>
        <groupId>org.springframework.cloud</groupId>
        <artifactId>spring-cloud-starter-feign</artifactId>
    </dependency>
    <dependency>
        <groupId>org.springframework.cloud</groupId>
        <artifactId>spring-cloud-starter-eureka</artifactId>
    </dependency>
    <dependency>
        <groupId>org.springframework.boot</groupId>
        <artifactId>spring-boot-starter-test</artifactId>
        <scope>test</scope>
    </dependency>
</dependencies>

<dependencyManagement>
    <dependencies>
        <dependency>
            <groupId>org.springframework.cloud</groupId>
            <artifactId>spring-cloud-dependencies</artifactId>
            <version>Camden.SR6</version>
            <type>pom</type>
            <scope>import</scope>
        </dependency>
    </dependencies>
</dependencyManagement>
<build>
    <plugins>
        <plugin>
            <groupId>org.springframework.boot</groupId>
            <artifactId>spring-boot-maven-plugin</artifactId>
        </plugin>
    </plugins>
</build>
2、建立包及启动类FeignApplication
/**
 * Created by gaofeng on 2017/7/14.
 */
@Configuration
@ComponentScan
@EnableAutoConfiguration
@EnableEurekaClient
@EnableFeignClients
@SpringBootApplication
public class FeignApplication {
    public static void main(String[] args) {
        SpringApplication.run(FeignApplication.class, args);
    }
}3、建立接口类,用来调用上文中FEIGN-CLIENT-TEST-001服务的方法hello(),FEIGN-CLIENT-TEST-001是全大写的
@FeignClient("FEIGN-CLIENT-TEST-001")
public interface IHello {
    @RequestMapping(value = "/hello",method = RequestMethod.GET)
    String hello();
}其中@FeignClient中指定需要调用的微服务的名称(全大写),@RequestMapping中指定访问微服务响应接口的路径,如之前微服务的hello方法是通过"/hello"路径访问,那么这里需要配置一致
4、新建Controller类,为前端提供REST接口
@RestController
public class HelloController {
    @Autowired
    private IHello iHello;
    @RequestMapping(value = "gethello",method = RequestMethod.GET)
    public String getHello() {
        return iHello.hello();
    }
}
5、配置Feign的配置文件,指定Eureka服务器注册地址和访问端口application.yml
server:
  port: 8081
eureka:
  client:
    serviceUrl:
      defaultZone: http://localhost:1000/eureka/
spring:
  application:
    name: feign-client-test-002
6、运行,查看之前Erueka服务端的页面
7、访问:http://127.0.0.1:8081/gethello
这里访问的就是feign-client-test-001的hello服务。

