本文使用 zxing-android-embedded 這個開源項目實現 二維碼掃描/生成 功能;
開發工具:android studio
1、如何將zxing-android-embedded添加到我們的項目中
1.1 添加arr依賴包
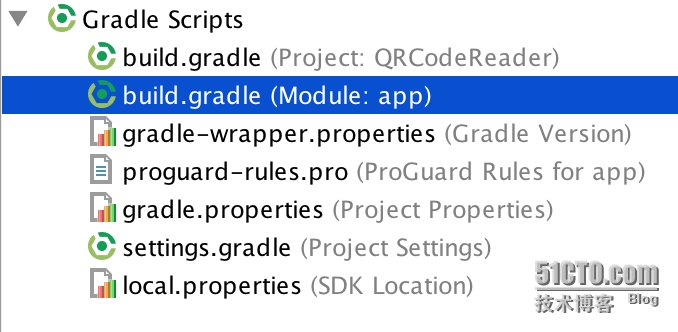
將以下代碼添加到build.gradle文件中。
repositories {
    mavenCentral()

    maven {
        url "https://dl.bintray.com/journeyapps/maven"
    }
}

dependencies {    // Supports Android 4.0.3 and later (API level 15)
    compile 'com.journeyapps:zxing-android-embedded:2.3.0@aar'

    // Supports Android 2.1 and later (API level 7), but not optimal for later Android versions.
    // If you only plan on supporting Android 4.0.3 and up, you don't need to include this.
    compile 'com.journeyapps:zxing-android-legacy:2.3.0@aar'

    // Convenience library to launch the scanning Activities.
    // It automatically picks the best scanning library from the above two, depending on the
    // Android version and what is available.
    compile 'com.journeyapps:zxing-android-integration:2.3.0@aar'

    // Version 3.0.x of zxing core contains some code that is not compatible on Android 2.2 and earlier.
    // This mostly affects encoding, but you should test if you plan to support these versions.
    // Older versions e.g. 2.2 may also work if you need support for older Android versions.
    compile 'com.google.zxing:core:3.2.0'
}注意:是app目錄下的build.gradle文件
1.2 通過gradle同步你的項目
點擊 "sync project with gradle files",android studio 將聯網下載必要的文件。
到這一步爲止,我們的項目已經可以使用 zxing-android-embedded 的代碼了!
2、掃描二維碼
2.1 啓動二維碼掃描界面
在Activity中,使用默認選項啓動,可使用以下代碼:
new IntentIntegrator(this).initiateScan(); //'this'是當前的Activity
在Fragment中,使用默認選項啓動,可使用以下代碼:
IntentIntegrator.forSupportFragment(this).initiateScan(); //'this'是當前的Fragment
2.1.1 自定義選項,參考 IntentIntegrator
2.2 接收掃描結果
掃描完成,將會調用你的 onActivityResult 方法。
因此我們需要重寫 onActivityResult 方法來獲取掃描結果。
@Override
public void onActivityResult(int requestCode, int resultCode, Intent intent) {
super.onActivityResult(requestCode, resultCode, intent);

    if (resultCode == Activity.RESULT_OK) {
        String contents = intent.getStringExtra("SCAN_RESULT");		//圖像內容
        String format = intent.getStringExtra("SCAN_RESULT_FORMAT");    //圖像格式

        // Handle successful scan
        Log.v("qr-code", contents + "####" + format);
        tv_content.setText(contents);
    } else if (resultCode == Activity.RESULT_CANCELED) {
        // Handle cancel
    }

}
到此步,完成了二維碼掃描功能。
如果掃描這張以下二維碼圖片,你將在logcat中得到這條輸出語句 “www.google.com####QR_CODE”
3 、生成二維碼
如果你需要將一段文本轉換成二維碼Bitmap,可參考以下代碼
private Bitmap generateQRCode(String qrCodeString){
    Bitmap bmp = null;    //二維碼圖片
    QRCodeWriter writer = new QRCodeWriter();
    try {
        BitMatrix bitMatrix = writer.encode(qrCodeString, BarcodeFormat.QR_CODE, 512, 512); //參數分別表示爲: 條碼文本內容,條碼格式,寬,高
        int width = bitMatrix.getWidth();
        int height = bitMatrix.getHeight();
        bmp = Bitmap.createBitmap(width, height, Bitmap.Config.RGB_565);

        //繪製每個像素
        for (int x = 0; x < width; x++) {
            for (int y = 0; y < height; y++) {
                bmp.setPixel(x, y, bitMatrix.get(x, y) ? Color.BLACK : Color.WHITE);
            }
        }

    } catch (WriterException e) {
        e.printStackTrace();
    }

    return bmp;
}

