


一、安裝open***
#yum install open***#yum install easy-rsa
二、生成證書
1、準備:
# cp /usr/share/doc/open***-2.4.5/sample/sample-config-files/server.conf /etc/open***# cp -r /usr/share/easy-rsa/ /etc/open***# cp /usr/share/doc/easy-rsa-3.0.3/vars.example easy-rsa/3.0/vars
2、初始化pki結構
#cd /etc/open***/easy-rsa/3.0# ./easyrsa init-pki
3、創建ca 密碼 (注意:cn那麼需要記住*)
# ./easyrsa build-ca
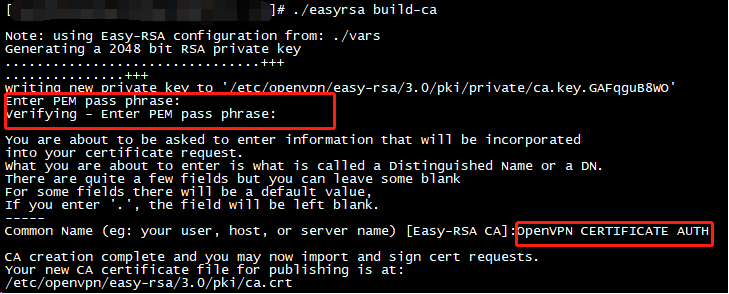
注:此處輸入兩次密碼, 一定要記住^_^, Common Name可以隨便填寫一個容易區分的信息。
4、創建Diffie-Hellman,確保key穿越不安全網絡
`# ./easyrsa gen-dh`5、生成防***key文件
`open*** --genkey --secret ta.key`6、創建服務器證書
./easyrsa gen-req ***server nopass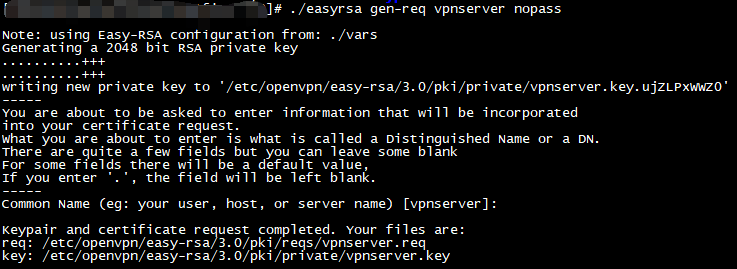
注:此處如果不指定nopass參數, 則需要創建服務器證書密碼。
7、簽約服務端證書:
`# ./easyrsa sign server ***server`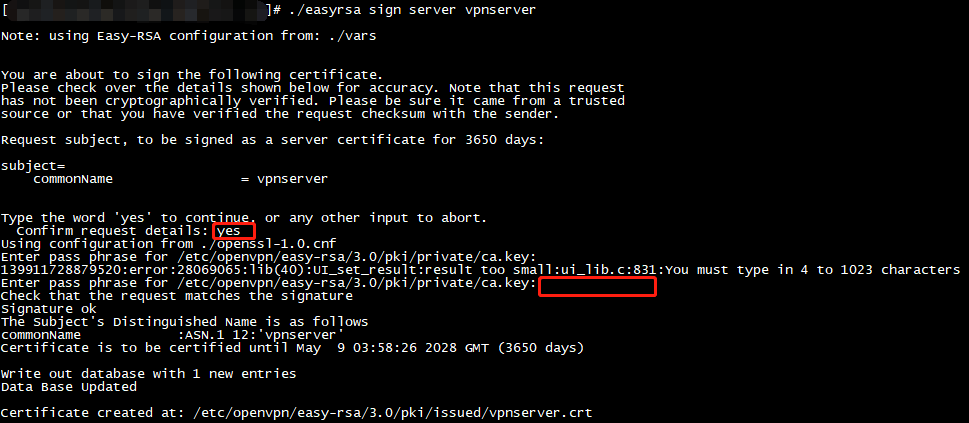
注:輸入yes簽發證書, 然後輸入上面設置的ca證書,如果忘了,則只能重新來過了。。。
8、生成客戶端證書:
`# ./easyrsa build-client-full client001`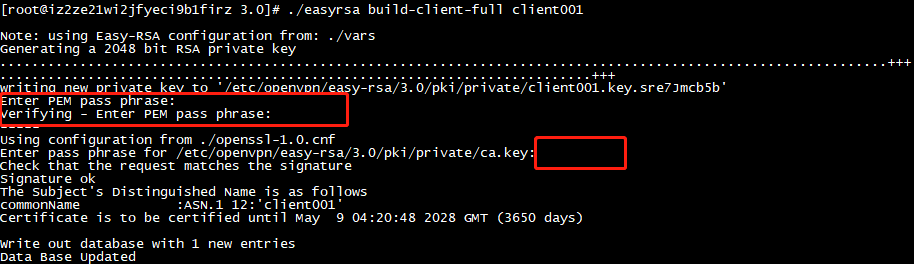
輸入兩次client密碼, 並輸入ca密碼。此處設置的密碼在***連接時會用到。
三、服務器端配置
1、將服務器證書整理到一起(此步爲了配置方便, 可以不做)
# cd /etc/open***/
# mkdir pki
# cd pki
# cp ../easy-rsa/3.0/ta.key ./
# cp ../easy-rsa/3.0/pki/ca.crt ./
# cp ../easy-rsa/3.0/pki/dh.pem ./
# cp ../easy-rsa/3.0/pki/issued/***server.crt ./
# cp ../easy-rsa/3.0/pki/private/***server.key ./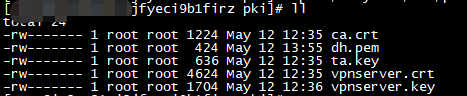
2、配置server.conf
local 102.94.xx.xx(填寫你的vps IP, 對於阿里雲服務器,此項需註釋**!!!**)
port 1194
proto udp
dev tun
ca /etc/open***/pki/ca.crt
cert /etc/open***/pki/server.crt
key /etc/open***/pki/server.key # This file should be kept secret
dh /etc/open***/pki/dh.pem
server 10.8.0.0 255.255.255.0
ifconfig-pool-persist ipp.txt
push "redirect-gateway def1 bypass-dhcp"
push "dhcp-option DNS 8.8.8.8"
keepalive 10 120
tls-auth /etc/open***/pki/ta.key 0
comp-lzo
max-clients 100
persist-key
persist-tun
status open***-status.log
verb 3
注:每個項目都會由介紹,open***提供的server.conf包含所配置的所有內容,我們只需要去掉前面的註釋#,然後修改我們自己的有關配置。
3、將客戶端所需證書整理到一起(可選)
# mkdir /etc/open***/client
# cd /etc/open***/client
# cp ../easy-rsa/3.0/ta.key ./
# cp ../easy-rsa/3.0/pki/ca.crt ./
# cp ../easy-rsa/3.0/pki/issued/client001.crt ./
# cp ../easy-rsa/3.0/pki/private/client001.key ./
4、配置轉發功能
# echo 'net.ipv4.ip_forward = 1' >/etc/sysctl.conf
# sysctl -p
5、配置防火牆
systemctl start firewalld.service
firewall-cmd --zone=public --list-all
firewall-cmd --add-service=open*** --permanent
firewall-cmd --add-port=1194/udp --permanent
firewall-cmd --add-source=10.8.0.0 --permanent
firewall-cmd --query-source=10.8.0.0 --permanent
firewall-cmd --add-masquerade --permanent
firewall-cmd --query-masquerade --permanent
firewall-cmd --reload
6、在阿里雲控制檯安全組規則中,開放1194端口

7、啓動open***
systemctl start open***@server四、客戶端配置
1、將上面的三個客戶端文件下載到本地客戶端電腦
ca.crt client001.crt client001.key ta.key這四個文件2、從官網下載open***客戶端進行安裝
在安裝目錄找到simple-config,將其中的client.o***拷貝到simple-config同級的conf文件夾
把剛纔下載的四個客戶端文件也拷貝到conf文件夾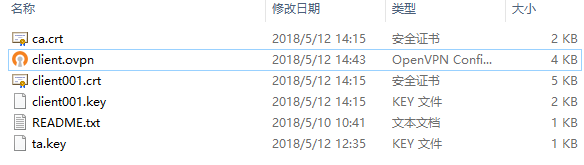
3、配置client.o***
client
dev tun
proto udp
remote 102.94.xx.xx 1194 //這裏修改成自己的服務器 ip
resolv-retry infinite
nobind
persist-key
persist-tun
ca ca.crt //這裏需要證書
cert client001.crt
key client001.key
tls-auth ta.key 1
comp-lzo
verb 3
五、排錯
1、啓動報錯(阿里雲服務器)
按報錯分析, 是找不到外網IP, 因爲ECS裏沒有配置這個IP, 因此在open***的server.conf註釋掉 ‘local 102.94.xx.xx’這項就可以了