Cobbler簡介
Cobbler是一個快速網絡安裝Linux的服務,在大批量系統安裝的環境中及其方便。
Cobbler功能
使用 Cobbler,您無需進行人工干預即可安裝機器。
Cobbler 支持衆多的發行版:Red Hat、Fedora、CentOS、Debian、Ubuntu 和 SuSE。
爲了協助管理系統,Cobbler 可通過 fence scripts 連接到各種電源管理環境。
首先也是最重要的,Cobbler需要Python,任何版本大於2.6的;官網說明(http://www.cobblerd.org/manuals/2.6.0/2/1_-_Prerequisites.html)
Cobbler也需要安裝以下的安裝包:
createrepo
httpd (apache2 for Debian/Ubuntu)
mkisofs
mod_wsgi (libapache2-mod-wsgi for Debian/Ubuntu)
mod_ssl (libapache2-mod-ssl)python-cheetah
python-netaddr
python-simplejson
python-urlgrabber
PyYAML (python-yaml for Debian/Ubuntu)
rsync
xinetd(system default installed )
syslinux
tftp-server (atftpd for Debian/Ubuntu, though others may work)
yum-utils
一、安裝和修改Cobbler相關的配置
1.安裝Cobbler
cobbler可以手動編譯安裝,也可以基於yum源的安裝, 如果需要通過yum源安裝,則需要配置epel源。
epel源可以通過下載官方給的epel源的目錄來實現安裝!http://fedoraproject.org/wiki/EPEL
# rpm -Uvh
# yum install cobbler -y
PS:新版的Fedora安裝系統存放在“testing”存儲庫中一段時間來檢查有沒有bug,如果你想通過EPEL安裝最新版的cobbler(未通過生產環境驗證有沒有bug),可在安裝或升級時啓動-testing模式。
$ sudo yum install –enablerepo=epel-testing cobbler
# or
$ sudo yum update –enablerepo=epel-testing cobbler
2.安裝DHCP服務
yum install dhcp -y
3.啓動各服務並設爲開機啓動
service httpd start (cobblerd/xinetd依次啓動 )
chkconfig httpd on (dhcpd/xinetd/tftp/cobblerd依次設置)
4.修改Cobbler配置:
# vim /etc/cobbler/setting
'next_server: 127.0.0.1' 替換本機IP地址 (DHCP服務地址)
'server: 127.0.0.1' 替換本機IP地址(cobbler服務地址)
'manage_dhcp: 0' 替換爲 1(cobbler管理dhcp,後面用於同步更新配置信息cobbler sync)
'manage_rsync: 0' 替換爲 1 (cobbler管理rsync功能)
5.啓動tftp和rsync服務
# vim /etc/xinetd.d/tftp
# vim /etc/xinetd.d/rsync
分別將disable項修改成:disable = no
6.修改DHCP模板,確保DHCP分配的地址和Cobbler在同一網段
# vim /etc/cobbler/dhcp.template
根據實際情況只修改subnet段的內容如下:
subnet 10.1.1.0 netmask 255.255.255.0 {
     option routers             10.1.1.1;
     option domain-name-servers 202.106.0.20;
     option subnet-mask         255.255.255.0;
     range dynamic-bootp        10.1.1.100 10.1.1.254;#     filename                  "/pxelinux.0";
     default-lease-time         21600;
     max-lease-time             43200;
     next-server                10.1.1.10;
     class "pxeclients" {
          match if substring (option vendor-class-identifier, 0, 9) = "PXEClient";
          if option pxe-system-type = 00:02 {
                  filename "ia64/elilo.efi";
          } else if option pxe-system-type = 00:06 {
                  filename "grub/grub-x86.efi";
          } else if option pxe-system-type = 00:07 {
                  filename "grub/grub-x86_64.efi";
          } else {
                  filename "pxelinux.0";
          }
     }}
注意:網上有些資料把上面的改爲了如下的格式,我覺得官方的方法更好一些,它有客戶端類型應怎麼引導的判斷!
subnet 192.168.0.0 netmask 255.255.255.0 {
#修改自己的路由
option routers 192.168.0.1;
#域名服務器地址
option domain-name-servers 202.106.0.20;
#子網掩碼
option subnet-mask 255.255.255.0;
#分配IP地址段
range dynamic-bootp 192.168.0.100 192.168.0.254;
filename “/pxelinux.0″;
default-lease-time 21600;
max-lease-time 43200;
next-server $next_server;
}
7.檢查配置
# /etc/init.d/httpd start
# /etc/init.d/cobblerd start
# cobbler check
The following are potential configuration items that you may want to fix:

1 : SELinux is enabled. Please review the following wiki page for details on ensuring cobbler works correctly in your SELinux environment:
2 : change 'disable' to 'no' in /etc/xinetd.d/rsync
3 : since iptables may be running, ensure 69, 80/443, and 25151 are unblocked
4 : debmirror package is not installed, it will be required to manage debian deployments and repositories
5 : ksvalidator was not found, install pykickstart
6 : The default password used by the sample templates for newly installed machines (default_password_crypted in /etc/cobbler/settings) is still set to 'cobbler' and should be changed, try: "openssl passwd -1 -salt 'random-phrase-here' 'your-password-here'" to generate new one
7 : fencing tools were not found, and are required to use the (optional) power management features. install cman or fence-agents to use them
然後根據提示,逐一解決上面出現的問題。
1.禁用SELINUX
# vim /etc/sysconfig/selinux
SELINUX=disabled
重啓系統使之生效。
2. 編輯rsync文件
# vim /etc/xinetd.d/rsync
disable = no //修改此處,將yes改爲no
3. 如果開啓了防火牆,確保允許69、80/443、25151端口通信
爲了方便,這裏直接關閉防火牆
# service iptables stop
4.如果是安裝Debian這樣的系統,需要安裝debmirror (不是的話可以忽略)
5.需要安裝pykickstart。
# yum install debmirror pykickstart -y //4、5一塊處理了。
6.修改cobbler用戶的默認密碼
# openssl passwd -1 -salt ‘suibianxie’ ‘cobblerpass’
$1$suibianx$z76PIFOEknPi2.WhUujho.
# vim /etc/cobbler/settings
default_password_crypted: $1$suibianx$z76PIFOEknPi2.WhUujho. //修改此處,將上面生成的加密字符串寫到這裏。
7.安裝cman或fence-agents啓動電源管理功能
# yum install cman -y //這裏我用cman
重啓服務,在檢查一下
# service cobblerd restart
Stopping cobbler daemon:                                   [  OK  ]
Starting cobbler daemon:                                   [  OK  ]
# cobbler checkThe following are potential configuration items that you may want to fix:

1 : comment out 'dists' on /etc/debmirror.conf for proper debian support
2 : comment out 'arches' on /etc/debmirror.conf for proper debian support

Restart cobblerd and then run 'cobbler sync' to apply changes.
解決上面的兩個提示:
# vim /etc/debmirror.conf //找到並註釋下面兩行的內容
#@dists=”sid”;
#@arches=”i386″;
檢查,發現沒有問題後繼續之後的操作!
# cobbler check
No configuration problems found. All systems go.
# cobbler sync
二、導入ISO系統文件
1.上傳鏡像到服務器
2.創建鏡像掛載目錄
3.掛載鏡像到創建目錄上
4. 從iso中導入客戶端要安裝的OS。
# cobbler import --path=/media/Centos6.5/ --name=Centos6.5 --arch=x86_64
task started: 2015-04-29_111745_import
task started (id=Media import, time=Wed Apr 29 11:17:45 2015)
Found a candidate signature: breed=redhat, version=rhel6
Found a matching signature: breed=redhat, version=rhel6
Adding distros from path /var/www/cobbler/ks_mirror/Centos6.5-x86_64:
creating new distro: Centos6.5-x86_64
trying symlink: /var/www/cobbler/ks_mirror/Centos6.5-x86_64 -> /var/www/cobbler/links/Centos6.5-x86_64
creating new profile: Centos6.5-x86_64
associating repos
checking for rsync repo(s)
checking for rhn repo(s)
checking for yum repo(s)
starting descent into /var/www/cobbler/ks_mirror/Centos6.5-x86_64 for Centos6.5-x86_64
processing repo at : /var/www/cobbler/ks_mirror/Centos6.5-x86_64
need to process repo/comps: /var/www/cobbler/ks_mirror/Centos6.5-x86_64
looking for /var/www/cobbler/ks_mirror/Centos6.5-x86_64/repodata/*comps*.xml
Keeping repodata as-is :/var/www/cobbler/ks_mirror/Centos6.5-x86_64/repodata
*** TASK COMPLETE ***
這個過程需要一些時間,可查看/var/www/cobbler/ks_mirror/下相關目錄文件的生成情況!
# cobbler sync
# cobbler list
distros:
   Centos6.5-x86_64

profiles:
   Centos6.5-x86_64

systems:

repos:

images:

mgmtclasses:

packages:

files:
三、Client部署測試
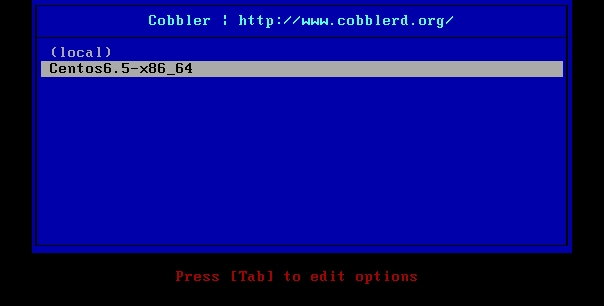
客戶機與服務端在同一網段,並設置爲PXE啓動!啓動後就可以看到 Cobbler 引導界面,選擇相應的系統條目就可以順利開始無人工干預安裝系統!
完成自動化安裝後,使用root用戶賬號登錄,密碼爲之前在配置文件中寫入的值!(本文中爲 cobblerpass)
問題BUG:
配置檢查出錯
# cobbler check
Traceback (most recent call last):
File “/usr/bin/cobbler”, line 36, in <module>
sys.exit(app.main())
File “/usr/lib/python2.6/site-packages/cobbler/cli.py”, line 655, in main
rc = cli.run(sys.argv)
File “/usr/lib/python2.6/site-packages/cobbler/cli.py”, line 270, in run
self.token = self.remote.login(“”, self.shared_secret)
File “/usr/lib64/python2.6/xmlrpclib.py”, line 1199, in __call__
return self.__send(self.__name, args)
File “/usr/lib64/python2.6/xmlrpclib.py”, line 1489, in __request
verbose=self.__verbose
File “/usr/lib64/python2.6/xmlrpclib.py”, line 1253, in request
return self._parse_response(h.getfile(), sock)
File “/usr/lib64/python2.6/xmlrpclib.py”, line 1392, in _parse_response
return u.close()
File “/usr/lib64/python2.6/xmlrpclib.py”, line 838, in close
raise Fault(**self._stack[0])
xmlrpclib.Fault: <Fault 1: “<class ‘cobbler.cexceptions.CX’>:’login failed'”>
這是一個GUB,解決方法:
# service cobblerd restart
# cobbler get-loaders

