apache+tomcat上篇文章,實現了負載均衡,現在我們實現session共享
一、tomcat集羣配置,session 同步配置:
tomcat1配置
A、修改Engine節點信息: <Engine name="Catalina" defaultHost="localhost" jvmRoute="tomcat1">
B、去掉<Cluster> <\Cluster> 的註釋符
C、修改Cluster 節點信息
<Membership
className="org.apache.catalina.cluster.mcast.McastService"
mcastBindAddress="127.0.0.1"
#IP自己配置,遠程的話寫遠程IP
mcastAddr="224.0.0.1"
mcastPort="45564"
mcastFrequency="500"
mcastDropTime="3000"/>
<Receiver
className="org.apache.catalina.cluster.tcp.ReplicationListener"
tcpListenAddress="127.0.0.1"
tcpListenPort="4001"
tcpSelectorTimeout="100"
tcpThreadCount="6"/>
tomcat2配置:
A、修改Engine節點信息: <Engine name="Catalina" defaultHost="localhost" jvmRoute="tomcat2">
B、去掉<Cluster> <\Cluster> 的註釋符
C、修改Cluster 節點信息
<Membership
className="org.apache.catalina.cluster.mcast.McastService"
mcastBindAddress="127.0.0.1"
#IP自己配置
mcastAddr="224.0.0.1"
mcastPort="45564"
mcastFrequency="500"
mcastDropTime="3000"/>
<Receiver
className="org.apache.catalina.cluster.tcp.ReplicationListener"
tcpListenAddress="127.0.0.1"
#IP自己配置
tcpListenPort="4002"
# 一定要改
tcpSelectorTimeout="100"
tcpThreadCount="6"/>
修改web應用裏面WEB-INF目錄下的web.xml文件,加入標籤
<distributable/>
直接加在</web-app>之前就可以了
做tomcat集羣必須需要這一步,否則用戶的session就無法正常使用。
注意事項:
1、mcastAddr="224.0.0.1"這主廣播地址因此需要開啓網卡組播功能
route add -net 224.0.0.0 netmask 240.0.0.0 dev eth0
分別在各機器上運行
2、查看端口情況:Netstat –antl |grep 4001 同步監聽的端口(2臺tomcat在不同機器情況下)
tocat1
tomcat2
3、測試廣播:
java -cp tomcat-replication.jar MCaster 224.0.0.1 45564 Terminal1
java -cp tomcat-replication.jar MCaster 224.0.0.1 45564 Terminal2
如果不報錯則能正常廣播tomcat-replication.jar 下載:[url]http://cvs.apache.org/~fhanik/tomcat-replication.jar[/url]如果是二臺機器,可以用tcpdump 抓取包
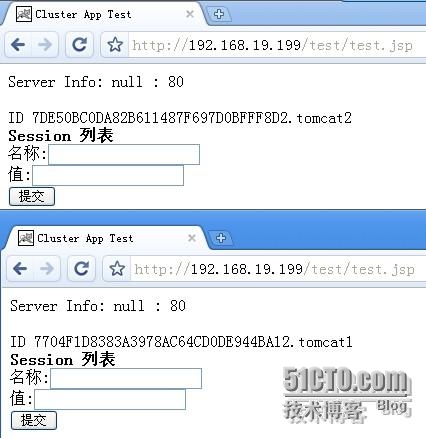
二、測試集羣及session同步
在2個tomct的webapps 下新建test 目錄目錄下建WEB-INF目錄下的web.xml文件
<web-app xmlns="http://java.sun.com/xml/ns/j2ee"
xmlns:xsi="http://www.w3.org/2001/XMLSchema-instance"
xsi:schemaLocation="http://java.sun.com/xml/ns/j2ee [url]http://java.sun.com/xml/ns/j2ee/web-app_2_4.xsd[/url]"
version="2.4">
<display-name>TomcatDemo</display-name>
<distributable/>
</web-app>
再在webapps 下建立print.jsptest.jsp
Print.jsp :
<%
System.out.println("http://andashu.blog.51cto.com/);
%>
</html>


