環境安裝
以下的環境版本
1、vagrant_2.1.5_x86_64.msi
2、VirtualBox-5.1.0-108711-Win.exe
3、centos-7.2.box
安裝VirtualBox
版本:VirtualBox-5.1.0-108711-Win
1、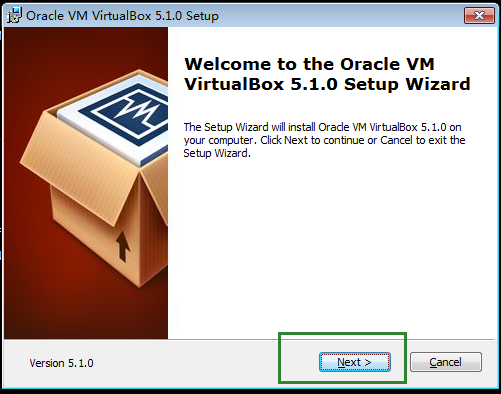
2、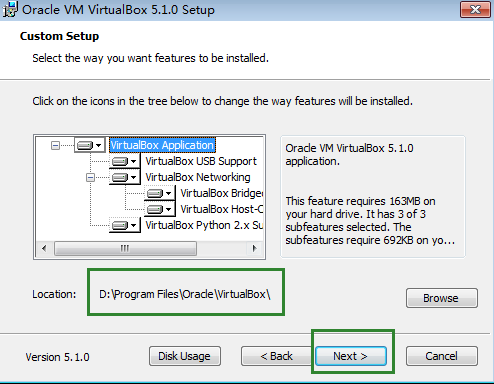
3、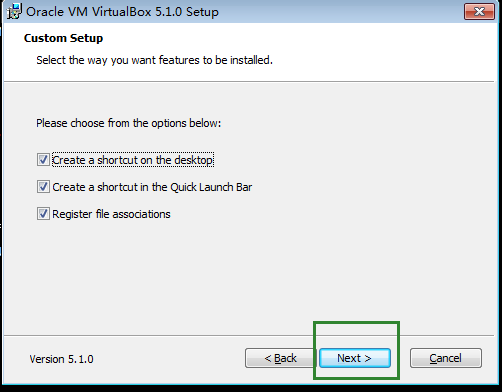
4、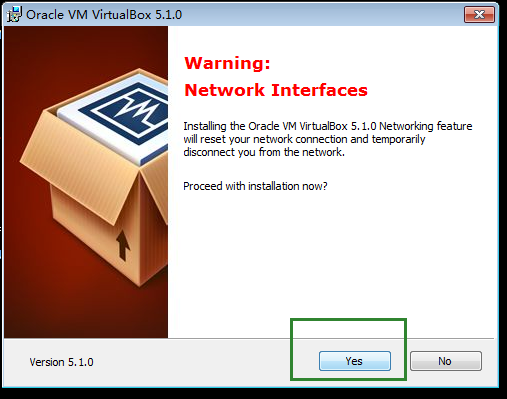
5、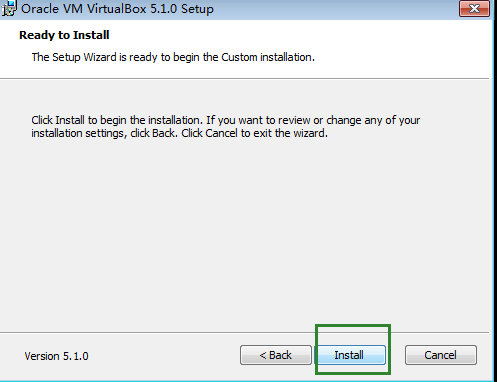
6、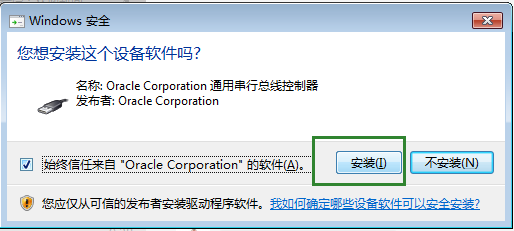
7、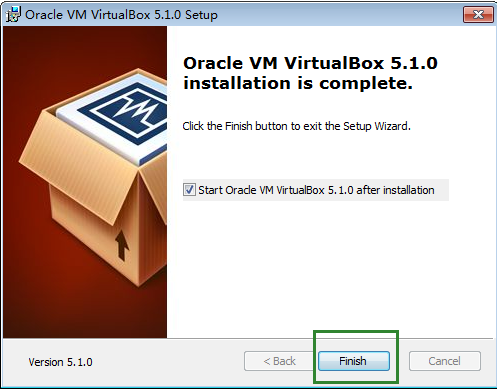
安裝vagrant
版本:vagrant_2.1.0_x86_64
1、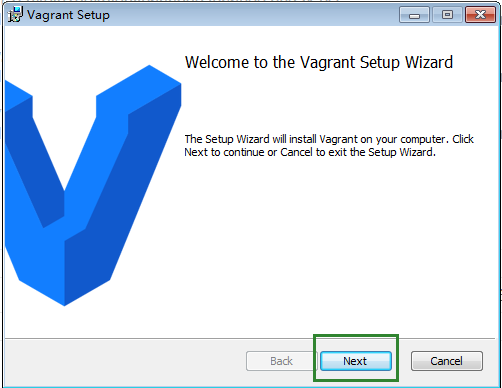
2、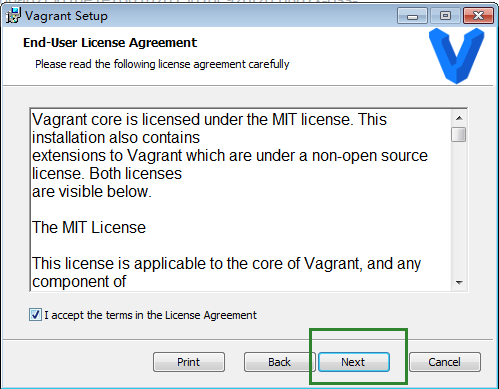
3、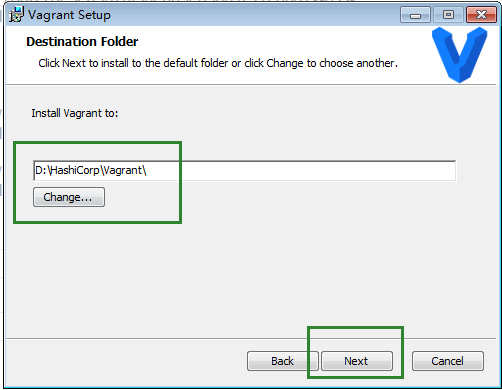
4、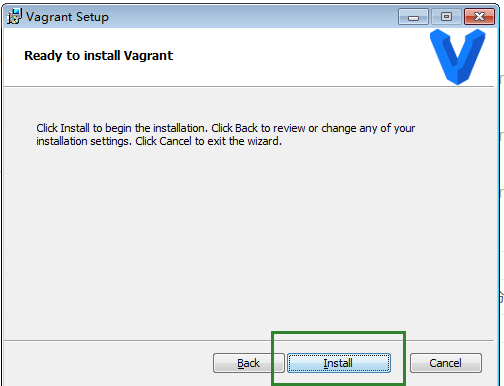
5、重啓下電腦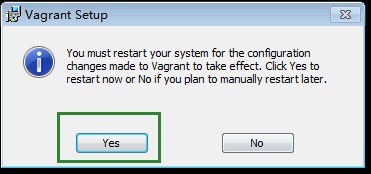
6、驗證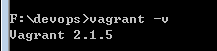
配置啓動虛擬機
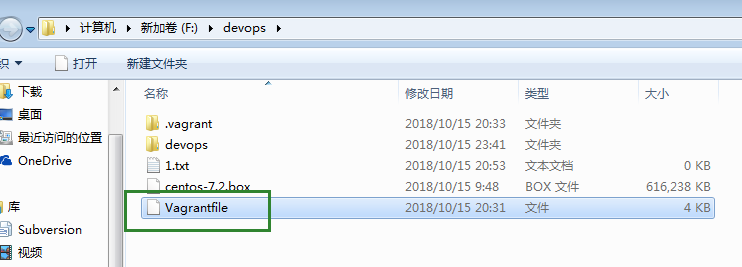
在F盤新建devops 文件夾,將centos-7.2.box 拷貝到F:\devops 中
1、打開cmd
2、初始化
F:\devops>vagrant init centos-7.2.box
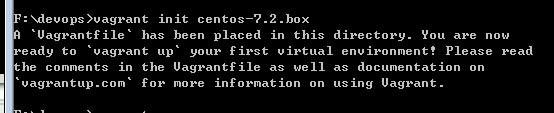
會在F:\devops中生產配置文件Vagrantfile,修改端口轉發,訪問主機的8000端口會調到虛擬機的8000端口
config.vm.network "forwarded_port", guest: 8000, host: 8000
3、啓動:啓動過程可能比較長,耐心等待
F:\devops>vagrant up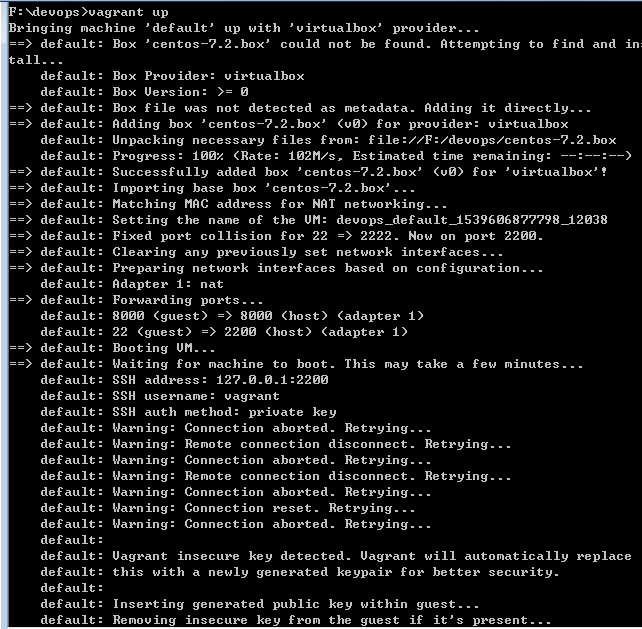
自動掛載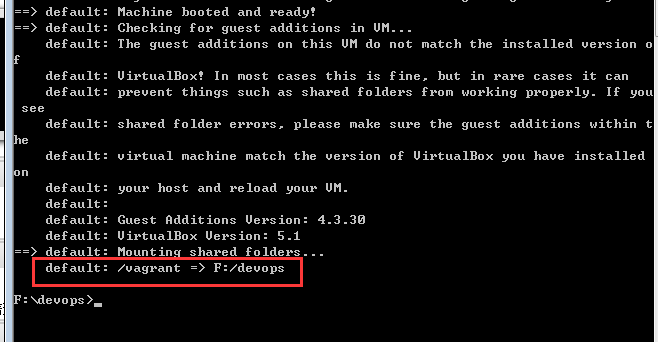
4、更改配置文件Vagrantfile啓動端口
config.vm.network "forwarded_port", guest: 8000, host: 8000
報錯如下: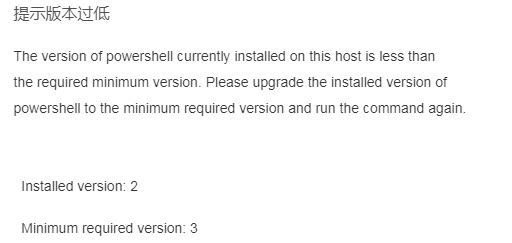
解決:安裝Windows6.1-KB2506143-x64.msu Windows6.1-KB2819745-x64-MultiPkg.msu
6、再次運行vagrant up
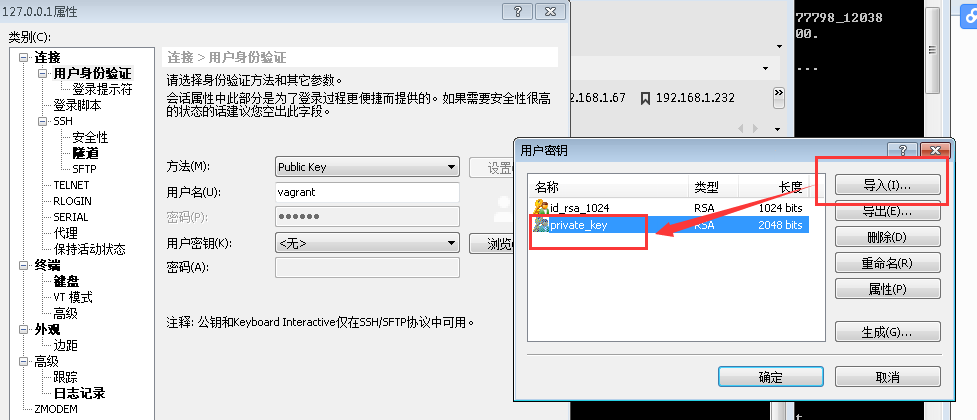
7、可以不用打開VirtualBox ,直接通過xshell連接虛擬機
可以通過key連接,key在F:\devops.vagrant\machines\default\virtualbox,導入這個key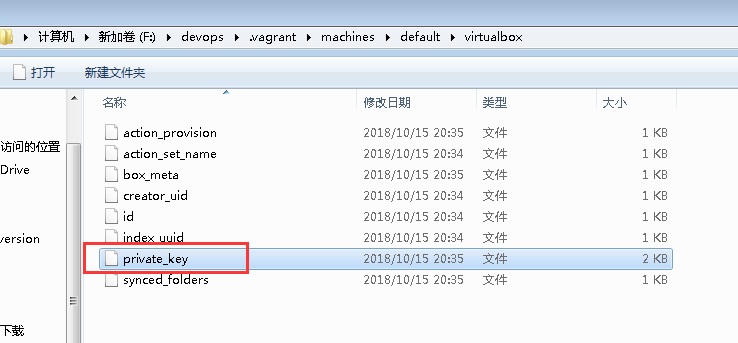
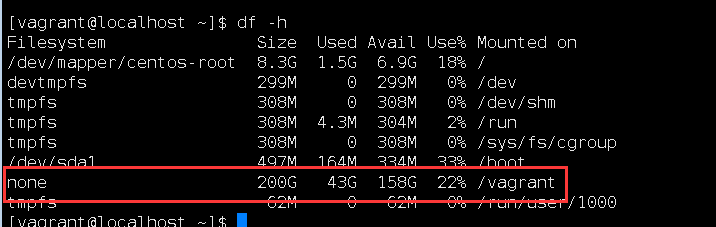
實現了共享目錄
虛擬機的鏡像文件存在以下位置
虛擬機安裝環境
1、[root@localhost tools]# wget https://www.python.org/ftp/python/3.6.6/Python-3.6.6.tgz
2、yum install net-tools *sz openssl-devel readline-devel unzip vim -y
3、tar xf Python-3.6.6.tgz
4、cd Python-3.6.6
5、./configure --prefix=/usr/local/python36
6、make && make install
7、導入pip源
tee /etc/pip.conf <<EOF
[global]
index-url = http://pypi.douban.com/simple
trusted-host = pypi.douban.com
[list]
format=columns
EOF
[root@localhost Python-3.6.6]# vi /etc/pip.conf
[global]
index-url = http://pypi.douban.com/simple
trusted-host = pypi.douban.com
[list]
format=columns
8、新建虛擬環境
用普通用戶創建
安裝:
[vagrant@localhost ~]$ sudo /usr/local/python36/bin/pip3 install virtualenv
創建:
[vagrant@localhost ~]$ /usr/local/python36/bin/virtualenv ./python36env
進入:
[vagrant@localhost ~]$ source ./python36env/bin/activate
(python36env) [vagrant@localhost ~]$ pip list
Package Version
pip 18.1
setuptools 40.4.3
wheel 0.32.1
安裝django
(python36env) [vagrant@localhost ~]$ pip install "django>=1.11,<2.0"
安裝數據庫:
(python36env) [vagrant@localhost ~]$ sudo yum -y install mariadb mariadb-server mariadb-devel
編輯:
vi /etc/my.ini
mysqld的模塊中
default-storage-engine = innodb
innodb_file_per_table
collation-server = utf8_general_ci
init-connect = 'SET NAMES utf8’
character-set-server = utf8
啓動:
(python36env) [vagrant@localhost ~]$ sudo systemctl start mariadb
(python36env) [vagrant@localhost ~]$ sudo systemctl enable mariadb
安裝數據庫模塊:
(python36env) [vagrant@localhost ~]$ pip install mysqlclient
mysql初始化:
(python36env) [vagrant@localhost ~]$ mysql_secure_installation
(python36env) [vagrant@localhost ~]$ mysql_secure_installation
NOTE: RUNNING ALL PARTS OF THIS SCRIPT IS RECOMMENDED FOR ALL MariaDB
      SERVERS IN PRODUCTION USE!  PLEASE READ EACH STEP CAREFULLY!

In order to log into MariaDB to secure it, we'll need the current
password for the root user.  If you've just installed MariaDB, and
you haven't set the root password yet, the password will be blank,
so you should just press enter here.

Enter current password for root (enter for none):
OK, successfully used password, moving on...

Setting the root password ensures that nobody can log into the MariaDB
root user without the proper authorisation.

Set root password? [Y/n] Y
New password: 123456
Re-enter new password: 123456
Password updated successfully!
Reloading privilege tables..
 ... Success!

By default, a MariaDB installation has an anonymous user, allowing anyone
to log into MariaDB without having to have a user account created for
them.  This is intended only for testing, and to make the installation
go a bit smoother.  You should remove them before moving into a
production environment.

Remove anonymous users? [Y/n] y
 ... Success!

Normally, root should only be allowed to connect from 'localhost'.  This
ensures that someone cannot guess at the root password from the network.

Disallow root login remotely? [Y/n] y
 ... Success!

By default, MariaDB comes with a database named 'test' that anyone can
access.  This is also intended only for testing, and should be removed
before moving into a production environment.

Remove test database and access to it? [Y/n] y
 - Dropping test database...
 ... Success!
 - Removing privileges on test database...
 ... Success!

Reloading the privilege tables will ensure that all changes made so far
will take effect immediately.

Reload privilege tables now? [Y/n] y
 ... Success!

Cleaning up...

All done!  If you've completed all of the above steps, your MariaDB
installation should now be secure.

Thanks for using MariaDB!
創建數據庫:
(python36env) [vagrant@localhost ~]$ mysql -uroot -p
Enter password:
Welcome to the MariaDB monitor.  Commands end with ; or \g.
Your MariaDB connection id is 10
Server version: 5.5.60-MariaDB MariaDB Server

Copyright (c) 2000, 2018, Oracle, MariaDB Corporation Ab and others.

Type 'help;' or '\h' for help. Type '\c' to clear the current input statement.

MariaDB [(none)]> create database devops CHARACTER SET utf8;
Query OK, 1 row affected (0.01 sec)
創建django項目:
(python36env) [vagrant@localhost ~]$ cd /vagrant/
(python36env) [vagrant@localhost vagrant]$ django-admin startproject devops
在vagrant中創建是因爲這個目錄關聯到了window目錄,這樣可以在windows上開發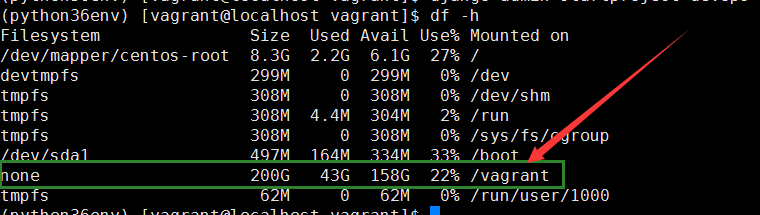
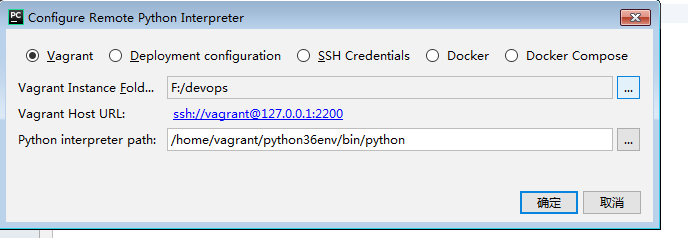
pycharm設置:
1、在pycharm中打開F:\devops
2、添加: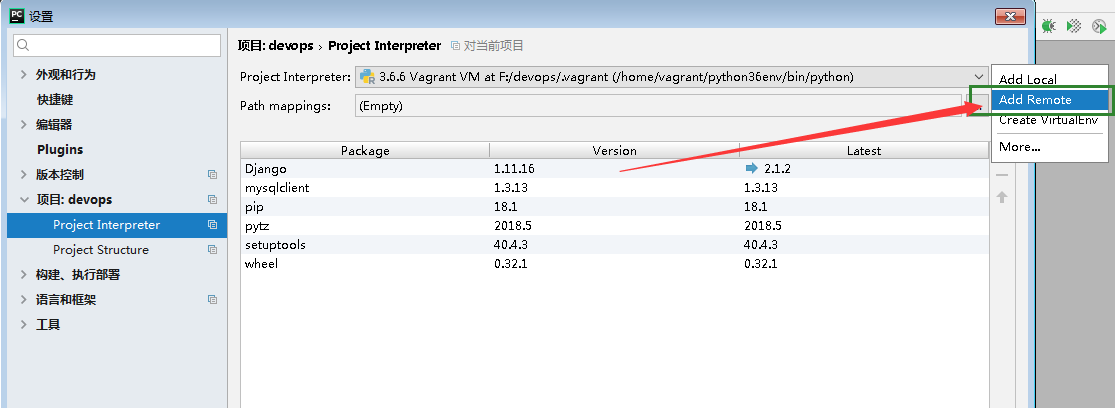
3、設置關聯linux
當前目錄必須和Vagrantfile同一個目錄才行
4、設置數據庫:
在settings中設置:
DATABASES = {
    'default': {
        'ENGINE': 'django.db.backends.mysql',
        'NAME': 'devops',
        'USER': 'root',
        'PASSWORD': '123456',
        'HOST': '127.0.0.1',
        'PORT': 3306,
        'OPTIONS':{
            'init_command': 'SET default_storage_engine=INNODB;',
        },
    }
}
5、驗證: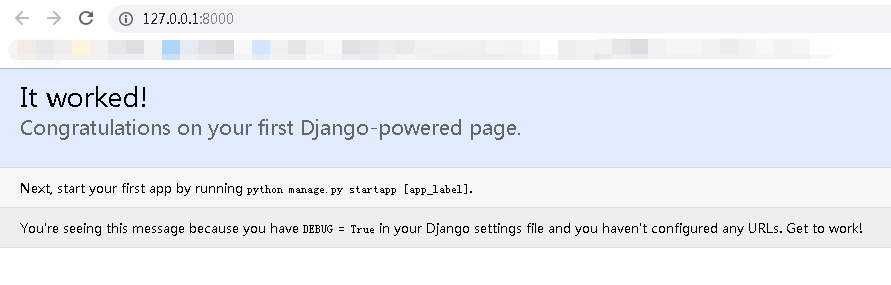
創建app
1、將python3加入到環境變量中
(python36env) [vagrant@localhost ~]$ vi .bash_profile
# .bash_profile

# Get the aliases and functions
if [ -f ~/.bashrc ]; then
        . ~/.bashrc
fi

# User specific environment and startup programs

PATH=$PATH:$HOME/.local/bin:$HOME/bin:/home/vagrant/python36env/bin

export PATH
2、(python36env) [vagrant@localhost ~]$ source .bash_profile
3、(python36env) [vagrant@localhost ~]$ cd /vagrant/devops/
4、(python36env) [vagrant@localhost devops]$ python manage.py startapp dashboard
5、設置urls路徑:
6、添加app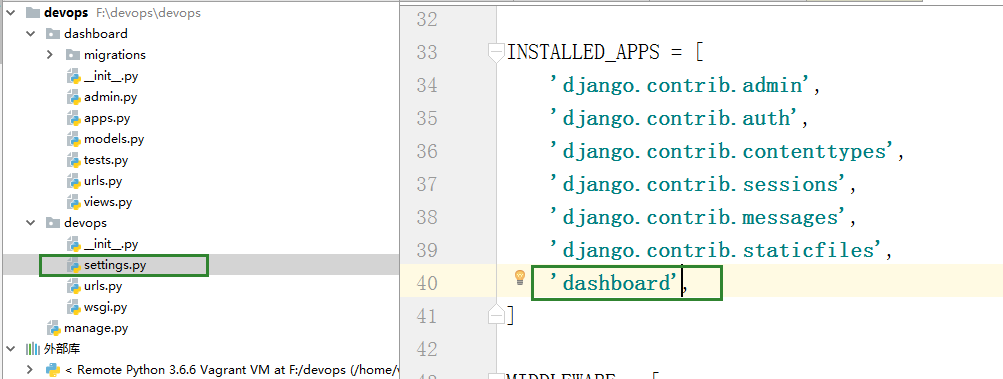
7、
驗證: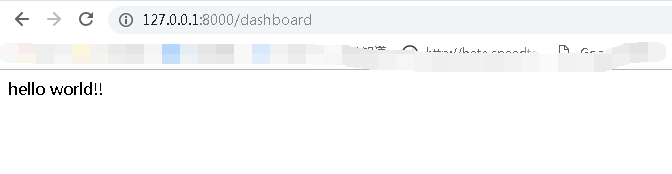
練習個登錄操作
get:獲取
post:提交
delete:刪除
1、安裝模塊
pip install requests
2、編寫url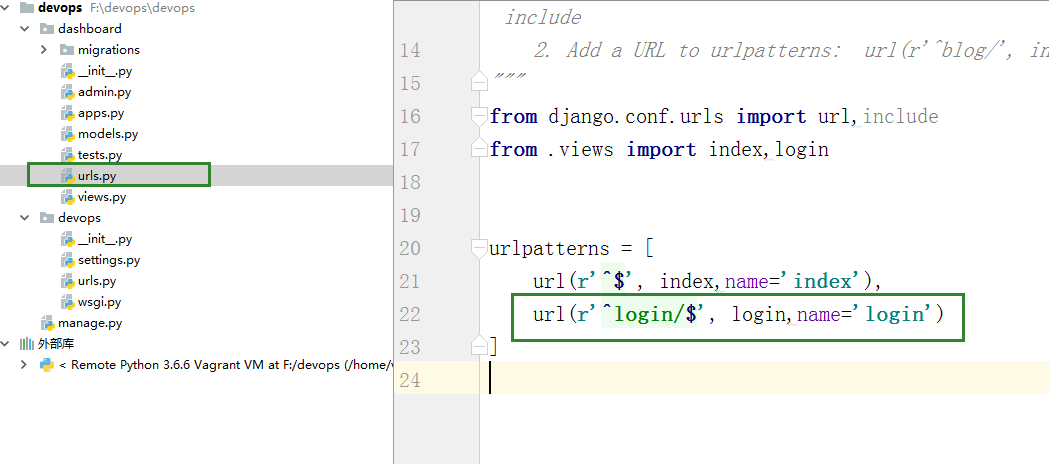
3、編寫view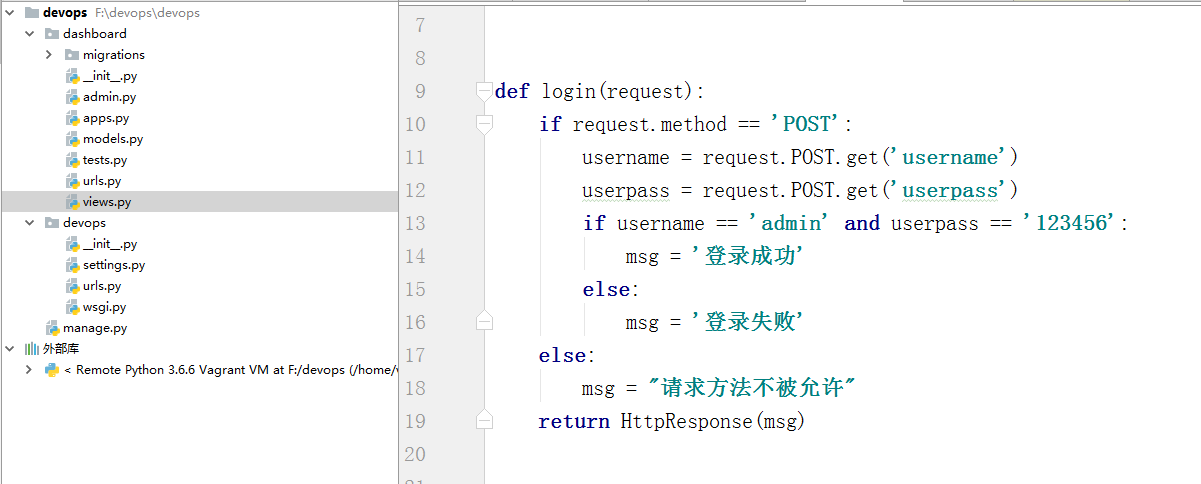
4、在settings.py中禁用csrf功能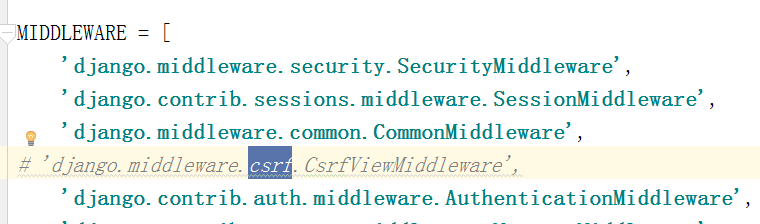
3、驗證: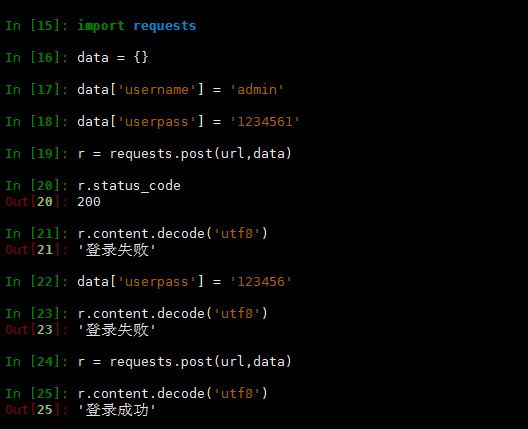
同步數據庫
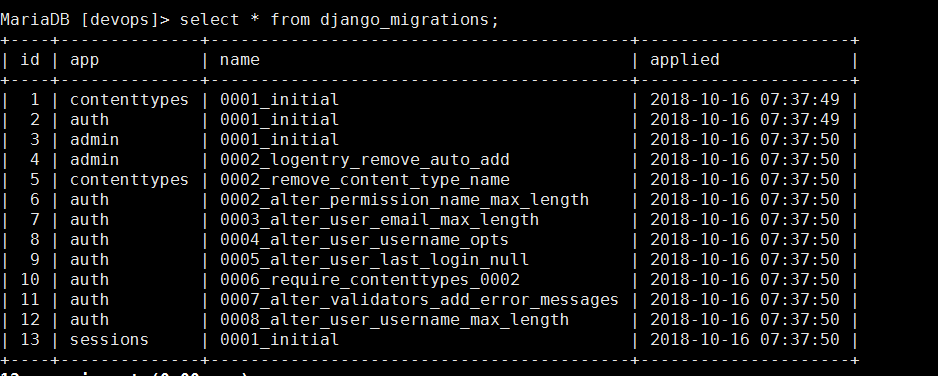
1、使用django命令行工具同步數據庫
python manage.py makemigrations
python manage.py migrate
python manage.py showmigrations
創建用戶
1、創建普通用戶
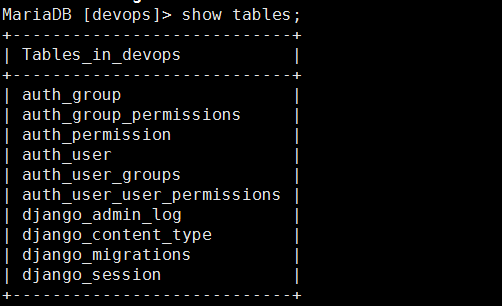
2、查看數據庫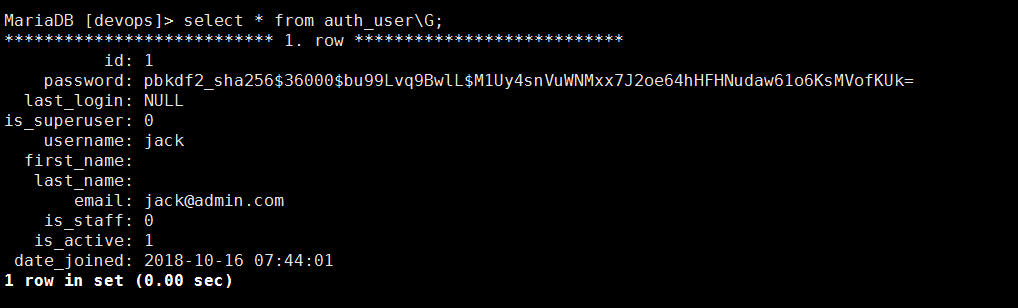
3、創建管理員用戶
4、查看,1表示管理員,0表示普通用戶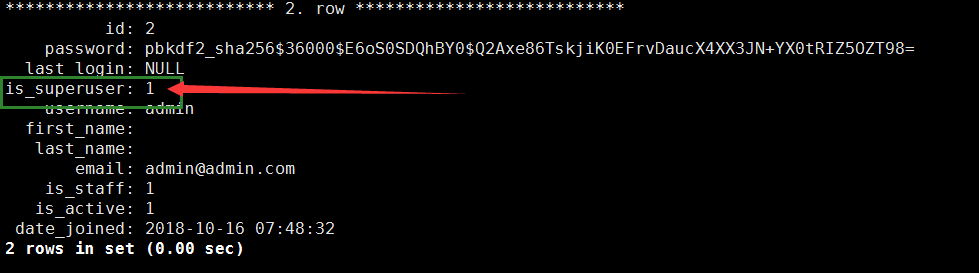
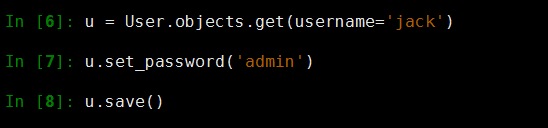
5、修改密碼