Fayson的github: https://github.com/fayson/cdhproject
推薦關注微信公衆號:“Hadoop實操”,ID:gh_c4c535955d0f,或者掃描文末二維碼。
1.概述
本文檔描述CENTOS7.2操作系統部署CDH企業版的過程。Cloudera企業級數據中心的安裝主要分爲4個步驟:
1.集羣服務器配置,包括安裝操作系統、關閉防火牆、同步服務器時鐘等;
2.外部數據庫安裝
3.安裝Cloudera管理器;
4.安裝CDH集羣;
5.集羣完整性檢查,包括HDFS文件系統、MapReduce、Hive等是否可以正常運行。
這篇文檔將着重介紹Cloudera管理器與CDH的安裝,並基於以下假設:
1.操作系統版本:CENTOS7.2
2.MariaDB數據庫版本爲10.2.1
3.CM版本:CDH 5.10.0
4.CDH版本:CDH 5.10.0
5.採用ec2-user對集羣進行部署
6.您已經下載CDH和CM的安裝包
2.前期準備
2.1.hostname及hosts配置
集羣中各個節點之間能互相通信使用靜態IP地址。IP地址和主機名通過/etc/hosts配置,主機名/etc/hostname進行配置。
以cm節點(172.31.2.159)爲例:
- hostname配置
/etc/hostname文件如下:
ip-172-31-2-159 或者你可以通過命令修改立即生效
ec2-user@ip-172-31-2-159 ~$ sudo hostnamectl set-hostname ip-172-31-2-159 <font face="微軟雅黑" size=4 color=red >注意:這裏修改hostname跟REDHAT6的區別
- hosts配置
/etc/hosts文件如下:
172.31.2.159 ip-172-31-2-159
172.31.12.108 ip-172-31-12-108
172.31.5.236 ip-172-31-5-236
172.31.7.96 ip-172-31-7-96
以上兩步操作,在集羣中其它節點做相應配置。
2.2.禁用SELinux
在所有節點執行sudo setenforce 0 命令,此處使用批處理shell執行:
ec2-user@ip-172-31-2-159 ~$ sh ssh\_do\_all.sh node.list "sudo setenforce 0" 集羣所有節點修改/etc/selinux/config文件如下:
SELINUX=disabled
SELINUXTYPE=targeted
2.3.關閉防火牆
集羣所有節點執行 sudo systemctl stop命令,此處通過shell批量執行命令如下:
[ec2-user@ip-172-31-2-159 ~]$ sh ssh_do_all.sh node.list "sudo systemctl stop firewalld"
[ec2-user@ip-172-31-2-159 ~]$ sh ssh_do_all.sh node.list "sudo systemctl disable firewalld"
[ec2-user@ip-172-31-2-159 ~]$ sh ssh_do_all.sh node.list "sudo systemctl status firewalld"
2.4.集羣時鐘同步
在CentOS7.2的操作系統上,已經默認的安裝了chrony,配置chrony時鐘同步,將cm(172.31.2.159)服務作爲本地chrony服務器,其它3臺服務器與其保持同步,配置片段:
-
172.31.2.159配置與自己同步
[ec2-user@ ip-172-31-2-159 ~]$ sudo vim /etc/chrony.conf server ip-172-31-2-159 iburst #keyfile=/etc/chrony.keys - 集羣其它節點:在註釋下增加如下配置
[ec2-user@ip-172-31-12-108 ~]$ sudo vim /etc/chrony.conf
# Use public servers from the pool.ntp.org project.
# Please consider joining the pool (http://www.pool.ntp.org/join.html).
server ip-172-31-2-159 iburst
#keyfile=/etc/chrony.keys- 重啓所有機器的chrony服務
[ec2-user@ip-172-31-2-159 ~]$ sh ssh_do_all.sh node.list "sudo systemctl restart chronyd"
- 驗證始終同步,在所有節點執行chronycsources命令,如下使用腳本批量執行
[ec2-user@ip-172-31-2-159 ~]$ sh ssh_do_all.sh node.list "chronyc sources"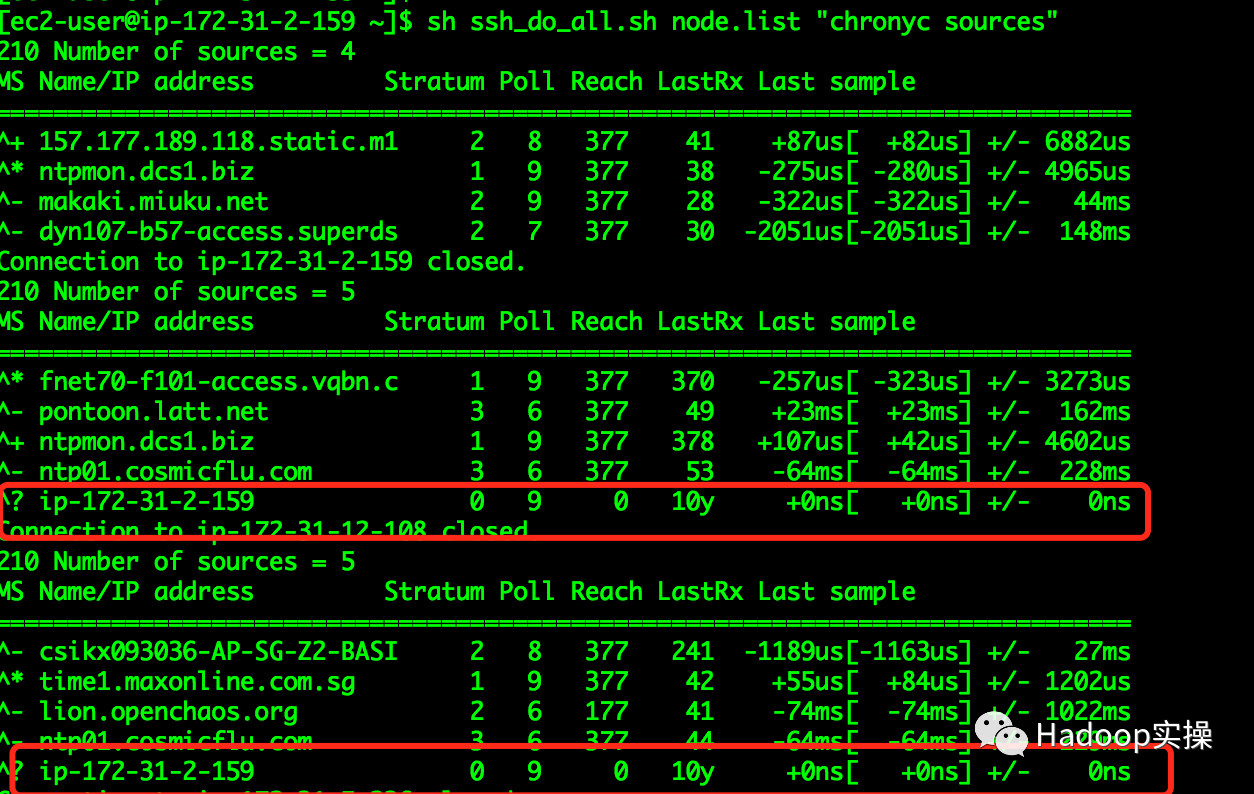
2.5.配置操作系統repo
-
掛載操作系統iso文件
[ec2-user@ip-172-31-2-159 ~]$ sudo mkdir /media/DVD1 [ec2-user@ip-172-31-2-159 ~]$ sudo mount -o loop CentOS-7-x86_64-DVD-1611.iso /media/DVD1/![在這裏插入圖片描述]()
- 配置操作系統repo
[ec2-user@ip-172-31-2-159 ~]$ sudo vim /etc/yum.repos.d/local_os.repo
[local_iso]
name=CentOS-$releasever - Media
baseurl=file:///media/DVD1
gpgcheck=0
enabled=1
[ec2-user@ip-172-31-2-159 ~]$ sudo yum repolist

2.6.安裝http服務
- 安裝httpd服務
[ec2-user@ip-172-31-2-159 ~]$ sudo yum -y install httpd- 啓動或停止httpd服務
[ec2-user@ip-172-31-2-159 ~]$ sudo systemctl start httpd
[ec2-user@ip-172-31-2-159 ~]$ sudo systemctl stop httpd- 安裝完httpd後,重新制作操作系統repo,換成http的方式方便其它服務器也可以訪問
[ec2-user@ip-172-31-2-159 ~]$ sudo mkdir /var/www/html/iso
[ec2-user@ip-172-31-2-159 ~]$ sudo scp -r /media/DVD1/* /var/www/html/iso/
[ec2-user@ip-172-31-2-159 ~]$ sudo vim /etc/yum.repos.d/os.repo
[osrepo]
name=os_repo
baseurl=http://172.31.2.159/iso/
enabled=true
gpgcheck=false
[ec2-user@ip-172-31-2-159 ~]$ sudo yum repolist
2.7.安裝MariaDB
- 由於centos7默認使用的是5.5.52版本的MariaDB,此處使用的10.2.1版本,點擊,在官網下載rpm安裝包:
MariaDB-10.2.1-centos7-x86_64-client.rpm
MariaDB-10.2.1-centos7-x86_64-common.rpm
MariaDB-10.2.1-centos7-x86_64-compat.rpm
MariaDB-10.2.1-centos7-x86_64-server.rpm
將包下載到本地,放在同一目錄,執行createrepo命令生成rpm元數據。
此處使用apache2,將上述mariadb10.2.1目錄移動到/var/www/html目錄下, 使得用戶可以通過HTTP訪問這些rpm包。
[ec2-user@ip-172-31-2-159 ~]$ sudo mv mariadb10.2.1 /var/www/html/安裝MariaDB依賴
[ec2-user@ip-172-31-2-159 ~]$ yum install libaio perl perl-DBI perl-Module-Pluggable perl-Pod-Escapes perl-Pod-Simple perl-libs perl-version製作本地repo
[ec2-user@ip-172-31-2-159 ~]$ sudo vim /etc/yum.repos.d/mariadb.repo
[mariadb]
name = MariaDB
baseurl = http://172.31.2.159/ mariadb10.2.1
enable = true
gpgcheck = false
[ec2-user@ip-172-31-2-159 ~]$ sudo yum repolist -
安裝MariaDB
[ec2-user@ip-172-31-2-159 ~]$ sudo yum -y install MariaDB-server MariaDB-client - 啓動並配置MariaDB
[ec2-user@ip-172-31-2-159 ~]$ sudo systemctl  start mariadb

[ec2-user@ip-172-31-2-159 ~]$ sudo /usr/bin/mysql_secure_installation

NOTE: RUNNING ALL PARTS OF THIS SCRIPT IS  RECOMMENDED FOR ALL MariaDB

       SERVERS IN PRODUCTION USE!   PLEASE READ EACH STEP CAREFULLY!

In order to log into MariaDB to secure it, we'll  need the current

password for the root user.  If you've just installed MariaDB, and

you haven't set the root password yet, the  password will be blank,

so you should just press enter here.

Enter current password for root (enter for none):

OK, successfully used password, moving on...

Setting the root password ensures that nobody can  log into the MariaDB

root user without the proper authorisation.

Set root password? [Y/n] Y

New password:

Re-enter new password:

Password updated successfully!

Reloading privilege tables..

 ...  Success!

By default, a MariaDB installation has an  anonymous user, allowing anyone

to log into MariaDB without having to have a user  account created fo

them.  This  is intended only for testing, and to make the installation

go a bit smoother.  You should remove them before moving into a

production environment.

Remove anonymous users? [Y/n] Y

 ...  Success!

Normally, root should only be allowed to connect  from 'localhost'.  This

ensures that someone cannot guess at the root  password from the network.

Disallow root login remotely? [Y/n] n

 ...  skipping.

By default, MariaDB comes with a database named  'test' that anyone can

access.   This is also intended only for testing, and should be removed

before moving into a production environment.

Remove test database and access to it? [Y/n] Y

 - Dropping  test database...

 ...  Success!

 - Removing  privileges on test database...

 ...  Success!

Reloading the privilege tables will ensure that  all changes made so fa

will take effect immediately.

Reload privilege tables now? [Y/n] Y

 ...  Success!

Cleaning up...

All done!   If you've completed all of the above steps, your MariaDB

installation should now be secure.

Thanks for using MariaDB!- 建立CM和Hive需要的表
[ec2-user@ip-172-31-2-159 ~]$ mysql -uroot -p
Enter password:
Welcome to the MariaDB monitor.  Commands end with ; or \g.
Your MariaDB connection id is 9
Server version: 10.2.1-MariaDB MariaDB Server
Copyright (c) 2000, 2016, Oracle, MariaDB Corporation Ab and others.
Type 'help;' or '\h' for help. Type '\c' to clear the current input statement.
MariaDB [(none)]>

create database metastore default character set utf8;
CREATE USER 'hive'@'%' IDENTIFIED BY 'password';
GRANT ALL PRIVILEGES ON metastore. * TO 'hive'@'%';
FLUSH PRIVILEGES;
create database cm default character set utf8;
CREATE USER 'cm'@'%' IDENTIFIED BY 'password';
GRANT ALL PRIVILEGES ON cm. * TO 'cm'@'%';
FLUSH PRIVILEGES;

create database am default character set utf8;
CREATE USER 'am'@'%' IDENTIFIED BY 'password';
GRANT ALL PRIVILEGES ON am. * TO 'am'@'%';
FLUSH PRIVILEGES;

create database rm default character set utf8;
CREATE USER 'rm'@'%' IDENTIFIED BY 'password';
GRANT ALL PRIVILEGES ON rm. * TO 'rm'@'%';
FLUSH PRIVILEGES;- 安裝jdbc驅動
[ec2-user@ip-172-31-2-159 ~]$ sudo mkdir -p /usr/share/java/
[ec2-user@ip-172-31-2-159 ~]$ sudo mv mysql-connector-java-5.1.37.jar /usr/share/java/
[ec2-user@ip-172-31-2-159 java]$ cd /usr/share/java
[ec2-user@ip-172-31-2-159 java]$ sudo ln -s mysql-connector-java-5.1.37.jar mysql-connector-java.jar
[ec2-user@ip-172-31-2-159 java]$ ll
total 964
-rw-r--r--. 1 root root 985600 Oct  6  2015 mysql-connector-java-5.1.37.jar
lrwxrwxrwx. 1 root root     31 Mar 29 14:37 mysql-connector-java.jar -> mysql-connector-java-5.1.37.jar
3.Cloudera Manager安裝
3.1.配置本地repo源
將Cloudera Manager安裝需要的7個rpm包下載到本地,放在同一目錄,執行createrepo命令生成rpm元數據。
[ec2-user@ip-172-31-2-159 cm]$ ls
cloudera-manager-agent-5.10.0-1.cm5100.p0.85.el7.x86_64.rpm
cloudera-manager-daemons-5.10.0-1.cm5100.p0.85.el7.x86_64.rpm
cloudera-manager-server-5.10.0-1.cm5100.p0.85.el7.x86_64.rpm
cloudera-manager-server-db-2-5.10.0-1.cm5100.p0.85.el7.x86_64.rpm
enterprise-debuginfo-5.10.0-1.cm5100.p0.85.el7.x86_64.rpm
jdk-6u31-linux-amd64.rpm
oracle-j2sdk1.7-1.7.0+update67-1.x86_64.rpm
[ec2-user@ip-172-31-2-159 cm]$ sudo createrepo .
Spawning worker 0 with 1 pkgs
Spawning worker 1 with 1 pkgs
Spawning worker 2 with 1 pkgs
Spawning worker 3 with 1 pkgs
Spawning worker 4 with 1 pkgs
Spawning worker 5 with 1 pkgs
Spawning worker 6 with 1 pkgs
Spawning worker 7 with 0 pkgs
Workers Finished
Saving Primary metadata
Saving file lists metadata
Saving other metadata
Generating sqlite DBs
Sqlite DBs complete-
配置Web服務器
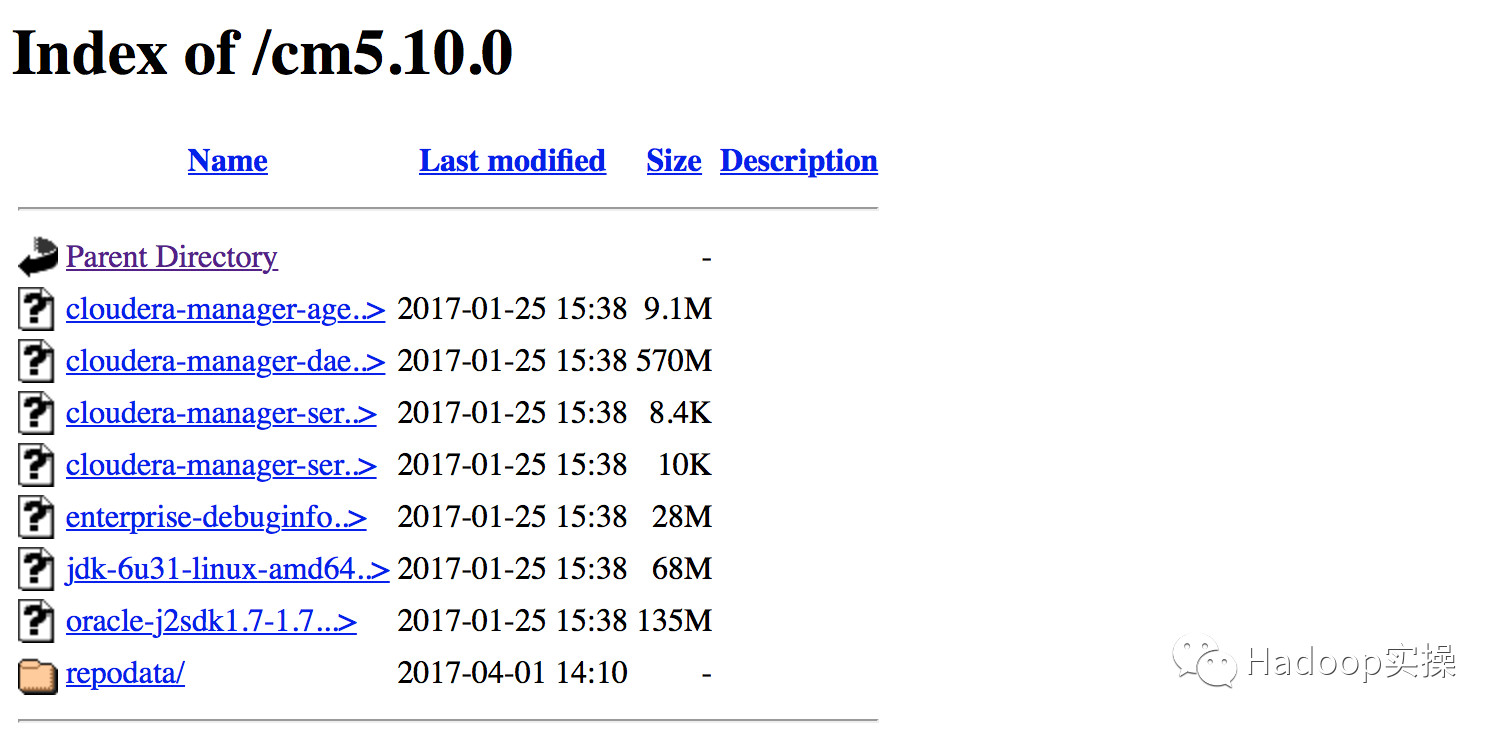
此處使用apache2,將上述cdh5.10.0/cm5.10.0目錄移動到/var/www/html目錄下, 使得用戶可以通過HTTP訪問這些rpm包。
[ec2-user@ip-172-31-2-159 ~]$ sudo mv cdh5.10.0/ cm5.10.0/ /var/www/html/![在這裏插入圖片描述]()
![在這裏插入圖片描述]()
- 製作Cloudera Manager的repo源
[ec2-user@ip-172-31-2-159 ~]$ sudo vim /etc/yum.repos.d/cm.repo [cmrepo] name = cm_repo baseurl = http://172.31.2.159/cm5.10.0.0 enable = true gpgcheck = false [ec2-user@ip-172-31-2-159 yum.repos.d]$ sudo yum repolist - 驗證安裝JDK
[ec2-user@ip-172-31-2-159 ~]$ sudo yum -y install oracle-j2sdk1.7-1.7.0+update67-1

3.2 安裝Cloudera Manager Server
-
通過yum安裝ClouderaManager Server
[ec2-user@ip-172-31-2-159 ~]$ sudo yum -y install cloudera-manager-server -
初始化數據庫
[ec2-user@ip-172-31-2-159 ~]$ sudo /usr/share/cmf/schema/scm_prepare_database.sh mysql cm cm password JAVA_HOME=/usr/java/jdk1.7.0_67-cloudera Verifying that we can write to /etc/cloudera-scm-server Creating SCM configuration file in /etc/cloudera-scm-server Executing: /usr/java/jdk1.7.0_67-cloudera/bin/java -cp /usr/share/java/mysql-connector-java.jar:/usr/share/java/ oracle-connector-java.jar:/usr/share/cmf/schema/../lib/* com.cloudera.enterprise.dbutil.DbCommandExecutor /etc/cloudera-scm-server/db.properties com.cloudera.cmf.db. [ main] DbCommandExecutor INFO Successfully connected to database. All done, your SCM database is configured correctly! -
啓動Cloudera Manager Server
[ec2-user@ip-172-31-2-159 ~]$ sudo systemctl start cloudera-scm-server -
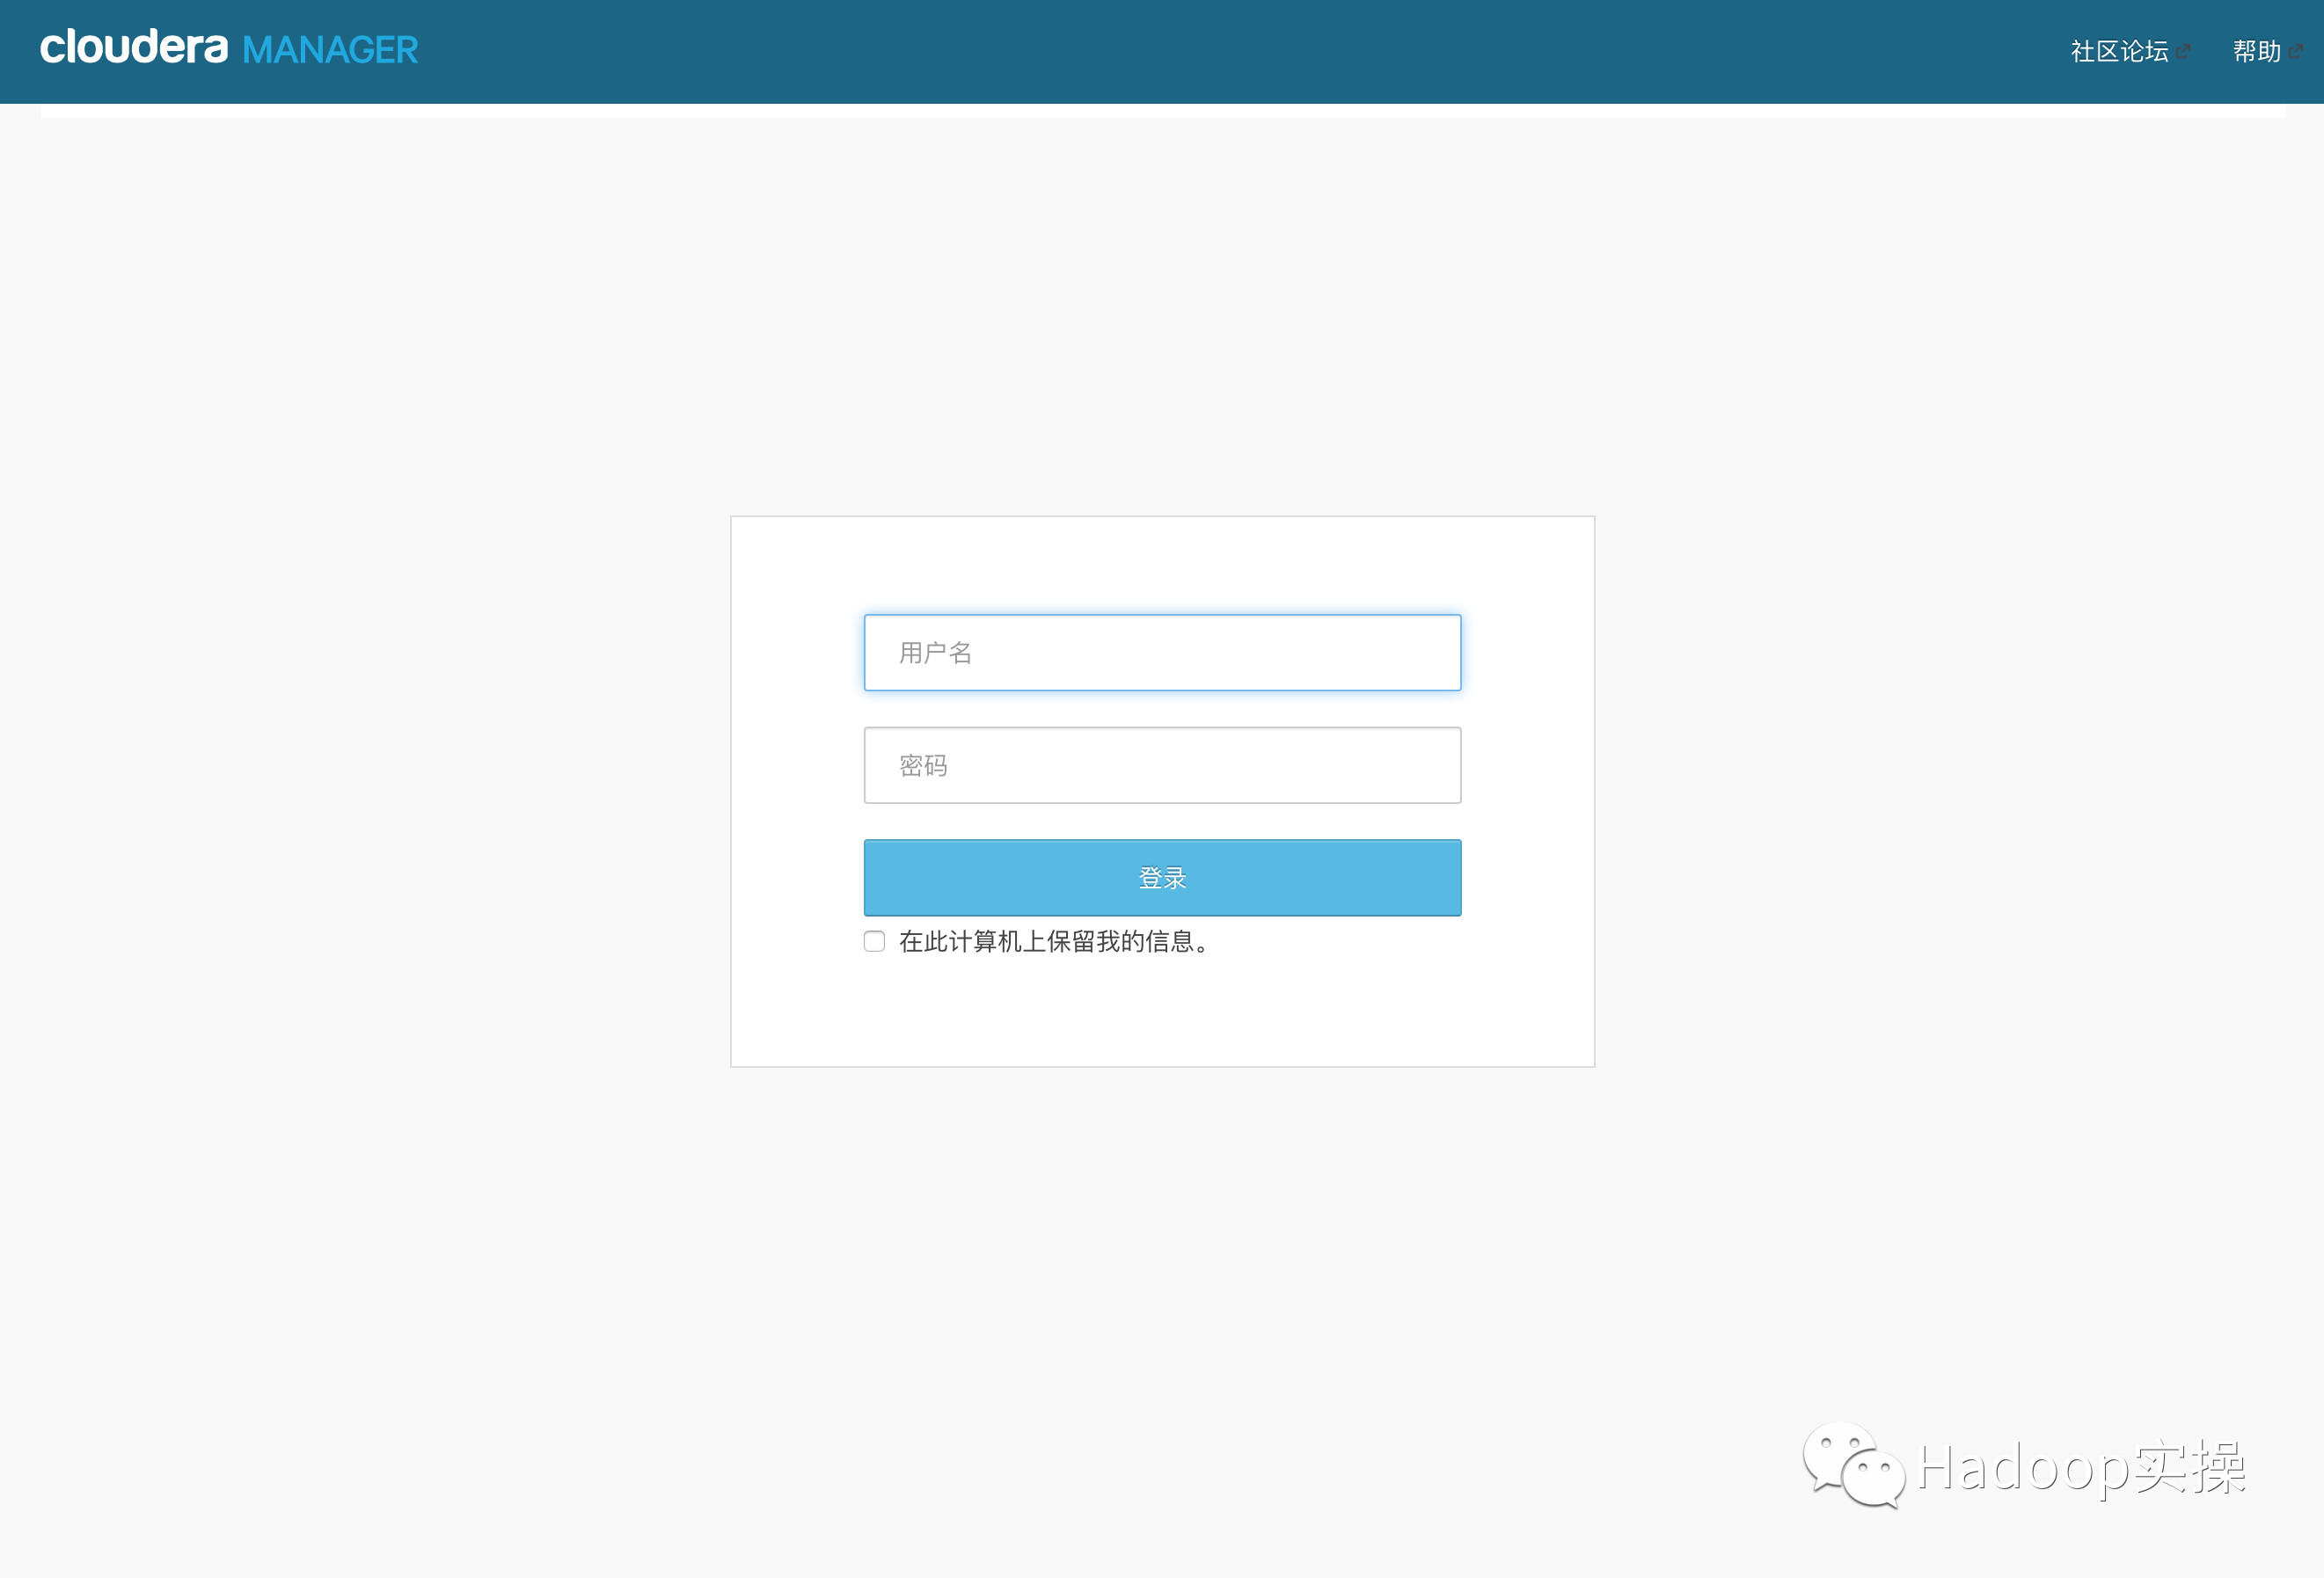
檢查端口是否監聽
[ec2-user@ip-172-31-2-159 ~]$ sudo netstat -lnpt | grep 7180 tcp 0 0 0.0.0.0:7180 0.0.0.0:* LISTEN 6890/java - 通過http://172.31.2.159:7180/cmf/login訪問CM
![在這裏插入圖片描述]()
4.CDH安裝
4.1.CDH集羣安裝嚮導
1.admin/admin登錄到CM
2.同意license協議,點擊繼續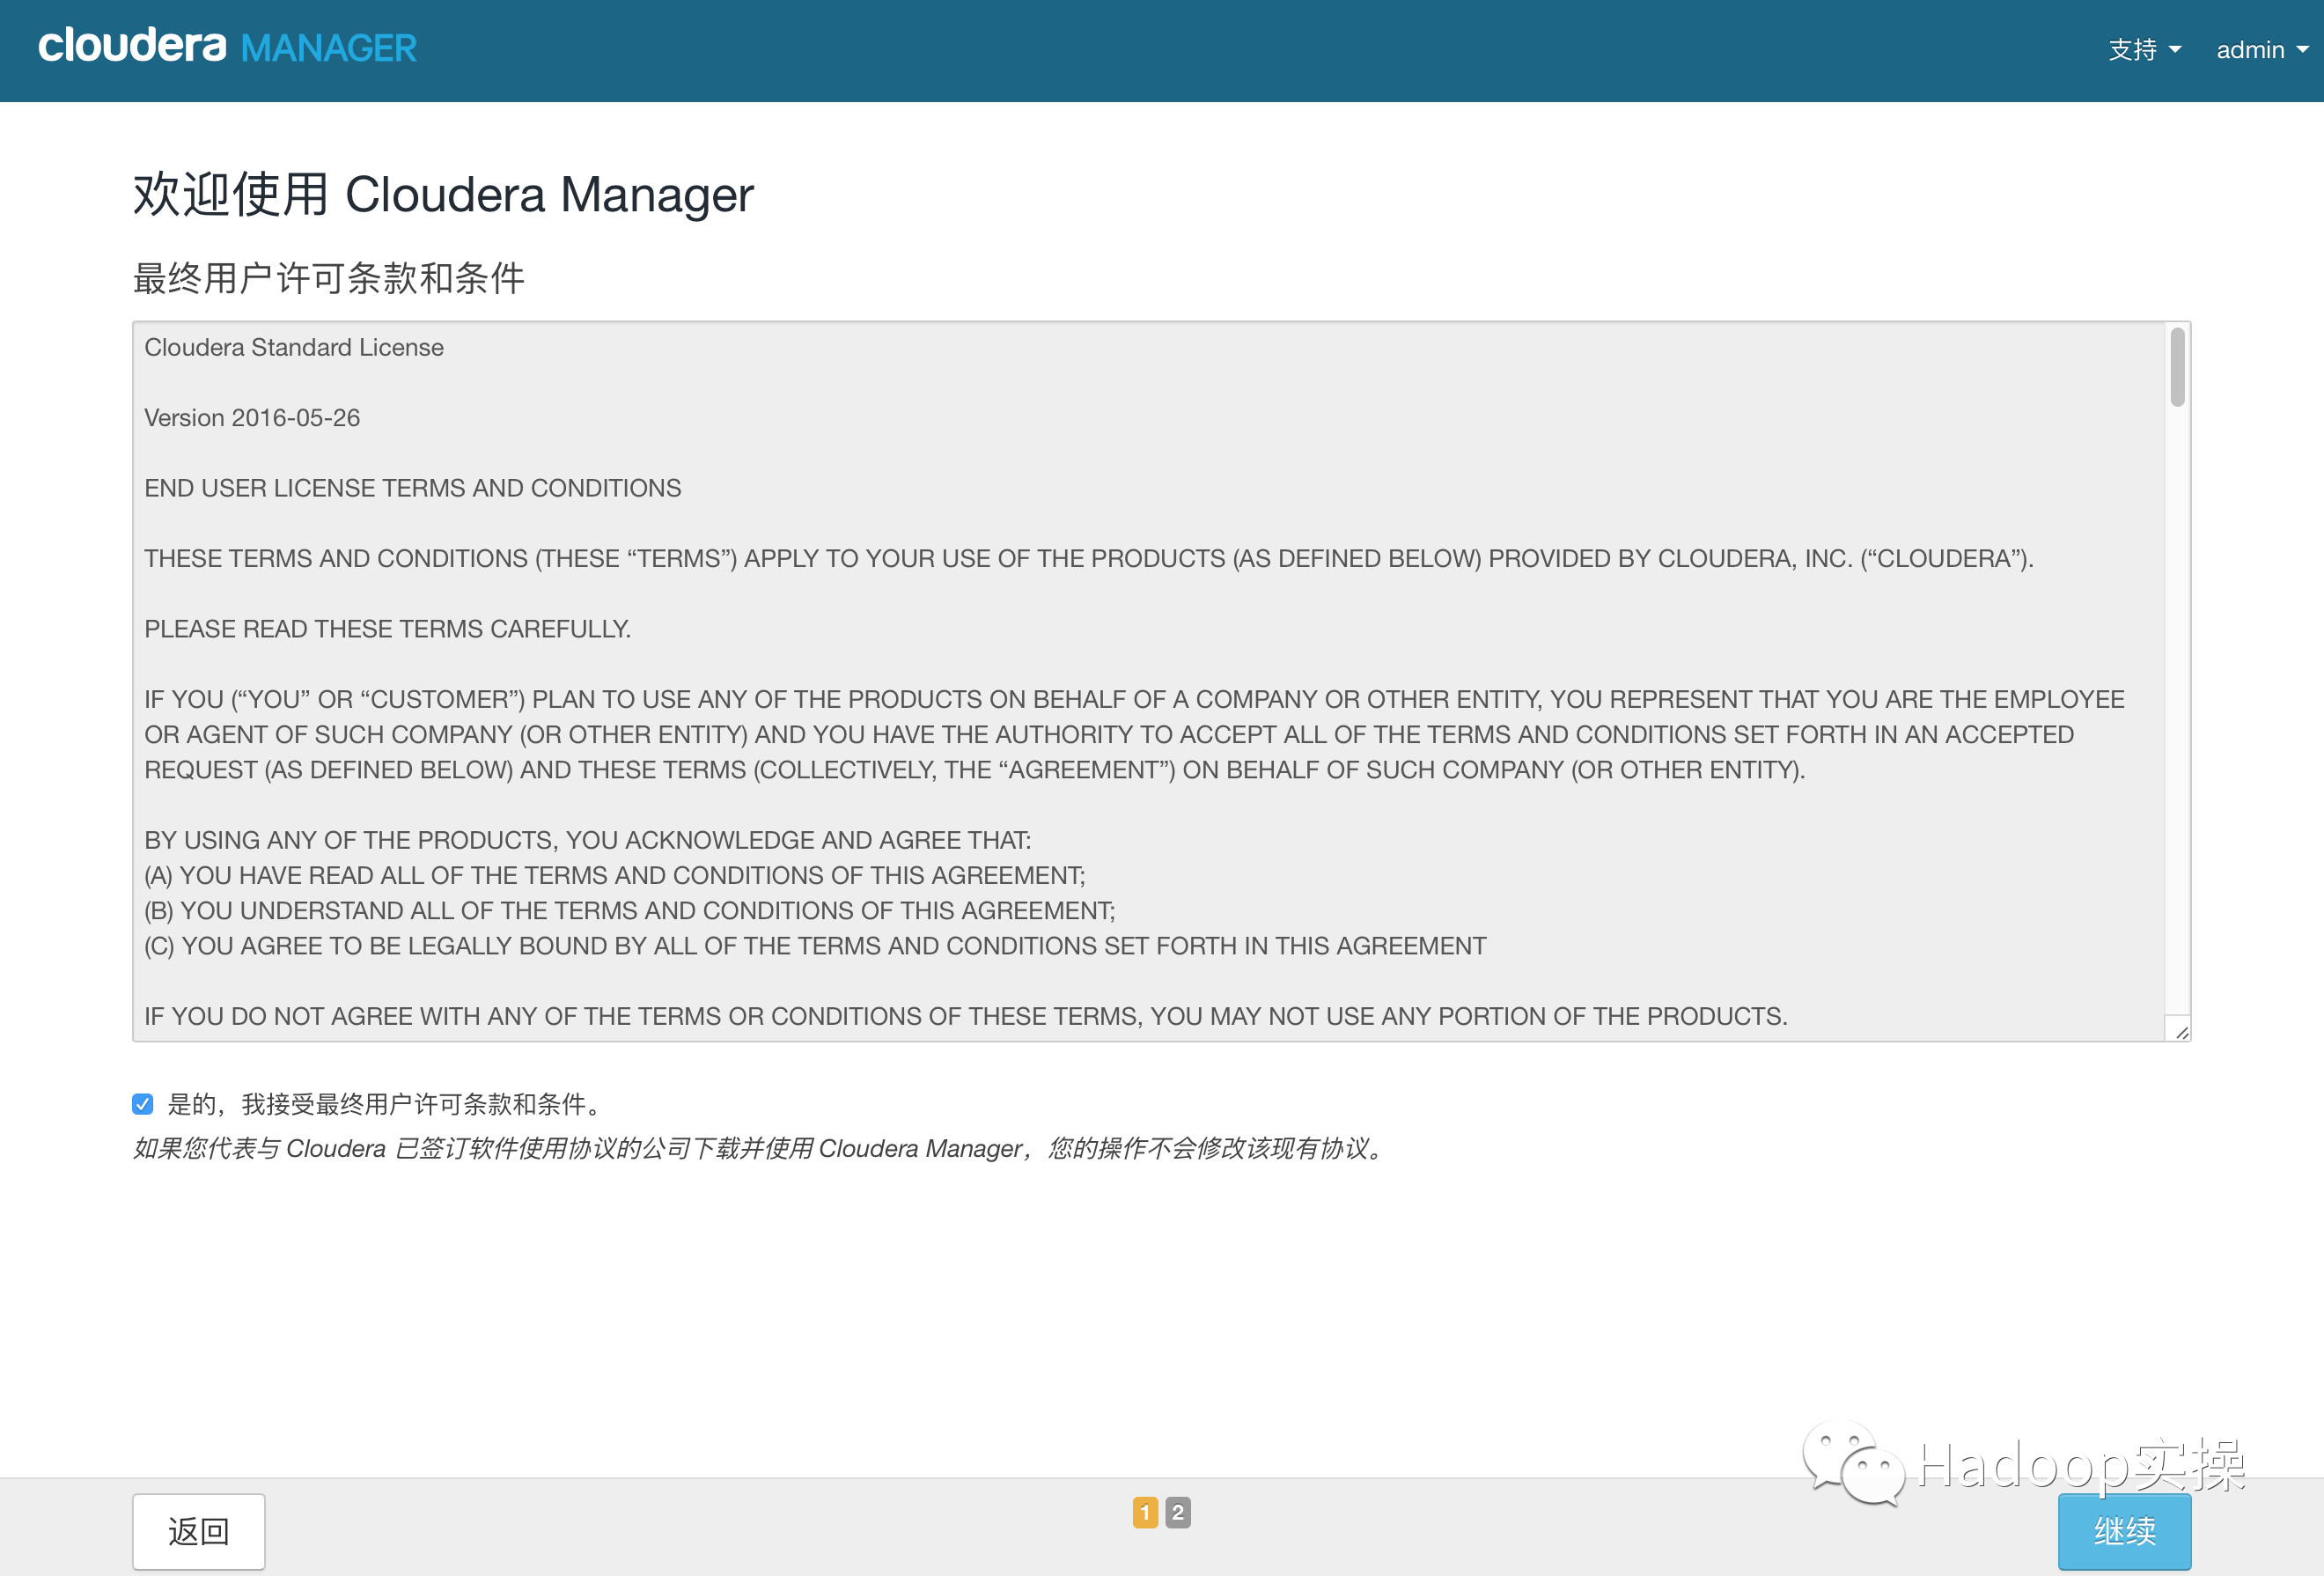
3.選擇60試用,點擊繼續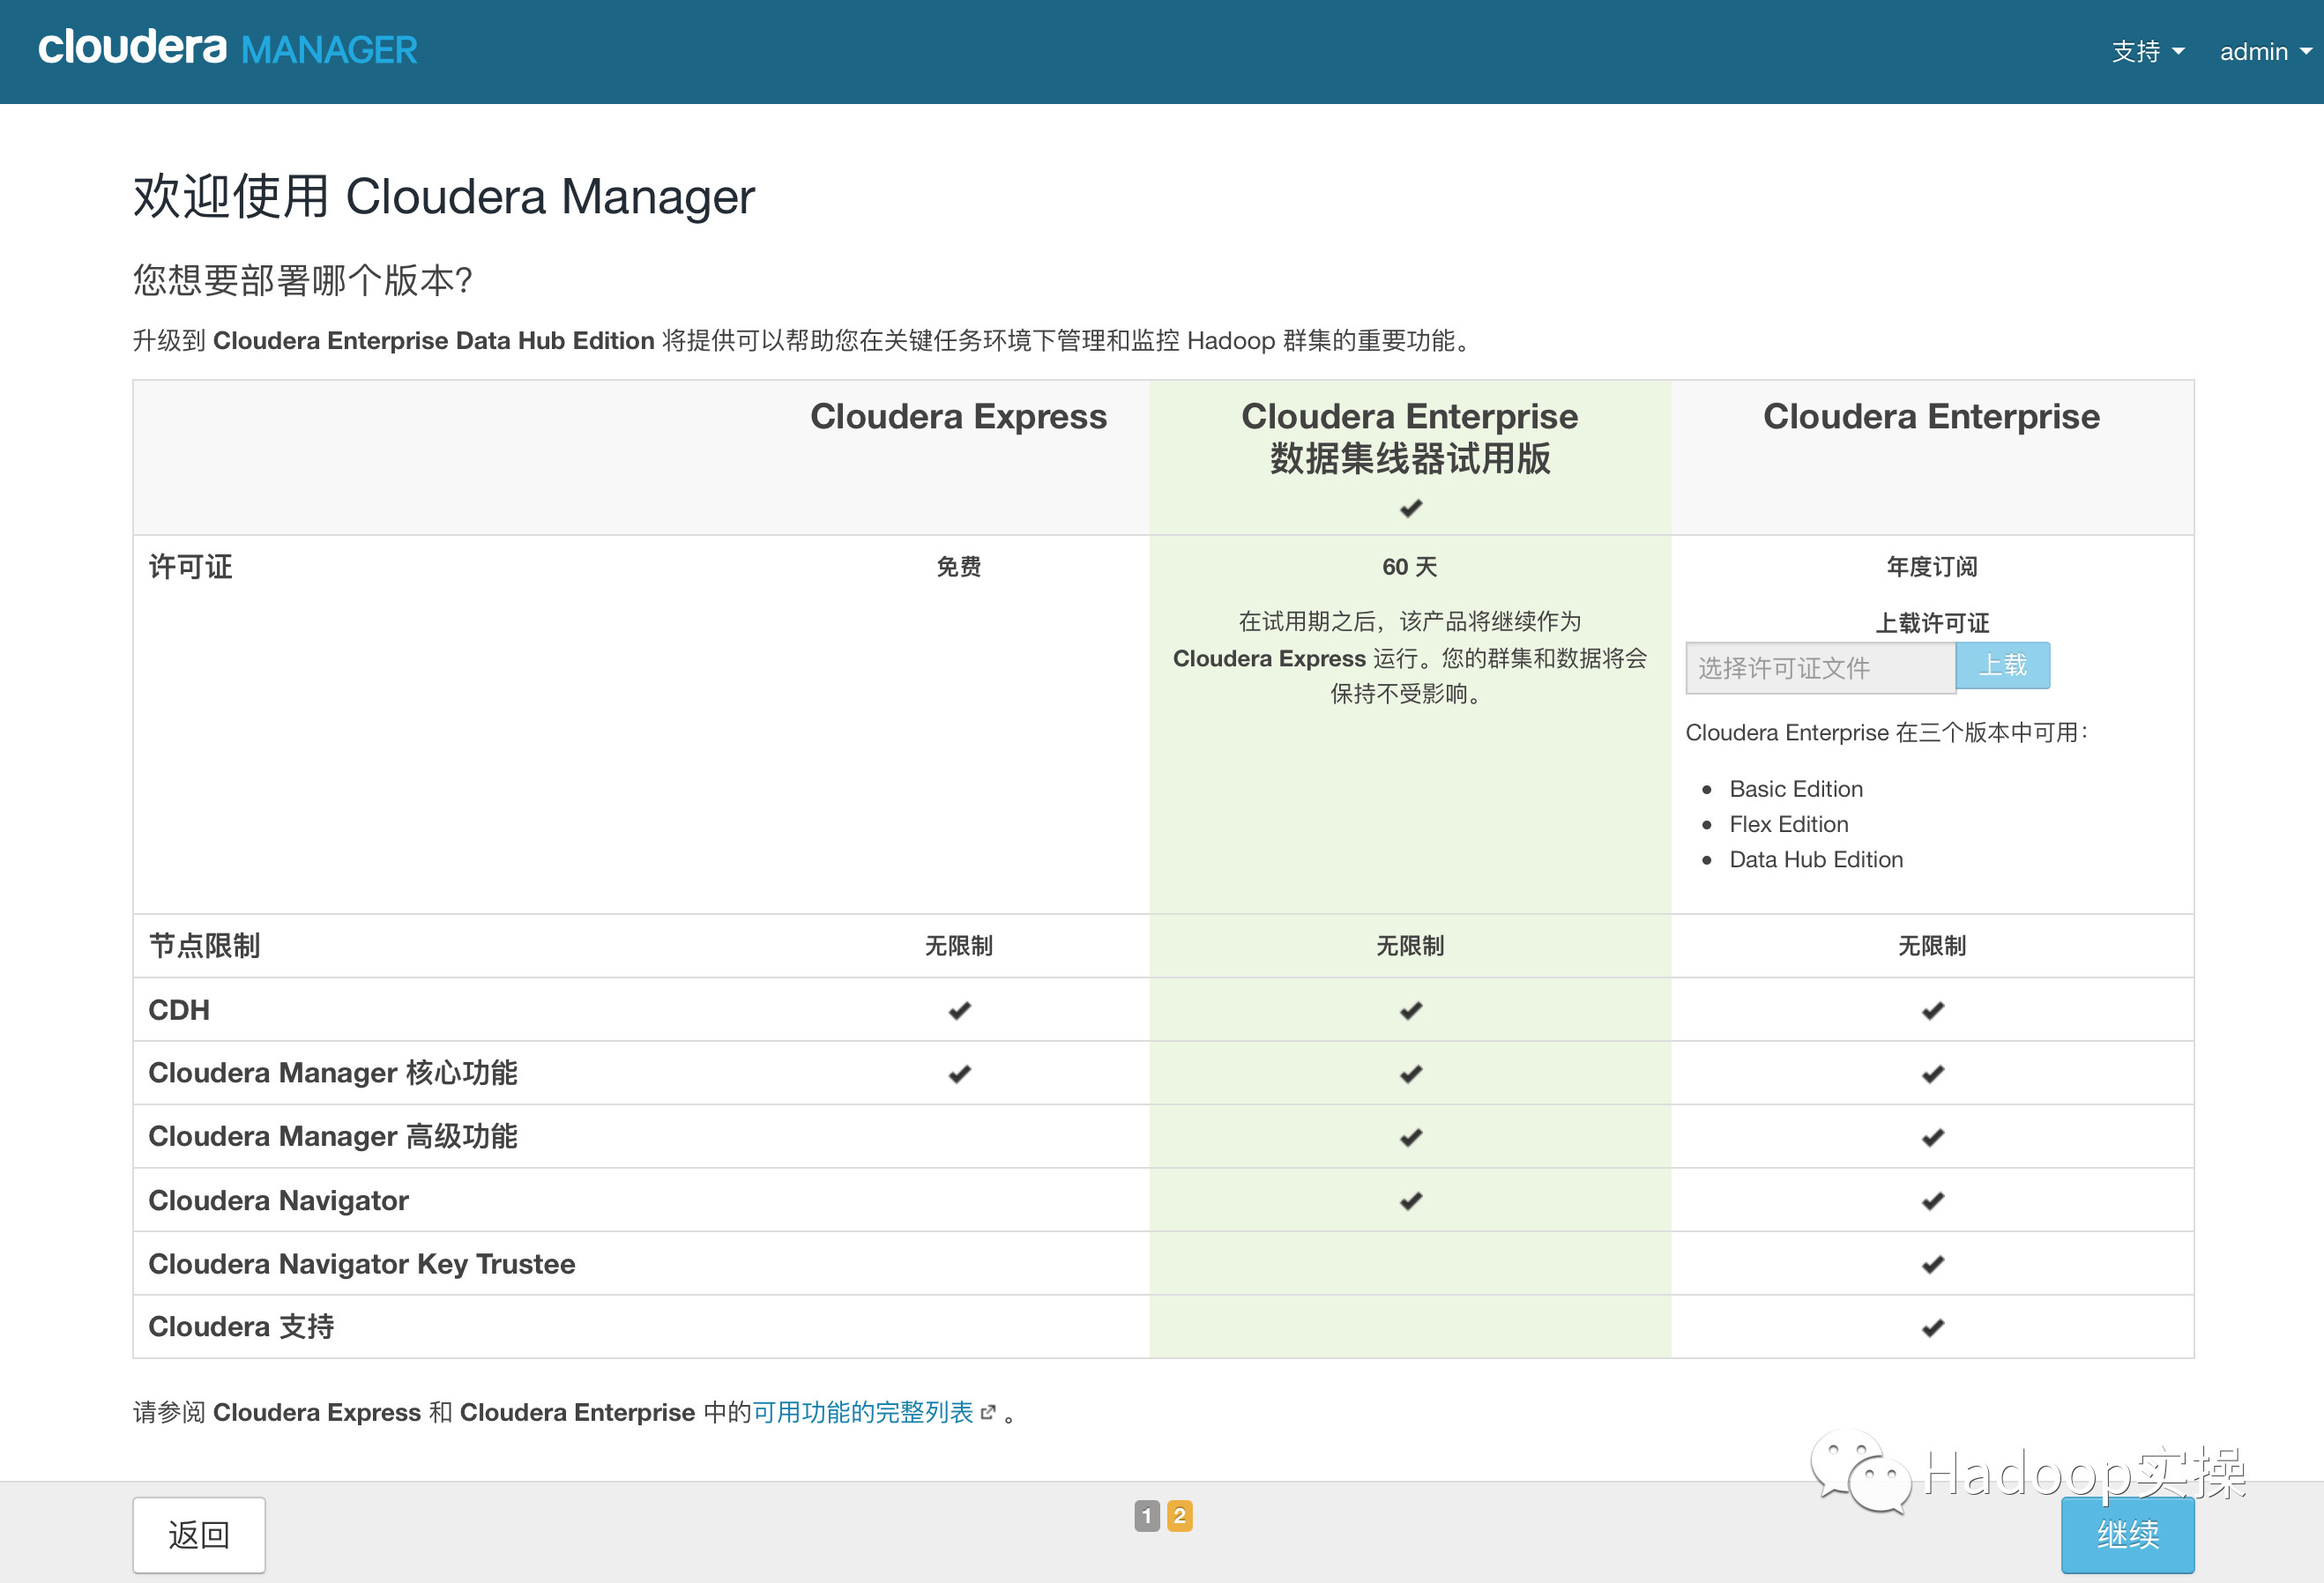
4.點擊“繼續”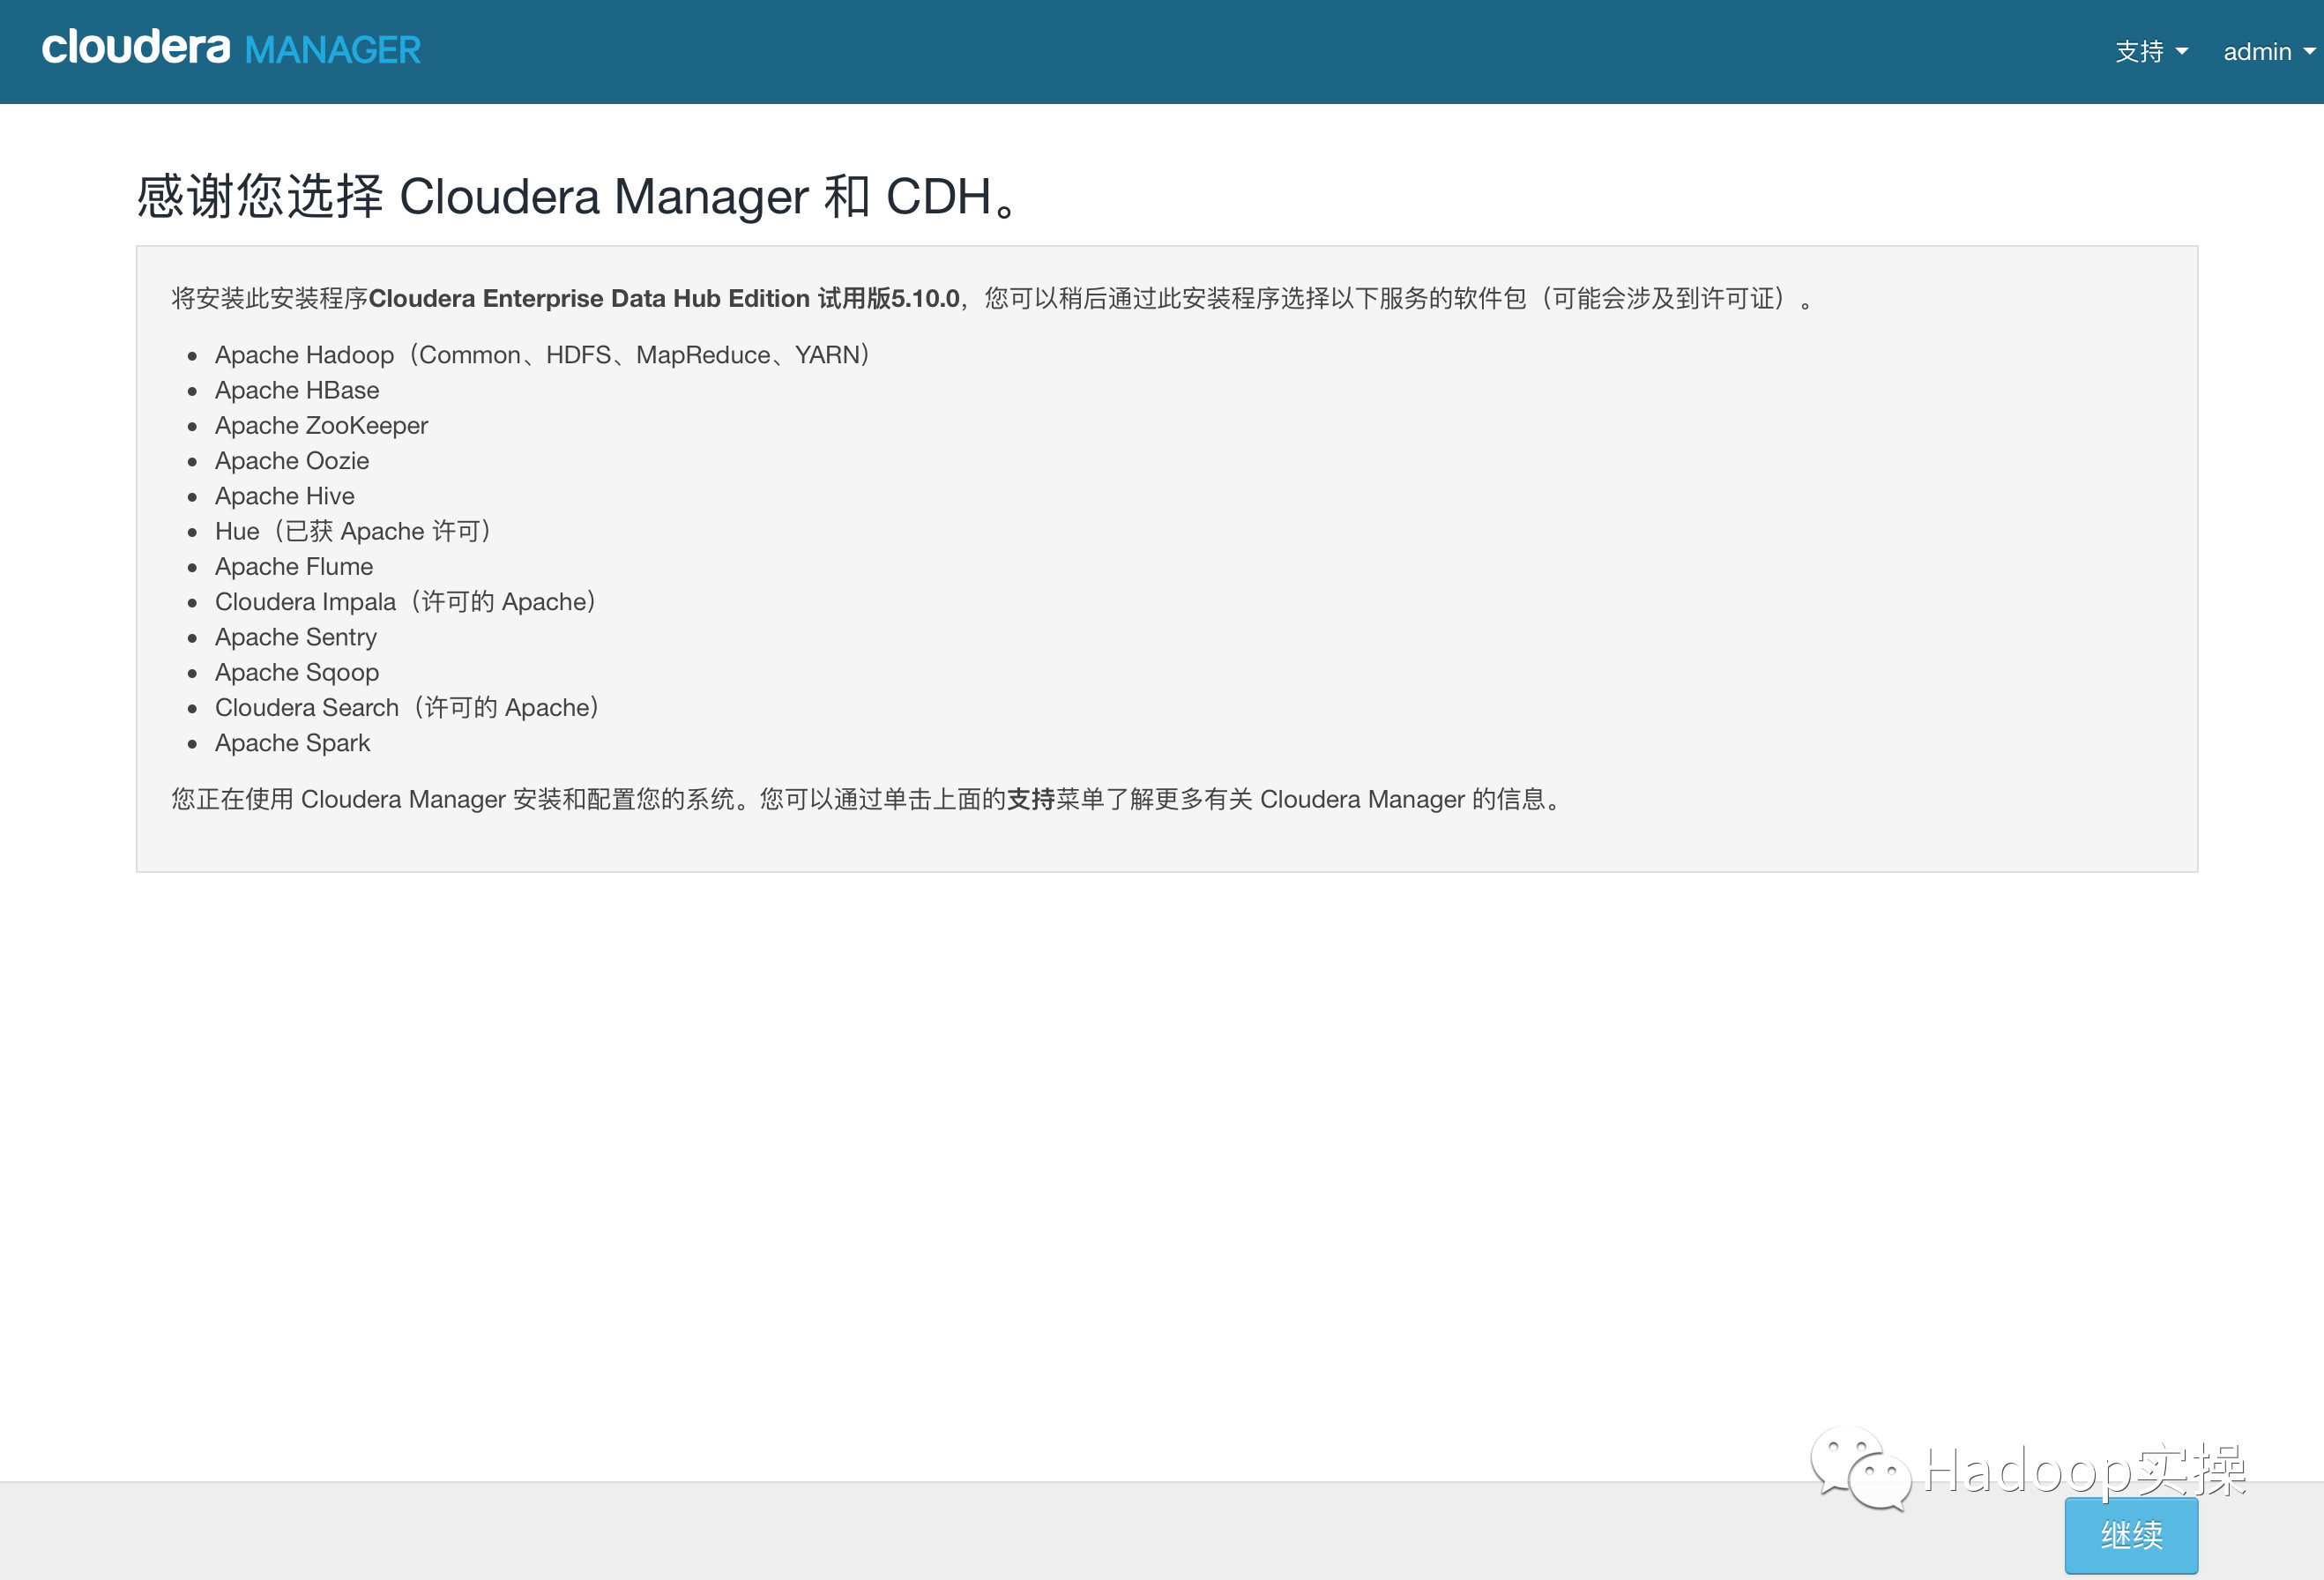
5.輸入主機ip或者名稱,點擊搜索找到主機後點擊繼續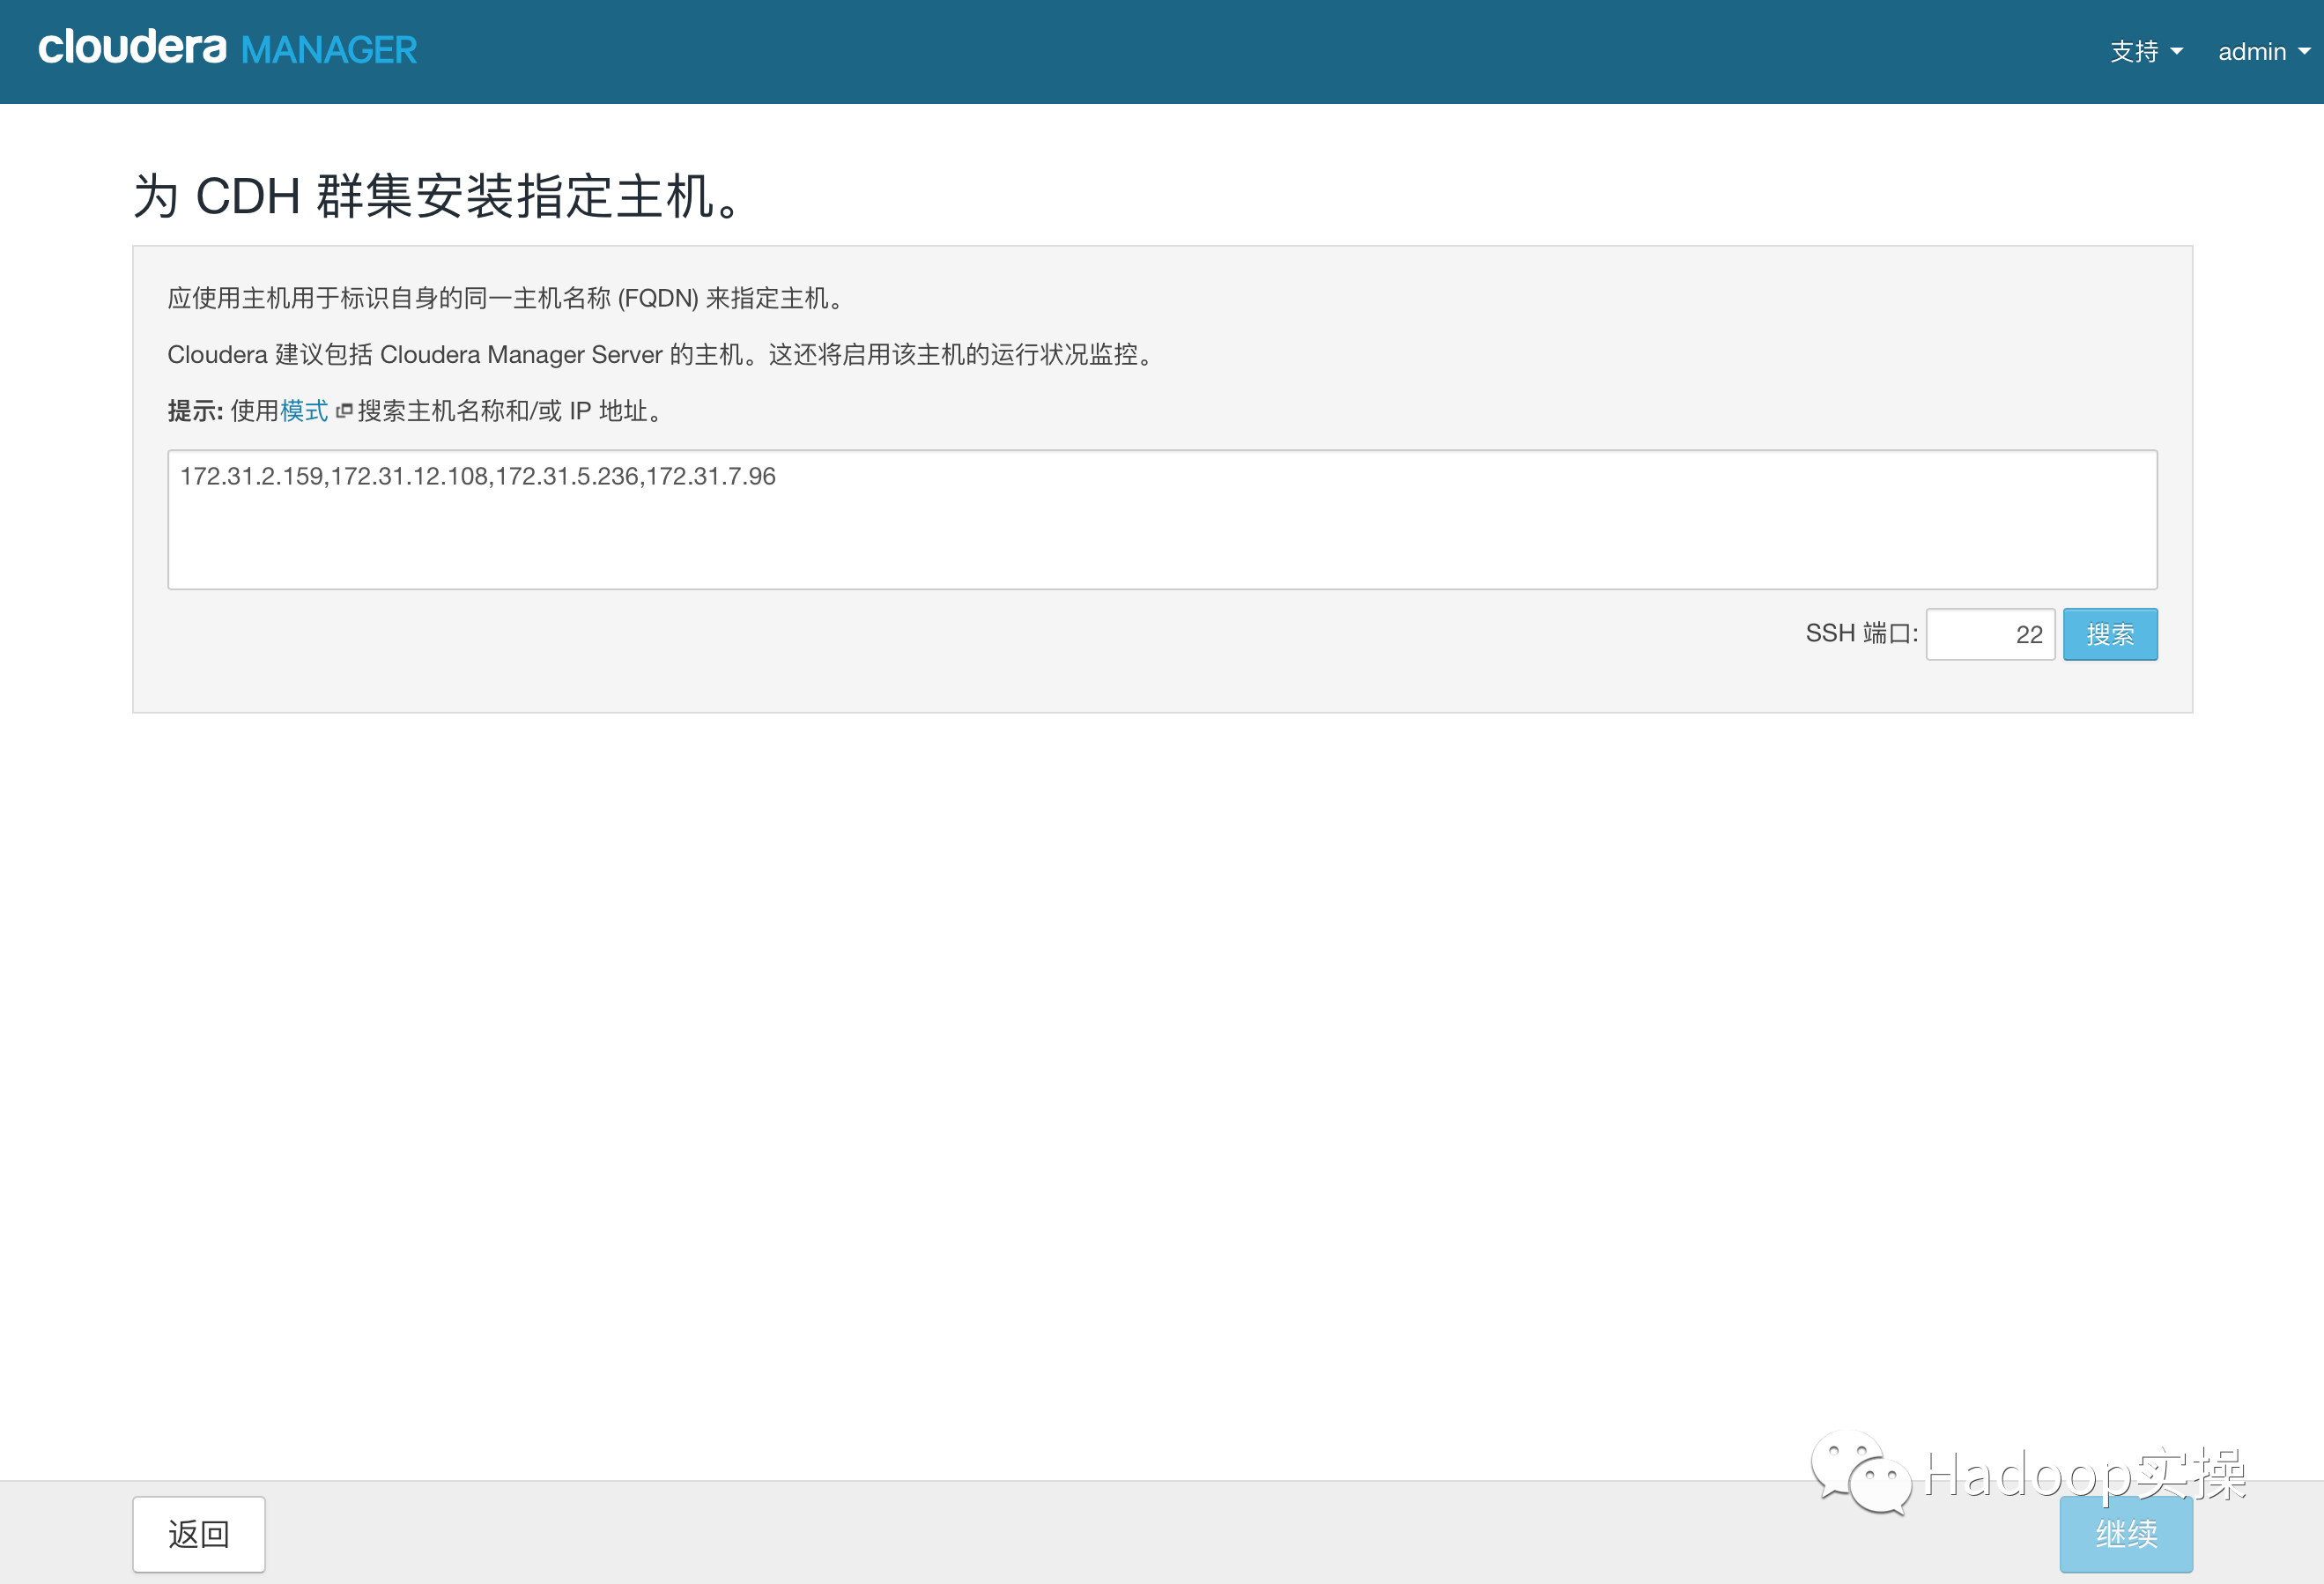

6.點擊“繼續”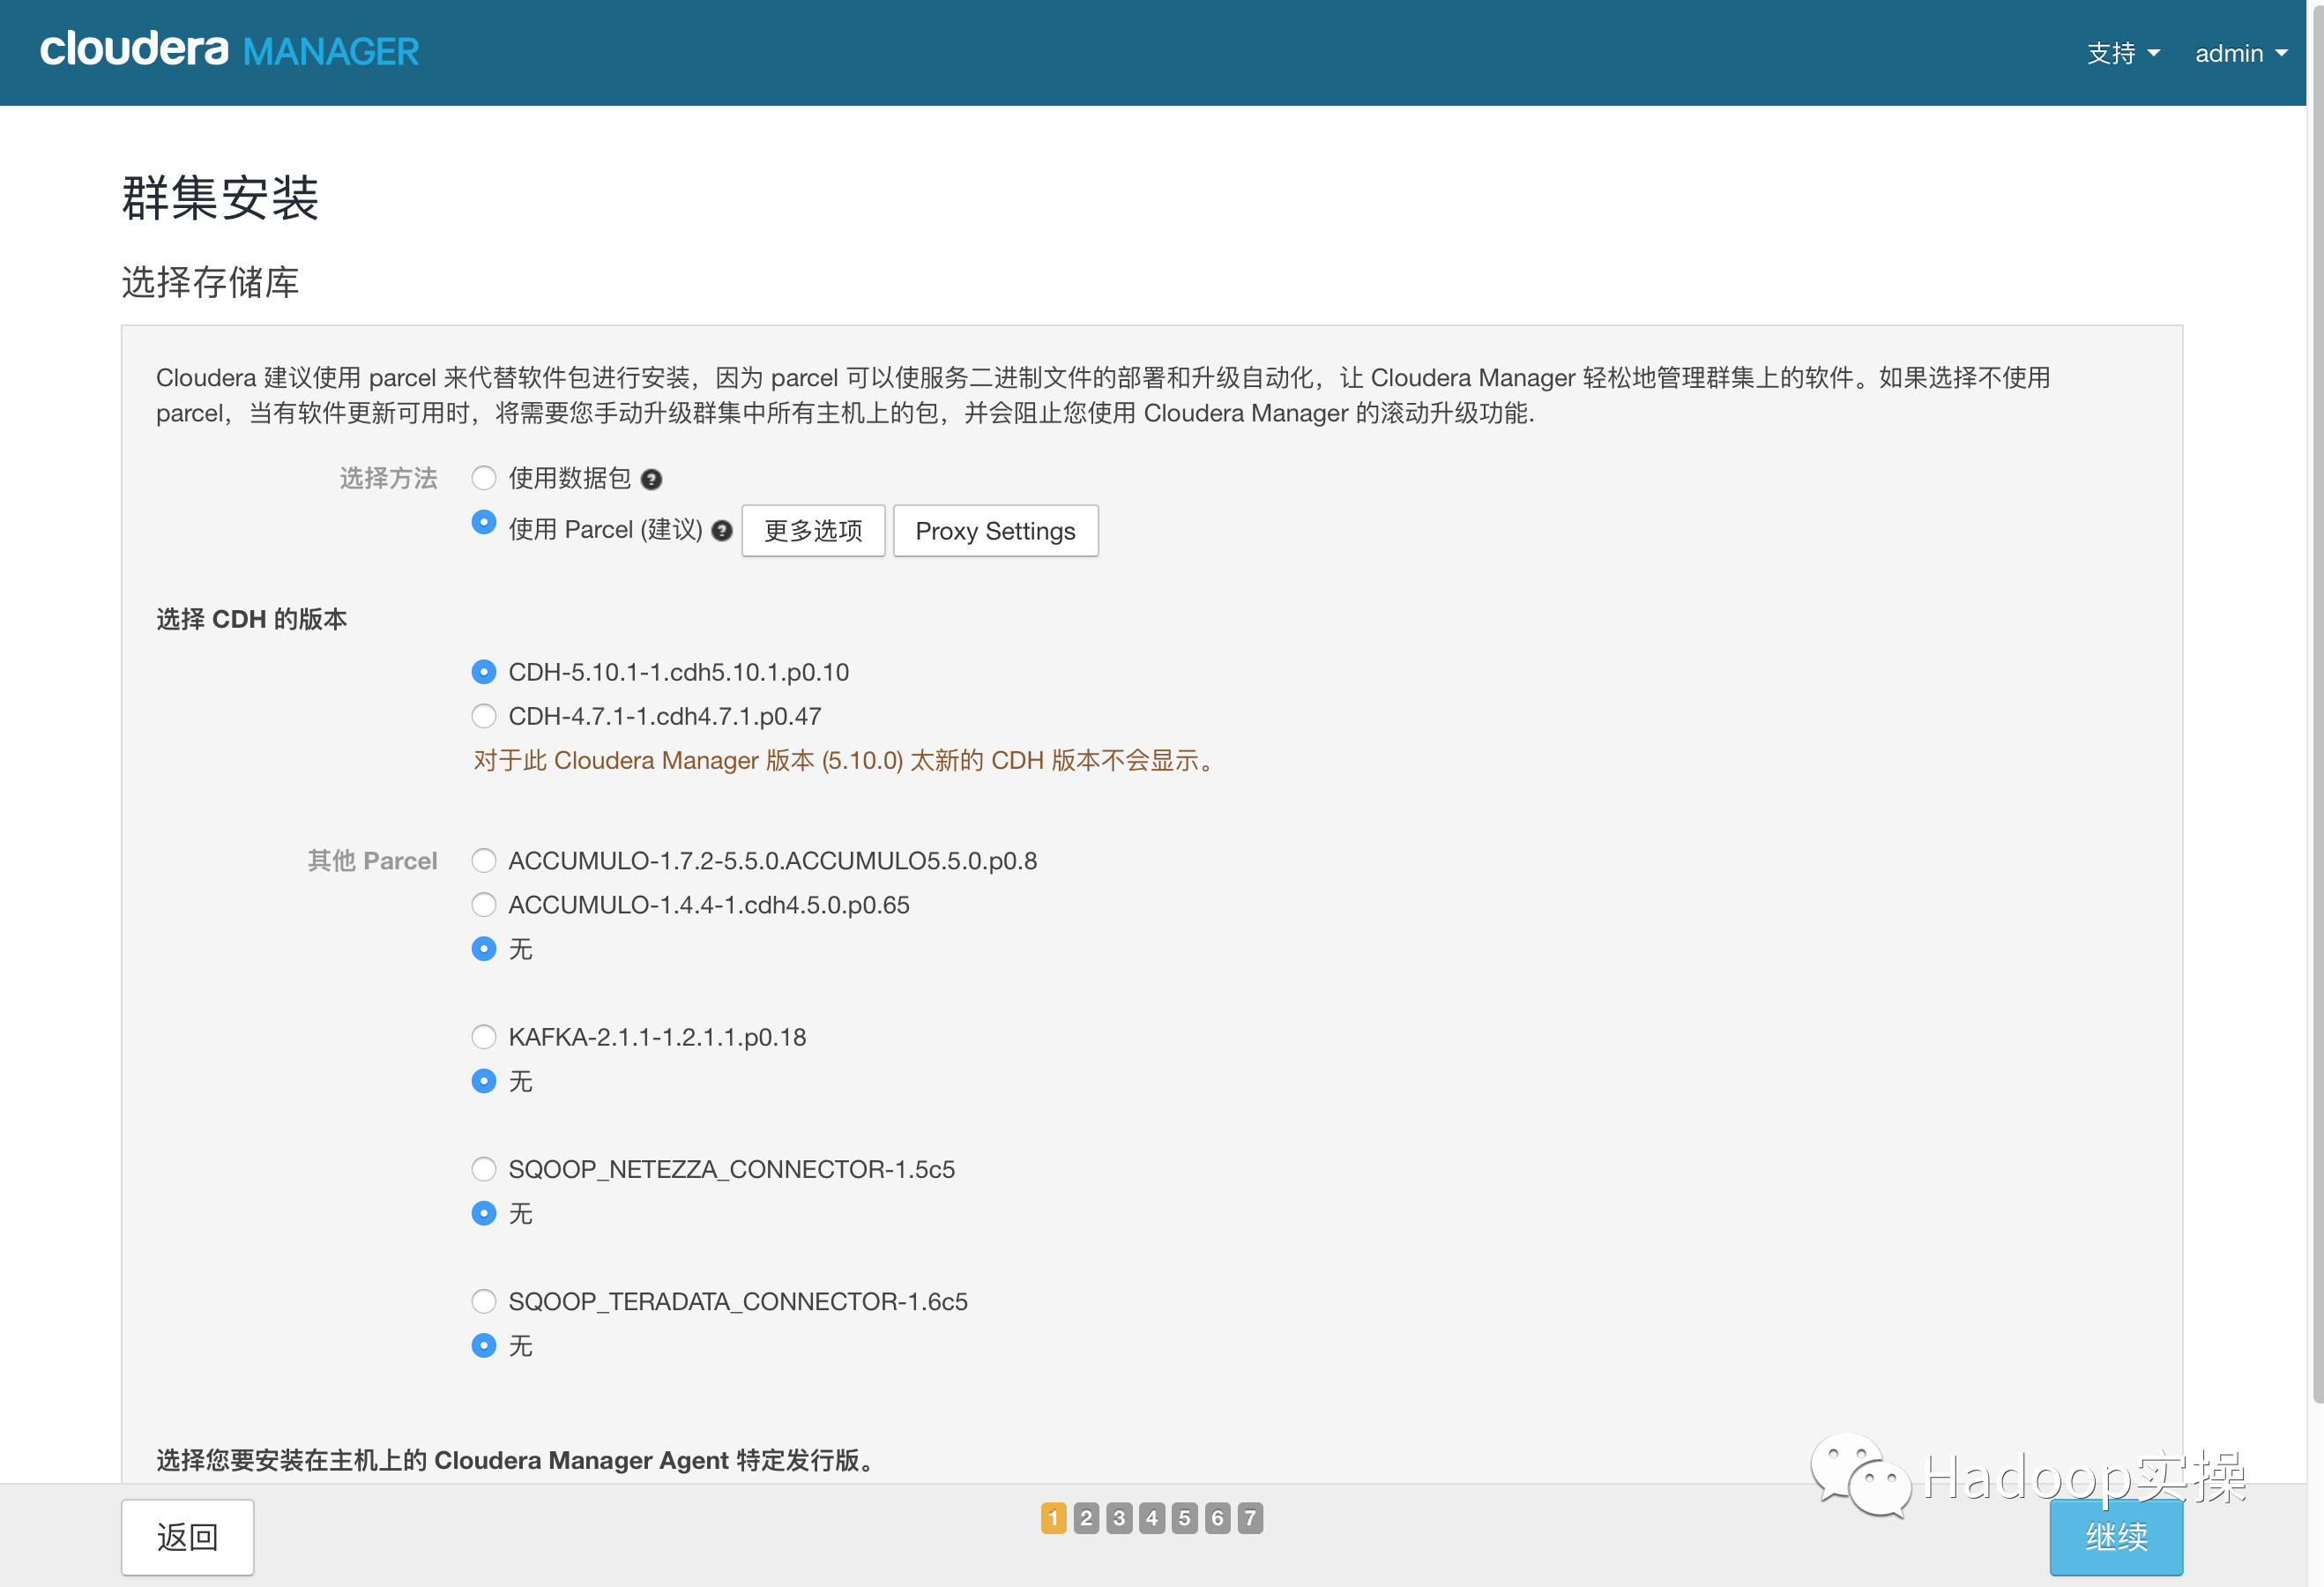
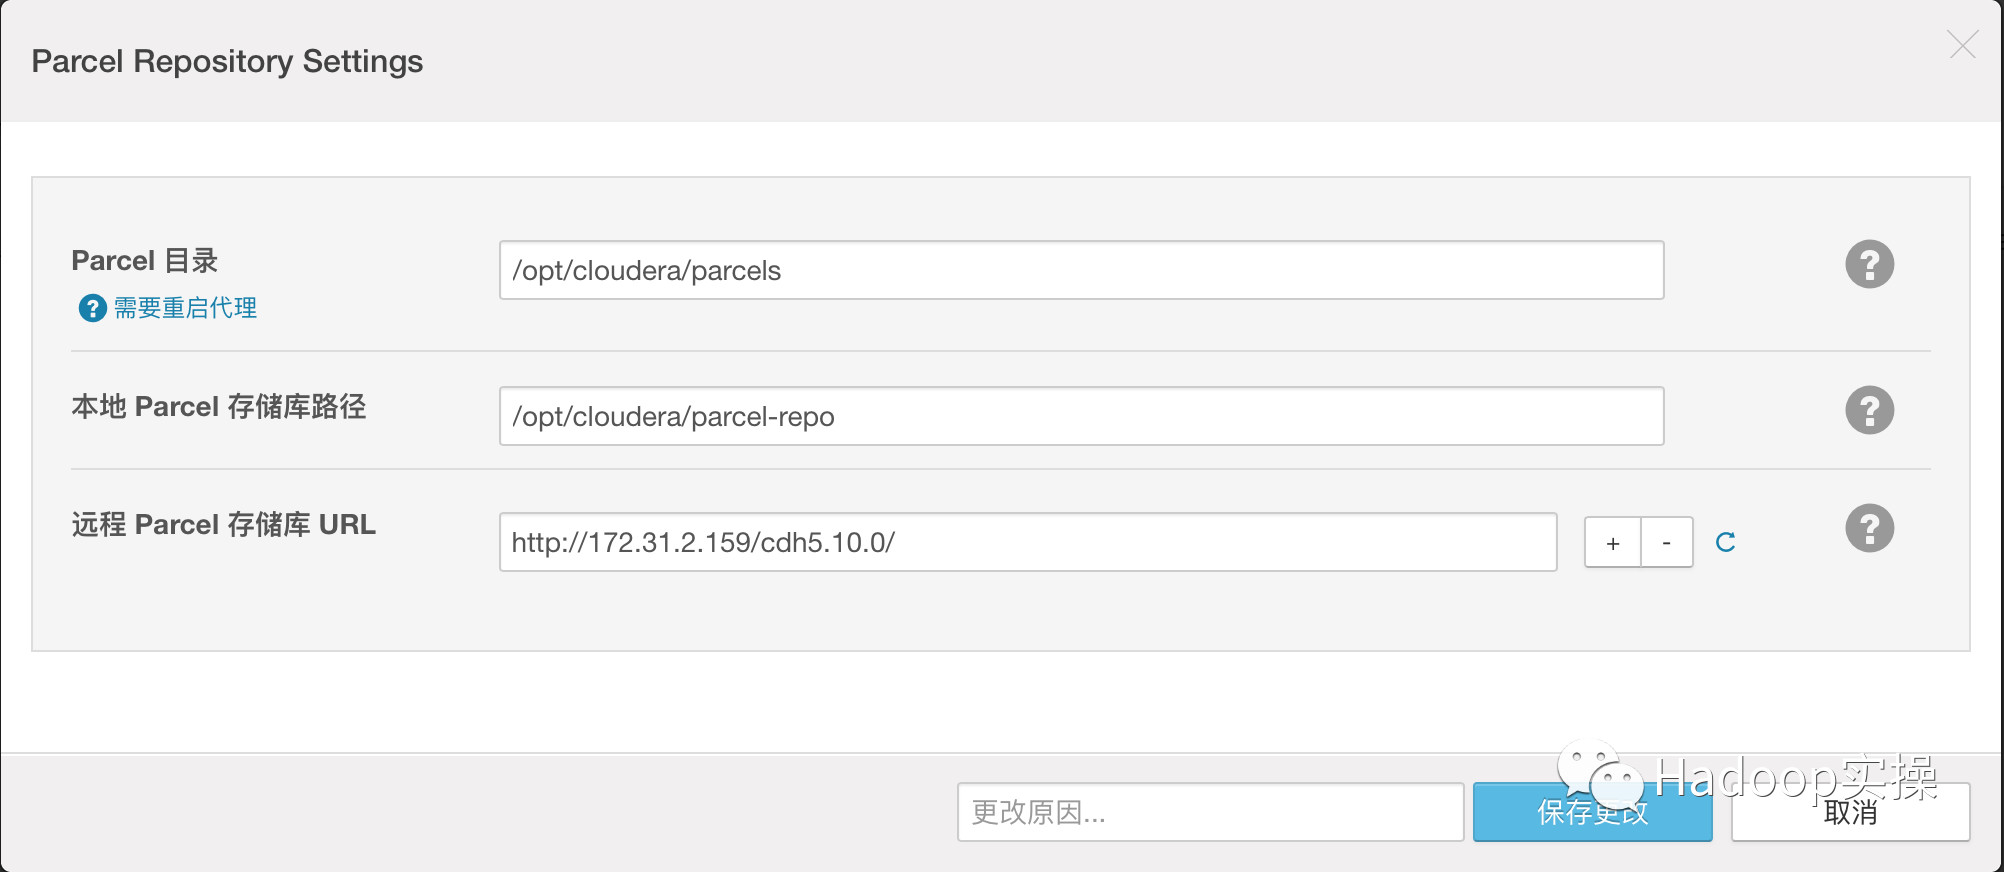
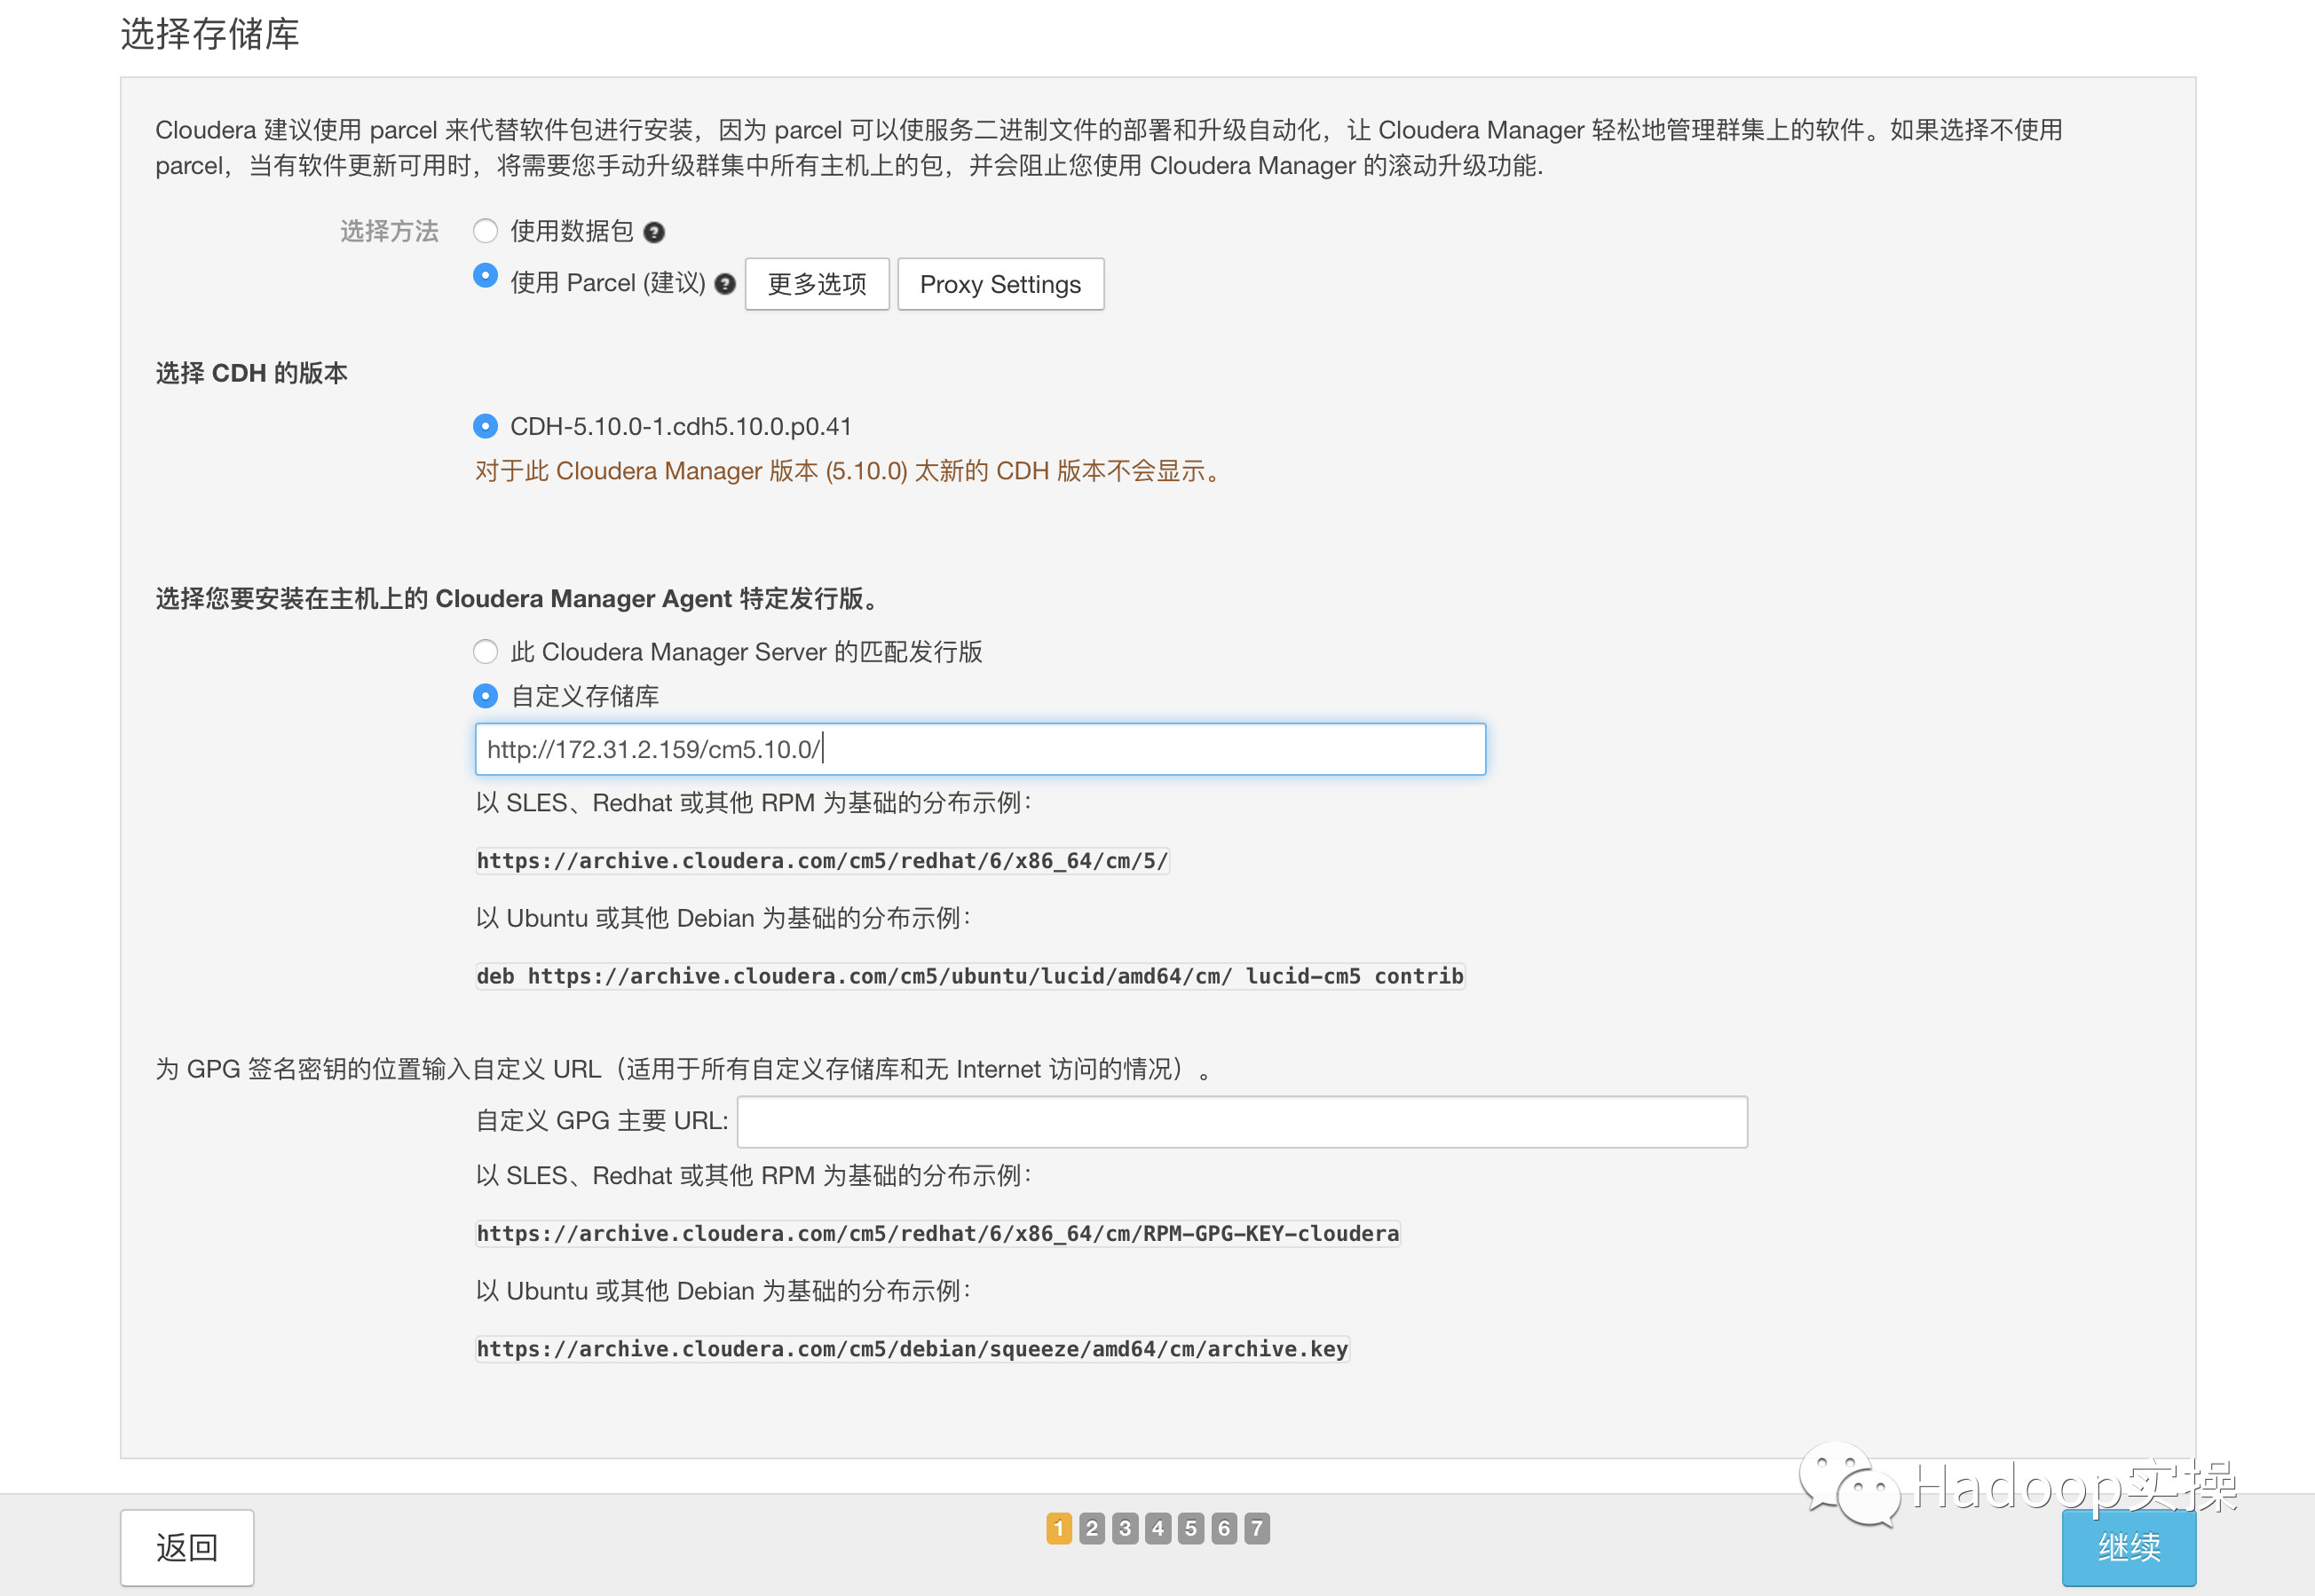
7.使用parcel選擇,點擊“更多選項”,點擊“-”刪除其它所有地址,輸入http://172.31.2.159/cm5.10.0/,點擊“保存更改”
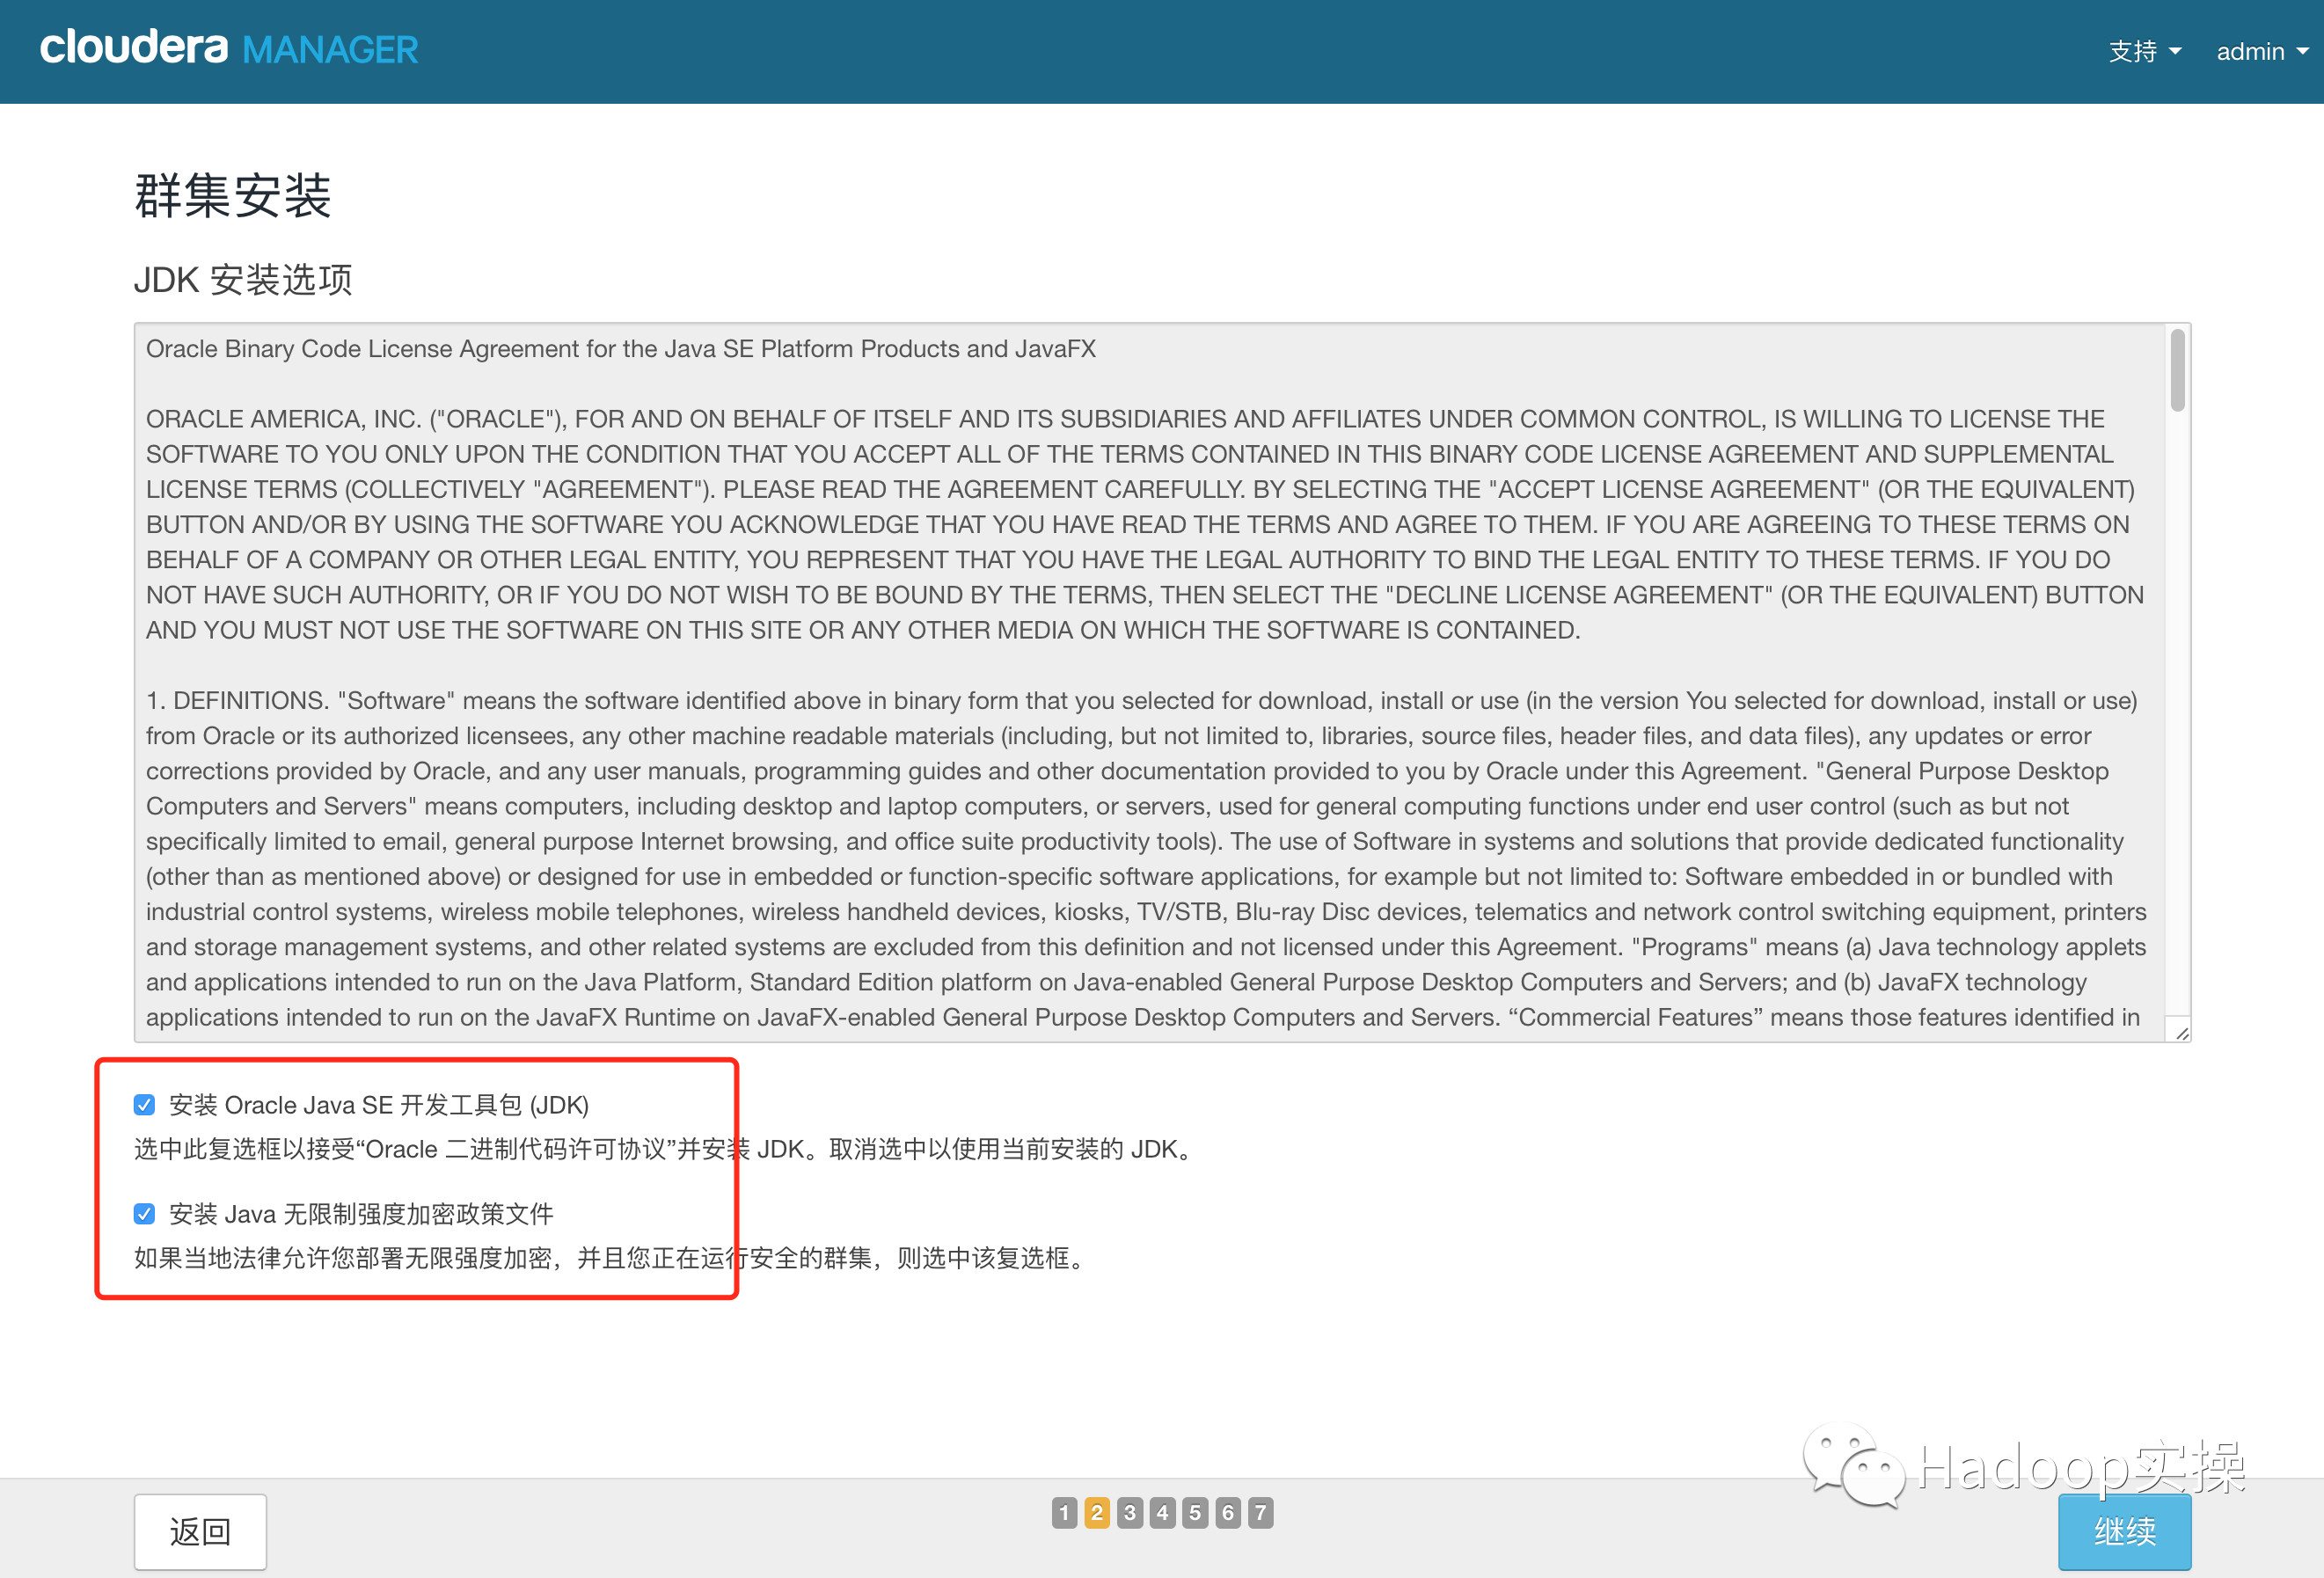
8.選擇自定義存儲庫,輸入cm的http地址
9.點擊“繼續”,進入下一步安裝jdk
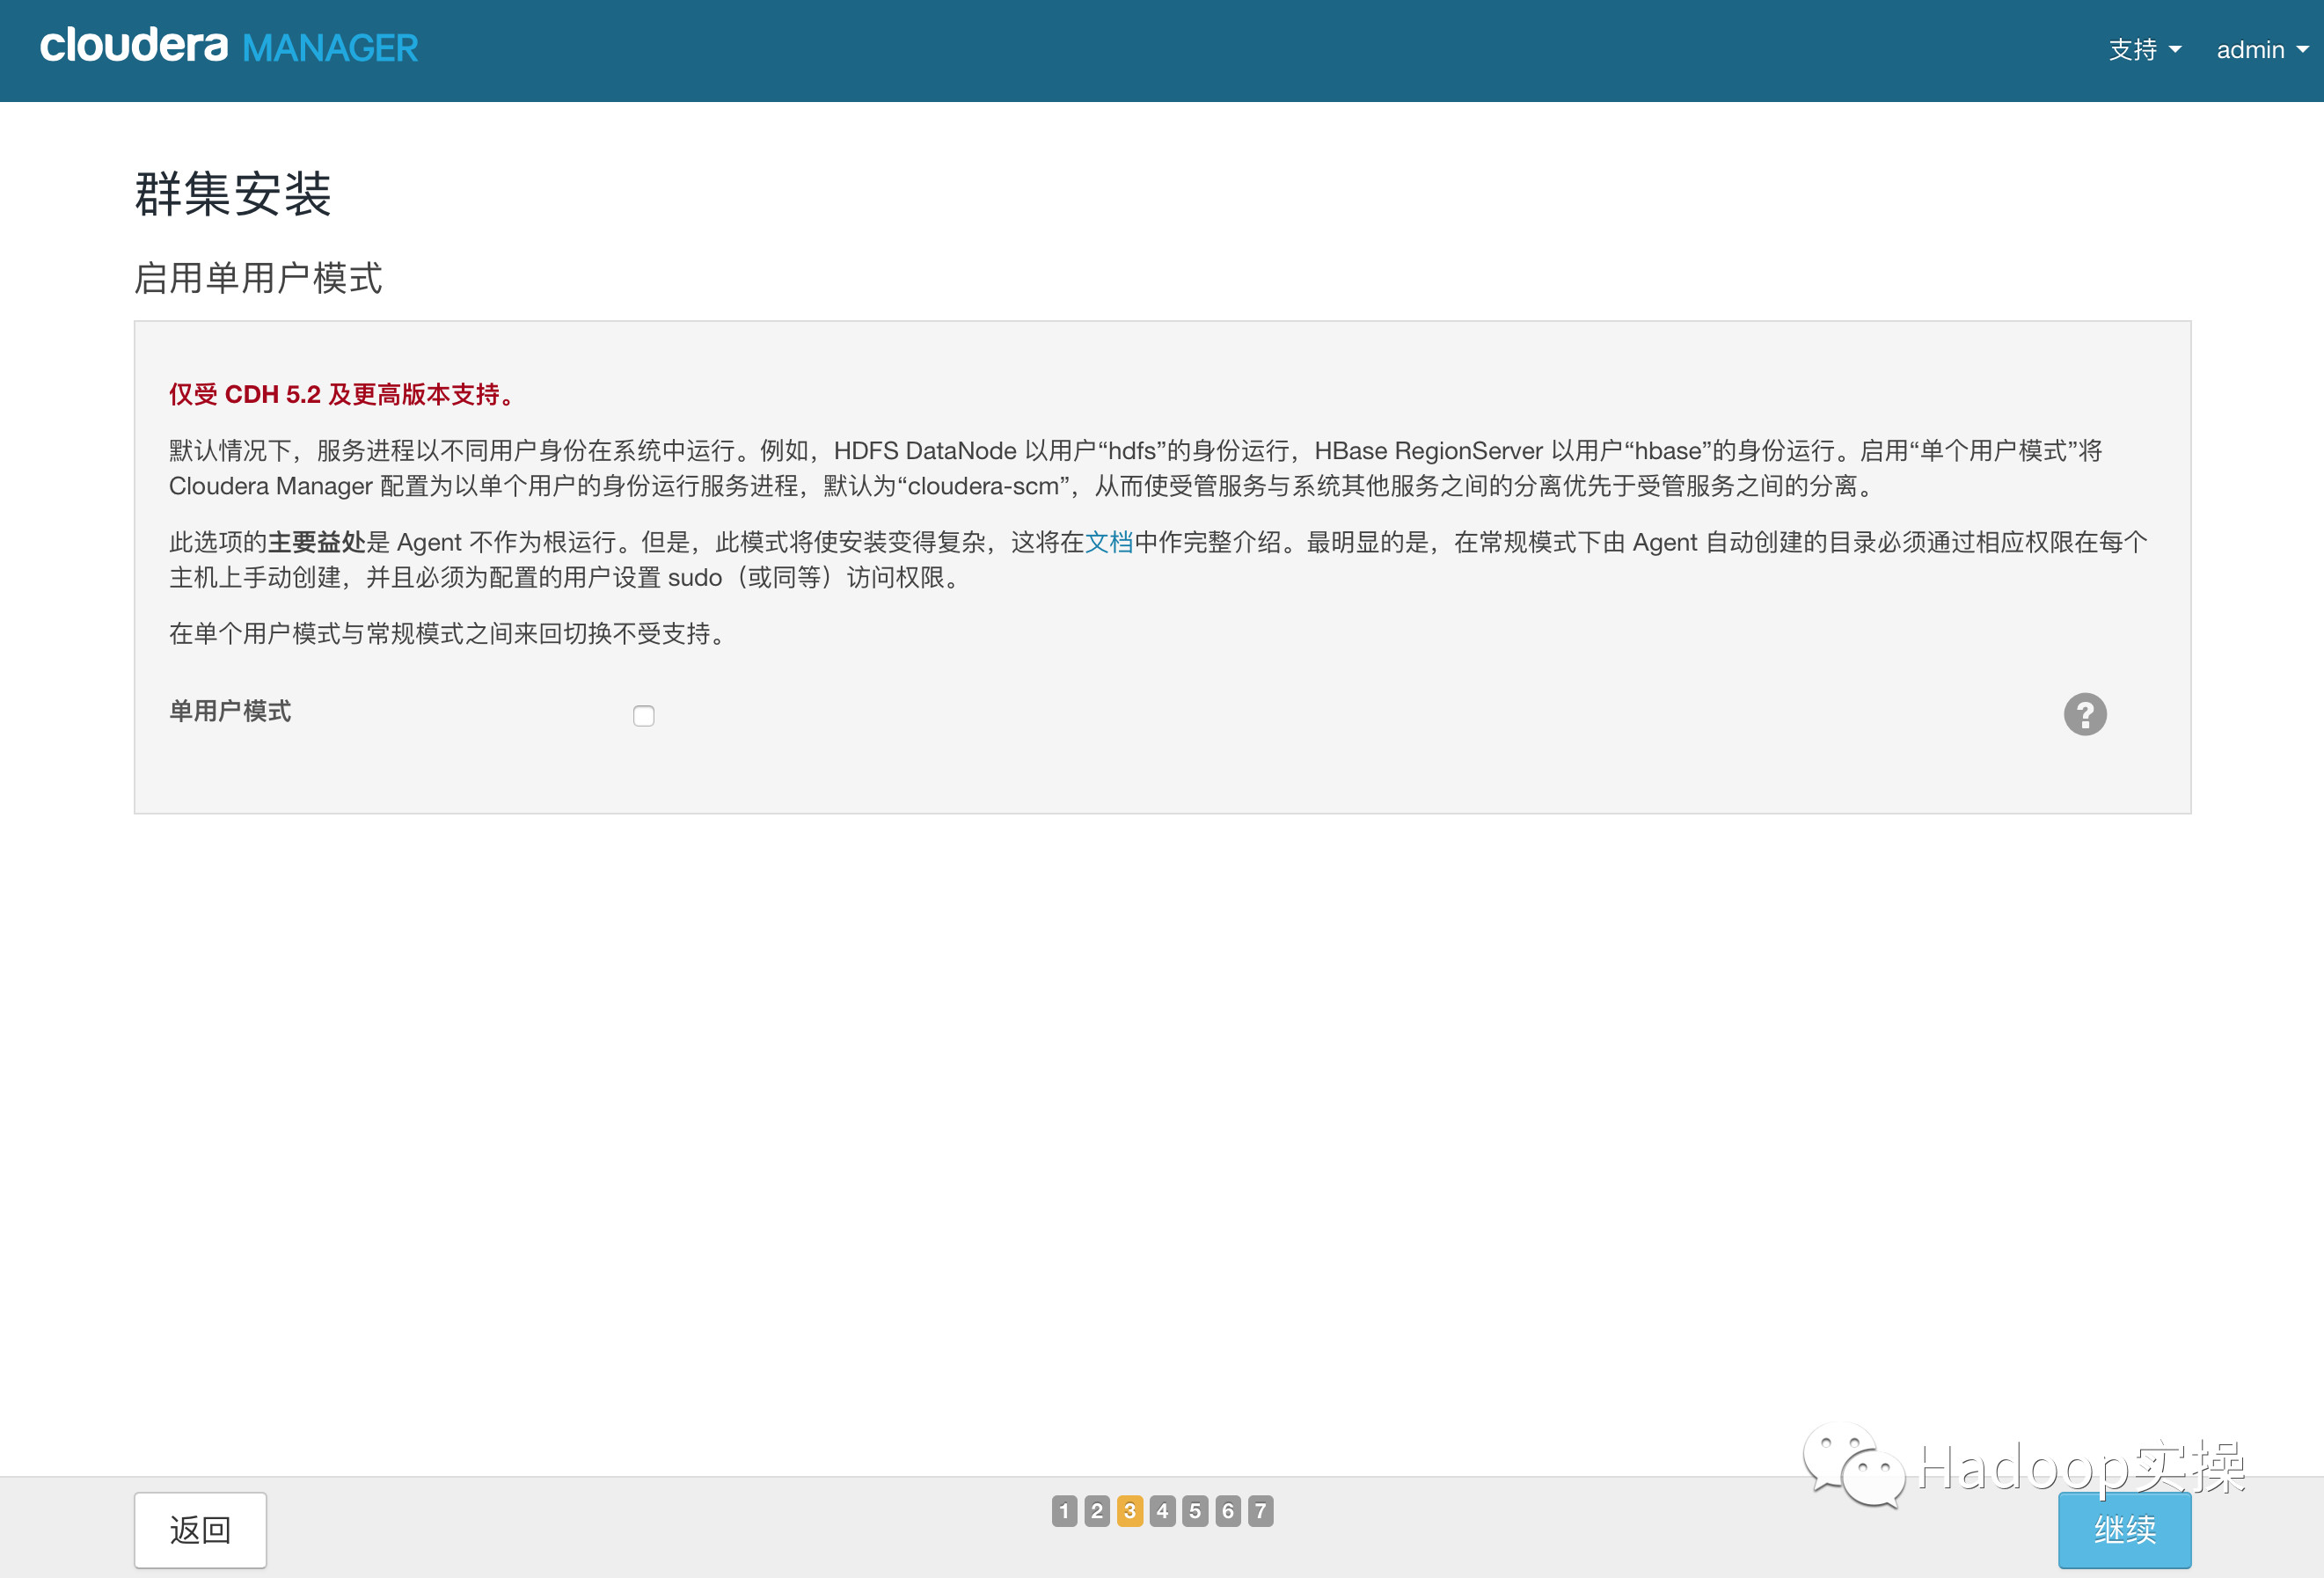
10.點擊“繼續”,進入下一步,默認多用戶模式
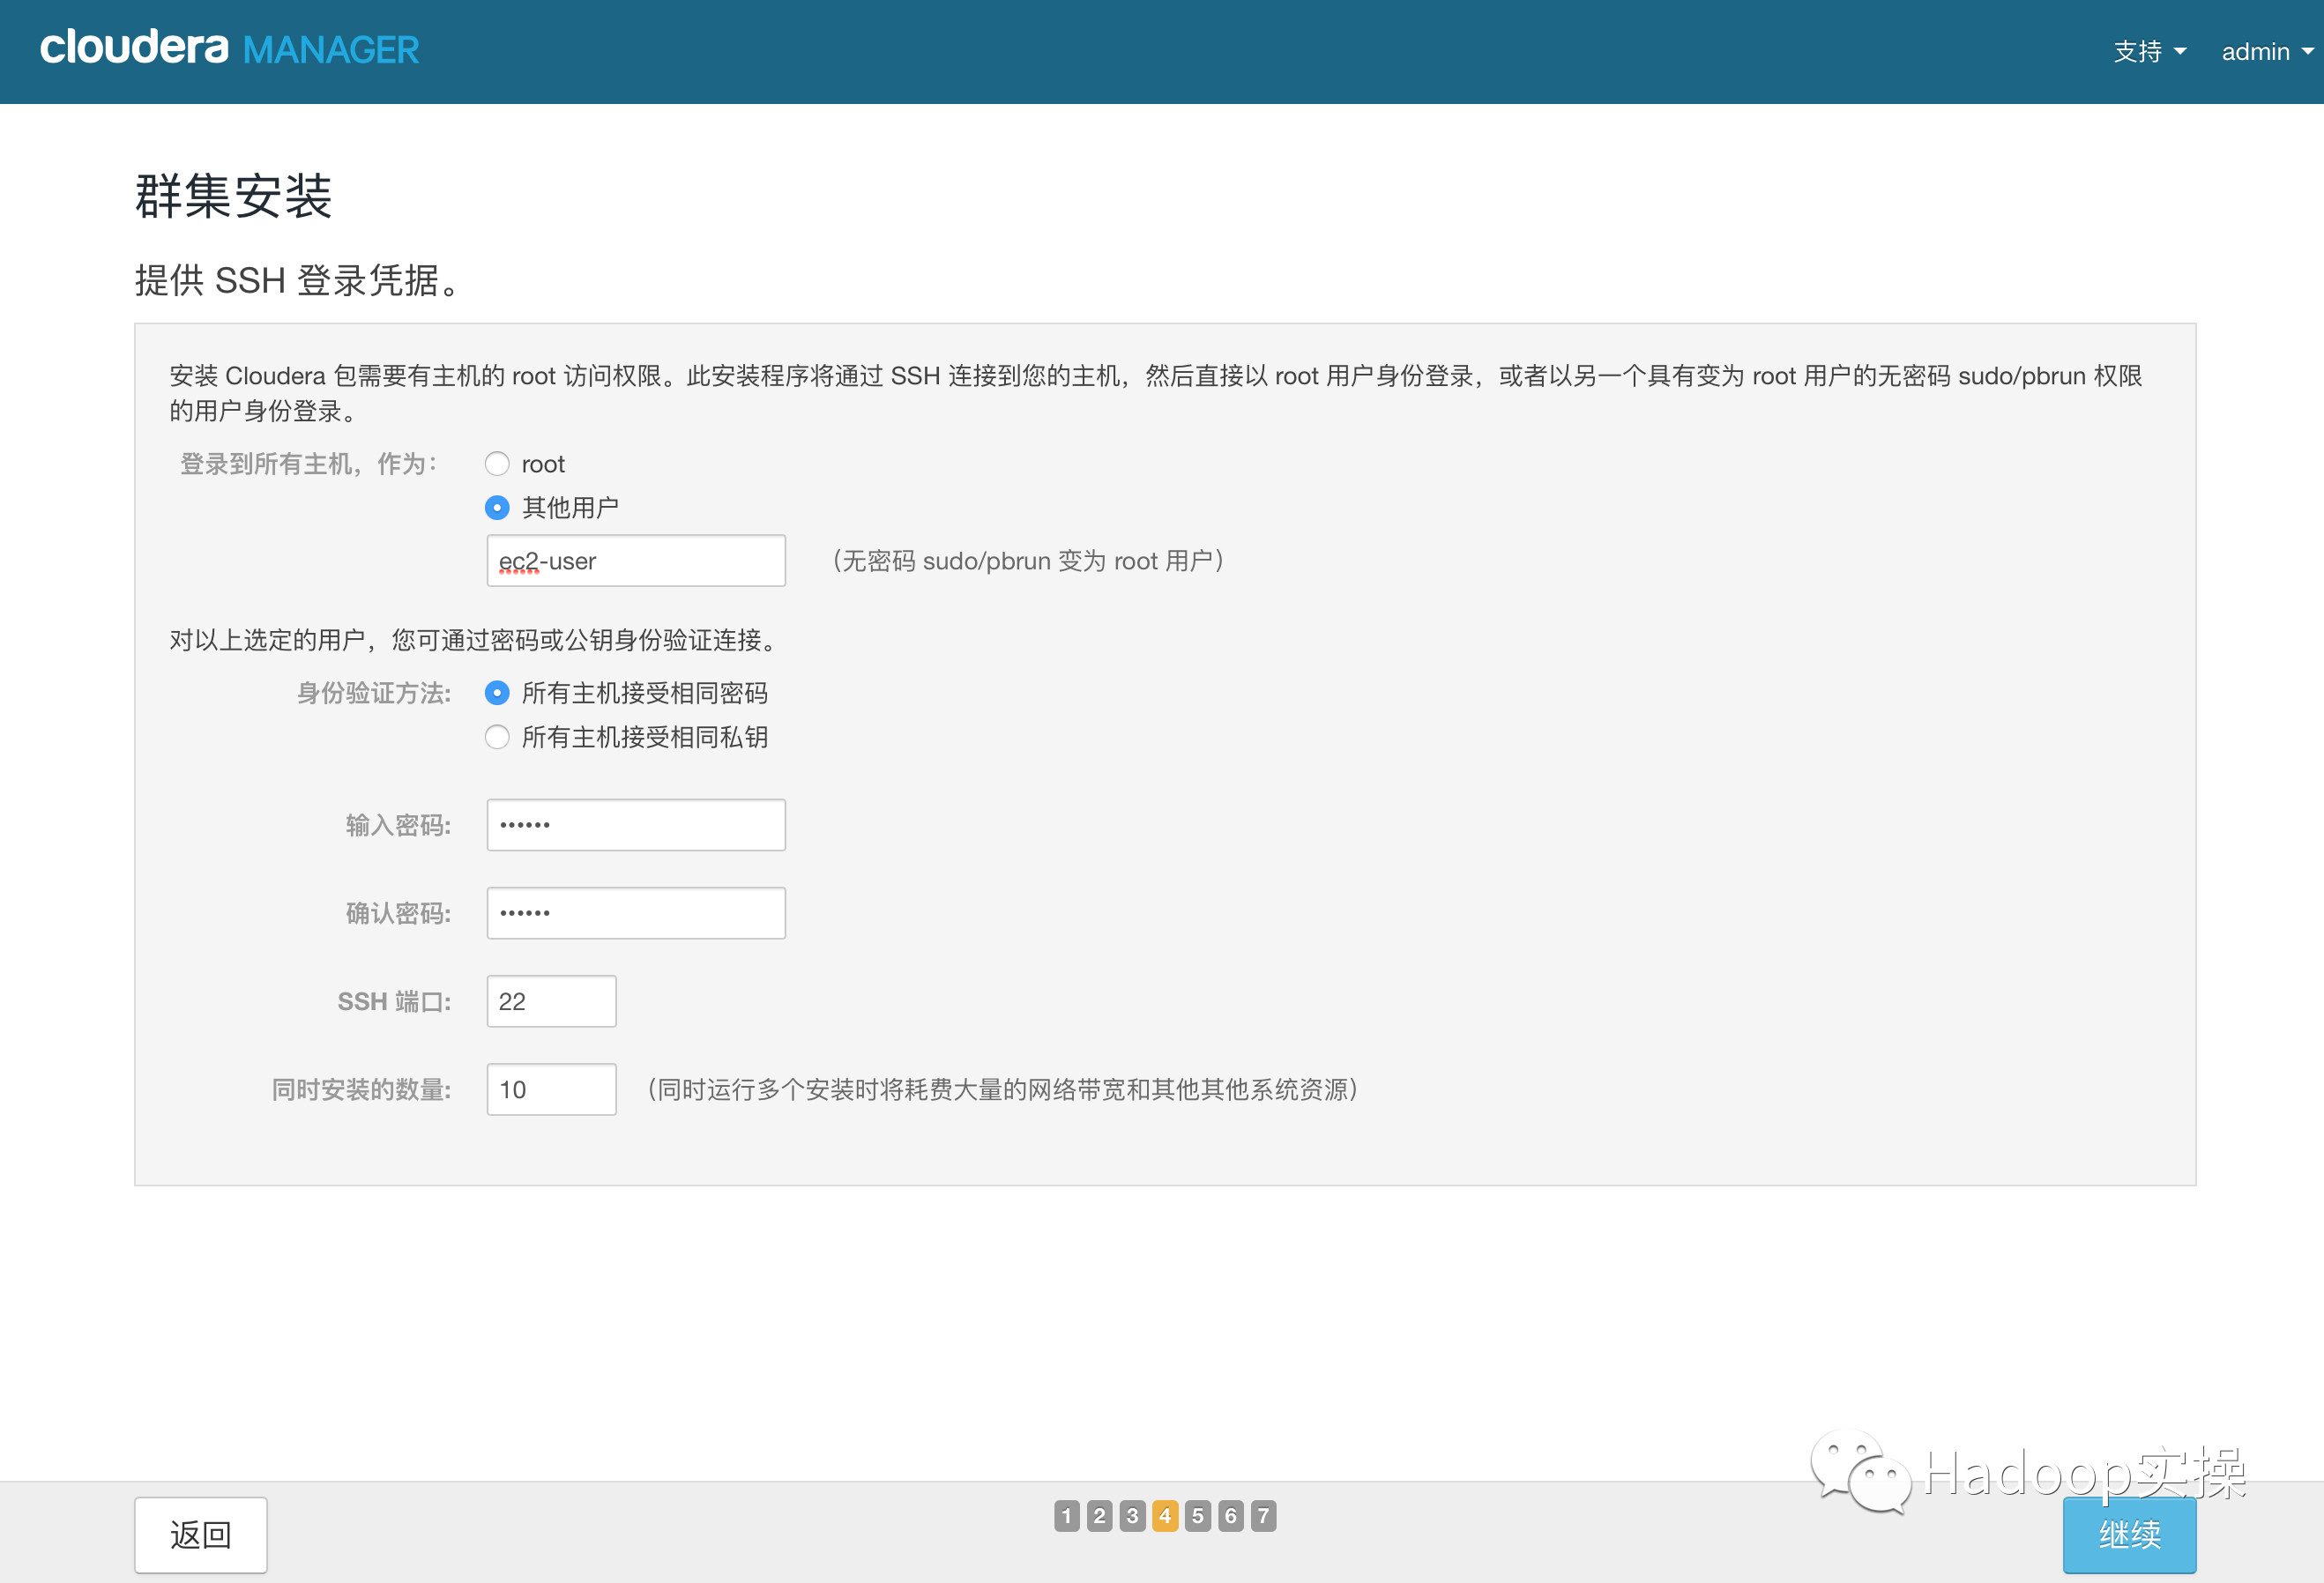
11.點擊“繼續”,進入下一步配置ssh賬號密碼
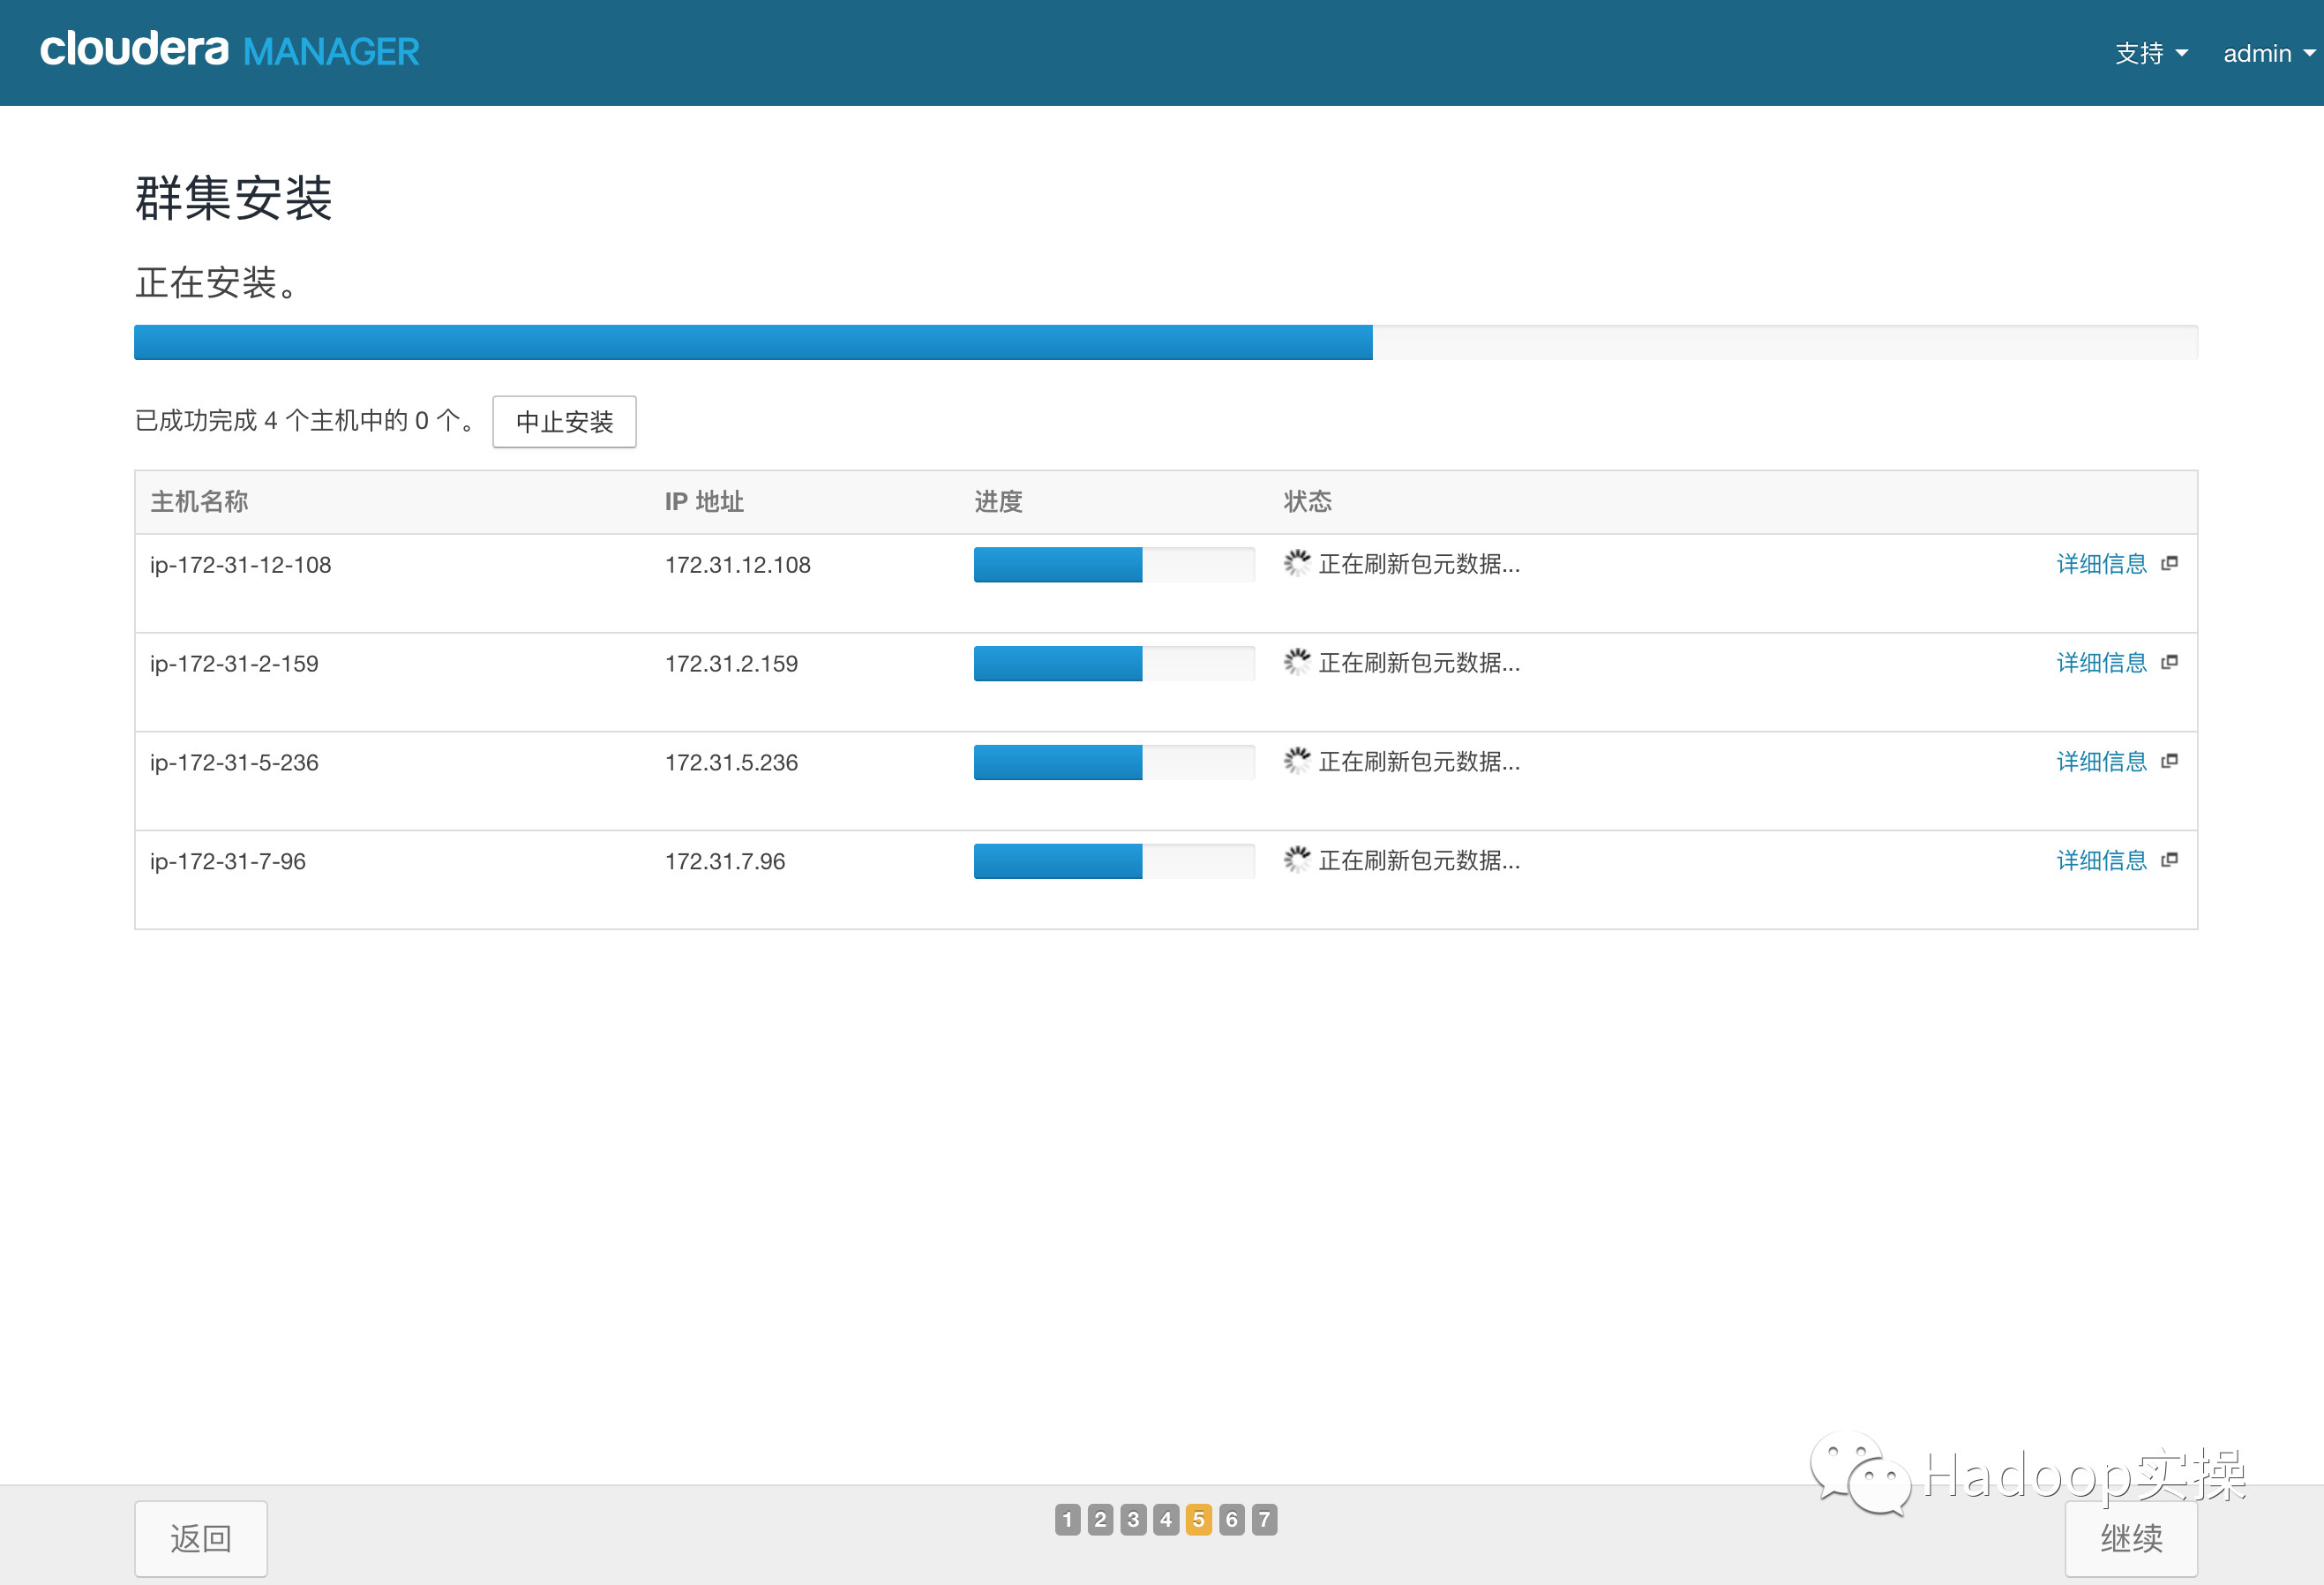
12.點擊“繼續”,進入下一步,安裝Cloudera Manager相關到各個節點
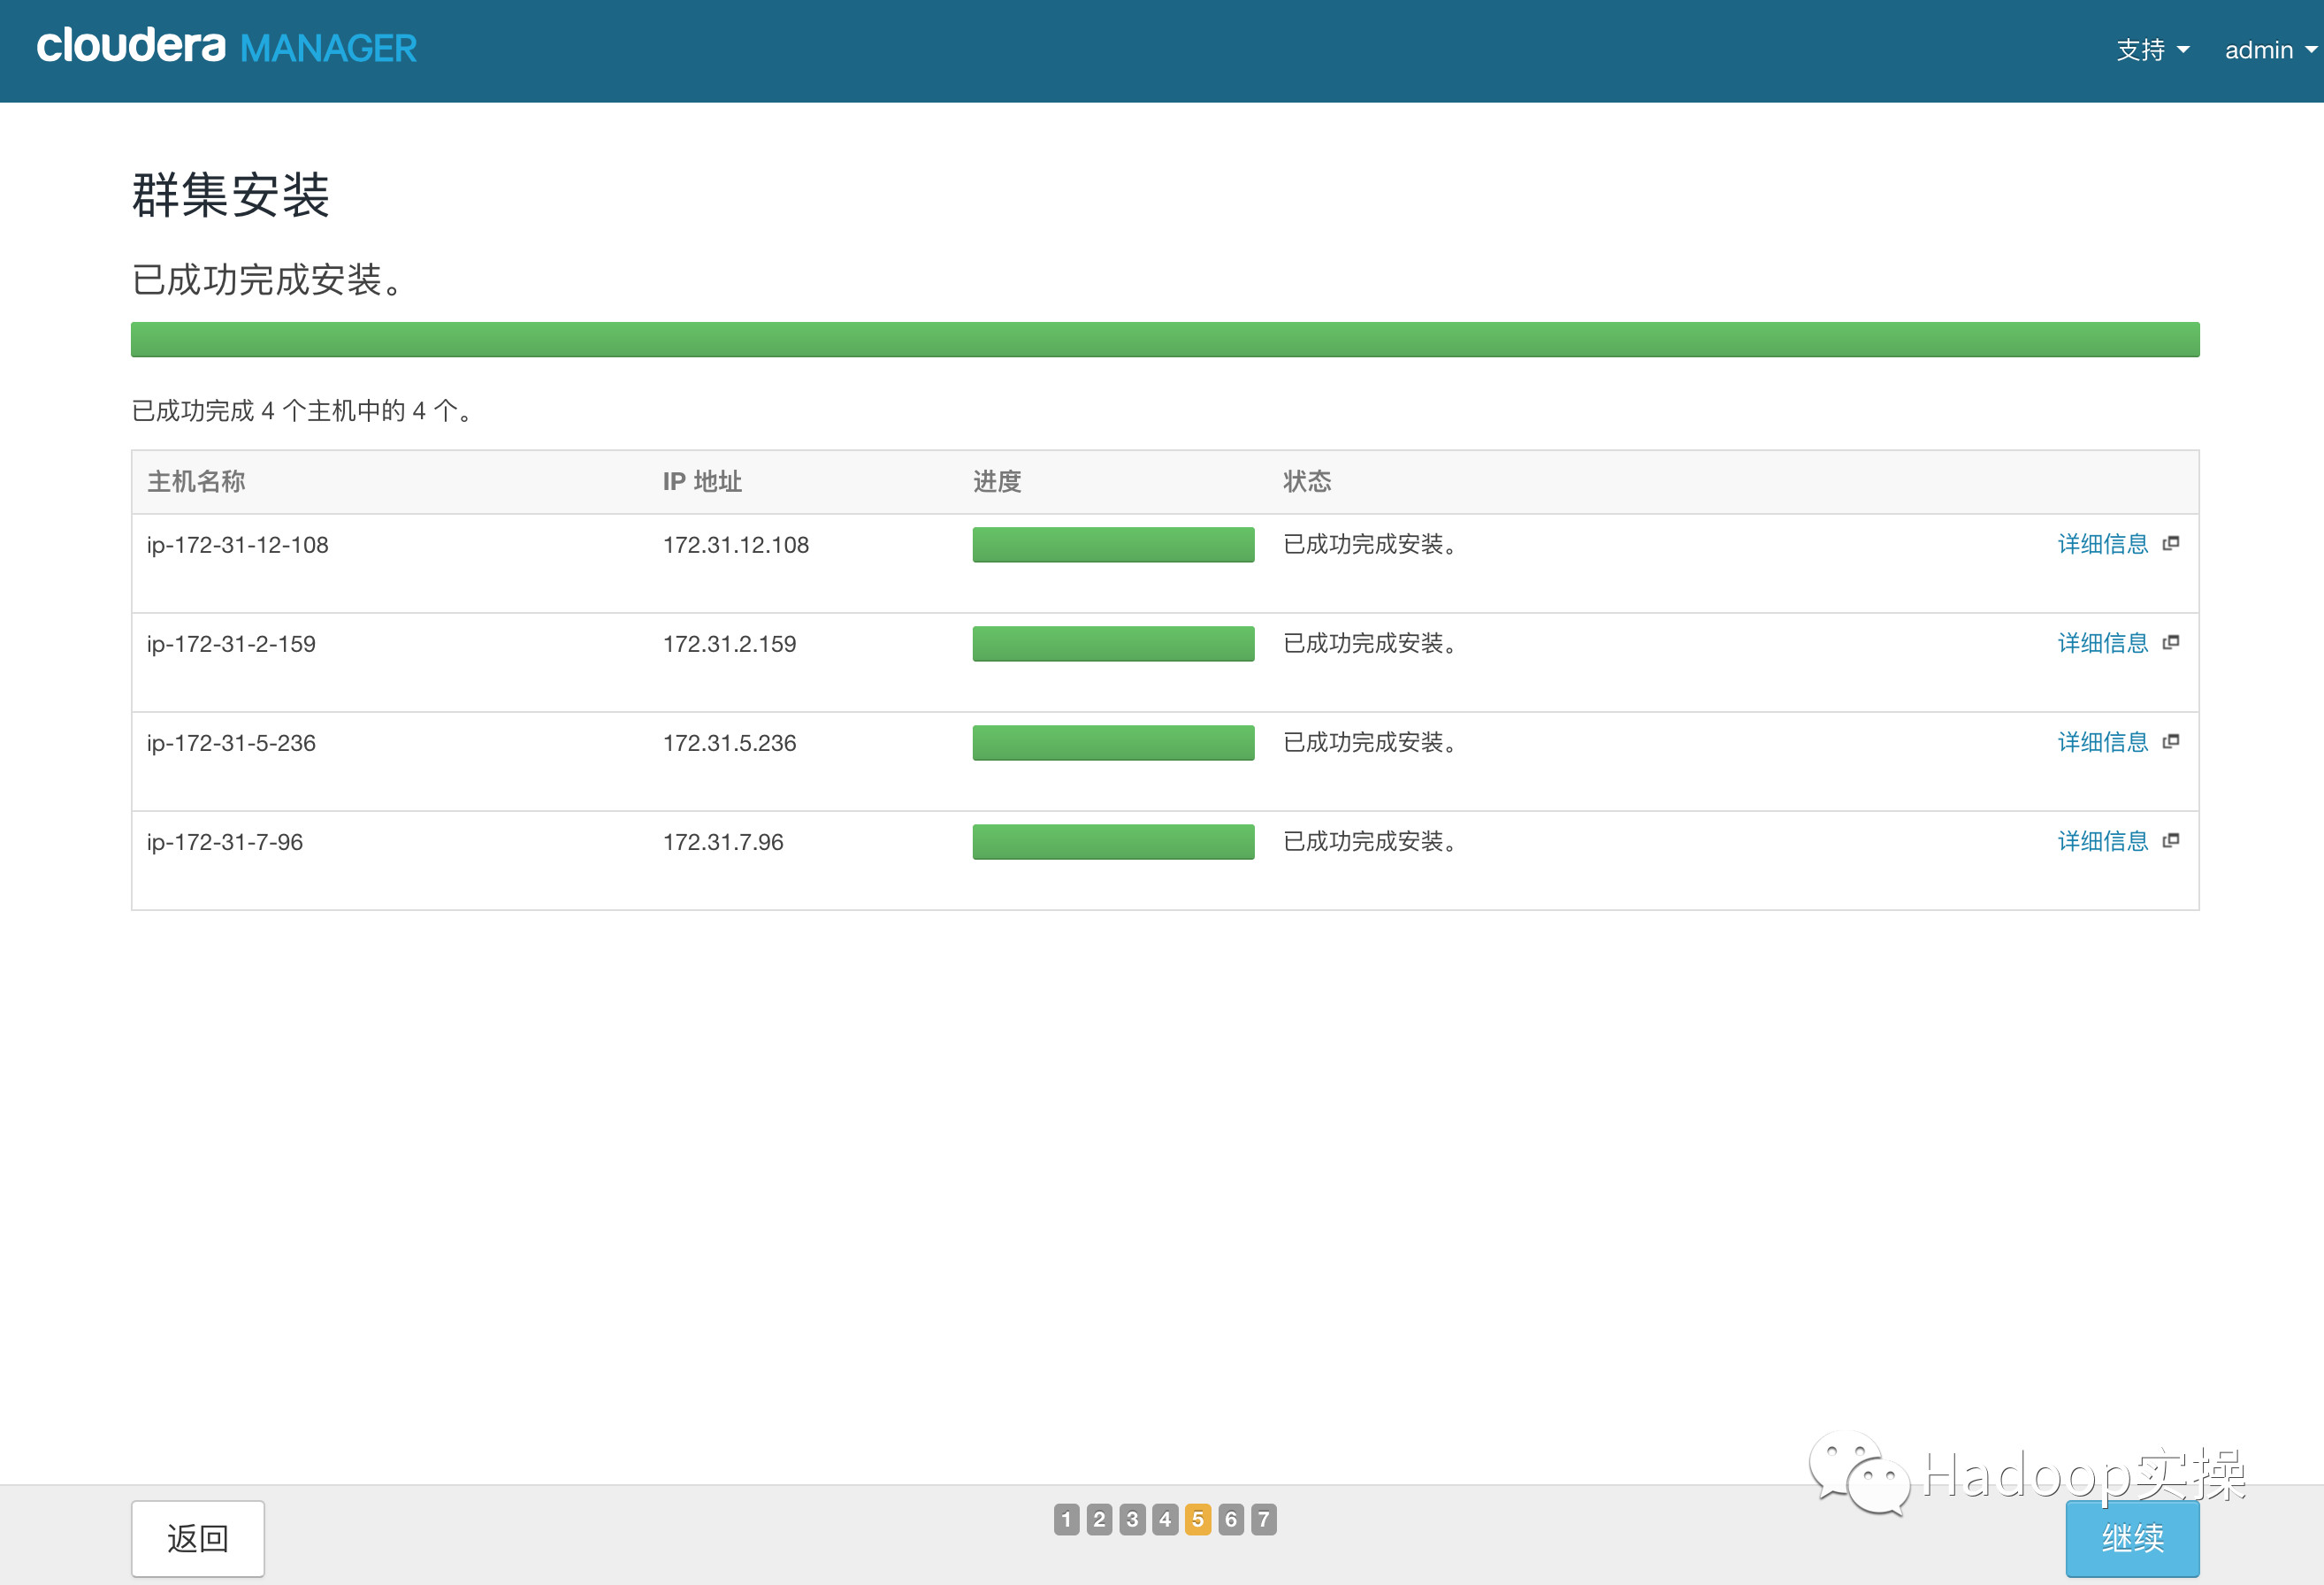
13.點擊“繼續”,進入下一步安裝cdh到各個節點

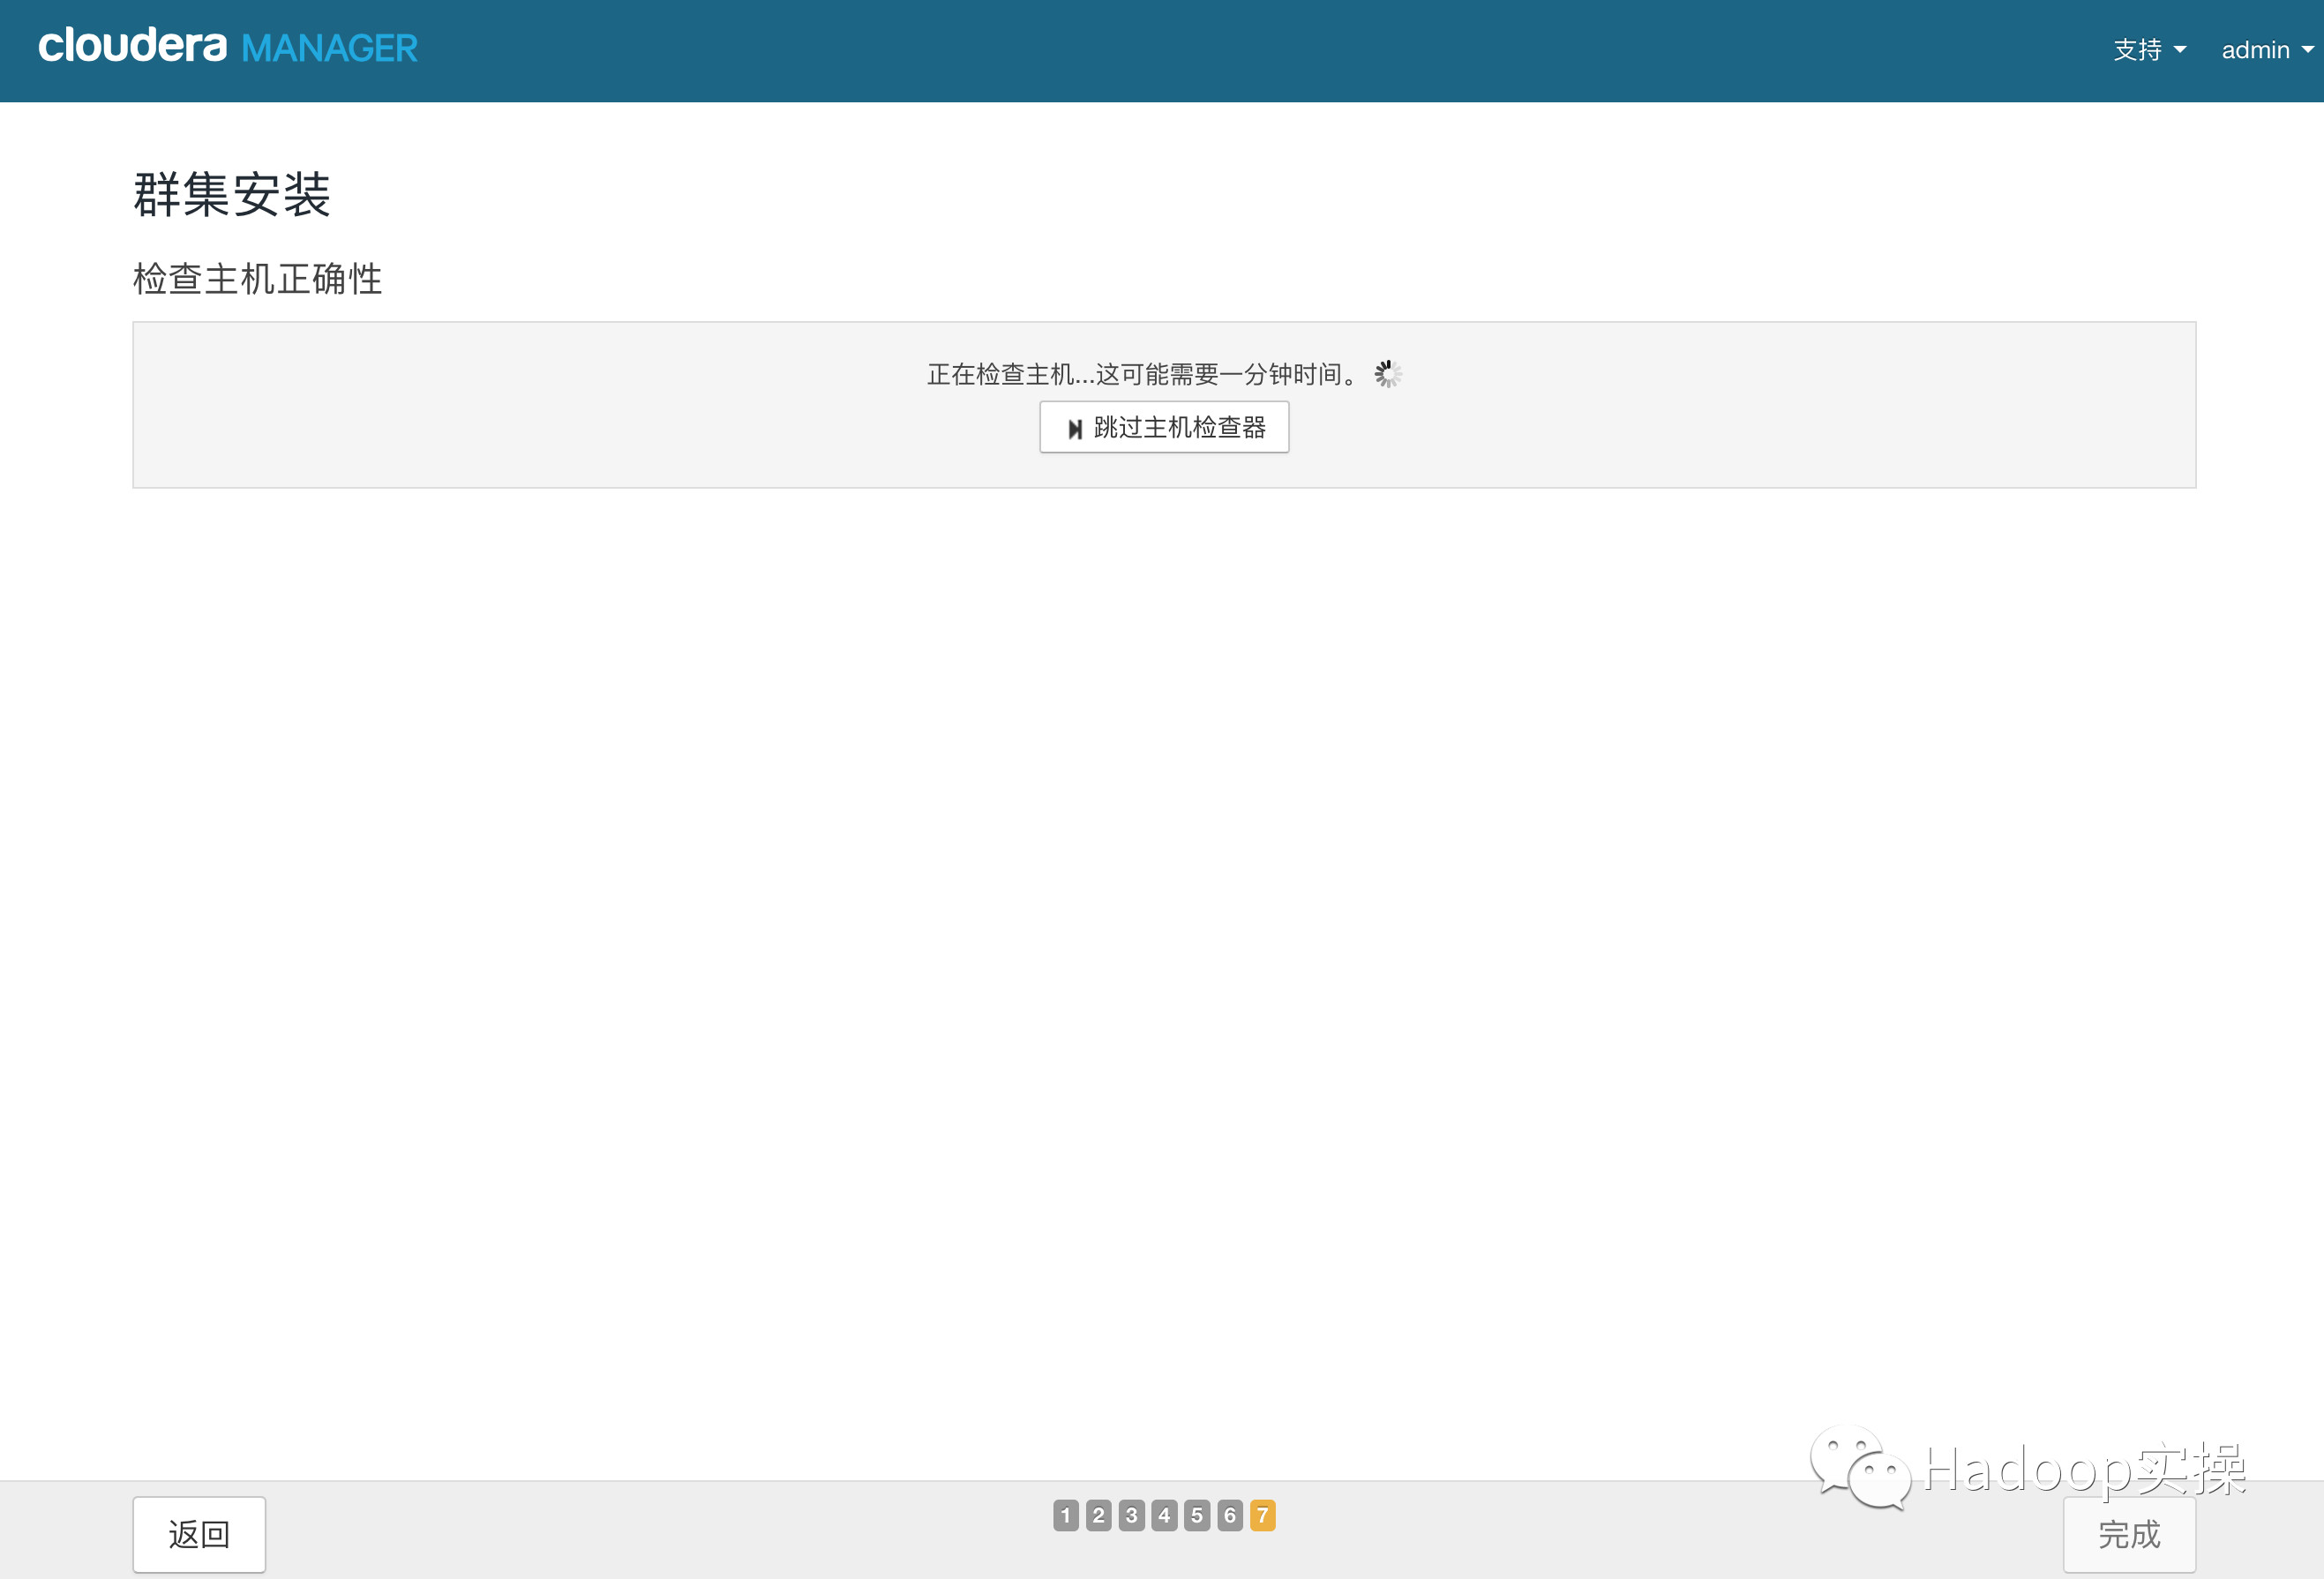
14.點擊“繼續”,進入下一步主機檢查,確保所有檢查項均通過
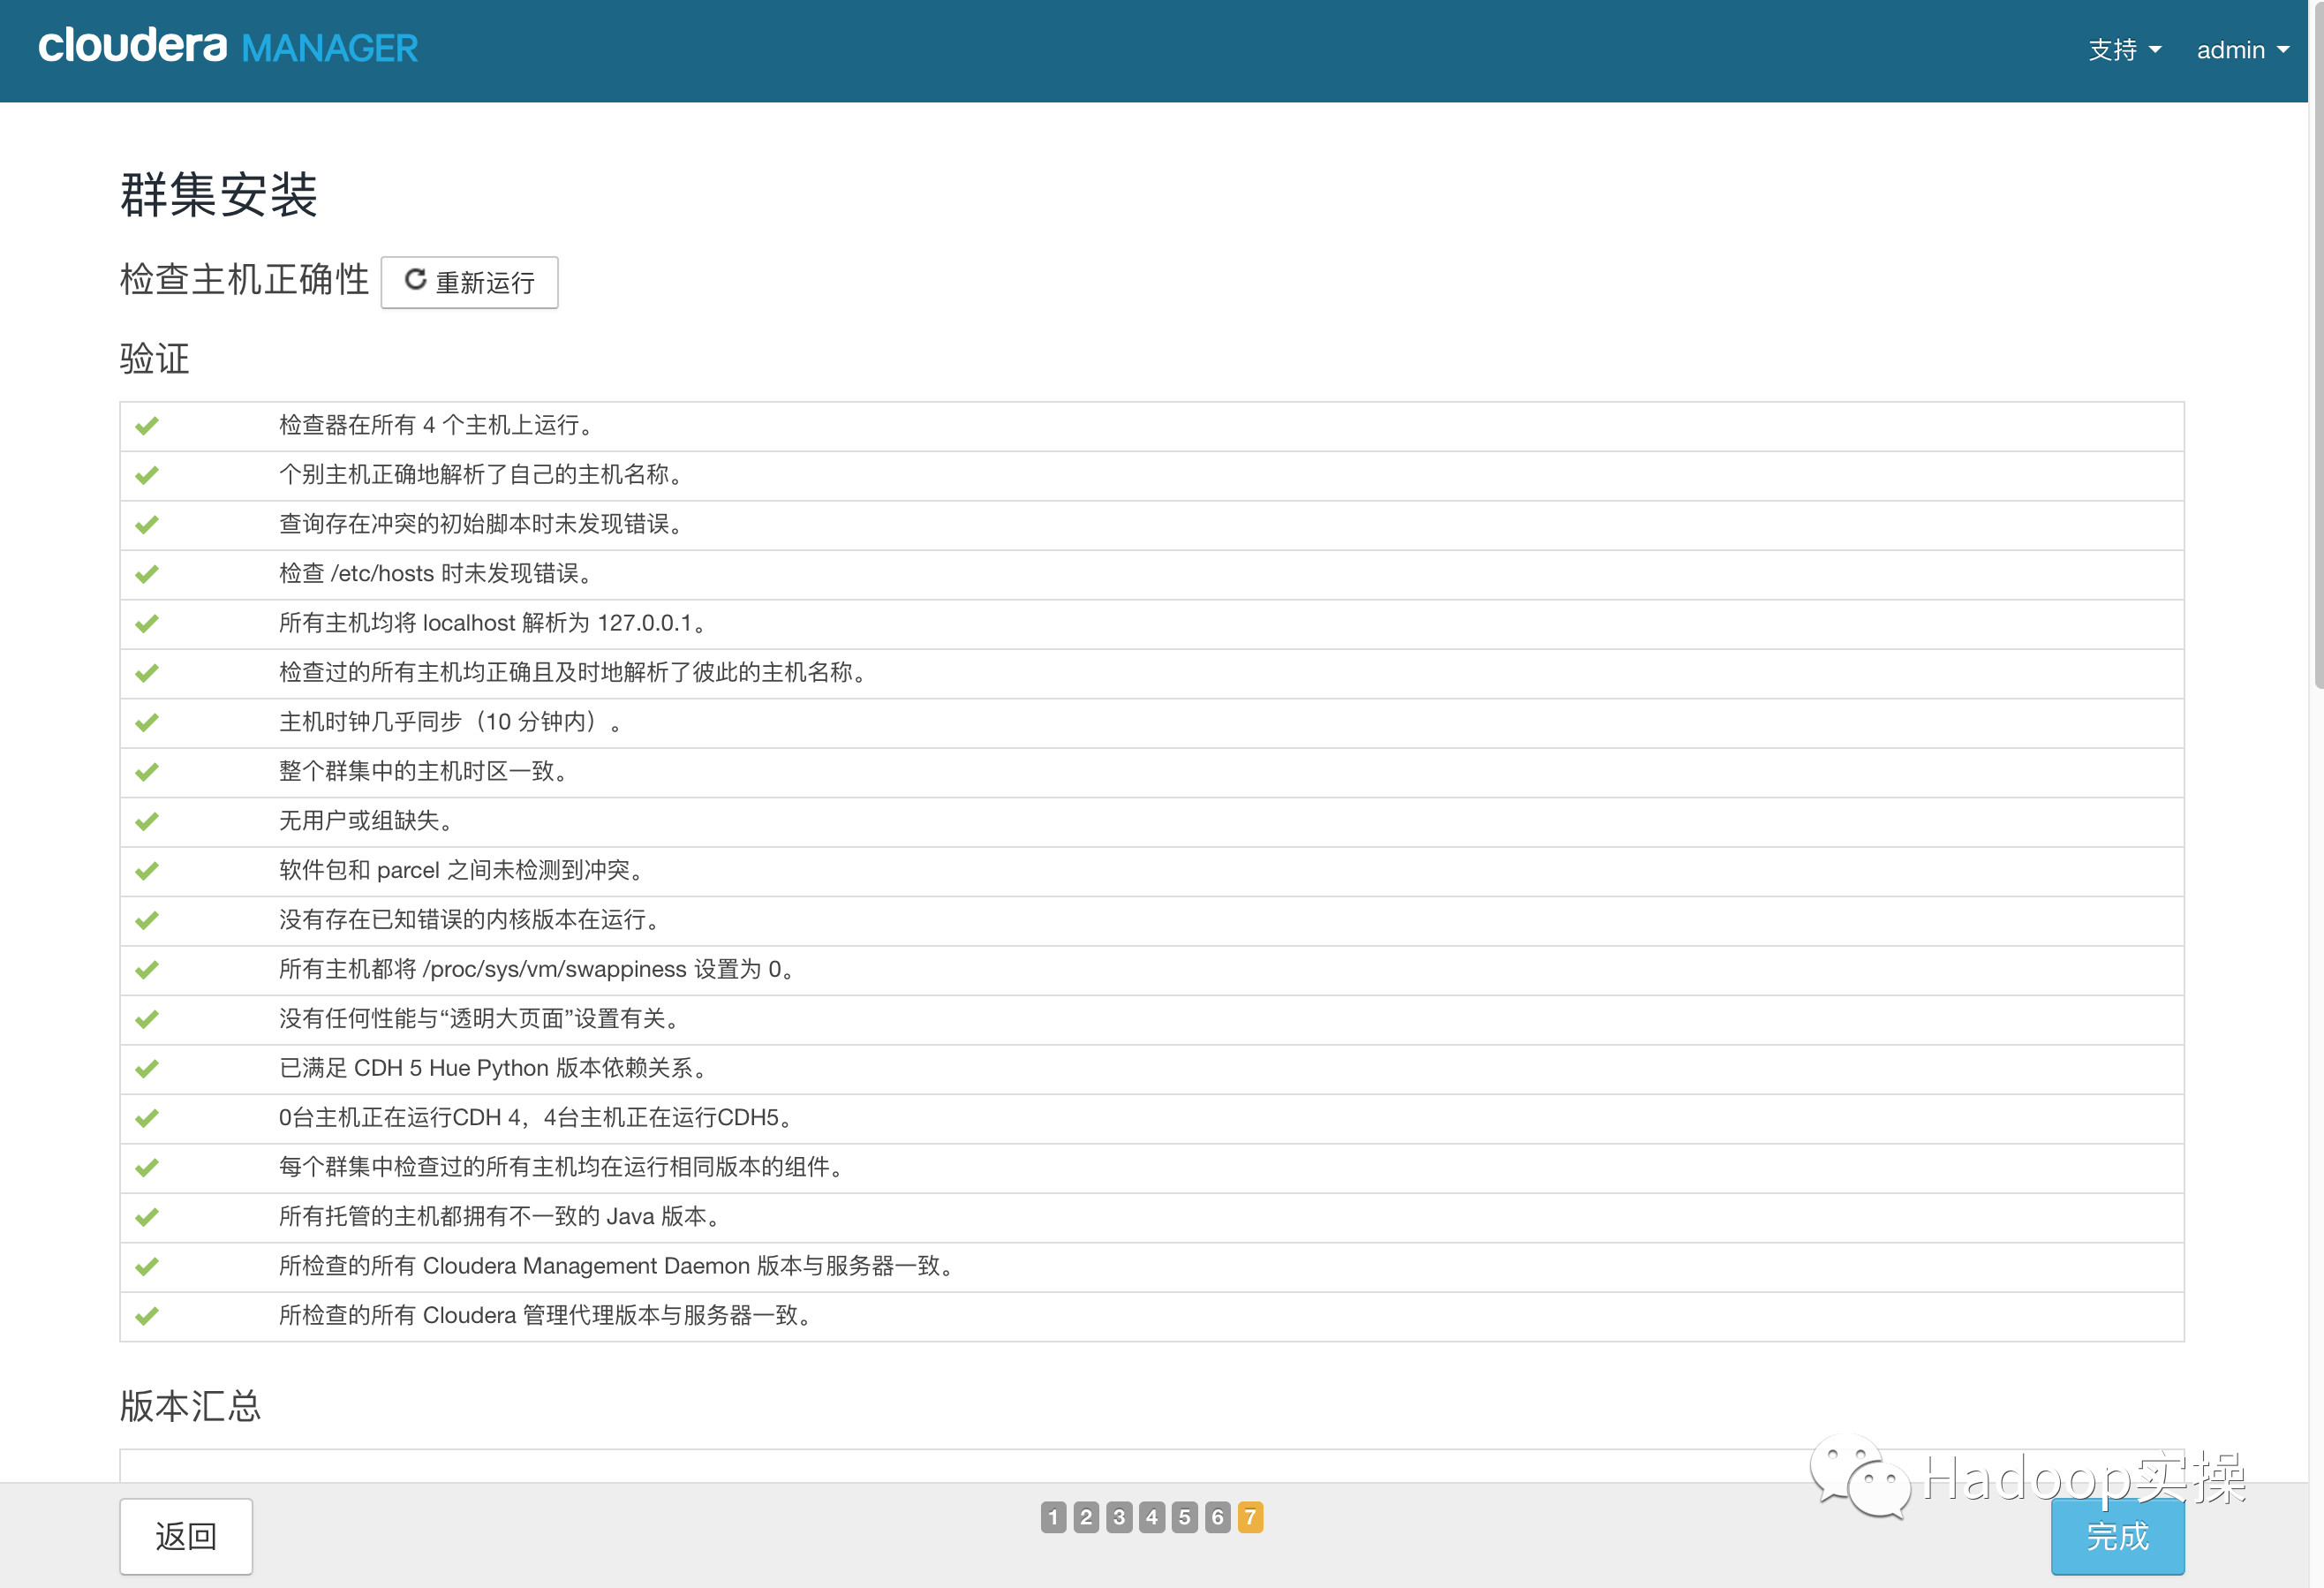
點擊完成進入服務安裝嚮導。
4.2.集羣設置安裝嚮導
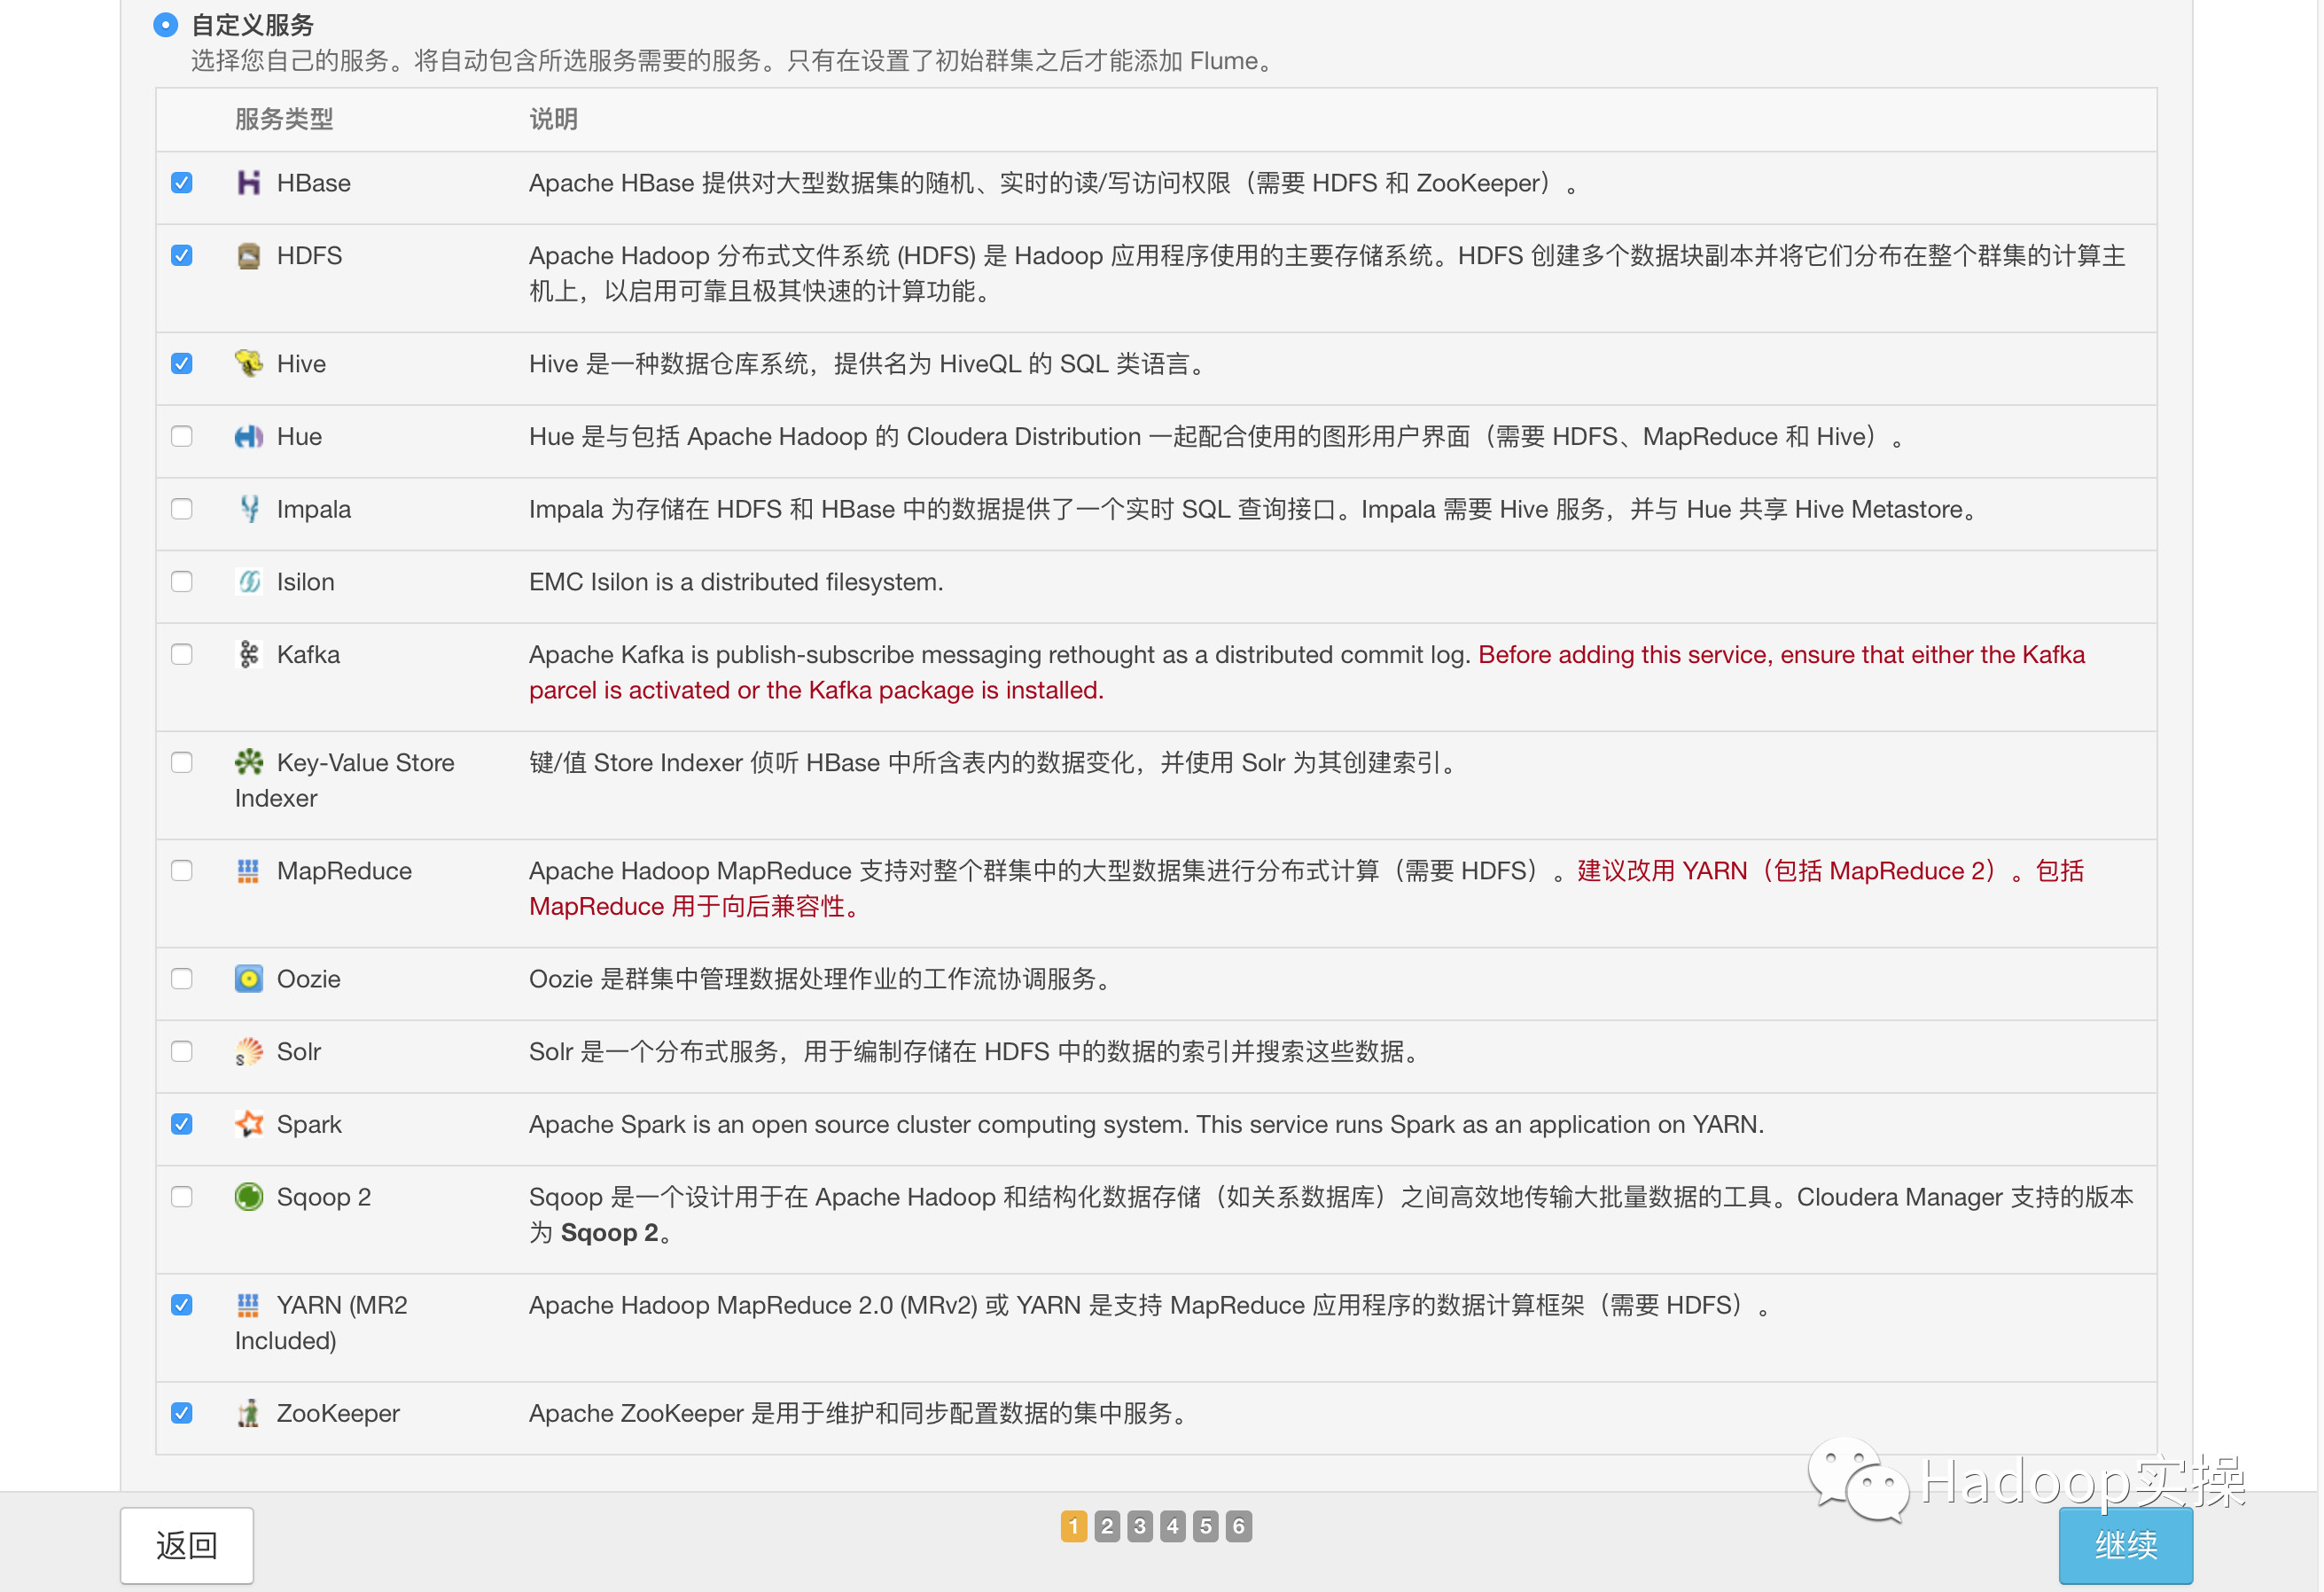
1.選擇需要安裝的服務
2.點擊“繼續”,進入集羣角色分配

3.點擊“繼續”,進入下一步,測試數據庫連接
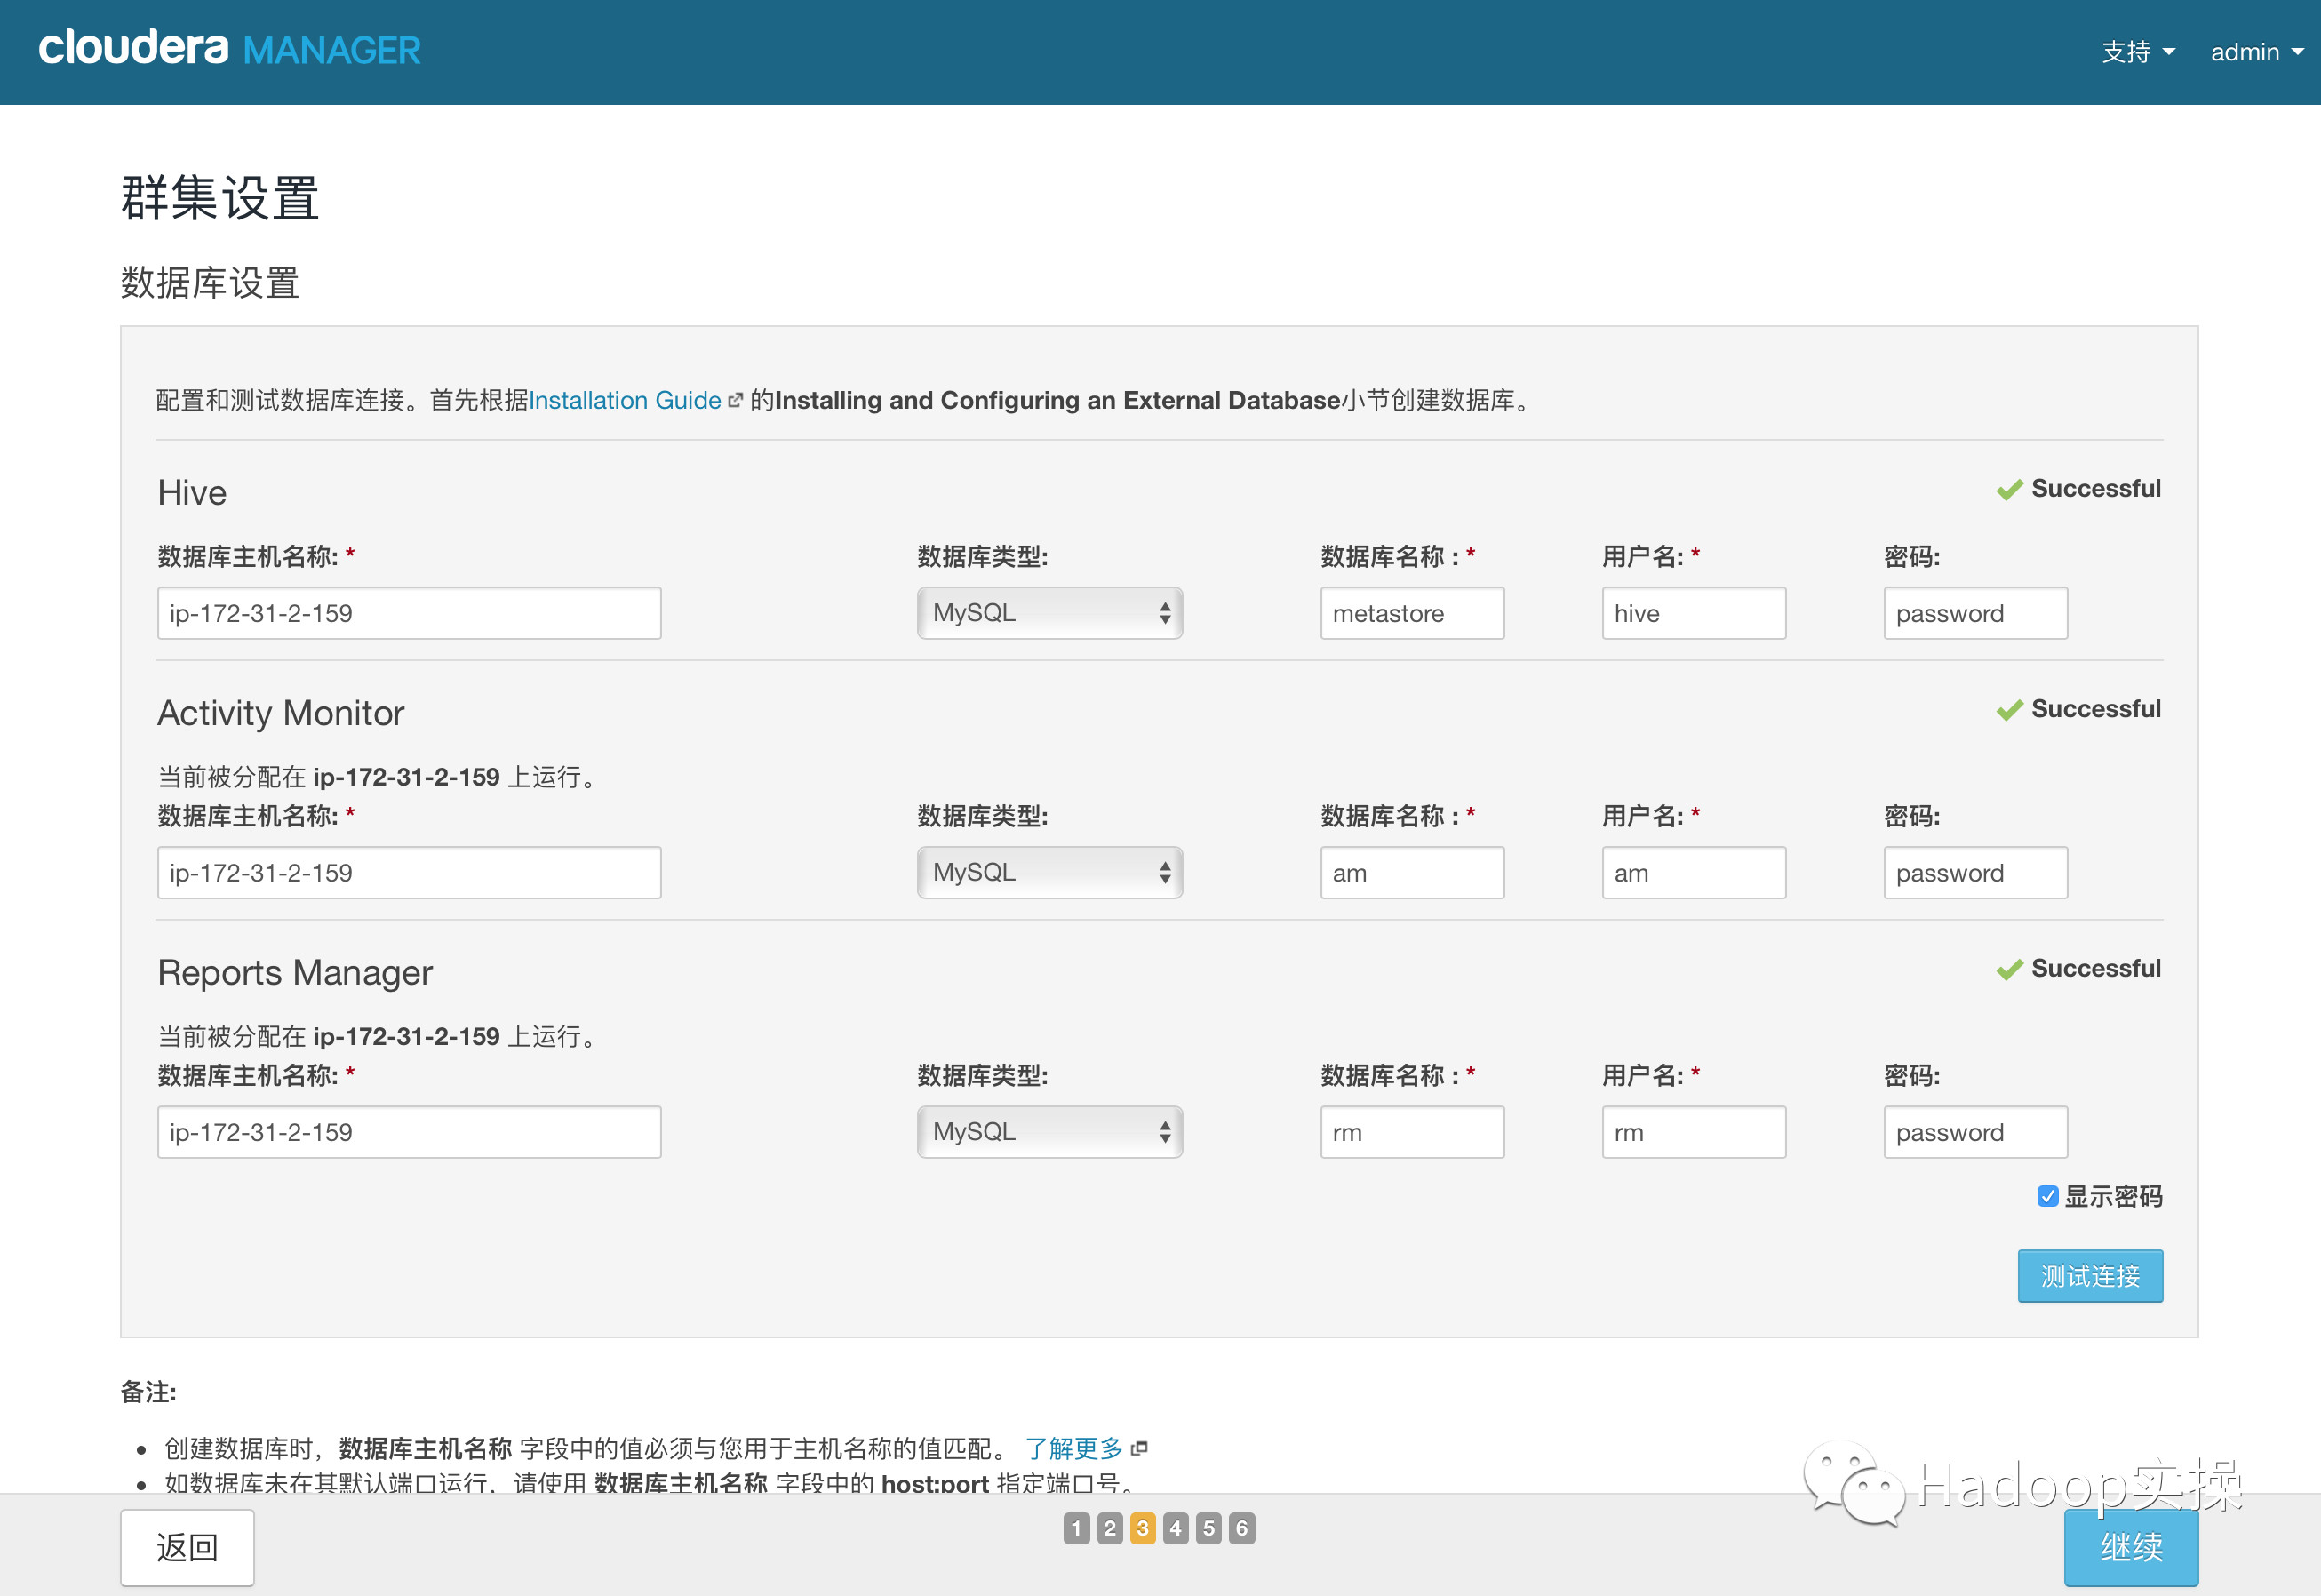
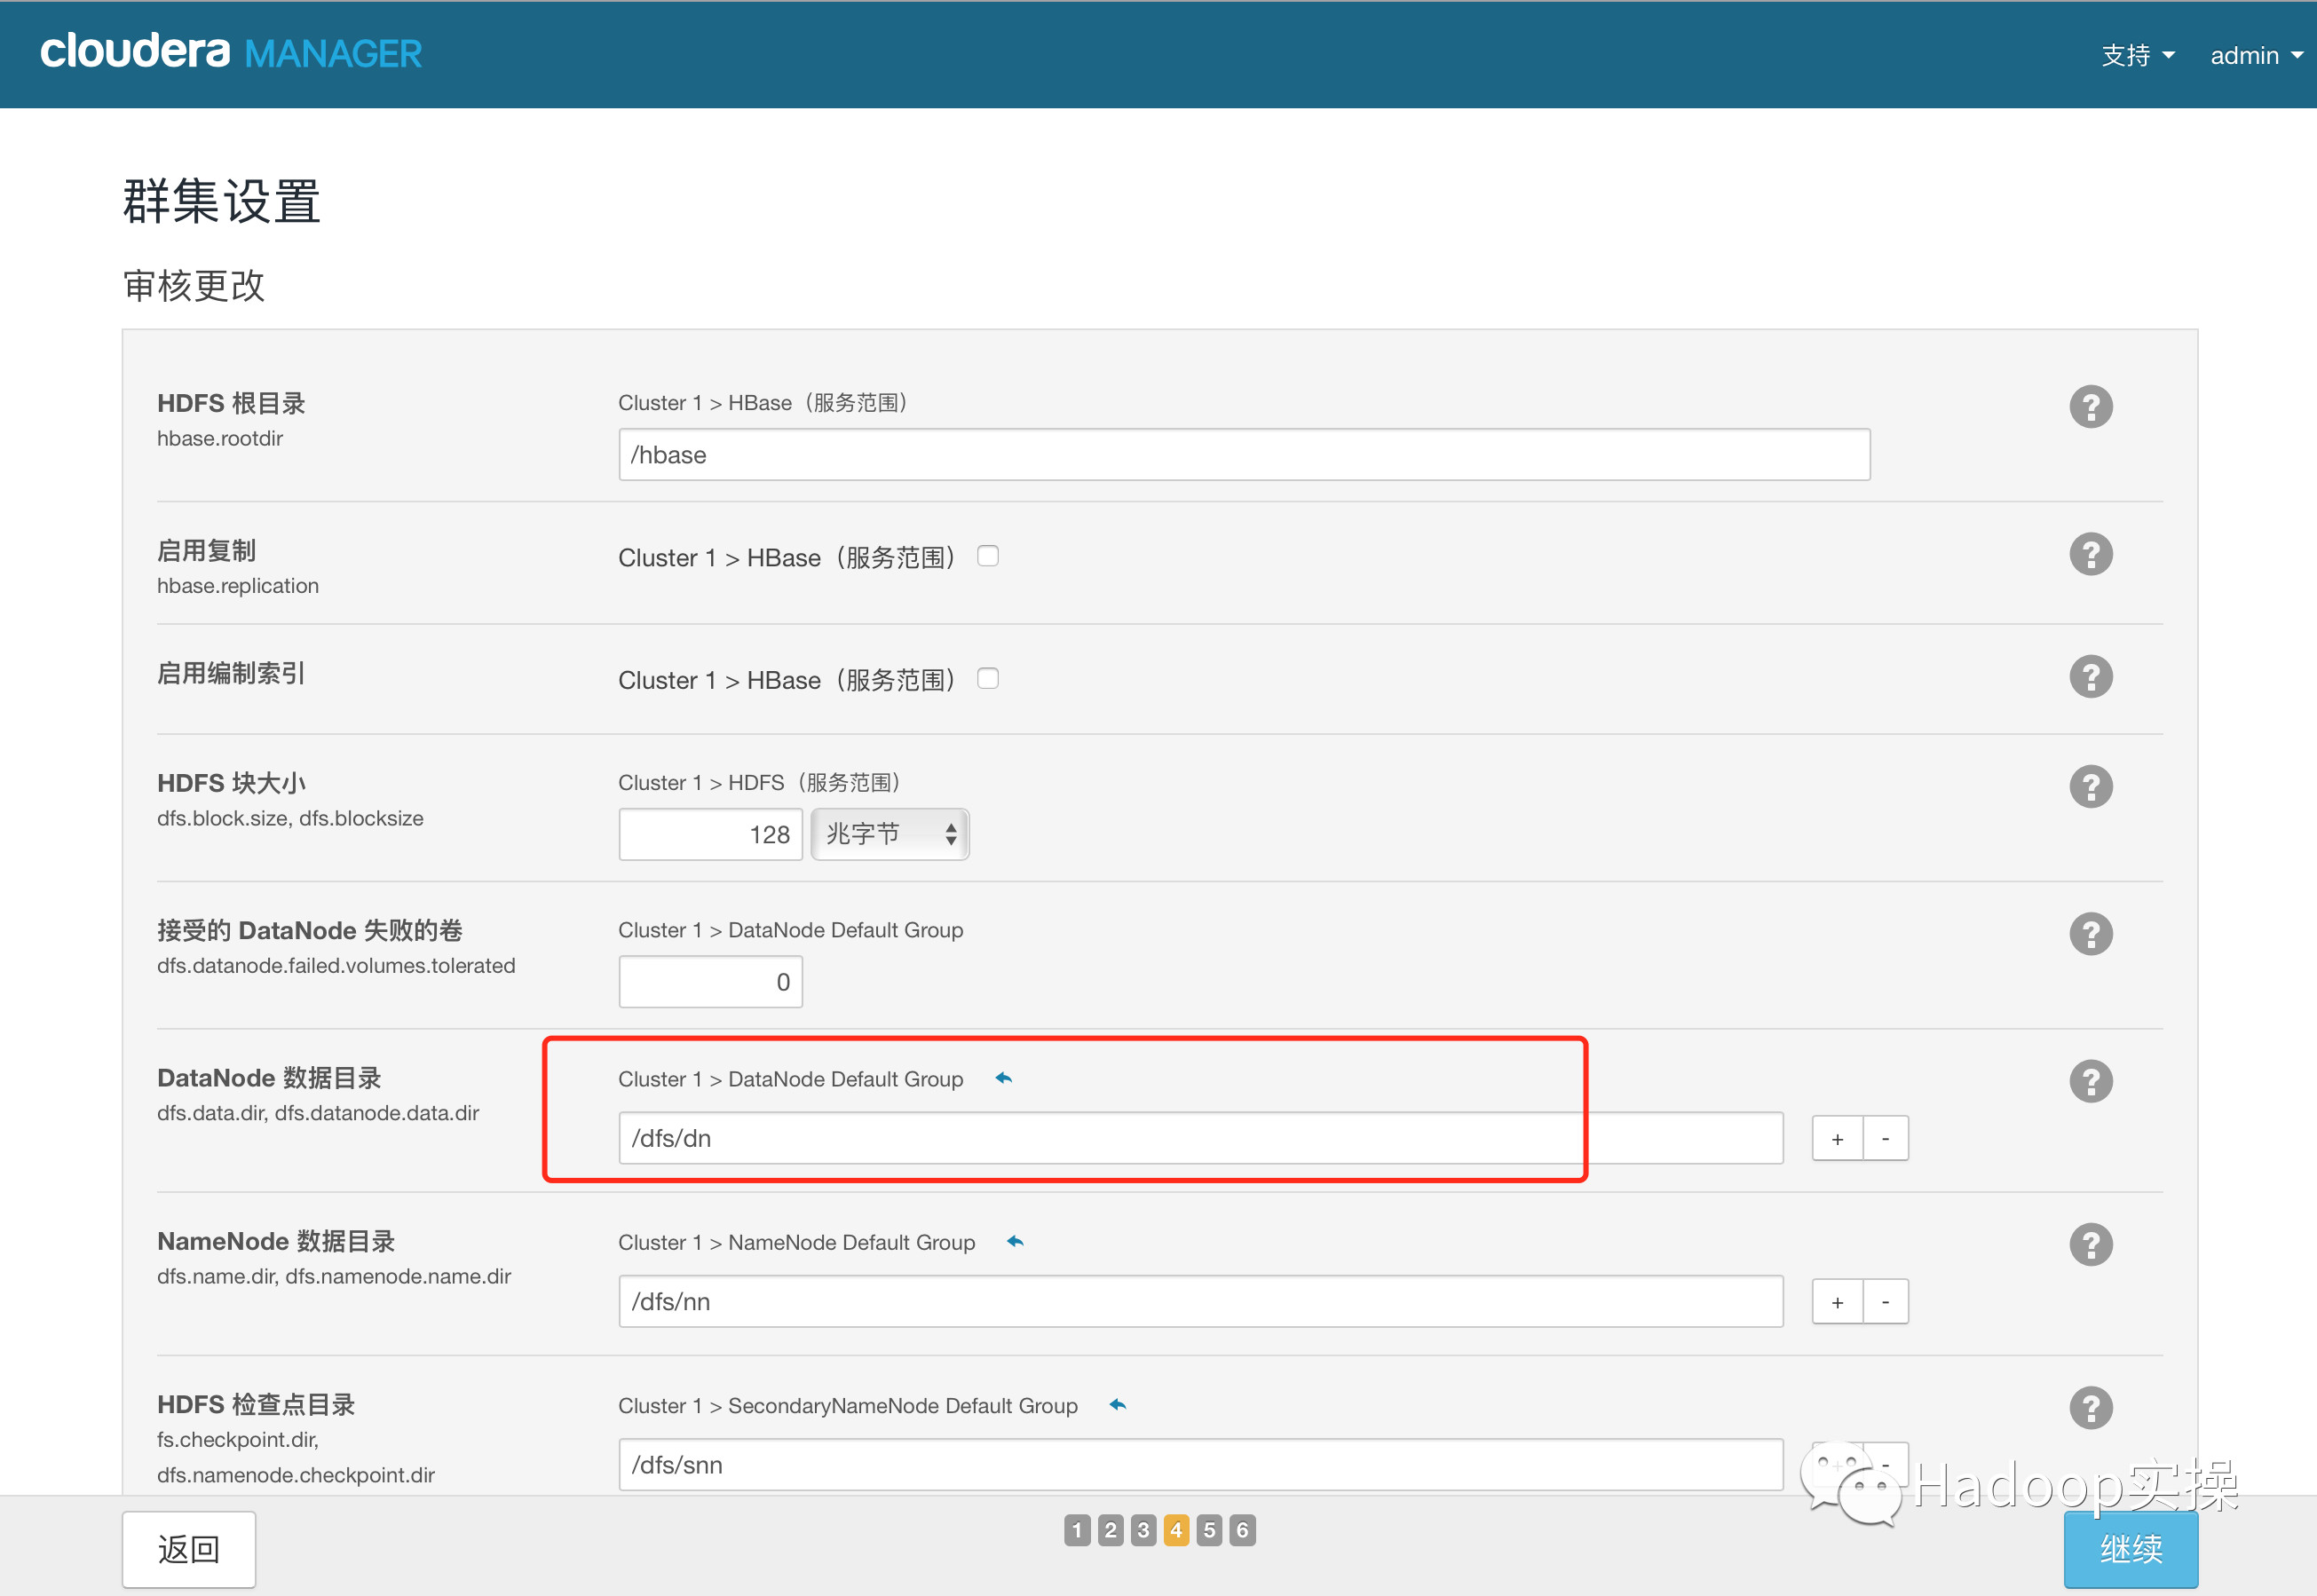
4.測試成功,點擊“繼續”,進入目錄設置,此處使用默認默認目錄,根據實際情況進行目錄修改
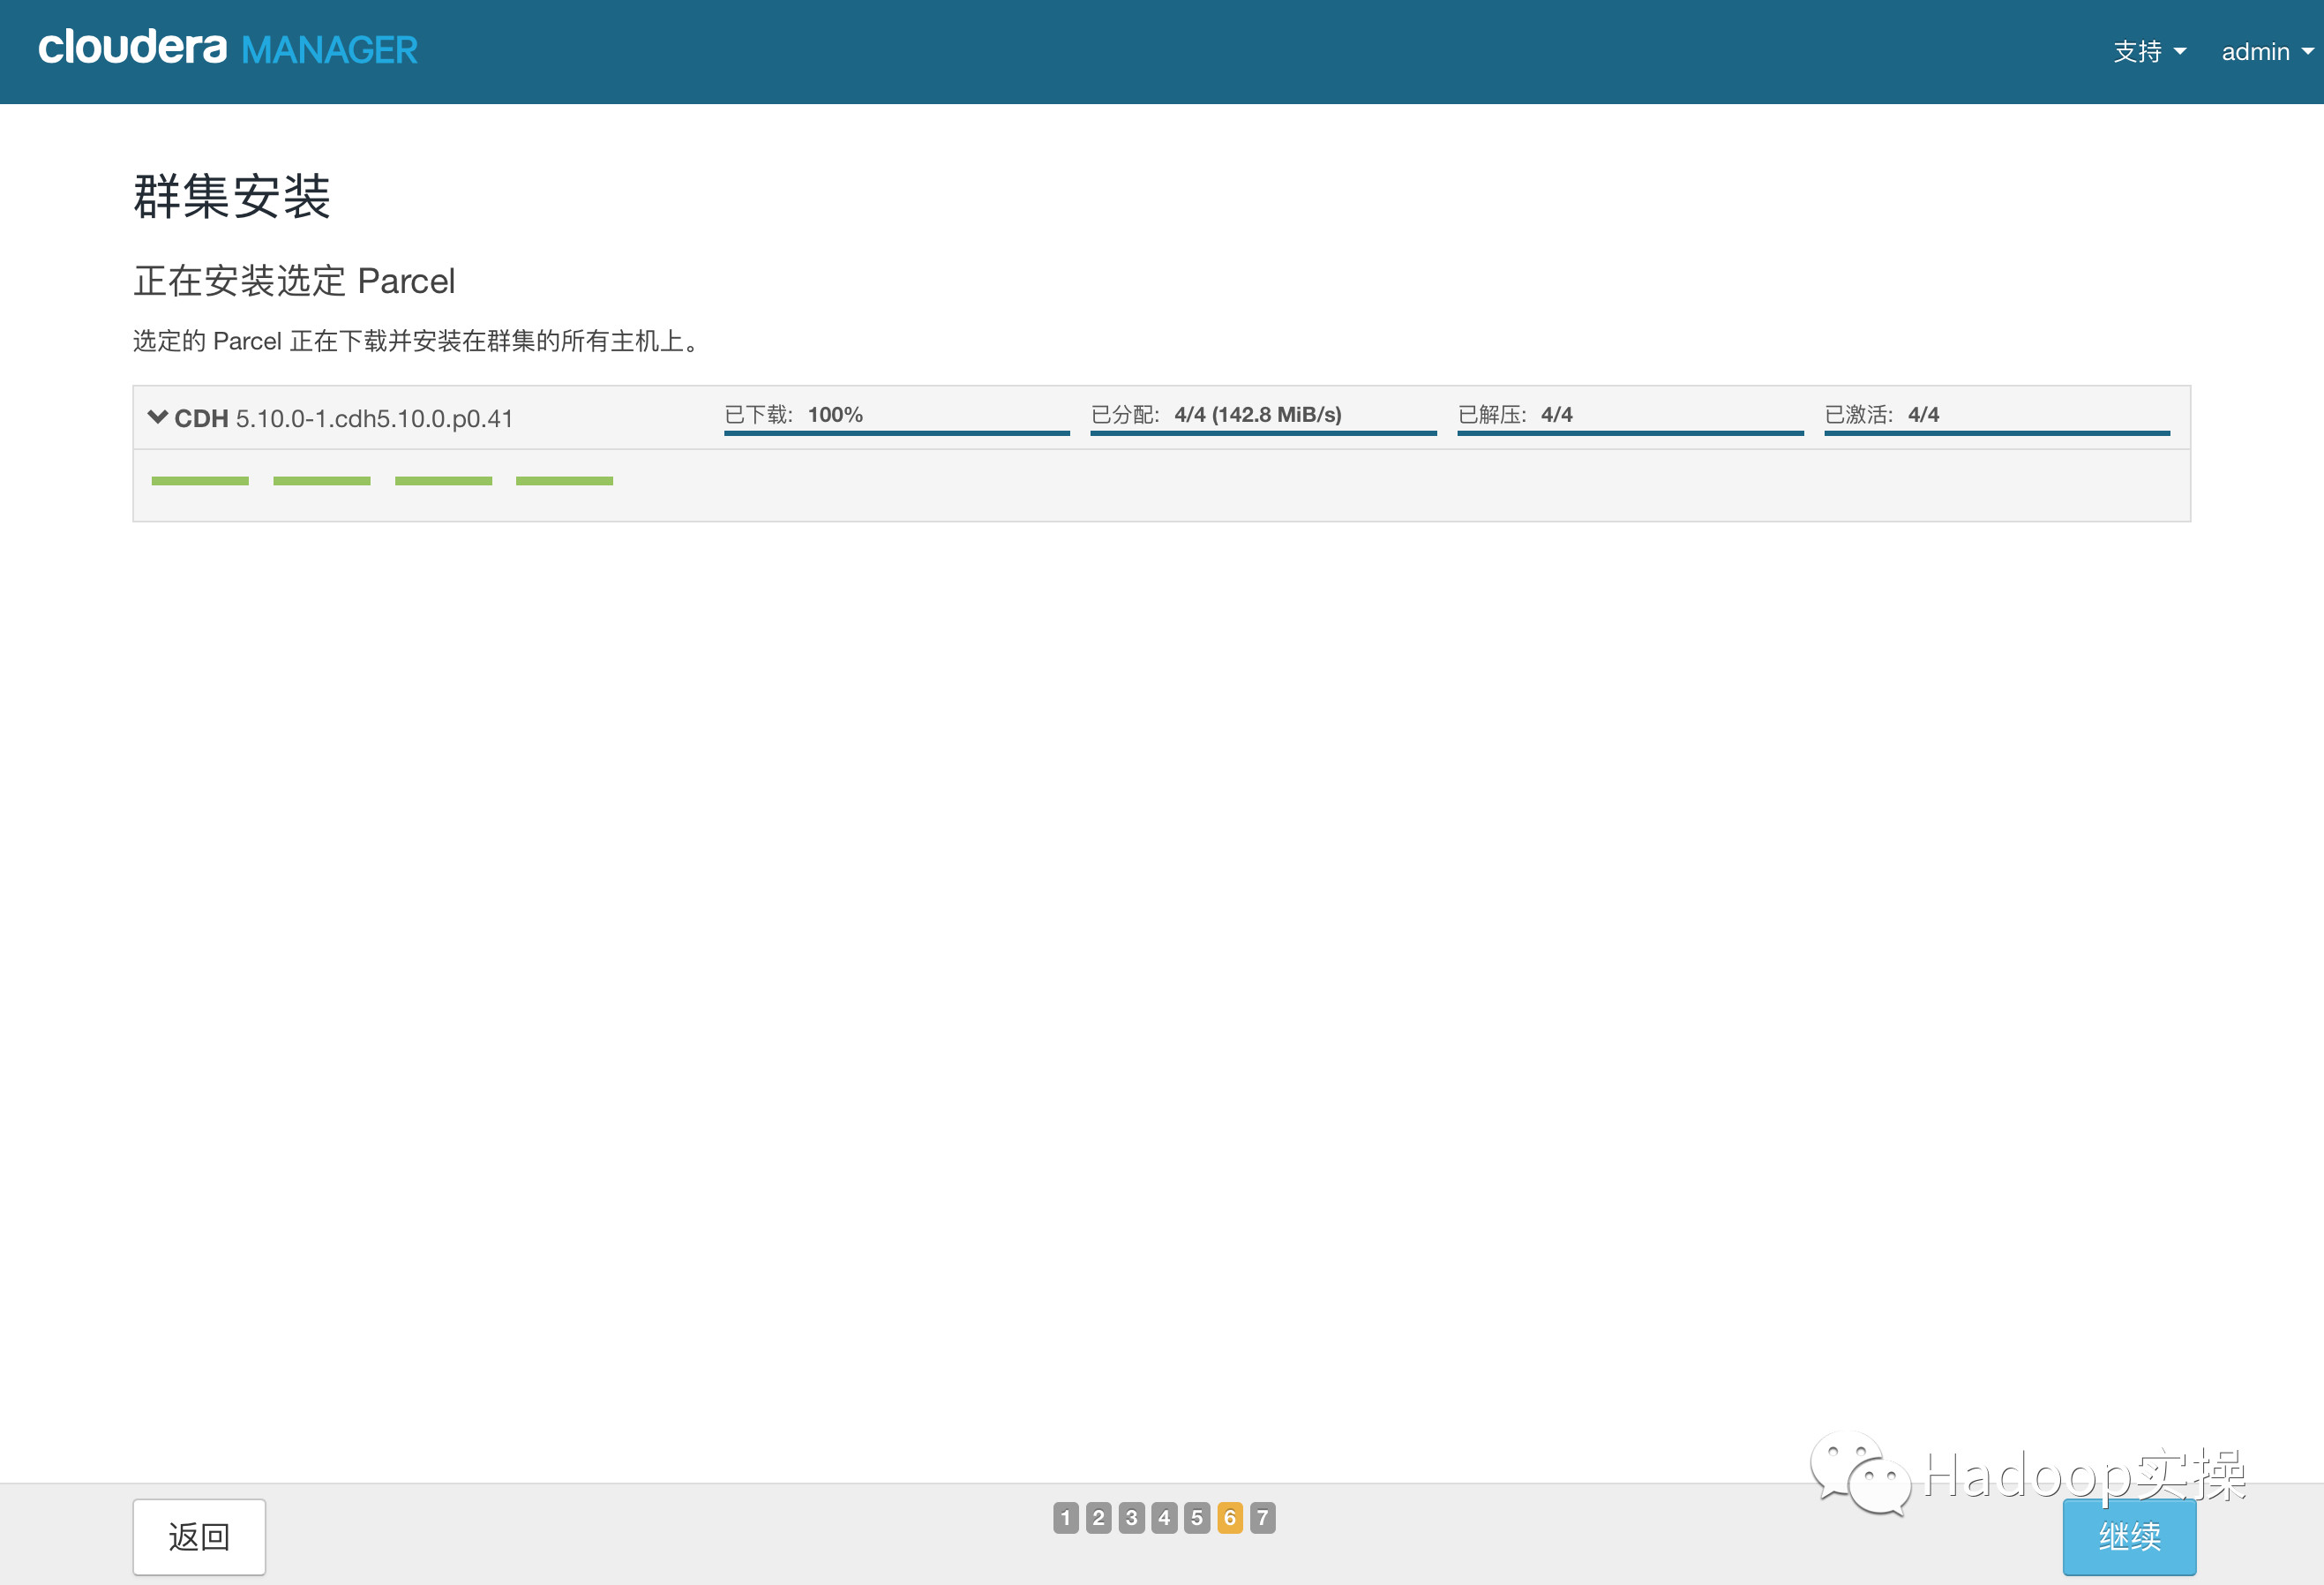
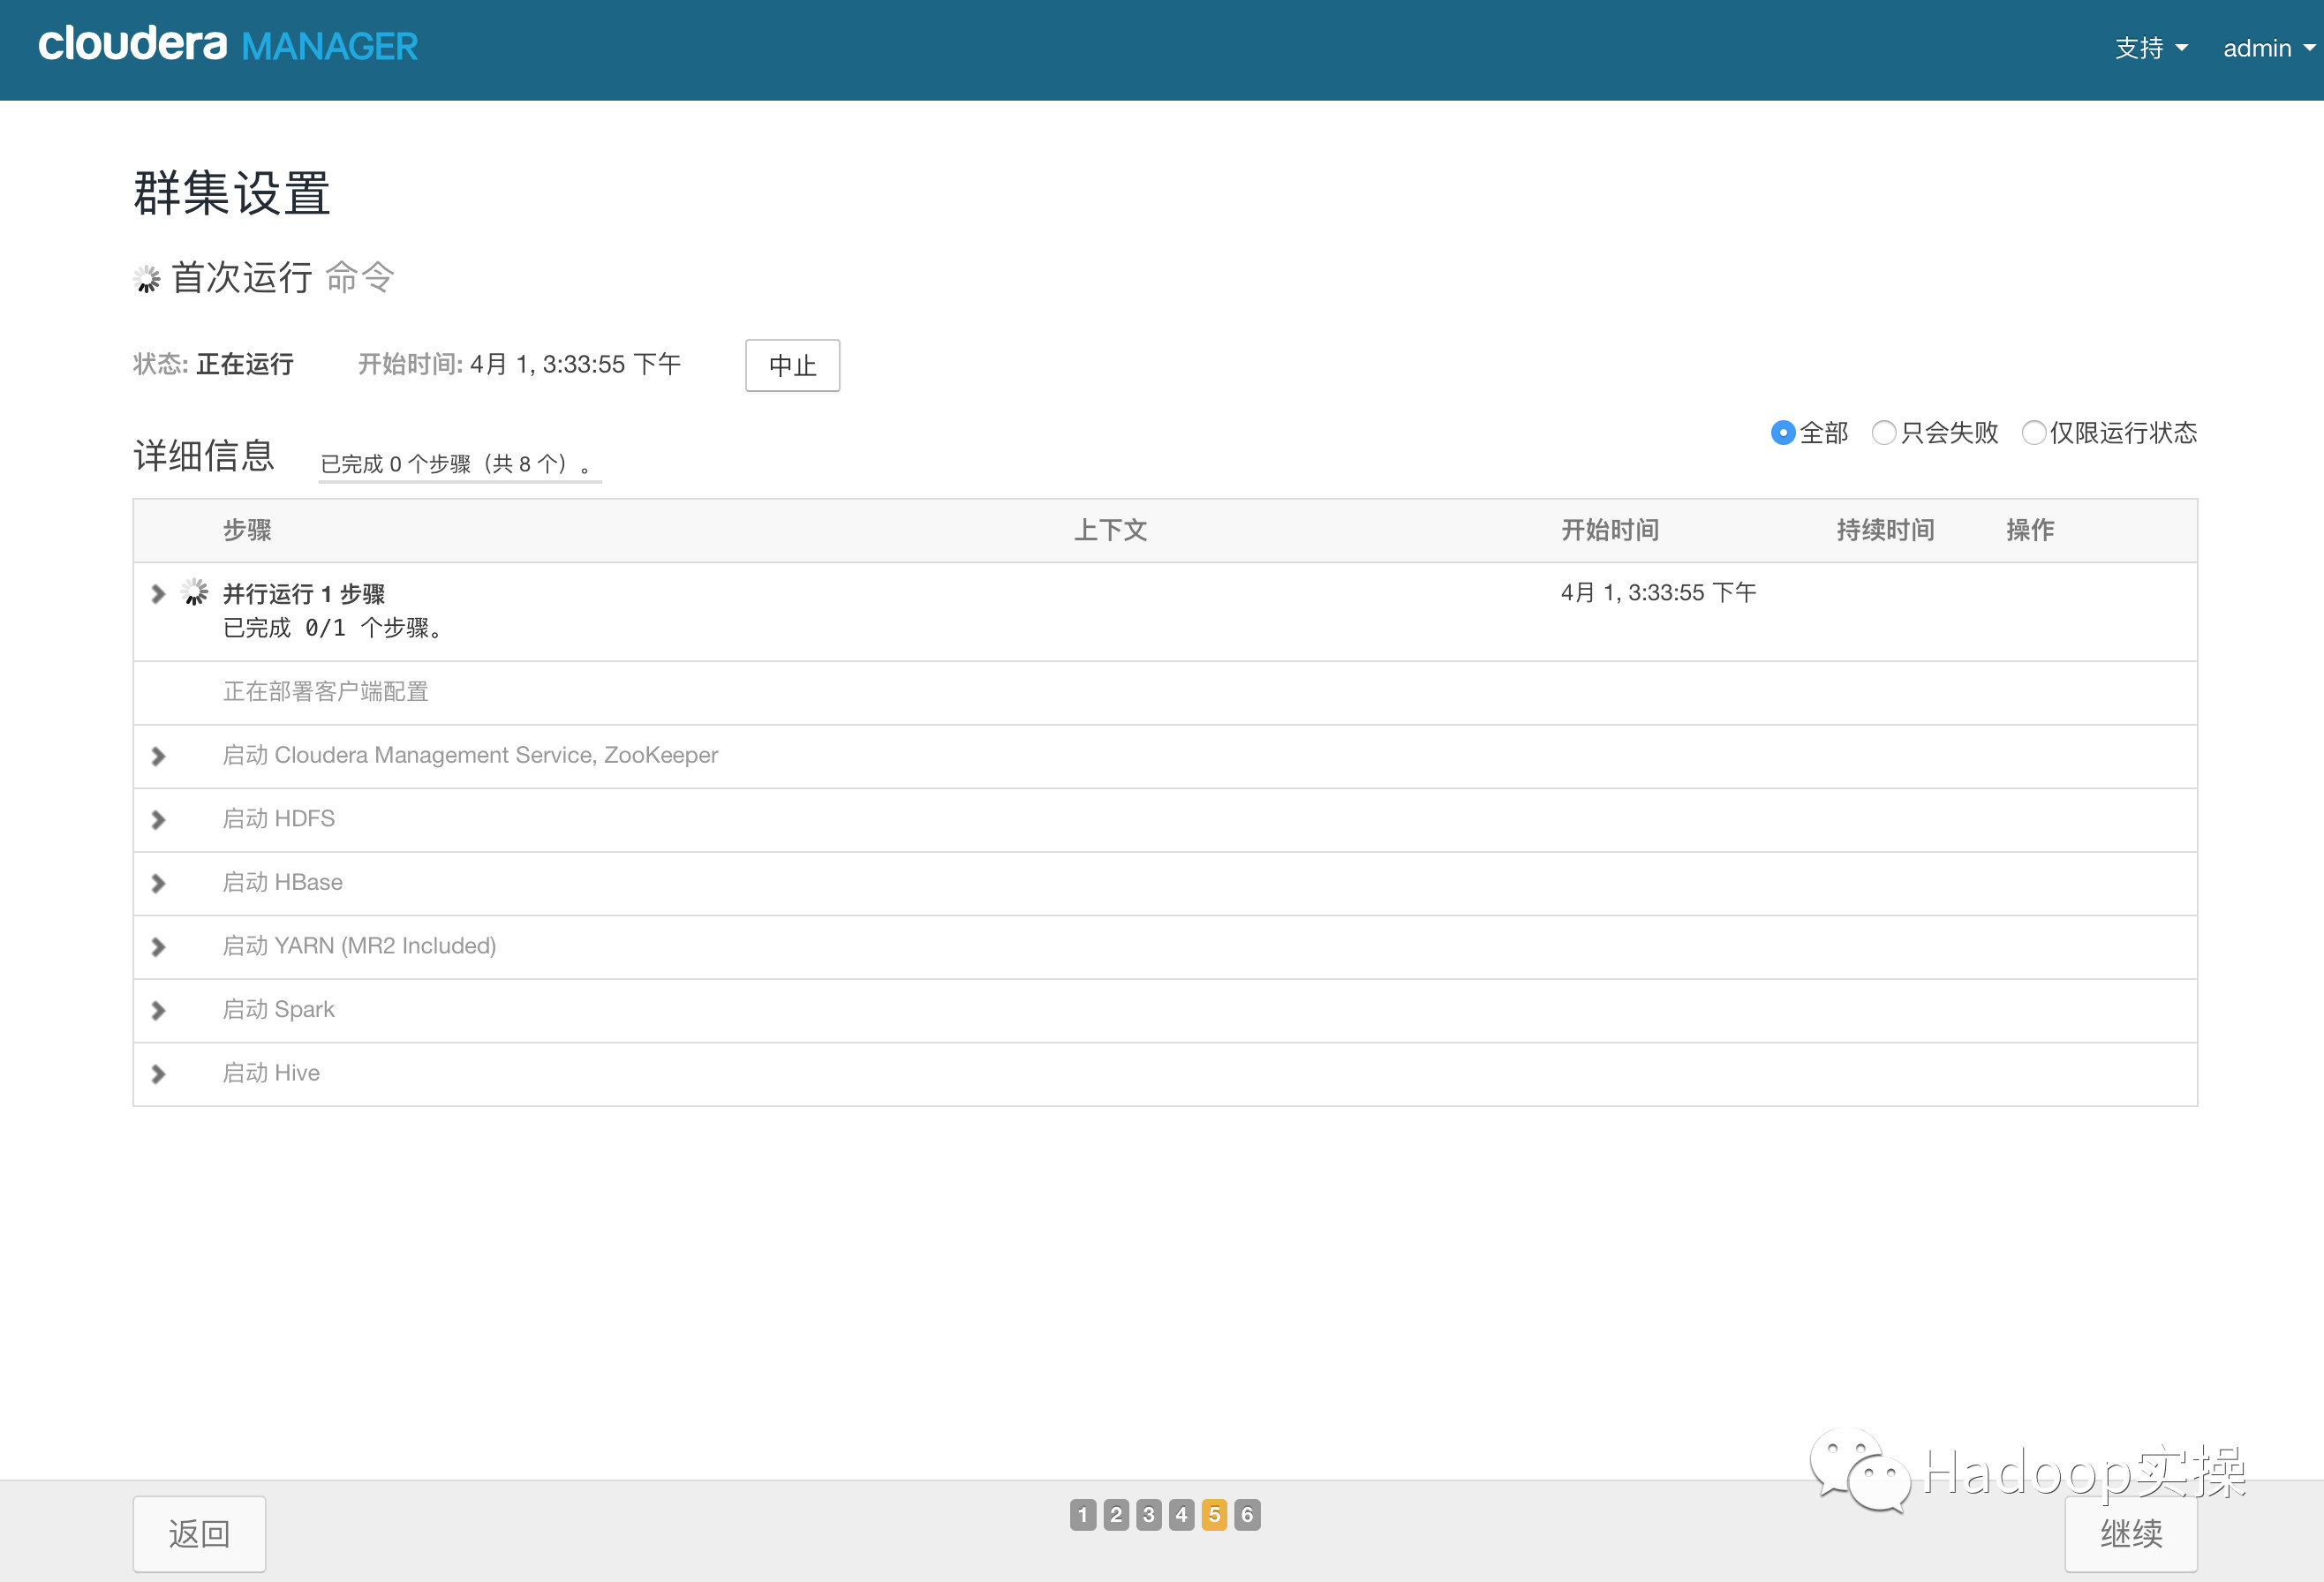
5.點擊“繼續”,進入各個服務啓動
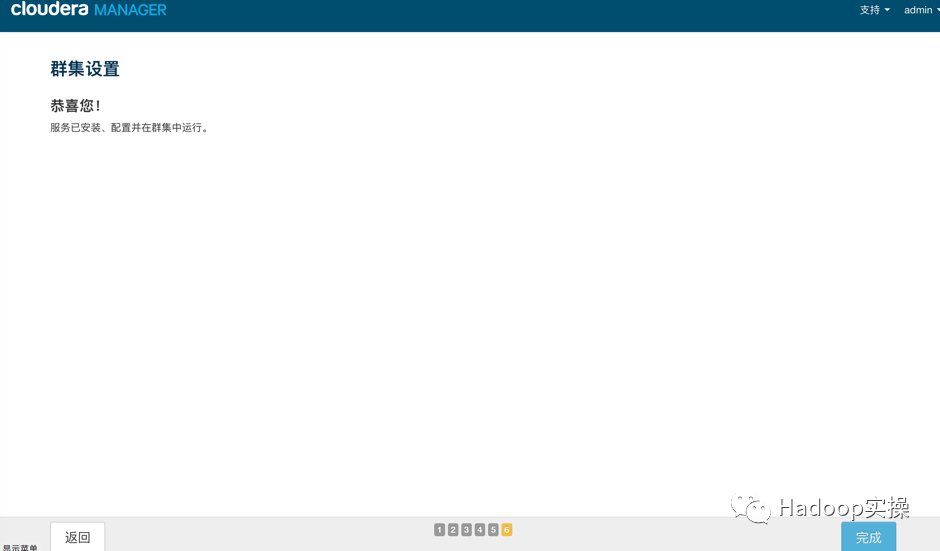
6.安裝成功
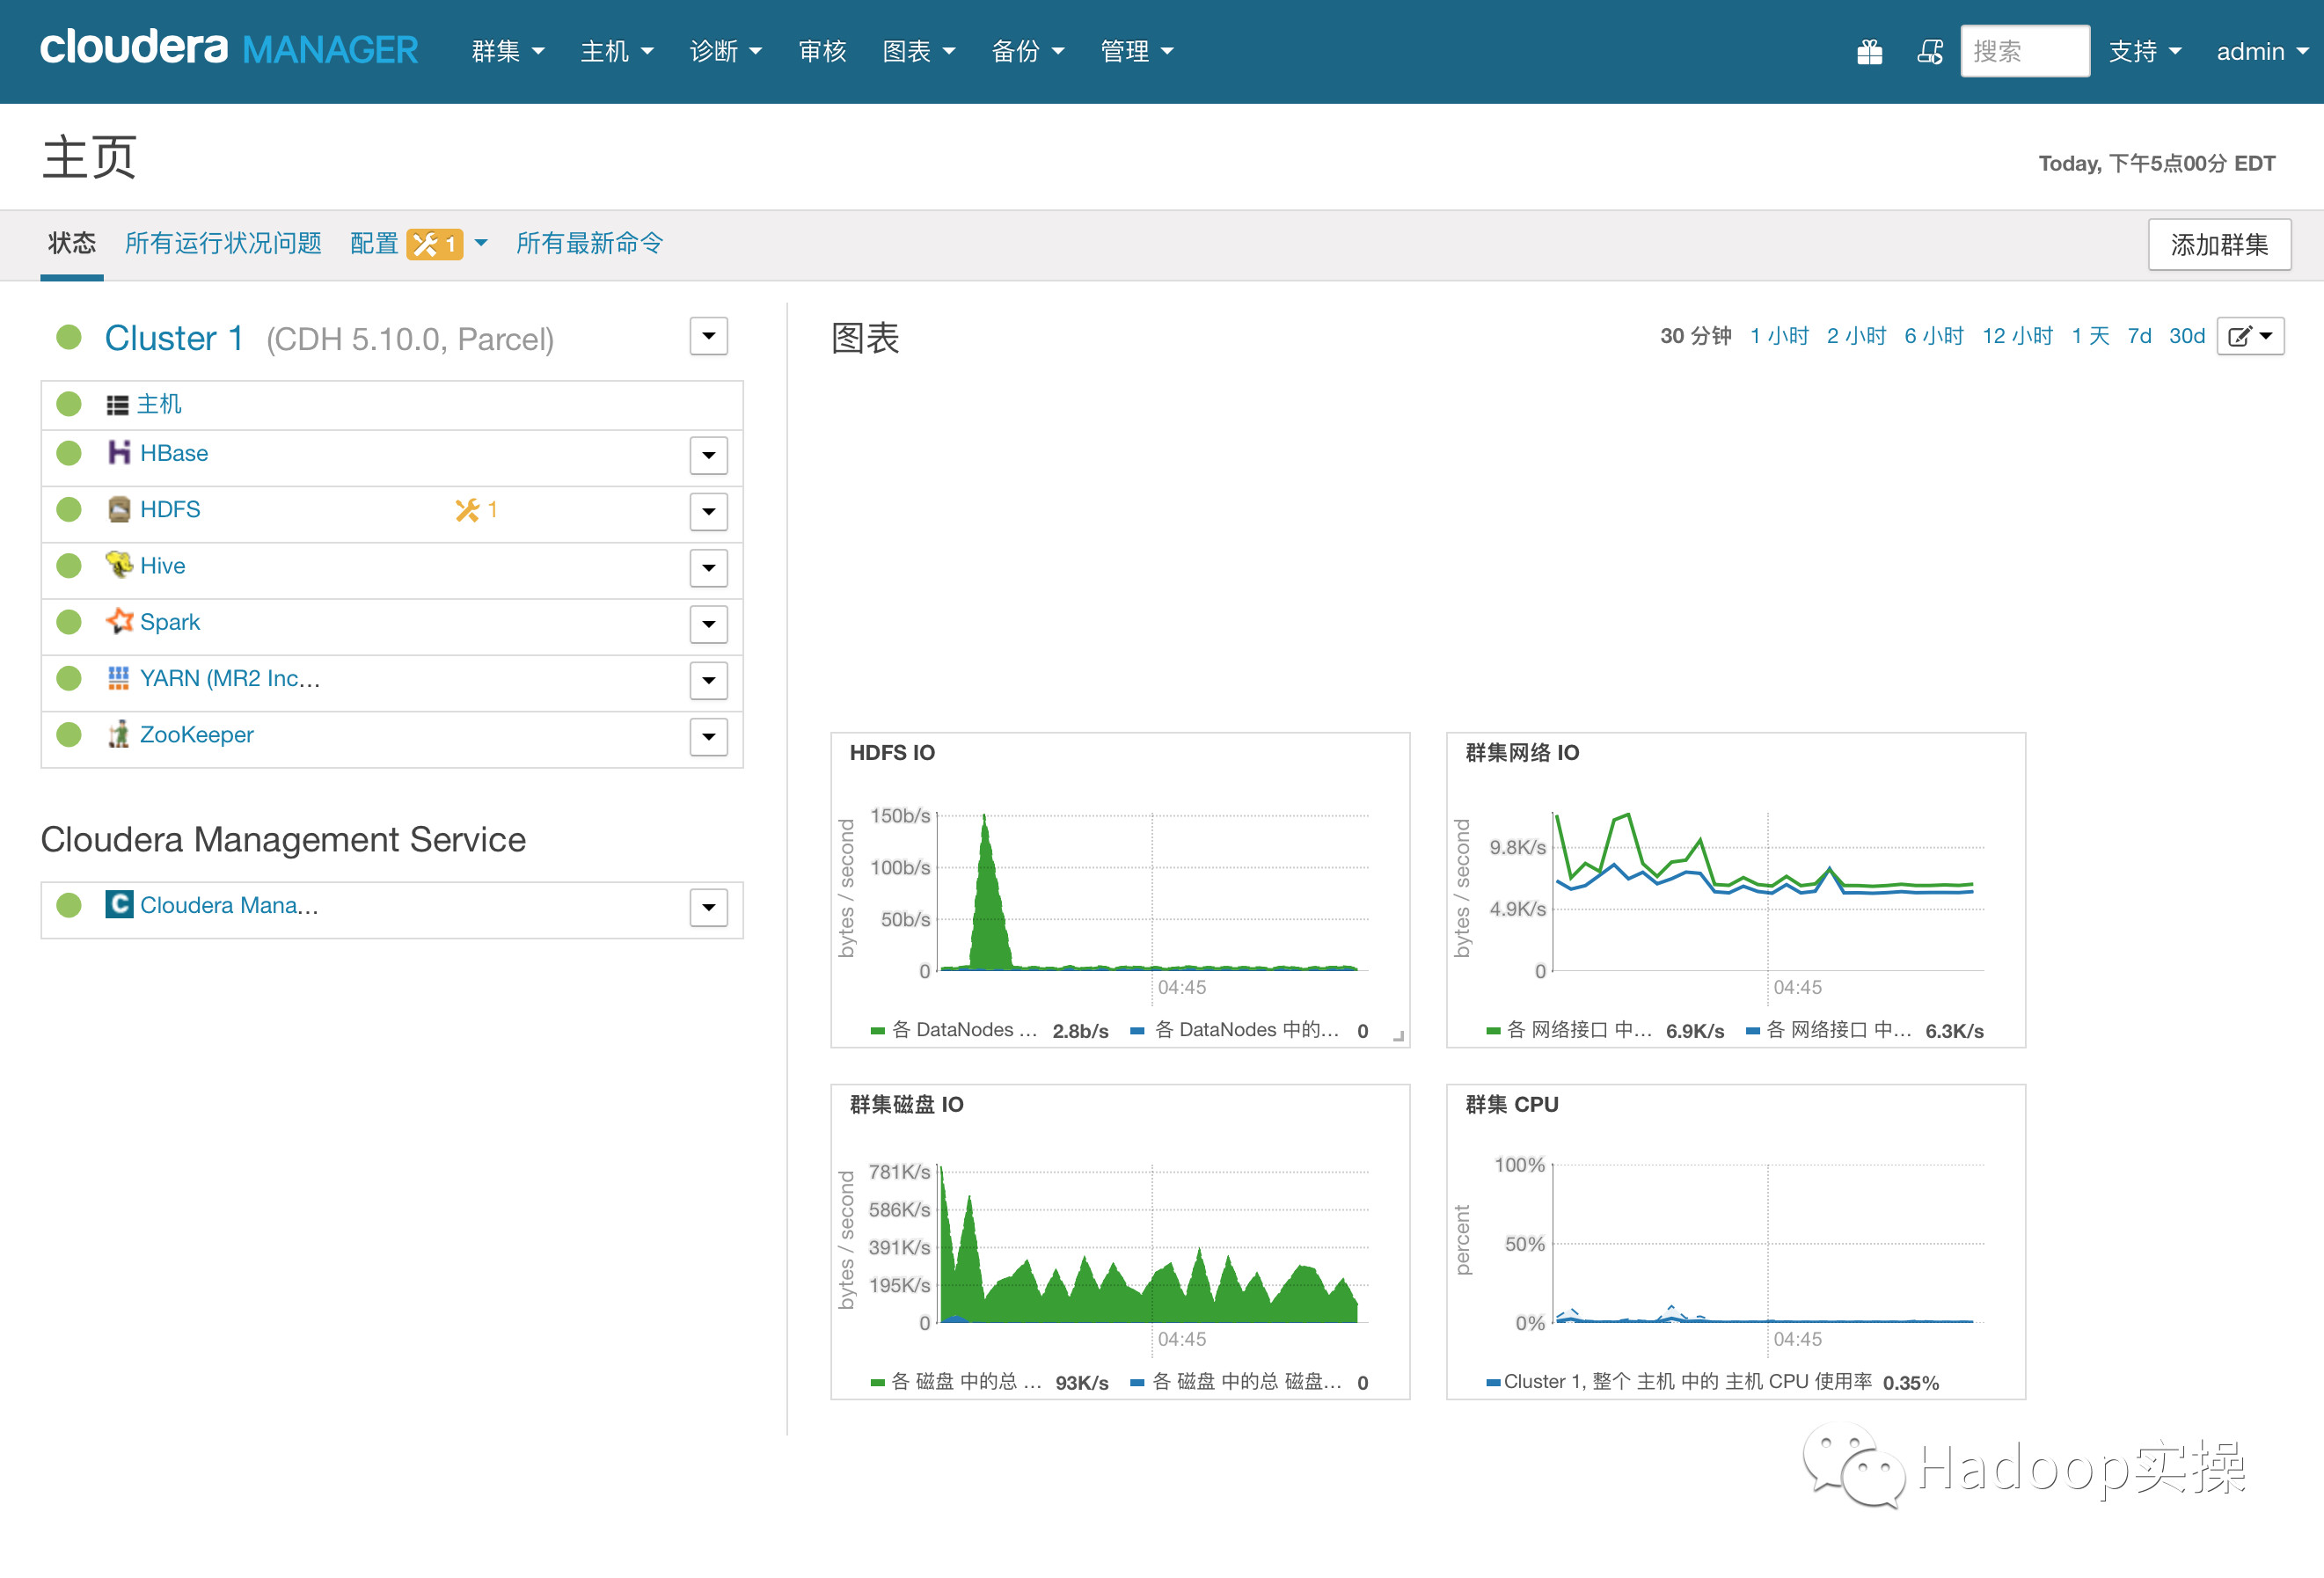
7.安裝成功後進入home管理界面
5.Kudu安裝
CDH從5.10開始,打包集成Kudu1.2,並且Cloudera正式提供支持。這個版本開始Kudu的安裝較之前要簡單很多,省去了Impala_Kudu,安裝完Kudu,Impala即可直接操作Kudu。
以下安裝步驟基於用戶使用Cloudera Manager來安裝和部署Kudu1.2
5.1.安裝csd文件
1.下載csd文件
[root@ip-172-31-2-159 ~]# wget http://archive.cloudera.com/kudu/csd/KUDU-5.10.0.jar2.將下載的jar包文件移動到/opt/cloudera/csd目錄
[root@ip-172-31-2-159 ~]# mv KUDU-5.10.0.jar /opt/cloudera/csd3.修改權限
[root@ip-172-31-2-159 ~]# chown cloudera-scm:cloudera-scm /opt/cloudera/csd/KUDU-5.10.0.jar
[root@ip-172-31-2-159 ~]# chmod 644 /opt/cloudera/csd/KUDU-5.10.0.jar
4.重啓Cloudera Manager服務
[root@ip-172-31-2-159 ~]# systemctl restart cloudera-scm-server5.2.安裝Kudu服務
1.下載Kudu服務需要的Parcel包
[root@ip-172-31-2-159 ~]# wget http://archive.cloudera.com/kudu/parcels/5.10/KUDU-1.2.0-1.cdh5.10.1.p0.66-el7.parcel
[root@ip-172-31-2-159 ~]# wget http://archive.cloudera.com/kudu/parcels/5.10/KUDU-1.2.0-1.cdh5.10.1.p0.66-el7.parcel.sha1
[root@ip-172-31-2-159 ~]# wget http://archive.cloudera.com/kudu/parcels/5.10/manifest.json
2.將Kudu的Parcel包部署到http服務
[root@ip-172-31-2-159 ~]# mkdir kudu1.2
[root@ip-172-31-2-159 ~]# mv KUDU-1.2.0-1.cdh5.10.1.p0.66-el7.parcel* kudu1.2/
[root@ip-172-31-2-159 ~]# mv manifest.json kudu1.2
[root@ip-172-31-2-159 ~]# mv kudu1.2/ /var/www/html/
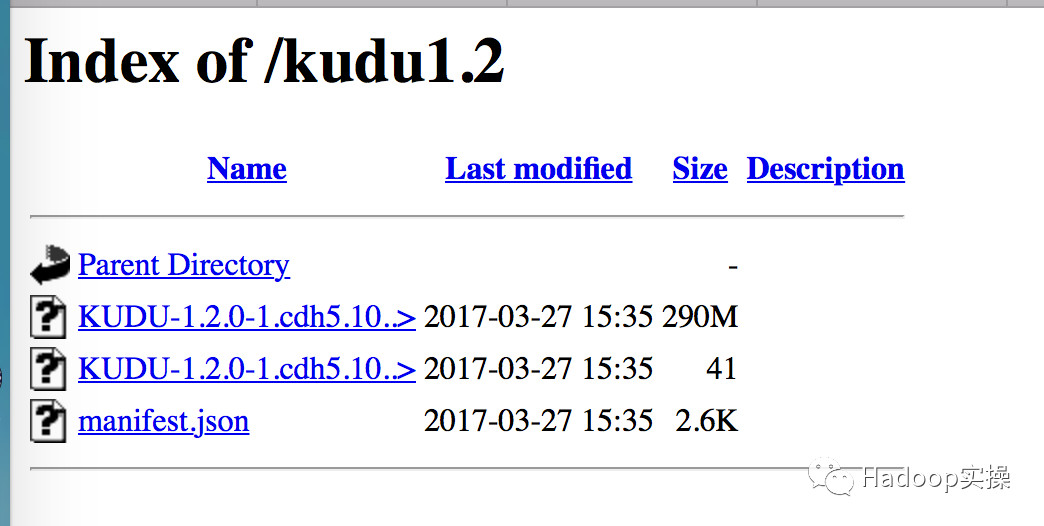
[root@ip-172-31-2-159 ~]# systemctl start httpd3.檢查http顯示Kudu正常:
4.通過CM界面配置Kudu的Parcel地址,並下載,分發,激活Kudu。

5.通過CM安裝Kudu1.2
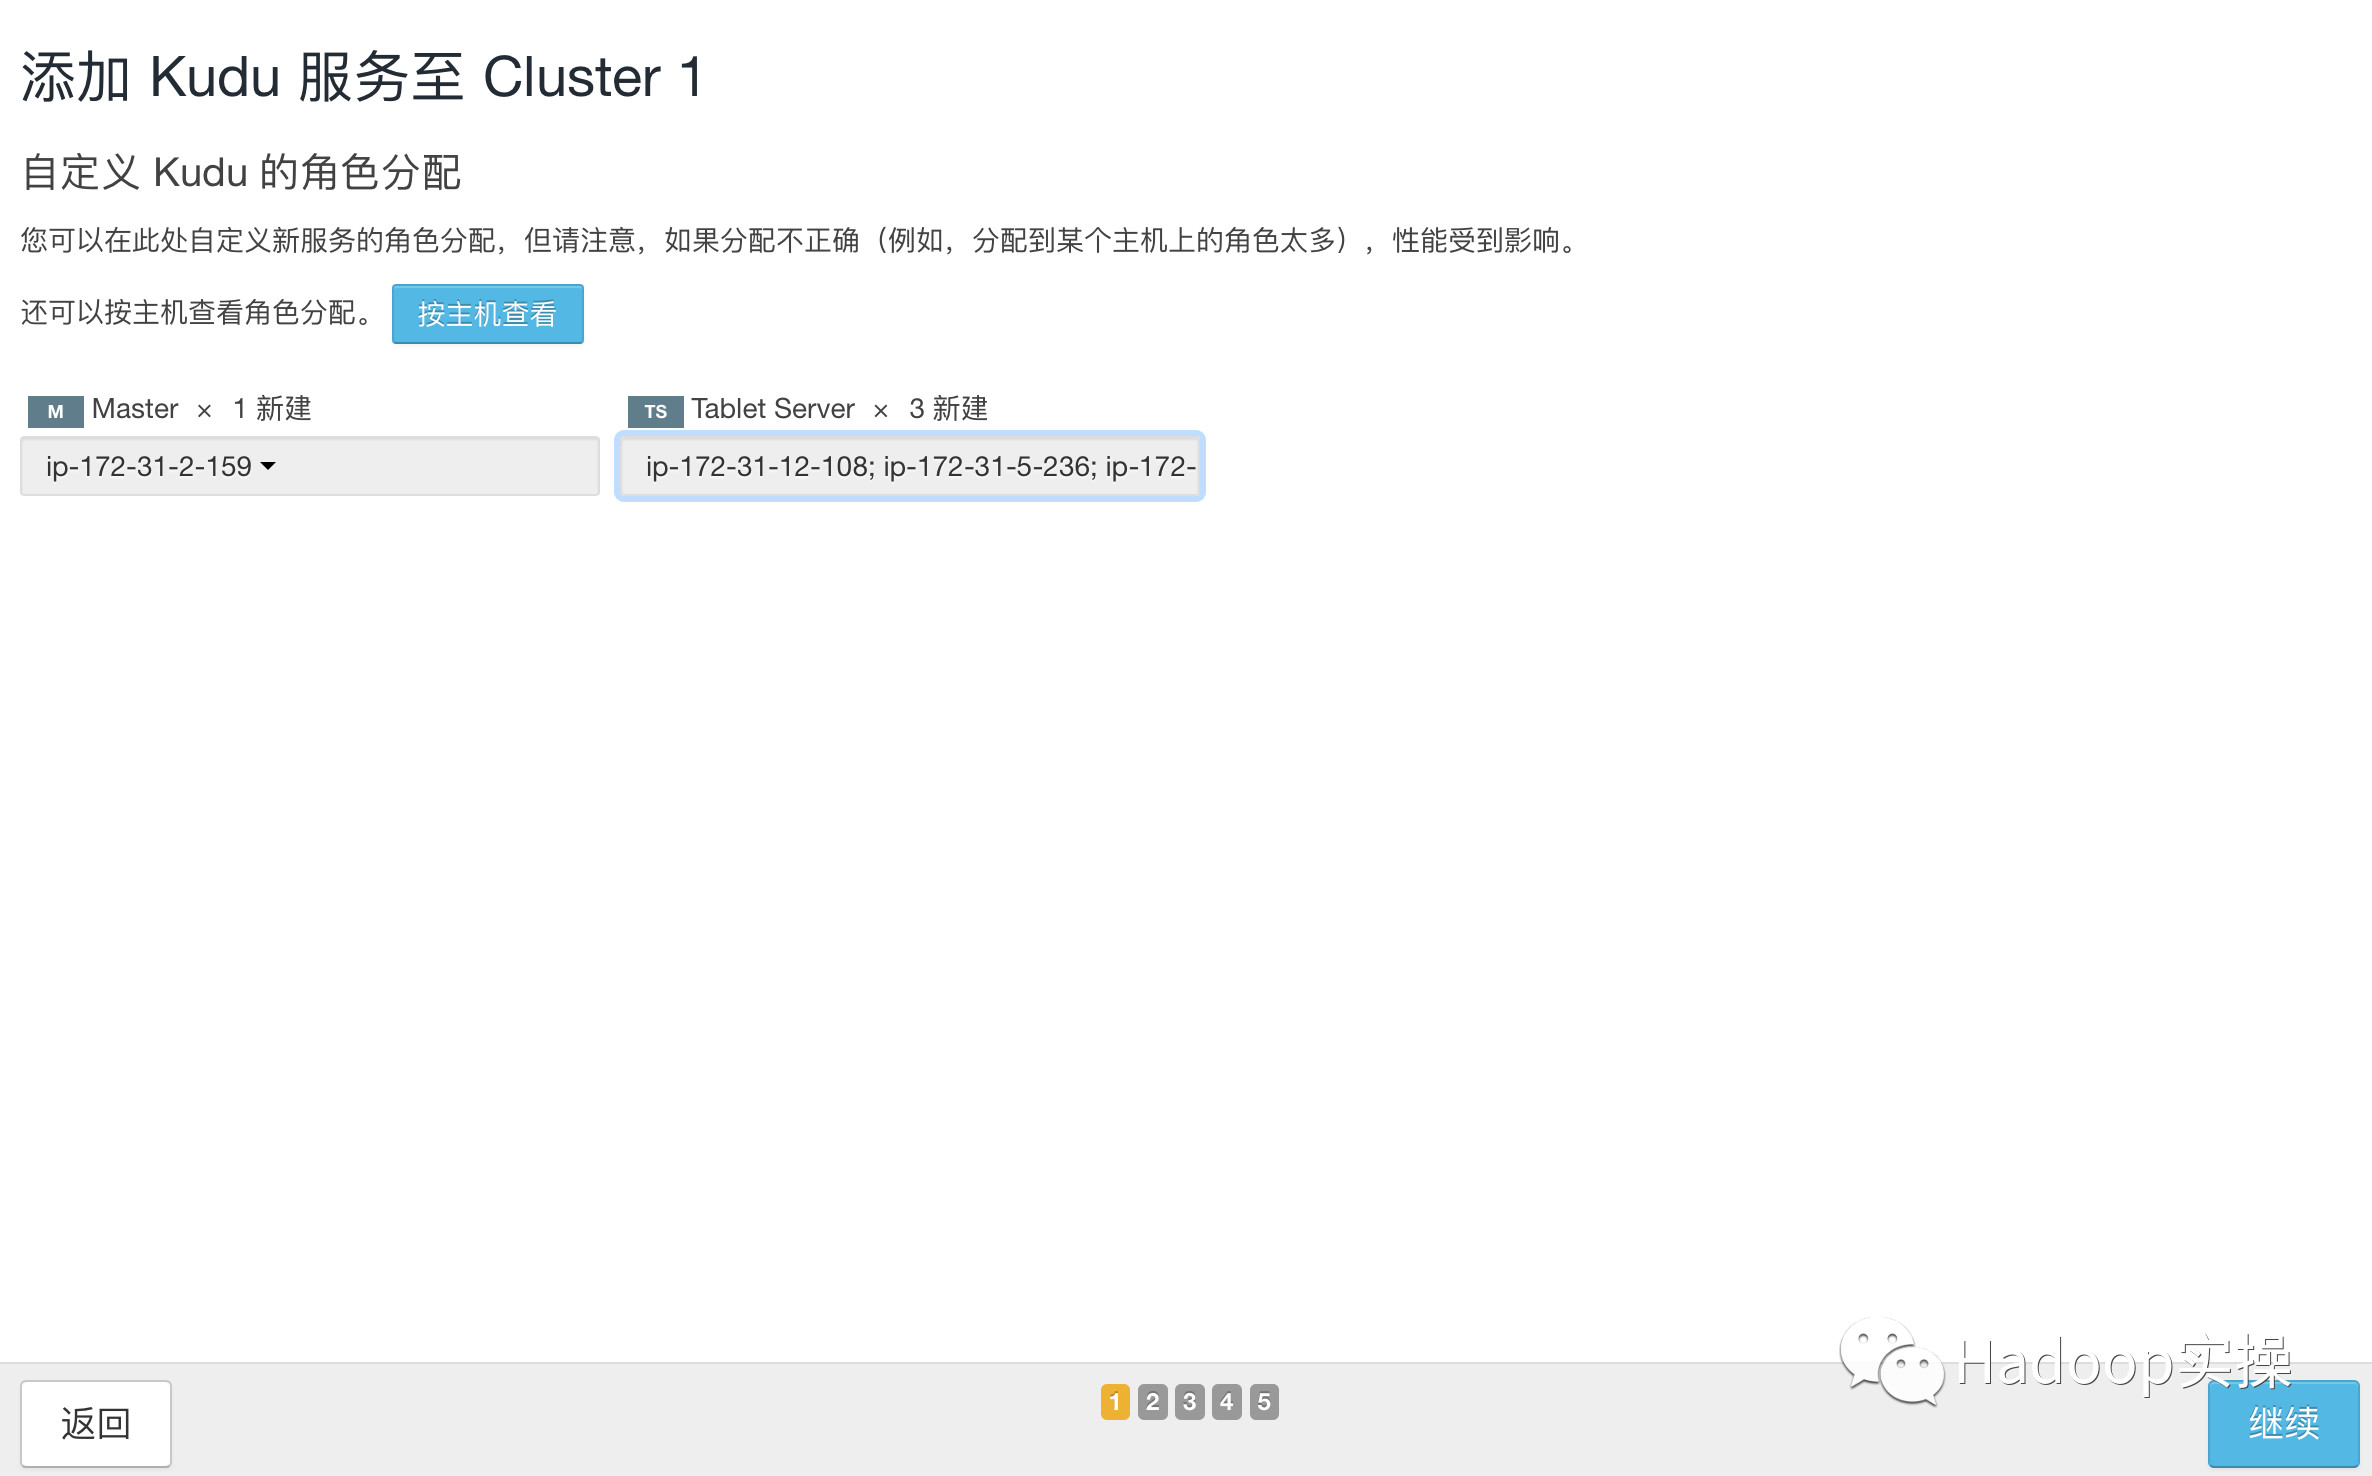
添加Kudu服務

選擇Master和Tablet Server
配置相應的目錄,<font face="微軟雅黑" size=4 color=red >注:無論是Master還是Tablet根據實際情況數據目錄(fs_data_dir)應該都可能有多個,以提高併發讀寫,從而提高Kudu性能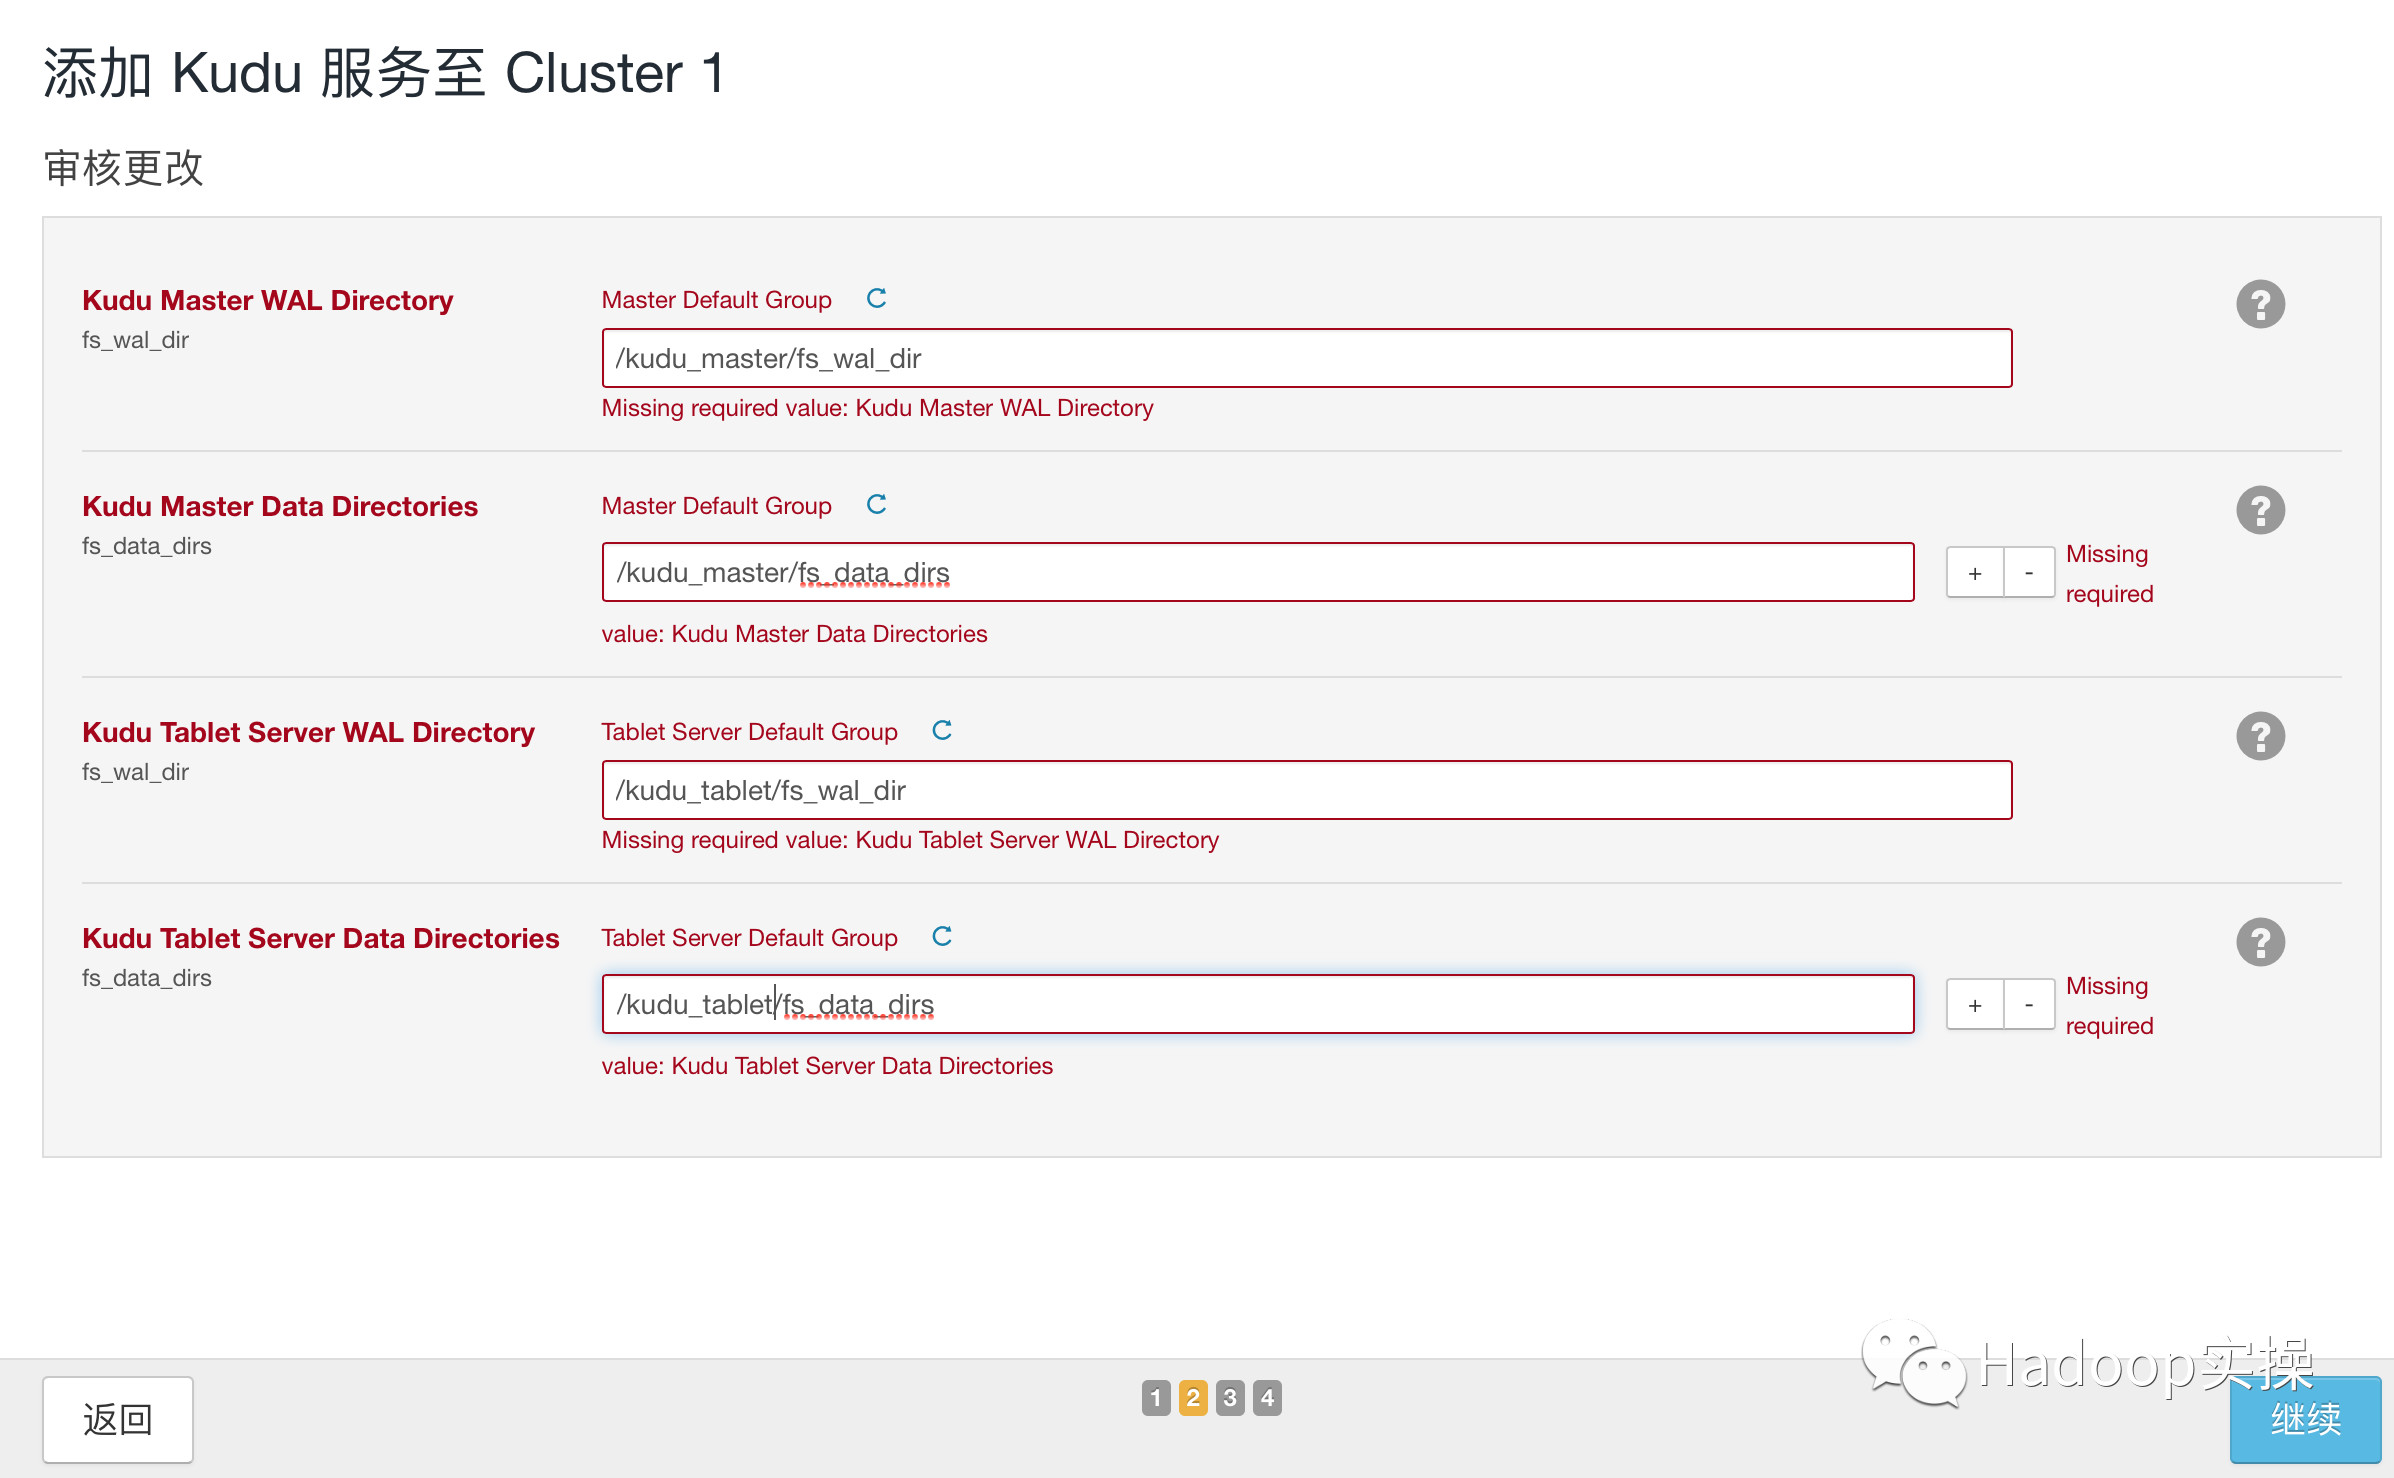
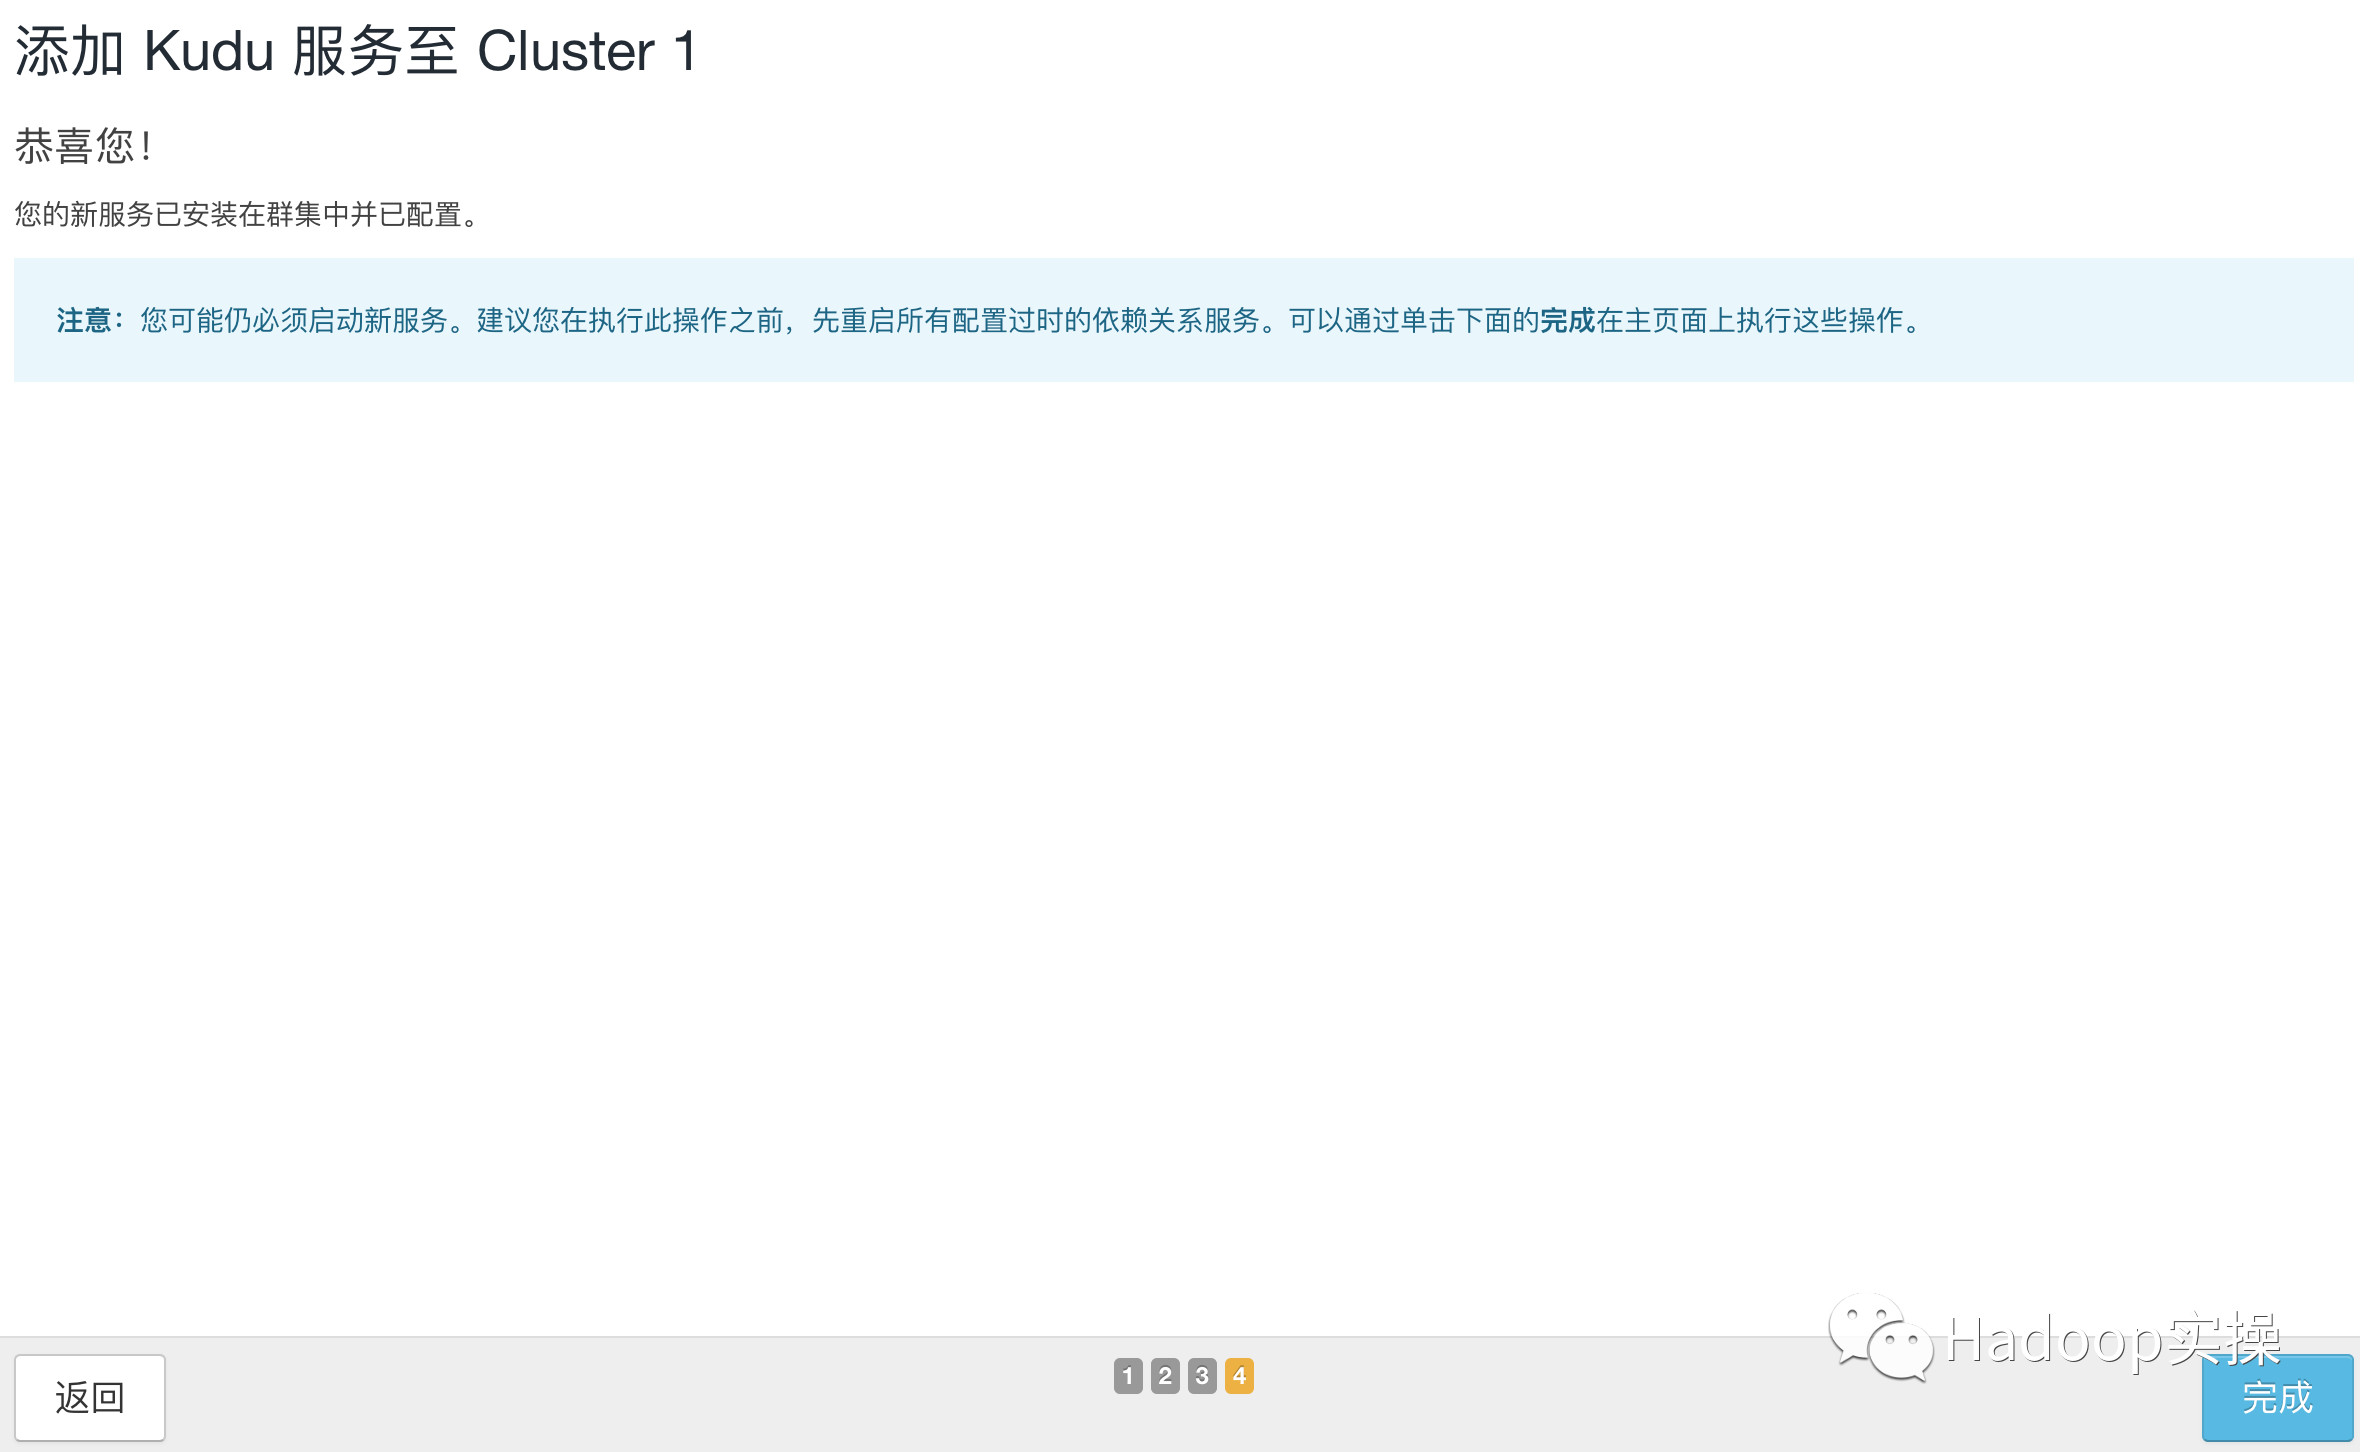
啓動Kudu服務

安裝完畢
5.3.配置Impala
在CDH5.10中,安裝完Kudu1.2後,默認Impala即可直接操作Kudu進行SQL操作,但爲了省去每次建表都需要在TBLPROPERTIES中添加kudu_master_addresses屬性,建議在Impala的高級配置Kudu Master的地址:
--kudu\_master\_hosts=ip-172-31-2-159:7051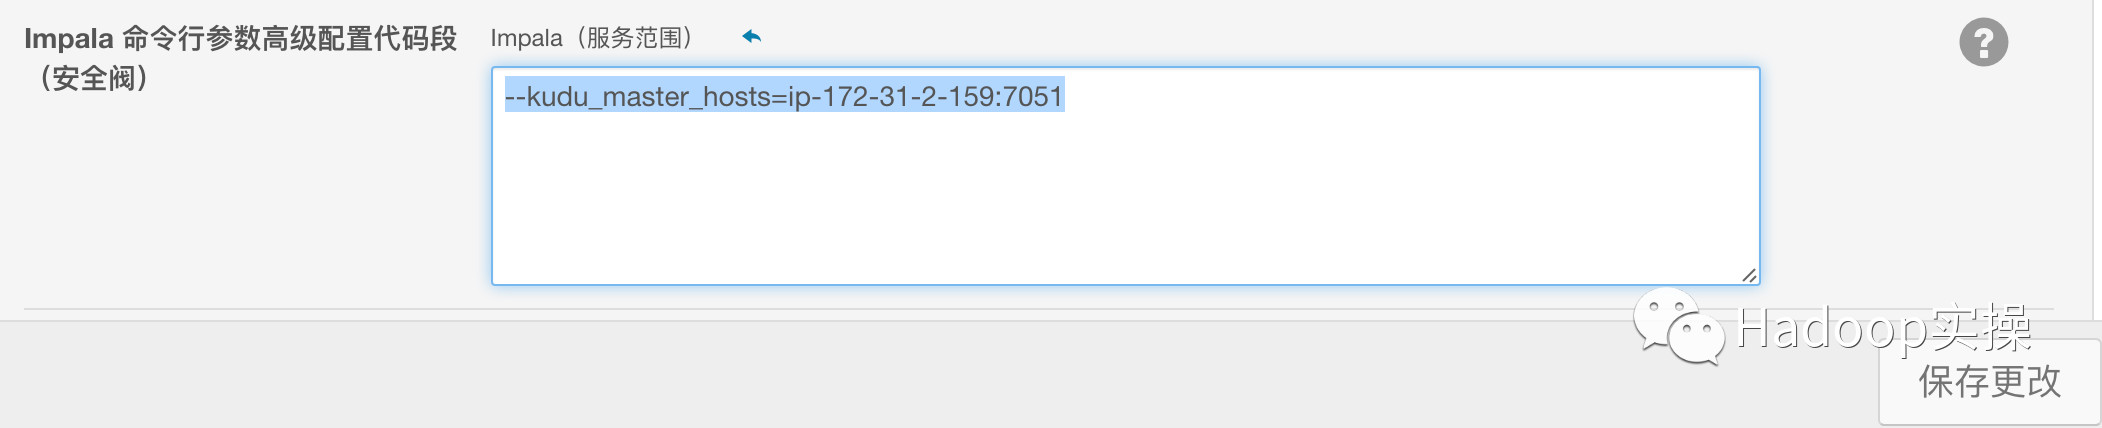
6.快速組件服務驗證
6.1.HDFS驗證(mkdir+put+cat+get)
[root@ip-172-31-2-159 ~]# hadoop fs -mkdir -p /lilei/test_table
[root@ip-172-31-2-159 ~]# cat > a.txt
1#2
c#d
我#你^C
[root@ip-172-31-2-159 ~]#
[root@ip-172-31-2-159 ~]#
[root@ip-172-31-2-159 ~]#
[root@ip-172-31-2-159 ~]# hadoop fs -put a.txt /lilei/test_table
[root@ip-172-31-2-159 ~]# hadoop fs -cat /lilei/test_table/a.txt
1#2
c#d
[root@ip-172-31-2-159 ~]# rm -rf a.txt
[root@ip-172-31-2-159 ~]#
[root@ip-172-31-2-159 ~]# hadoop fs -get /lilei/test_table/a.txt
[root@ip-172-31-2-159 ~]#
[root@ip-172-31-2-159 ~]# cat a.txt
1#2
c#d
6.2.Hive驗證
[root@ip-172-31-2-159 ~]# hive

Logging initialized using configuration in jar:file:/opt/cloudera/parcels/CDH-5.10.0-1.cdh5.10.0.p0.41/jars/hive-common-1.1.0-cdh5.10.0.jar!/hive-log4j.properties
WARNING: Hive CLI is deprecated and migration to Beeline is recommended.
hive> create external table test_table
    > (
    > s1 string,
    > s2 string
    > )
    > row format delimited fields terminated by '#'
    > stored as textfile location '/lilei/test_table';
OK
Time taken: 0.631 seconds
hive> select * from test_table;
OK
1   2
c   d
Time taken: 0.36 seconds, Fetched: 2 row(s)
hive> select count(*) from test_table;
Query ID = root_20170404013939_69844998-4456-4bc1-9da5-53ea91342e43
Total jobs = 1
Launching Job 1 out of 1
Number of reduce tasks determined at compile time: 1
In order to change the average load for a reducer (in bytes):
  set hive.exec.reducers.bytes.per.reducer=<number>
In order to limit the maximum number of reducers:
  set hive.exec.reducers.max=<number>
In order to set a constant number of reducers:
  set mapreduce.job.reduces=<number>
Starting Job = job_1491283979906_0005, Tracking URL = http://ip-172-31-2-159:8088/proxy/application_1491283979906_0005/
Kill Command = /opt/cloudera/parcels/CDH-5.10.0-1.cdh5.10.0.p0.41/lib/hadoop/bin/hadoop job  -kill job_1491283979906_0005
Hadoop job information for Stage-1: number of mappers: 1; number of reducers: 1
2017-04-04 01:39:25,425 Stage-1 map = 0%,  reduce = 0%
2017-04-04 01:39:31,689 Stage-1 map = 100%,  reduce = 0%, Cumulative CPU 1.02 sec
2017-04-04 01:39:36,851 Stage-1 map = 100%,  reduce = 100%, Cumulative CPU 2.34 sec
MapReduce Total cumulative CPU time: 2 seconds 340 msec
Ended Job = job_1491283979906_0005
MapReduce Jobs Launched:
Stage-Stage-1: Map: 1  Reduce: 1   Cumulative CPU: 2.34 sec   HDFS Read: 6501 HDFS Write: 2 SUCCESS
Total MapReduce CPU Time Spent: 2 seconds 340 msec
OK
2
Time taken: 21.56 seconds, Fetched: 1 row(s)
6.3.MapReduce驗證
[root@ip-172-31-2-159 ~]# hadoop jar /opt/cloudera/parcels/CDH/lib/hadoop-0.20-mapreduce/hadoop-examples.jar pi 5 5
Number of Maps  = 5
Samples per Map = 5
Wrote input for Map #0
Wrote input for Map #1
Wrote input for Map #2
Wrote input for Map #3
Wrote input for Map #4
Starting Job
17/04/04 01:38:15 INFO client.RMProxy: Connecting to ResourceManager at ip-172-31-2-159/172.31.2.159:8032
17/04/04 01:38:15 INFO mapreduce.JobSubmissionFiles: Permissions on staging directory /user/root/.staging are incorrect: rwxrwxrwx. Fixing permissions to correct value rwx------
17/04/04 01:38:15 INFO input.FileInputFormat: Total input paths to process : 5
17/04/04 01:38:15 INFO mapreduce.JobSubmitter: number of splits:5
17/04/04 01:38:15 INFO mapreduce.JobSubmitter: Submitting tokens for job: job_1491283979906_0004
17/04/04 01:38:16 INFO impl.YarnClientImpl: Submitted application application_1491283979906_0004
17/04/04 01:38:16 INFO mapreduce.Job: The url to track the job: http://ip-172-31-2-159:8088/proxy/application_1491283979906_0004/
17/04/04 01:38:16 INFO mapreduce.Job: Running job: job_1491283979906_0004
17/04/04 01:38:21 INFO mapreduce.Job: Job job_1491283979906_0004 running in uber mode : false
17/04/04 01:38:21 INFO mapreduce.Job:  map 0% reduce 0%
17/04/04 01:38:26 INFO mapreduce.Job:  map 100% reduce 0%
17/04/04 01:38:32 INFO mapreduce.Job:  map 100% reduce 100%
17/04/04 01:38:32 INFO mapreduce.Job: Job job_1491283979906_0004 completed successfully
17/04/04 01:38:32 INFO mapreduce.Job: Counters: 49
    File System Counters
        FILE: Number of bytes read=64
        FILE: Number of bytes written=749758
        FILE: Number of read operations=0
        FILE: Number of large read operations=0
        FILE: Number of write operations=0
        HDFS: Number of bytes read=1350
        HDFS: Number of bytes written=215
        HDFS: Number of read operations=23
        HDFS: Number of large read operations=0
        HDFS: Number of write operations=3
    Job Counters
        Launched map tasks=5
        Launched reduce tasks=1
        Data-local map tasks=5
        Total time spent by all maps in occupied slots (ms)=16111
        Total time spent by all reduces in occupied slots (ms)=2872
        Total time spent by all map tasks (ms)=16111
        Total time spent by all reduce tasks (ms)=2872
        Total vcore-seconds taken by all map tasks=16111
        Total vcore-seconds taken by all reduce tasks=2872
        Total megabyte-seconds taken by all map tasks=16497664
        Total megabyte-seconds taken by all reduce tasks=2940928
    Map-Reduce Framework
        Map input records=5
        Map output records=10
        Map output bytes=90
        Map output materialized bytes=167
        Input split bytes=760
        Combine input records=0
        Combine output records=0
        Reduce input groups=2
        Reduce shuffle bytes=167
        Reduce input records=10
        Reduce output records=0
        Spilled Records=20
        Shuffled Maps =5
        Failed Shuffles=0
        Merged Map outputs=5
        GC time elapsed (ms)=213
        CPU time spent (ms)=3320
        Physical memory (bytes) snapshot=2817884160
        Virtual memory (bytes) snapshot=9621606400
        Total committed heap usage (bytes)=2991587328
    Shuffle Errors
        BAD_ID=0
        CONNECTION=0
        IO_ERROR=0
        WRONG_LENGTH=0
        WRONG_MAP=0
        WRONG_REDUCE=0
    File Input Format Counters
        Bytes Read=590
    File Output Format Counters
        Bytes Written=97
Job Finished in 17.145 seconds
Estimated value of Pi is 3.68000000000000000000
6.4.Impala驗證
[root@ip-172-31-2-159 ~]# impala-shell -i ip-172-31-7-96
Starting Impala Shell without Kerberos authentication
Connected to ip-172-31-7-96:21000
Server version: impalad version 2.7.0-cdh5.10.0 RELEASE (build 785a073cd07e2540d521ecebb8b38161ccbd2aa2)
***********************************************************************************
Welcome to the Impala shell.
(Impala Shell v2.7.0-cdh5.10.0 (785a073) built on Fri Jan 20 12:03:56 PST 2017)

Run the PROFILE command after a query has finished to see a comprehensive summary
of all the performance and diagnostic information that Impala gathered for that
query. Be warned, it can be very long!
***********************************************************************************
[ip-172-31-7-96:21000] > show tables;
Query: show tables
+------------+
| name       |
+------------+
| test_table |
+------------+
Fetched 1 row(s) in 0.20s
[ip-172-31-7-96:21000] > select * from test_table;
Query: select * from test_table
Query submitted at: 2017-04-04 01:41:56 (Coordinator: http://ip-172-31-7-96:25000)
Query progress can be monitored at: http://ip-172-31-7-96:25000/query_plan?query_id=c4a06bd46f9106b:4a69f04800000000
+----+----+
| s1 | s2 |
+----+----+
| 1  | 2  |
| c  | d  |
+----+----+
Fetched 2 row(s) in 3.73s
[ip-172-31-7-96:21000] > select count(*) from test_table;
Query: select count(*) from test_table
Query submitted at: 2017-04-04 01:42:06 (Coordinator: http://ip-172-31-7-96:25000)
Query progress can be monitored at: http://ip-172-31-7-96:25000/query_plan?query_id=2a415724696f7414:1f9113ea00000000
+----------+
| count(*) |
+----------+
| 2        |
+----------+
Fetched 1 row(s) in 0.15s
6.5.Spark驗證
[root@ip-172-31-2-159 ~]# spark-shell
Setting default log level to "WARN".
To adjust logging level use sc.setLogLevel(newLevel).
Welcome to
      ____              __
     / __/__  ___ _____/ /__
    _\ \/ _ \/ _ `/ __/  '_/
   /___/ .__/\_,_/_/ /_/\_\   version 1.6.0
      /_/

Using Scala version 2.10.5 (Java HotSpot(TM) 64-Bit Server VM, Java 1.7.0_67)
Type in expressions to have them evaluated.
Type :help for more information.
Spark context available as sc (master = yarn-client, app id = application_1491283979906_0006).
17/04/04 01:43:26 WARN metastore.ObjectStore: Version information not found in metastore. hive.metastore.schema.verification is not enabled so recording the schema version 1.1.0
17/04/04 01:43:27 WARN metastore.ObjectStore: Failed to get database default, returning NoSuchObjectException
SQL context available as sqlContext.

scala> var textFile=sc.textFile("hdfs://ip-172-31-2-159:8020/lilei/test_table/a.txt")
textFile: org.apache.spark.rdd.RDD[String] = hdfs://ip-172-31-2-159:8020/lilei/test_table/a.txt MapPartitionsRDD[1] at textFile at <console>:27

scala>

scala> textFile.count()
res0: Long = 2
6.6.Kudu驗證
[root@ip-172-31-2-159 ~]# impala-shell -i ip-172-31-7-96
Starting Impala Shell without Kerberos authentication
Connected to ip-172-31-7-96:21000
Server version: impalad version 2.7.0-cdh5.10.0 RELEASE (build 785a073cd07e2540d521ecebb8b38161ccbd2aa2)
***********************************************************************************
Welcome to the Impala shell.
(Impala Shell v2.7.0-cdh5.10.0 (785a073) built on Fri Jan 20 12:03:56 PST 2017)

Every command must be terminated by a ';'.
***********************************************************************************
[ip-172-31-7-96:21000] > CREATE TABLE my_first_table
                       > (
                       >   id BIGINT,
                       >   name STRING,
                       >   PRIMARY KEY(id)
                       > )
                       > PARTITION BY HASH PARTITIONS 16
                       > STORED AS KUDU;
Query: create TABLE my_first_table
(
  id BIGINT,
  name STRING,
  PRIMARY KEY(id)
)
PARTITION BY HASH PARTITIONS 16
STORED AS KUDU

Fetched 0 row(s) in 1.35s
[ip-172-31-7-96:21000] > INSERT INTO my_first_table VALUES (99, "sarah");
Query: insert INTO my_first_table VALUES (99, "sarah")
Query submitted at: 2017-04-04 01:46:08 (Coordinator: http://ip-172-31-7-96:25000)
Query progress can be monitored at: http://ip-172-31-7-96:25000/query_plan?query_id=824ce0b3765c6b91:5ea8dd7c00000000
Modified 1 row(s), 0 row error(s) in 3.37s
[ip-172-31-7-96:21000] >
[ip-172-31-7-96:21000] > INSERT INTO my_first_table VALUES (1, "john"), (2, "jane"), (3, "jim");
Query: insert INTO my_first_table VALUES (1, "john"), (2, "jane"), (3, "jim")
Query submitted at: 2017-04-04 01:46:13 (Coordinator: http://ip-172-31-7-96:25000)
Query progress can be monitored at: http://ip-172-31-7-96:25000/query_plan?query_id=a645259c3b8ae7cd:e446e15500000000
Modified 3 row(s), 0 row error(s) in 0.11s
[ip-172-31-7-96:21000] > select * from my_first_table;
Query: select * from my_first_table
Query submitted at: 2017-04-04 01:46:19 (Coordinator: http://ip-172-31-7-96:25000)
Query progress can be monitored at: http://ip-172-31-7-96:25000/query_plan?query_id=f44021589ff0d94d:8d30568200000000
+----+-------+
| id | name  |
+----+-------+
| 2  | jane  |
| 3  | jim   |
| 1  | john  |
| 99 | sarah |
+----+-------+
Fetched 4 row(s) in 0.55s
[ip-172-31-7-96:21000] > delete from my_first_table where id =99;
Query: delete from my_first_table where id =99
Query submitted at: 2017-04-04 01:46:56 (Coordinator: http://ip-172-31-7-96:25000)
Query progress can be monitored at: http://ip-172-31-7-96:25000/query_plan?query_id=814090b100fdf0b4:1b516fe400000000
Modified 1 row(s), 0 row error(s) in 0.15s
[ip-172-31-7-96:21000] >
[ip-172-31-7-96:21000] > select * from my_first_table;
Query: select * from my_first_table
Query submitted at: 2017-04-04 01:46:57 (Coordinator: http://ip-172-31-7-96:25000)
Query progress can be monitored at: http://ip-172-31-7-96:25000/query_plan?query_id=724aa3f84cedb109:a679bf0200000000
+----+------+
| id | name |
+----+------+
| 2  | jane |
| 3  | jim  |
| 1  | john |
+----+------+
Fetched 3 row(s) in 0.15s
[ip-172-31-7-96:21000] > INSERT INTO my_first_table VALUES (99, "sarah");
Query: insert INTO my_first_table VALUES (99, "sarah")
Query submitted at: 2017-04-04 01:47:32 (Coordinator: http://ip-172-31-7-96:25000)
Query progress can be monitored at: http://ip-172-31-7-96:25000/query_plan?query_id=6244b3c6d33b443e:f43c857300000000
Modified 1 row(s), 0 row error(s) in 0.11s
[ip-172-31-7-96:21000] >
[ip-172-31-7-96:21000] > update my_first_table set name='lilei' where id=99;
Query: update my_first_table set name='lilei' where id=99
Query submitted at: 2017-04-04 01:47:32 (Coordinator: http://ip-172-31-7-96:25000)
Query progress can be monitored at: http://ip-172-31-7-96:25000/query_plan?query_id=8f4ab0dd3c19f9df:b2c7bdfa00000000
Modified 1 row(s), 0 row error(s) in 0.13s
[ip-172-31-7-96:21000] > select * from my_first_table;
Query: select * from my_first_table
Query submitted at: 2017-04-04 01:47:34 (Coordinator: http://ip-172-31-7-96:25000)
Query progress can be monitored at: http://ip-172-31-7-96:25000/query_plan?query_id=6542579c8bd5b6ad:af68f50800000000
+----+-------+
| id | name  |
+----+-------+
| 2  | jane  |
| 3  | jim   |
| 1  | john  |
| 99 | lilei |
+----+-------+
Fetched 4 row(s) in 0.15s
[ip-172-31-7-96:21000] > upsert  into my_first_table values(1, "john"), (4, "tom"), (99, "lilei1");
Query: upsert into my_first_table values(1, "john"), (4, "tom"), (99, "lilei1")
Query submitted at: 2017-04-04 01:48:52 (Coordinator: http://ip-172-31-7-96:25000)
Query progress can be monitored at: http://ip-172-31-7-96:25000/query_plan?query_id=694fc7ac2bc71d21:947f1fa200000000
Modified 3 row(s), 0 row error(s) in 0.11s
[ip-172-31-7-96:21000] >
[ip-172-31-7-96:21000] > select * from my_first_table;
Query: select * from my_first_table
Query submitted at: 2017-04-04 01:48:52 (Coordinator: http://ip-172-31-7-96:25000)
Query progress can be monitored at: http://ip-172-31-7-96:25000/query_plan?query_id=a64e0ee707762b6b:69248a6c00000000
+----+--------+
| id | name   |
+----+--------+
| 2  | jane   |
| 3  | jim    |
| 1  | john   |
| 99 | lilei1 |
| 4  | tom    |
+----+--------+
Fetched 5 row(s) in 0.16s
爲天地立心,爲生民立命,爲往聖繼絕學,爲萬世開太平。
推薦關注Hadoop實操,第一時間,分享更多Hadoop乾貨,歡迎轉發和分享。
原創文章,歡迎轉載,轉載請註明:轉載自微信公衆號Hadoop實操