


Cobbler是PXE的二次開發產品所以功能更強大;
準備一臺已經安裝好操作系統的虛擬機:CentOS Linux release 7.5.1804 (Core) IP地址172.16.75.1
安裝一些必備組件:
cobbler實在epel源當中的,可能直接yum安不上,所以我們先解決epel源的問題:
[root@1 ~]# yum -y install epel-release
然後安裝組件:
[root@1 ~]# yum -y install cobbler dhcp bind httpd rsync syslinux tftp-server
安好,就進行下面的工作:
[root@1 ~]# setenforce 0
[root@1 ~]# iptables -F
[root@1 ~]# systemctl start httpd
[root@1 ~]# systemctl start cobblerd
[root@1 ~]# cobbler check //檢查,對出現的問題一一解決
The following are potential configuration items that you may want to fix:
1 : The 'server' field in /etc/cobbler/settings must be set to something other than localhost, or kickstarting features will not work. This should be a resolvable hostname or IP for the boot server as reachable by all machines that will use it.
2 : For PXE to be functional, the 'next_server' field in /etc/cobbler/settings must be set to something other than 127.0.0.1, and should match the IP of the boot server on the PXE network.
3 : SELinux is enabled. Please review the following wiki page for details on ensuring cobbler works correctly in your SELinux environment:
https://github.com/cobbler/cobbler/wiki/Selinux
4 : change 'disable' to 'no' in /etc/xinetd.d/tftp
5 : Some network boot-loaders are missing from /var/lib/cobbler/loaders, you may run 'cobbler get-loaders' to download them, or, if you only want to handle x86/x86_64 netbooting, you may ensure that you have installed a recent version of the syslinux package installed and can ignore this message entirely. Files in this directory, should you want to support all architectures, should include pxelinux.0, menu.c32, elilo.efi, and yaboot. The 'cobbler get-loaders' command is the easiest way to resolve these requirements.
6 : enable and start rsyncd.service with systemctl
7 : debmirror package is not installed, it will be required to manage debian deployments and repositories
8 : The default password used by the sample templates for newly installed machines (default_password_crypted in /etc/cobbler/settings) is still set to 'cobbler' and should be changed, try: "openssl passwd -1 -salt 'random-phrase-here' 'your-password-here'" to generate new one
9 : fencing tools were not found, and are required to use the (optional) power management features. install cman or fence-agents to use them
Restart cobblerd and then run 'cobbler sync' to apply changes.
解決第一個問題: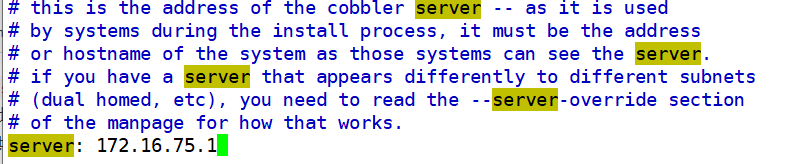
解決第二個問題:
解決第三個問題:
[root@1 ~]# setenforce 0 //執行者各命令就行了
解決第四個問題: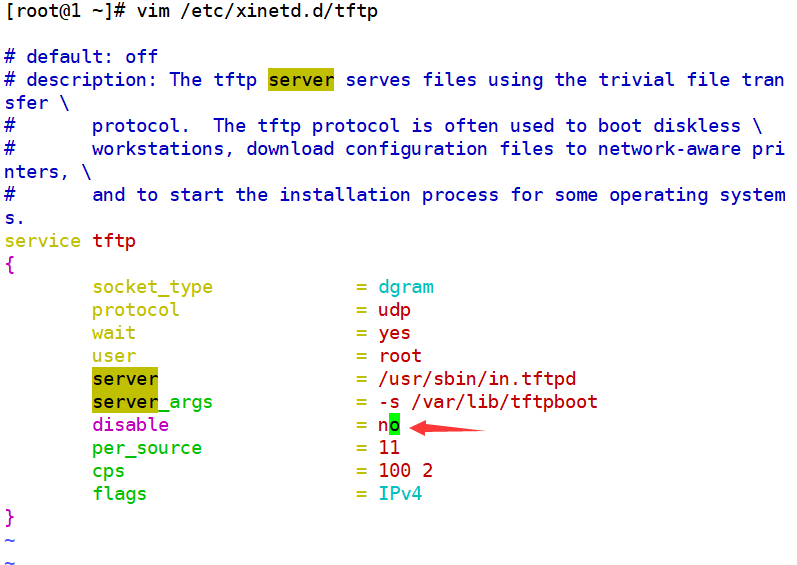
解決第五個問題: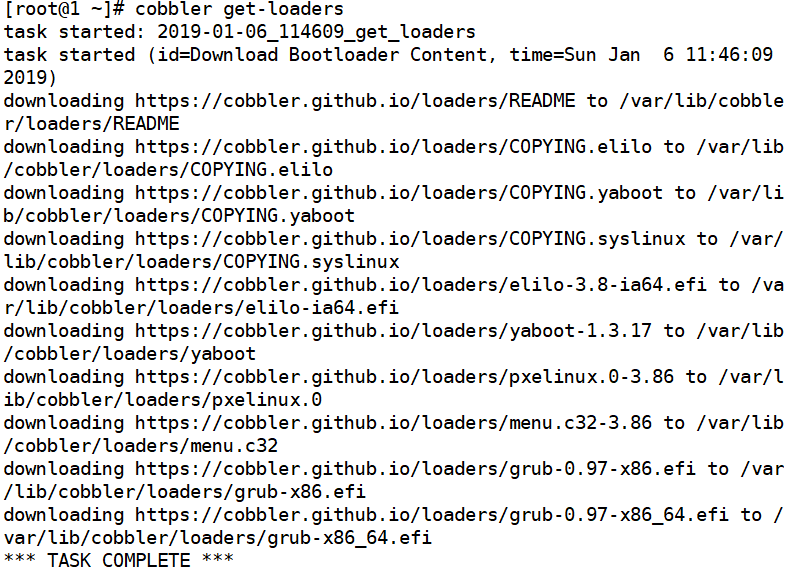
解決第六個問題:
[root@1 ~]# systemctl enable rsyncd
Created symlink from /etc/systemd/system/multi-user.target.wants/rsyncd.service to /usr/lib/systemd/system/rsyncd.service.
[root@1 ~]# systemctl start rsyncd
解決第八個問題:
[root@1 ~]# openssl passwd -1 123456
$1$1PRzBrcv$DUkTlLcxl/PFAtLZWdJ4M.
第七個和第九個不用管;
我們可以看到在問題結尾有這麼一行:Restart cobblerd and then run 'cobbler sync' to apply changes.
解決完這些完問題後,按照最後一行的提示操作即可:
[root@1 ~]# systemctl restart cobblerd
[root@1 ~]# cobbler sync
完成後再次檢查: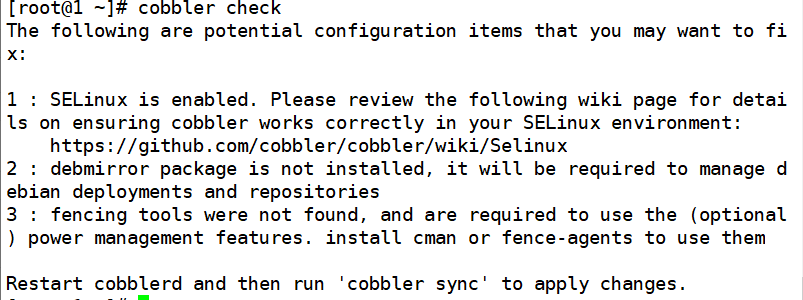
這些就不用管了,對我們安裝系統就沒影響了;
接下來我們要用cobbler管理dhcp:
[root@1 ~]# vim /etc/cobbler/settings
[root@1 ~]# vim /etc/cobbler/dhcp.template 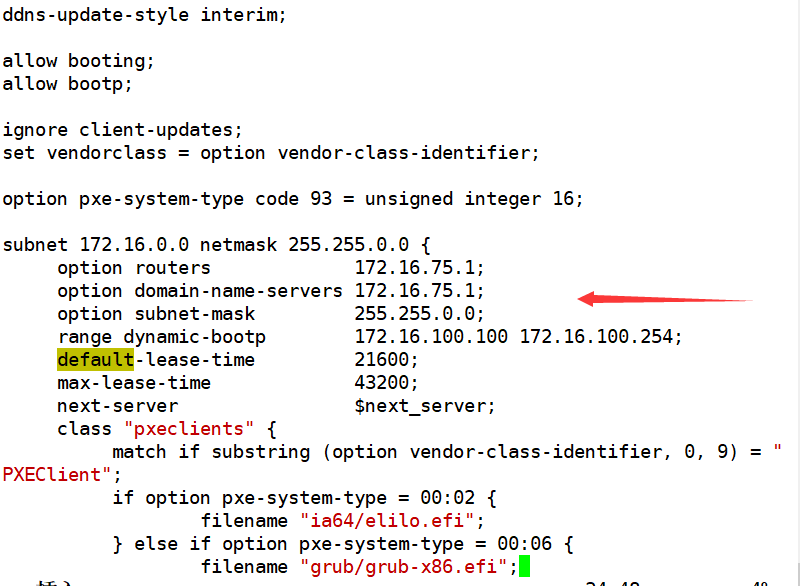
修改上面的內容即可,這些都是幹啥的我在之前的PXE安裝操作系統的時候有解釋;
重啓服務,同步數據:
[root@1 ~]# systemctl restart cobblerd
[root@1 ~]# cobbler sync
[root@1 ~]# cat /etc/dhcp/dhcpd.conf //再次查看,其內部會自動添加如下內容;
**
Cobbler managed dhcpd.conf file
generated from cobbler dhcp.conf template (Sun Jan 6 04:01:36 2019)
Do NOT make changes to /etc/dhcpd.conf. Instead, make your changes
in /etc/cobbler/dhcp.template, as /etc/dhcpd.conf will be
overwritten.
**
ddns-update-style interim;
allow booting;
allow bootp;
ignore client-updates;
set vendorclass = option vendor-class-identifier;
option pxe-system-type code 93 = unsigned integer 16;
subnet 172.16.0.0 netmask 255.255.0.0 {
option routers 172.16.75.1;
option domain-name-servers 172.16.75.1;
option subnet-mask 255.255.0.0;
range dynamic-bootp 172.16.100.100 172.16.100.254;
default-lease-time 21600;
max-lease-time 43200;
next-server 172.16.75.1;
class "pxeclients" {
match if substring (option vendor-class-identifier, 0, 9) = "PXEClient";
if option pxe-system-type = 00:02 {
filename "ia64/elilo.efi";
} else if option pxe-system-type = 00:06 {
filename "grub/grub-x86.efi";
} else if option pxe-system-type = 00:07 {
filename "grub/grub-x86_64.efi";
} else if option pxe-system-type = 00:09 {
filename "grub/grub-x86_64.efi";
} else {
filename "pxelinux.0";
}
}
}
group for Cobbler DHCP tag: default
group {
}
與PXE不同,Cobbler可以自動幫助我們生成系統安裝的yum 源,而不需要我們自己去製作,我們只要指定光盤路徑就好了,並指定kickstart文件路徑(這個文件的製作之前的博客中有說呦):
[root@1 ~]# mkdir /mnt/cdrom
[root@1 ~]# mount -r /dev/sr0 /mnt/cdrom/
[root@1 ~]# cobbler import --name="CentOS-7.5-x86_64" --path=/mnt/cdrom --kickstart=/var/lib/cobbler/kickstarts/centos7-common-ks.cfg --arch=x86_64
task started: 2019-01-06_121449_import
task started (id=Media import, time=Sun Jan 6 12:14:49 2019)
Found a candidate signature: breed=redhat, version=rhel6
Found a candidate signature: breed=redhat, version=rhel7
Found a matching signature: breed=redhat, version=rhel7
Adding distros from path /var/www/cobbler/ks_mirror/CentOS-7.5-x86_64:
creating new distro: CentOS-7.5-x86_64
trying symlink: /var/www/cobbler/ks_mirror/CentOS-7.5-x86_64 -> /var/www/cobbler/links/CentOS-7.5-x86_64
creating new profile: CentOS-7.5-x86_64
associating repos
checking for rsync repo(s)
checking for rhn repo(s)
checking for yum repo(s)
starting descent into /var/www/cobbler/ks_mirror/CentOS-7.5-x86_64 for CentOS-7.5-x86_64
processing repo at : /var/www/cobbler/ks_mirror/CentOS-7.5-x86_64
need to process repo/comps: /var/www/cobbler/ks_mirror/CentOS-7.5-x86_64
looking for /var/www/cobbler/ks_mirror/CentOS-7.5-x86_64/repodata/comps.xml
Keeping repodata as-is :/var/www/cobbler/ks_mirror/CentOS-7.5-x86_64/repodata
TASK COMPLETE
這個過程很慢,等等就好;
好這個Centos7.5的就準備好了,我們在準備一個Centos6.7的:
在我們的虛擬機中把Centos6.7的光盤鏡像掛載上然後再進行操作:
[root@1 ~]# mount -r /dev/sr0 /mnt/cdrom/
[root@1 ~]# cobbler import --name="CentOS-6.7-x86_64" --path=/mnt/cdrom --kickstart=/var/lib/cobbler/kickstarts/centos6-common-ks.cfg --arch=x86_64
task started: 2019-01-06_124948_import
task started (id=Media import, time=Sun Jan 6 12:49:48 2019)
Found a candidate signature: breed=redhat, version=rhel6
Found a matching signature: breed=redhat, version=rhel6
Adding distros from path /var/www/cobbler/ks_mirror/CentOS-6.7-x86_64:
- Warning : Multiple archs found : ['x86_64', 'i386']
creating new distro: CentOS-6.7-x86_64
trying symlink: /var/www/cobbler/ks_mirror/CentOS-6.7-x86_64 -> /var/www/cobbler/links/CentOS-6.7-x86_64
creating new profile: CentOS-6.7-x86_64
creating new distro: CentOS-6.7-i386
trying symlink: /var/www/cobbler/ks_mirror/CentOS-6.7-x86_64 -> /var/www/cobbler/links/CentOS-6.7-i386
creating new profile: CentOS-6.7-i386
associating repos
checking for rsync repo(s)
checking for rhn repo(s)
checking for yum repo(s)
starting descent into /var/www/cobbler/ks_mirror/CentOS-6.7-x86_64 for CentOS-6.7-x86_64
processing repo at : /var/www/cobbler/ks_mirror/CentOS-6.7-x86_64
need to process repo/comps: /var/www/cobbler/ks_mirror/CentOS-6.7-x86_64
looking for /var/www/cobbler/ks_mirror/CentOS-6.7-x86_64/repodata/comps.xml
Keeping repodata as-is :/var/www/cobbler/ks_mirror/CentOS-6.7-x86_64/repodata
starting descent into /var/www/cobbler/ks_mirror/CentOS-6.7-x86_64 for CentOS-6.7-i386
processing repo at : /var/www/cobbler/ks_mirror/CentOS-6.7-x86_64
need to process repo/comps: /var/www/cobbler/ks_mirror/CentOS-6.7-x86_64
looking for /var/www/cobbler/ks_mirror/CentOS-6.7-x86_64/repodata/comps.xml
Keeping repodata as-is :/var/www/cobbler/ks_mirror/CentOS-6.7-x86_64/repodata
TASK COMPLETE
在這呢,你多換幾個光盤分別掛載,並設置就可以完成多個系統選擇了,當我們完成這些操作後可以看到
[root@1 ~]# cat /var/lib/tftpboot/pxelinux.cfg/default
DEFAULT menu
PROMPT 0
MENU TITLE Cobbler | http://cobbler.github.io/
TIMEOUT 200
TOTALTIMEOUT 6000
ONTIMEOUT local
LABEL local
MENU LABEL (local)
MENU DEFAULT
LOCALBOOT -1
LABEL CentOS-6.7-i386
kernel /images/CentOS-6.7-i386/vmlinuz
MENU LABEL CentOS-6.7-i386
append initrd=/images/CentOS-6.7-i386/initrd.img ksdevice=bootif lang= kssendmac text ks=http://172.16.75.1/cblr/svc/op/ks/profile/CentOS-6.7-i386
ipappend 2
LABEL CentOS-6.7-x86_64
kernel /images/CentOS-6.7-x86_64/vmlinuz
MENU LABEL CentOS-6.7-x86_64
append initrd=/images/CentOS-6.7-x86_64/initrd.img ksdevice=bootif lang= kssendmac text ks=http://172.16.75.1/cblr/svc/op/ks/profile/CentOS-6.7-x86_64
ipappend 2
LABEL CentOS-7.5-x86_64
kernel /images/CentOS-7.5-x86_64/vmlinuz
MENU LABEL CentOS-7.5-x86_64
append initrd=/images/CentOS-7.5-x86_64/initrd.img ksdevice=bootif lang= kssendmac text ks=http://172.16.75.1/cblr/svc/op/ks/profile/CentOS-7.5-x86_64
ipappend 2
MENU end
這些自動添加的內容,這時候我們就可以打開一臺沒有安裝操作系統的白鼠機進行測試了: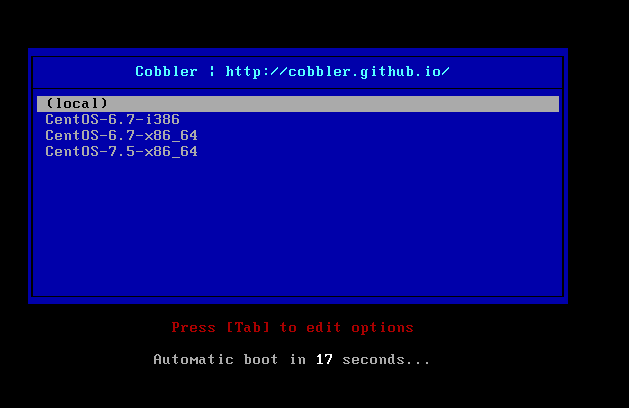
隨便選一個我們想要安裝的系統進行安裝就好了;
這裏我麼選擇CentOS-6.7-i386的進行安裝就好了,因爲CentOS7.5的我裝過了,沒問題喲!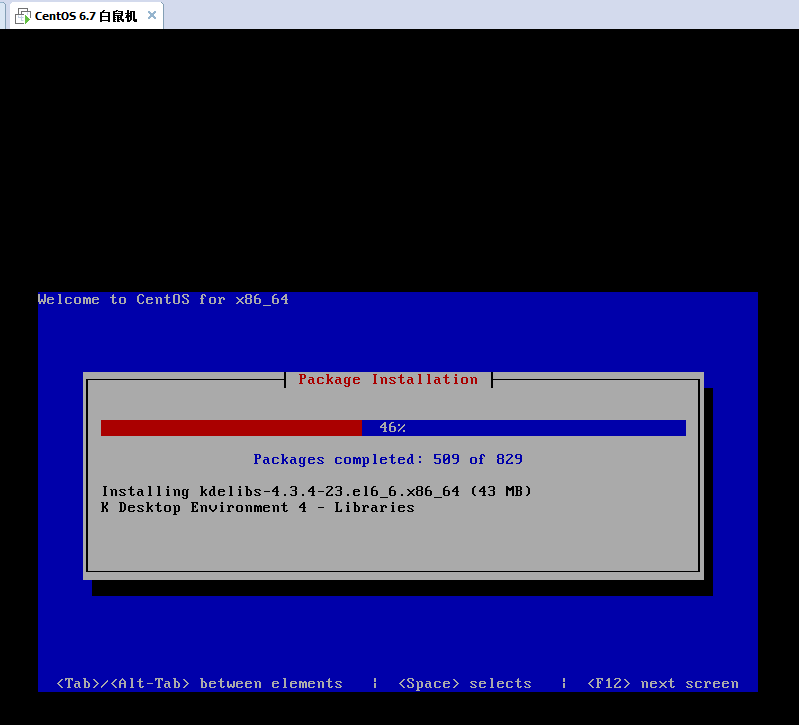
正在安裝,需要等一會,乾點別的啥的就行,因爲到這裏基本上就證明你已經成功了;
當然cobbler還可以在cobbler_web界面中進行管理,有興趣的小夥伴可以瞭解下。
開始讀條了:
讀條完畢,系統安裝好了,登錄進去試試吧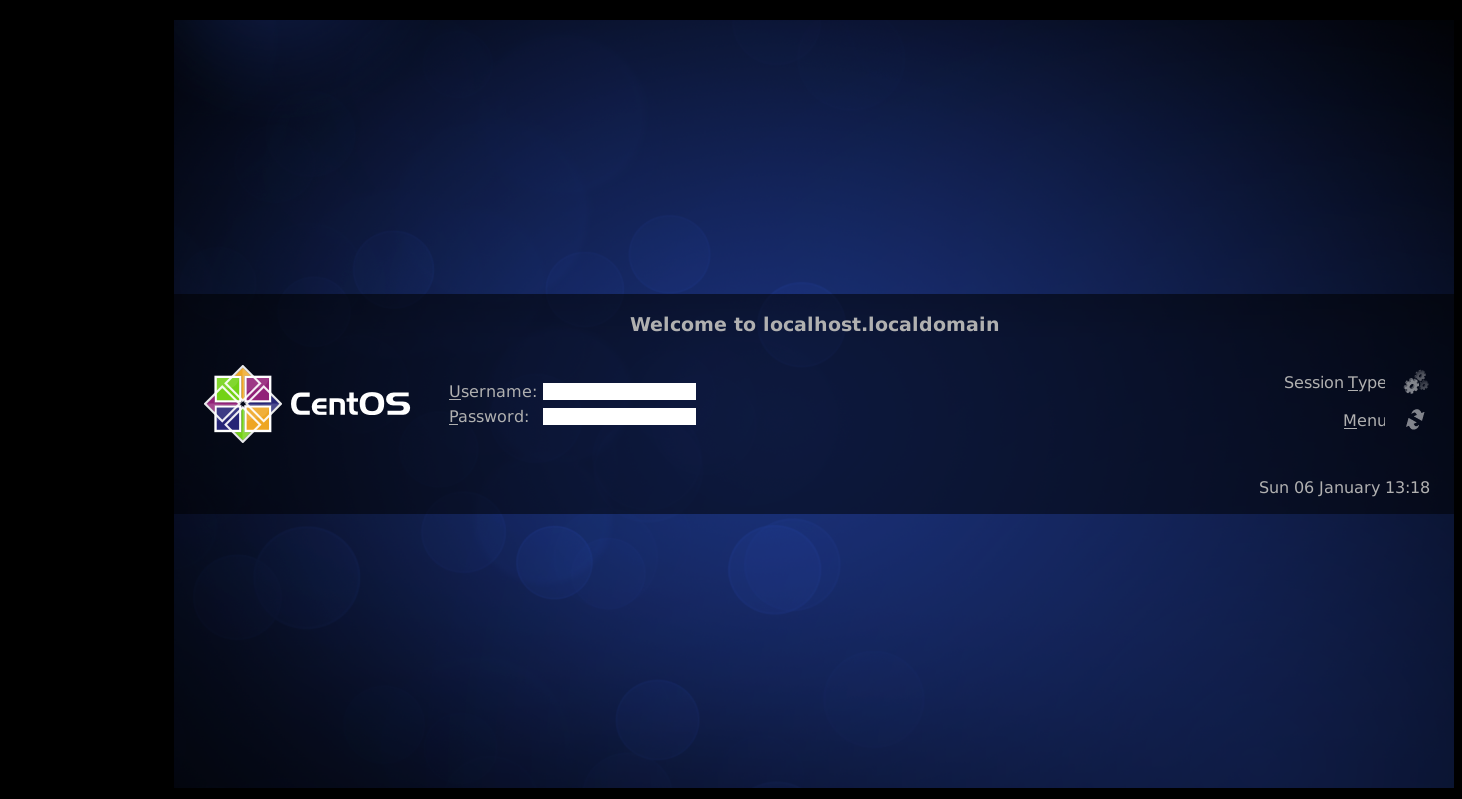
這個username和password在kickstart文件中有寫,我寫的是用戶:root 密碼:123456
登錄:
成功。