1.http服務
- http: Hyper Text Transfer Protocol, 80/tcp
- 常用 http/1.1
1.支持cache, MIME(支持傳送多媒體文件), method
2.POST命令和HEAD命令 頭信息是 ASCII 碼,後面數據可爲任何格式。服務器迴應時會告訴客戶 端,數據是什麼格式,即Content-Type字段的作用。這些數據類型總稱爲 MIME 多用途互聯網郵件擴展,每個值包括一級類型和二級類型,預定義的 類型,也可自定義類型
3.持久連接(persistent connection),即TCP連接默認不 關閉,可以被多個請求複用,不用聲明Connection: keep-alive 。對於同一個域名,大多數瀏覽器允許同時建立6個持久連接
4.管道機制(pipelining),即在同一個TCP連接裏,客戶端 可以同時發送多個請求,進一步改進了HTTP協議的效率
5.支持GET、PUT、PATCH、OPTIONS、DELETE方法- 問題
1.同一個TCP連接裏面,所有的數據通信是按次序進行的。服務器 只能順序處理迴應,前面的迴應慢,會有許多請求排隊,造成" 隊頭堵塞"(Head-of-line blocking)
爲避免上述問題,兩種方法:一是減少請求數,二是同時多開持 久連接。網頁優化技巧,比如合併腳本和樣式表、將圖片嵌入 CSS代碼、域名分片(domain sharding)等
2.HTTP 協議不帶有狀態,每次請求都必須附上所有信息。請求的 很多字段都是重複的,浪費帶寬,影響速度 - http請求基本過程
1、建立連接
2、接收請求
3、處理請求
4、訪問資源
5、構建響應報文 頭部
6、發送響應報文
7、記錄日誌
- 問題
- 方法介紹
GET:從服務器獲取一個資源
HEAD:只從服務器獲取文檔的響應首部
POST:向服務器輸入數據,通常會再由網關程序繼續處理 例如提交用戶密碼或者信息
PUT:將請求的主體部分存儲在服務器中,如上傳文件
DELETE:請求刪除服務器上指定的文檔
TRACE:追蹤請求到達服務器中間經過的代理服務器
OPTIONS:請求服務器返回對指定資源支持使用的請求方法 - 狀態碼介紹
1xx:100-101 信息提示
2xx:200-206 成功
3xx:300-305 重定向
4xx:400-415 錯誤類信息,客戶端錯誤
5xx:500-505 錯誤類信息,服務器端錯誤
200: 成功,請求數據通過響應報文的entity-body部分發送;OK
301: 請求的URL指向的資源已經被刪除;但在響應報文中通過首部 Location指明瞭資源現在所處的新位置;Moved Permanently
302: 響應報文Location指明資源臨時新位置 Moved Temporarily
304:服務器上的資源未曾發生改變,使用本機緩存
401: 需要輸入賬號和密碼認證方能訪問資源;Unauthorized
403: 請求被禁止;Forbidden
404: 服務器無法找到客戶端請求的資源;Not Found
500: 服務器內部錯誤;Internal Server Error
502: 代理服務器從後端服務器收到了一條僞響應,如無法連接到網關;Bad Gateway 無法連接到調度的服務器
503 – 服務不可用,臨時服務器維護或過載,服務器無法處理請求
504 – 網關超時
2.基於httpd實現網站用戶訪問控制
1.安裝httpd服務
2.準備好主頁
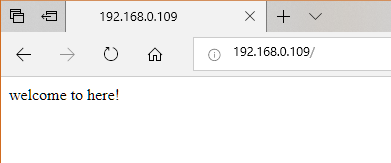
[root@centos7 ~]#echo 'welcome to here!' > /var/www/html/index.html3.啓動服務
[root@centos7 ~]#systemctl start httpd4.測試網頁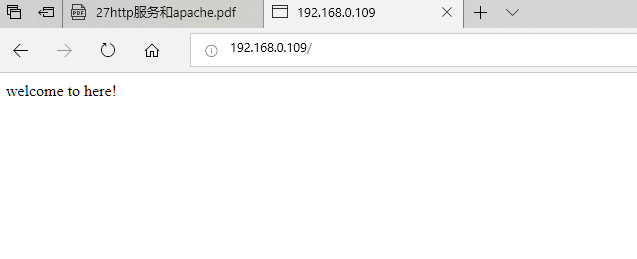
5.利用htpasswd命令生成用戶和密碼,注意文件要能被apache賬號讀取
[root@centos7 conf.d]#htpasswd -c /data/user dcrfan
New password:
Re-type new password:
Adding password for user dcrfan
[root@centos7 conf.d]#htpasswd  /data/user zhang
New password:
Re-type new password:
Adding password for user zhang
[root@centos7 ~]#chown apache /data/user
6.修改httpd配置文件
 <Directory "/var/www/html">
   Options Indexes FollowSymLinks
   AllowOverride None
   AuthType Basic   #加密類型
   AuthName "please input your name"  #提示字符串
   AuthUserFile  "/data/user"            #用戶密碼驗證文件
   Require  user  dcrfan                #允許訪問用戶
 </Directory>

[root@centos7 conf.d]#systemctl  restart httpd
7.測試網頁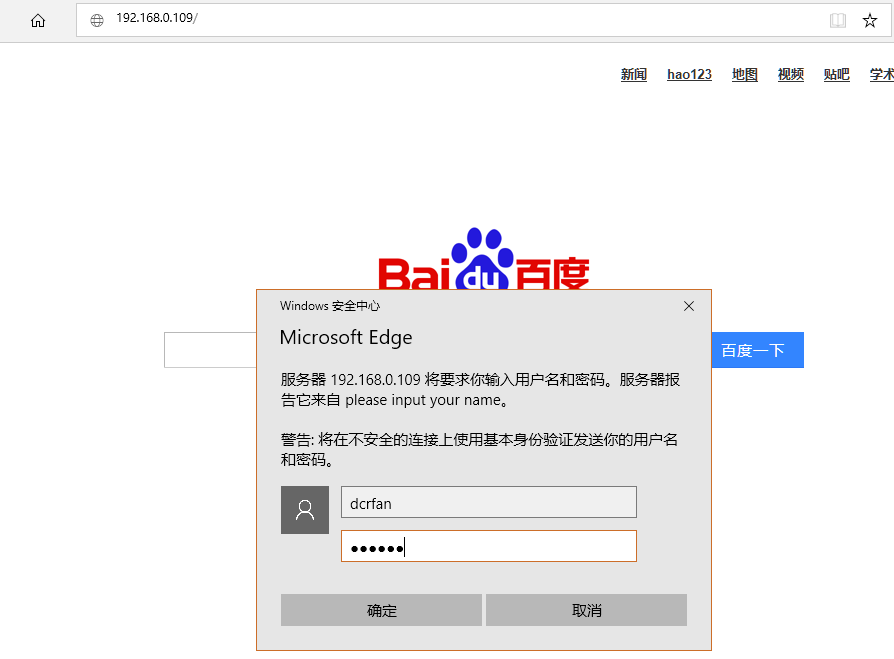
8.其他權限控制選項
Require all granted 允許所有主機訪問:
Require all denied 拒絕所有主機訪問
Require host HOSTNAME:授權特定主機訪問
Require not host HOSTNAME:拒絕 特定主機訪問
Require ip IPADDR:授權指定來源的IP訪問
Require not ip IPADDR:拒絕特定的IP訪問
/不能有失敗,至少有一個成功匹配才成功,即失敗優先
<RequireAll>
Require all granted
Require not ip 172.16.1.1 拒絕特定IP
</RequireAll>
/多個語句有一個成功,則成功,即成功優先
<RequireAny>
Require all denied
require ip 172.16.1.1 允許特定IP
</RequireAny>
3.基於httpd實現網站虛擬主機
建立測試文件主頁
[root@centos7 conf.d]#mkdir /var/www/html/{a,b,c}
[root@centos7 conf.d]#echo "a">/var/www/html/a/index.html
[root@centos7 conf.d]#echo "b">/var/www/html/b/index.html
[root@centos7 conf.d]#echo "c">/var/www/html/c/index.html
1.基於port實現虛擬主機
修改配置文件
[root@centos7 conf.d]#vim port.conf
  listen 808
  listen 8080
   <virtualhost 192.168.0.109:80>
   servername www.a.com
  documentroot "/var/www/html/a"
   </virtualhost>
   <virtualhost 192.168.0.109:808>
 servername www.b.com
  documentroot "/var/www/html/b"
  </virtualhost>
 <virtualhost 192.168.0.109:8080>
 servername www.c.com
  documentroot "/var/www/html/c"
  </virtualhost>
重啓服務並查看端口
[root@centos7 conf.d]#systemctl  restart httpd
    [root@centos7 ~]#ss -ntl
State       Recv-Q Send-Q           Local Address:Port                          Peer Address:Port
LISTEN      0      128                          *:111                                      *:*
LISTEN      0      128                          *:41968                                    *:*
LISTEN      0      5                192.168.122.1:53                                       *:*
LISTEN      0      128                          *:22                                       *:*
LISTEN      0      128                  127.0.0.1:631                                      *:*
LISTEN      0      100                  127.0.0.1:25                                       *:*
LISTEN      0      128                         :::111                                     :::*
LISTEN      0      128                         :::8080                                    :::*
LISTEN      0      128                         :::80                                      :::*
LISTEN      0      128                         :::22                                      :::*
LISTEN      0      128                        ::1:631                                     :::*
LISTEN      0      100                        ::1:25                                      :::*
LISTEN      0      128                         :::53952                                   :::*
LISTEN      0      128                         :::808                                     :::*
測試文件
[root@centos7 ~]#curl 192.168.0.109
a
[root@centos7 ~]#curl 192.168.0.109:808
b
[root@centos7 ~]#curl 192.168.0.109:8080
c
~
2.基於ip實現虛擬主機
修改配置文件
<virtualhost 192.168.0.109:80>
servername www.a.com
documentroot "/var/www/html/a"
</virtualhost>
<virtualhost 192.168.0.110:80>
servername www.b.com
documentroot "/var/www/html/b"
</virtualhost>
<virtualhost 192.168.0.111:80>
servername www.c.com
documentroot "/var/www/html/c"
</virtualhost>
重啓httpd服務
[root@centos7 conf.d]#systemctl restart httpd爲本機臨時添加ip地址
[root@centos7 ~]#ip address add 192.168.0.110/24 dev eth0
[root@centos7 ~]#ip address add 192.168.0.111/24 dev eth0
查看ip
[root@centos7 ~]#ip a
1: lo: <LOOPBACK,UP,LOWER_UP> mtu 65536 qdisc noqueue state UNKNOWN qlen 1
    link/loopback 00:00:00:00:00:00 brd 00:00:00:00:00:00
    inet 127.0.0.1/8 scope host lo
       valid_lft forever preferred_lft forever
    inet6 ::1/128 scope host
       valid_lft forever preferred_lft forever
2: eth0: <BROADCAST,MULTICAST,UP,LOWER_UP> mtu 1500 qdisc pfifo_fast state UP qlen 1000
    link/ether 00:0c:29:53:4d:b3 brd ff:ff:ff:ff:ff:ff
    inet 192.168.0.109/24 brd 192.168.0.255 scope global eth0
       valid_lft forever preferred_lft forever
    inet 192.168.0.110/24 scope global secondary eth0
       valid_lft forever preferred_lft forever
    inet 192.168.0.111/24 scope global secondary eth0
       valid_lft forever preferred_lft forever
    inet6 fe80::47f0:15a7:5a66:13c7/64 scope link
       valid_lft forever preferred_lft forever
測試
 [root@centos7 ~]#curl 192.168.0.109
a
[root@centos7 ~]#curl 192.168.0.110
b
[root@centos7 ~]#curl 192.168.0.111
c
3.基於FQDN實現虛擬主機
修改配置文件並重啓服務
<virtualhost *:80>
servername www.a.com
documentroot "/var/www/html/a"
</virtualhost>
<virtualhost *:80>
servername www.b.com
documentroot "/var/www/html/b"
</virtualhost>
<virtualhost *:80>
servername www.c.com
documentroot "/var/www/html/c"
</virtualhost>
修改測試客戶端host文件,讓其能解析這三個地址
[root@centos7 ~]#cat /etc/hosts
127.0.0.1   localhost localhost.localdomain localhost4 localhost4.localdomain4
::1         localhost localhost.localdomain localhost6 localhost6.localdomain6
192.168.0.109 www.a.com www.b.com www.c.com
測試
[root@centos7 ~]#curl www.a.com
a
[root@centos7 ~]#curl www.b.com
b
[root@centos7 ~]#curl www.c.com
c
注意:一般虛擬機不要與main主機混用;因此,要使用虛擬主機, 一般先禁用main主機
禁用方法:註釋中心主機的DocumentRoot指令即可
還可以定製各自日誌文件
ErrorLog "logs/host.example.com-error_log"
TransferLog "logs/host.example.com-access_log"
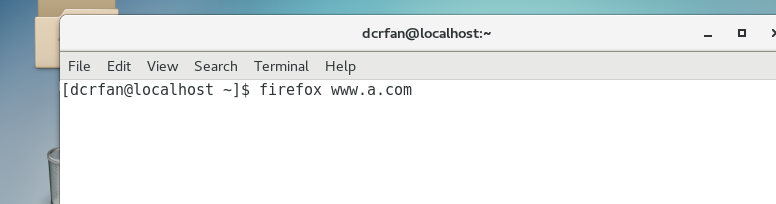
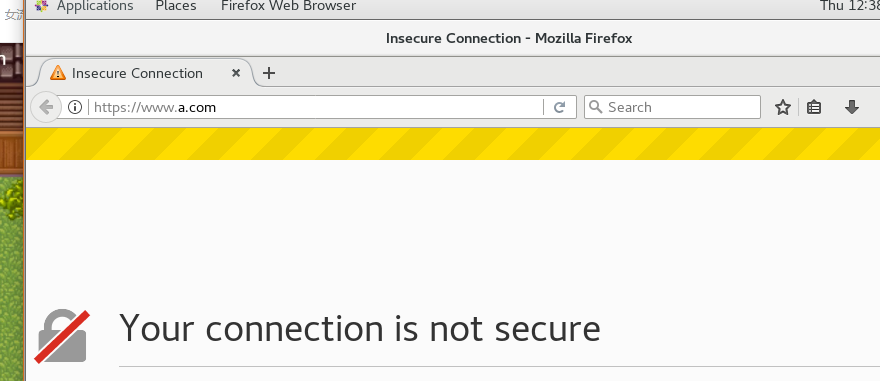
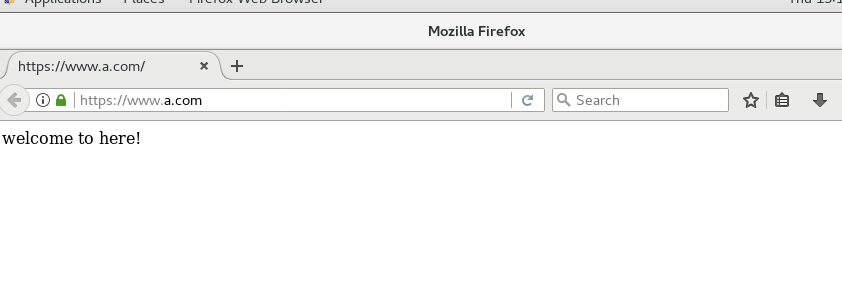
4.基於httpd實現網站https加密
要實現https加密需要搭建CA服務器實現加密通訊,安裝mod_ssl模塊,服務以443端口監聽
1.在192.168.0.112搭建ca
[root@localhost ~]# (umask 066; openssl genrsa -out /etc/pki/CA/private/cakey.pem 2048)
Generating RSA private key, 2048 bit long modulus
.......................................+++
.......+++
e is 65537 (0x10001)
[root@localhost ~]# openssl req -new -x509 -key /etc/pki/CA/private/cakey.pem  -days 7200 -out /etc/pki/CA/cacert.pem
You are about to be asked to enter information that will be incorporated
into your certificate request.
What you are about to enter is what is called a Distinguished Name or a DN.
There are quite a few fields but you can leave some blank
For some fields there will be a default value,
If you enter '.', the field will be left blank.
Country Name (2 letter code) [XX]:cn
State or Province Name (full name) []:gd
Locality Name (eg, city) [Default City]:gz
Organization Name (eg, company) [Default Company Ltd]:dcrfan
Organizational Unit Name (eg, section) []:dcrfan.cn
Common Name (eg, your name or your server's hostname) []:dcrfan
Email Address []:
[root@localhost ~]# echo 01 > /etc/pki/CA/serial
[root@localhost ~]# touch /etc/pki/CA/index.txt
2.在192.168.0.109生成密鑰
root@centos7 ~]# (umask 066; openssl genrsa -out /etc/httpd/httpd.key 2048)
Generating RSA private key, 2048 bit long modulus
.............................................................................................+++
.............................+++
e is 65537 (0x10001)
[root@centos7 ~]# openssl req -new -key /etc/httpd/httpd.key  -out /etc/httpd/httpd.csr
You are about to be asked to enter information that will be incorporated
into your certificate request.
What you are about to enter is what is called a Distinguished Name or a DN.
There are quite a few fields but you can leave some blank
For some fields there will be a default value,
If you enter '.', the field will be left blank.
Country Name (2 letter code) [XX]:cn
State or Province Name (full name) []:gd
Locality Name (eg, city) [Default City]:gz
Organization Name (eg, company) [Default Company Ltd]:dcrfan
Organizational Unit Name (eg, section) []:dcrfan.cn
Common Name (eg, your name or your server's hostname) []:www.a.com #與網站域名一致
Email Address []:
Please enter the following 'extra' attributes
to be sent with your certificate request
A challenge password []:
An optional company name []:
[root@centos7 ~]#scp /etc/httpd/httpd.csr 192.168.0.112:/data/
3.在192.168.0.112簽名證書
[root@localhost ~]# openssl ca -in /data/httpd.csr -out /etc/pki/CA/certs/httpd.crt -days 160
Using configuration from /etc/pki/tls/openssl.cnf
Check that the request matches the signature
Signature ok
Certificate Details:
        Serial Number: 1 (0x1)
        Validity
            Not Before: Feb  7 02:40:31 2019 GMT
            Not After : Jul 17 02:40:31 2019 GMT
        Subject:
            countryName               = cn
            stateOrProvinceName       = gd
            organizationName          = dcrfan
            organizationalUnitName    = dcrfan.cn
            commonName                = www.a.com
        X509v3 extensions:
            X509v3 Basic Constraints:
                CA:FALSE
            Netscape Comment:
                OpenSSL Generated Certificate
            X509v3 Subject Key Identifier:
                48:30:32:22:C2:7F:68:A5:45:C6:99:3B:46:B5:6B:08:7F:94:86:DB
            X509v3 Authority Key Identifier:
               keyid:29:BE:1C:83:B6:3E:49:D0:12:3F:80:A5:64:CB:17:02:8C:43:3B:1A
Certificate is to be certified until Jul 17 02:40:31 2019 GMT (160 days)
Sign the certificate? [y/n]:y
1 out of 1 certificate requests certified, commit? [y/n]y
Write out database with 1 new entries
Data Base Updated
[root@localhost ~]# scp /etc/pki/CA/certs/httpd.crt /etc/pki/CA/cacert.pem  192.168.0.109:/etc/httpd/
4.安裝模塊
[root@centos7 ~]#yum install mod_ssl5.修改httpd配置文件
[root@centos7 ~]#ls /etc/httpd
cacert.pem  conf  conf.d  conf.modules.d  httpd.crt  httpd.csr  httpd.key  logs  modules  run
[root@centos7 ~]#vim /etc/httpd/conf.d/ssl.conf
DocumentRoot "/var/www/html/"
ServerName www.a.com
SSLCertificateFile /etc/httpd/cacert.pem #指定ca證書位置
SSLCertificateKeyFile /etc/httpd/httpd.key #指定自己的私鑰位置
SSLCACertificateFile /etc/httpd/httpd.crt #指定ca簽名的證書位置6.實現HSTS,讓網址自動應用https
vim /etc/httpd/conf/httpd.conf
Header always set Strict-Transport-Security "maxage=31536000"
RewriteEngine on
RewriteRule ^(/.*)$  https://%{HTTP_HOST}$1 [redirect=302]
7.修改測試服務器/etc/hosts
192.168.0.109 www.a.com
8.測試(在瀏覽器添加ca證書)