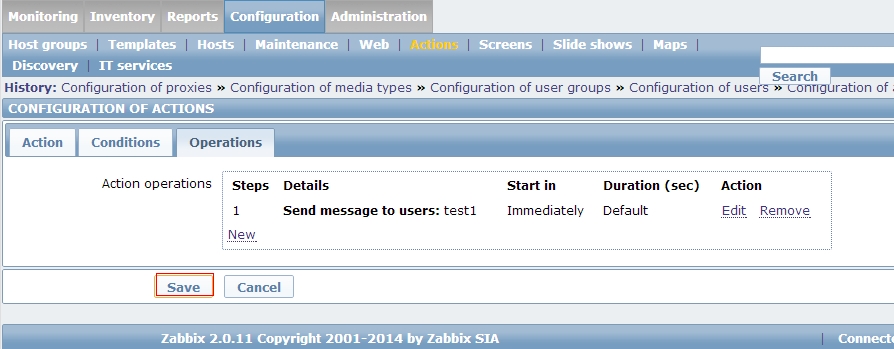
基於web開源軟件。
zabbix會把回去的數據保存到數據庫中,需要依賴數據庫。
可以自動發現主機和網絡設備。
大多可以在web界面配置
1、安裝zabbix
平臺:centos6.4 環境:LAMP 服務端ip:192.168.0.104 客戶端ip:192.168.0.106
安裝rpm包的LAMP
[root@localhost ~]# yum install -y httpd mysql mysql-libs php php-mysql mysql-server php-bcmath php-gd php-mbstring
安裝zabbix軟件
[root@localhost ~]# yum install -y zabbix20 zabbix20-agent zabbix20-server zabbix20-server-mysql zabbix20-web zabbix20-web-mysql net-snmp-devel
啓動zabbix、http、mysql
[root@localhost ~]# /etc/init.d/zabbix-server start; /etc/init.d/zabbix-agent start
Starting Zabbix server:                                    [  OK  ]
Starting Zabbix agent:                                     [  OK  ]
[root@localhost ~]# /etc/init.d/httpd start
Starting httpd: httpd: Could not reliably determine the server's fully qualified domain name, using localhost.localdomain for ServerName
                                                           [  OK  ]
[root@localhost ~]# /etc/init.d/mysqld start
Starting MySQL SUCCESS!
創建zabbix庫
[root@localhost ~]# mysql -uroot -p123456 -e "create database zabbix"
//數據導入zabbix庫
[root@localhost ~]# mysql -uroot -p --default-character-set=utf8 zabbix < /usr/share/zabbix-mysql/schema.sql
Enter password:
[root@localhost ~]# mysql -uroot -p --default-character-set=utf8 zabbix < /usr/share/zabbix-mysql/p_w_picpaths.sql
Enter password:
[root@localhost ~]# mysql -uroot --default-character-set=utf8 -p zabbix < /usr/share/zabbix-mysql/data.sql
Enter password:
2、網頁安裝zabbix
瀏覽器中訪問http://192.168.0.104/zabbix
出現下面的問題,需要修改php配置文件。
根據提示進行修改相應的參數
[root@localhost ~]# vim /etc/php.ini
post_max_size = 16M
max_execution_time = 300
max_input_time = 300
date.timezone = "Asia/Shanghai"
[root@localhost ~]# /etc/init.d/httpd restart
Stopping httpd:                                            [  OK  ]
Starting httpd: httpd: Could not reliably determine the server's fully qualified domain name, using localhost.localdomain for ServerName
                                                           [  OK  ]
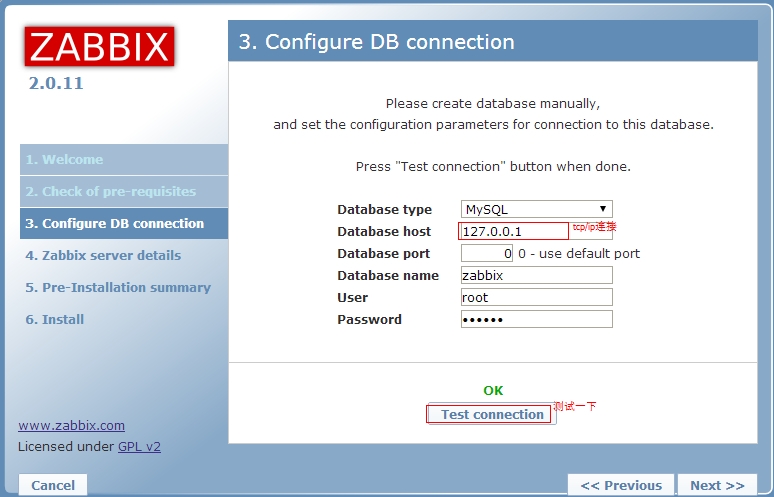
數據庫設置
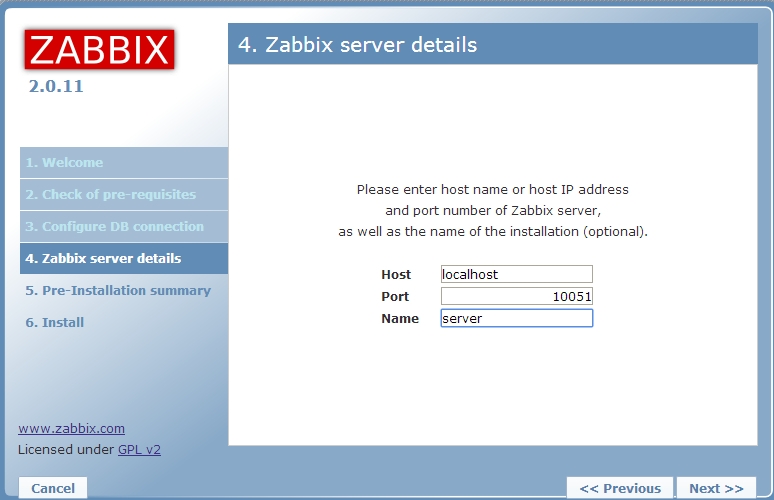
下一步,進入登錄界面
登錄後如果遇到“zabbix server is not running”這樣的錯誤,需要修改/etc/zabbix/zabbix_server.conf文件
[root@localhost ~]# vim /etc/zabbix/zabbix_server.conf
DBHost=127.0.0.1
DBUser=root
DBPassword=123456
[root@localhost ~]# /etc/init.d/zabbix-server restart
Shutting down Zabbix server:                               [  OK  ]
Starting Zabbix server:                                    [  OK  ]
3、加入監控主機
在客戶端上安裝zabbix客戶端
[root@localhost ~]# rpm -ivh http://www.lishiming.net/data/p_w_upload/forum/month_1211/epel-release-6-7.noarch.rpm
[root@client ~]# yum install zabbix20-agent
[root@client ~]#vim /etc/zabbix_agentd.conf
Server=192.168.0.104
ServerActive=192.168.0.104:10050
 Hostname=aming//自定義,但要唯一
[root@client ~]#/etc/init.d/zabbix-agent start
服務端測試
[root@localhost ~]# zabbix_get -s 192.168.0.106 -p 10050 -k "system.hostname"
client
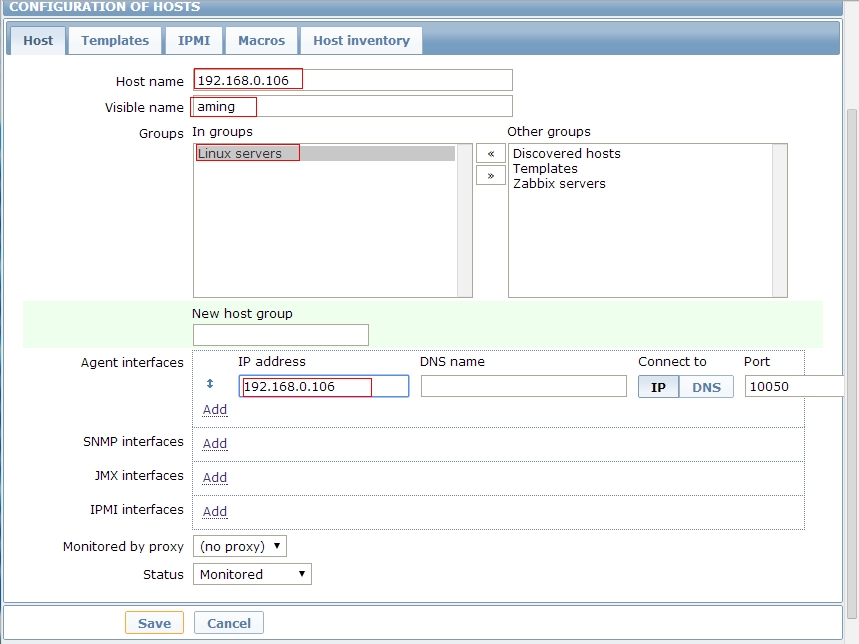
web界面配置
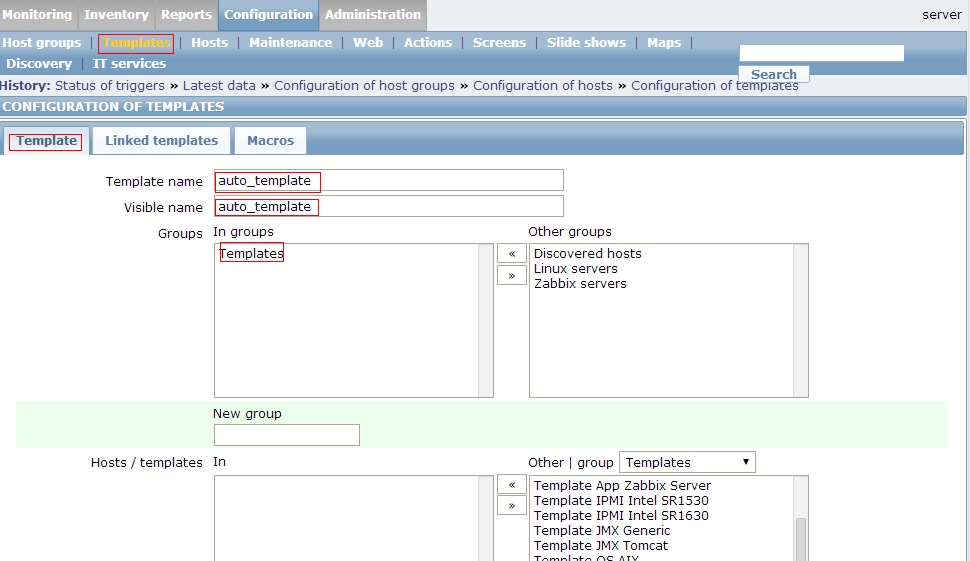
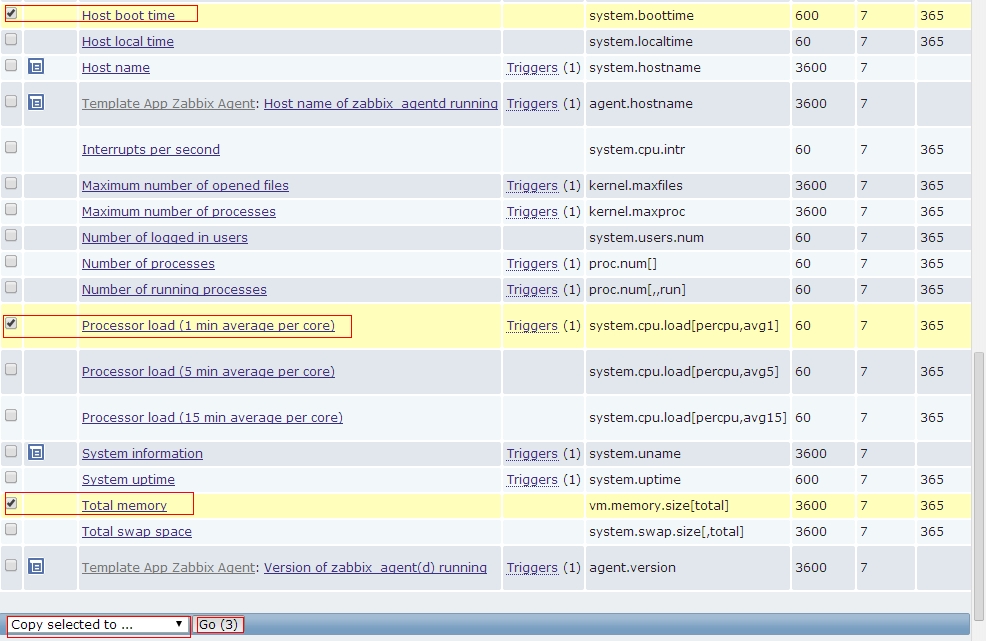
配置模板
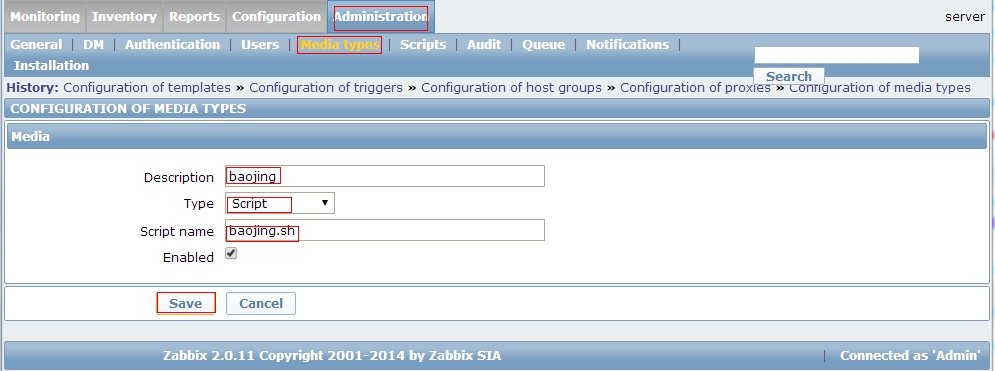
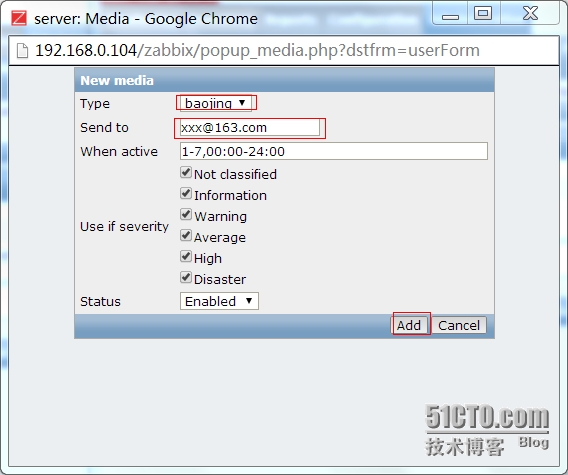
4、自定義模板
//服務端
[root@localhost ~]# yum install -y sendmail ; mkdir -p /home/zabbix/bin
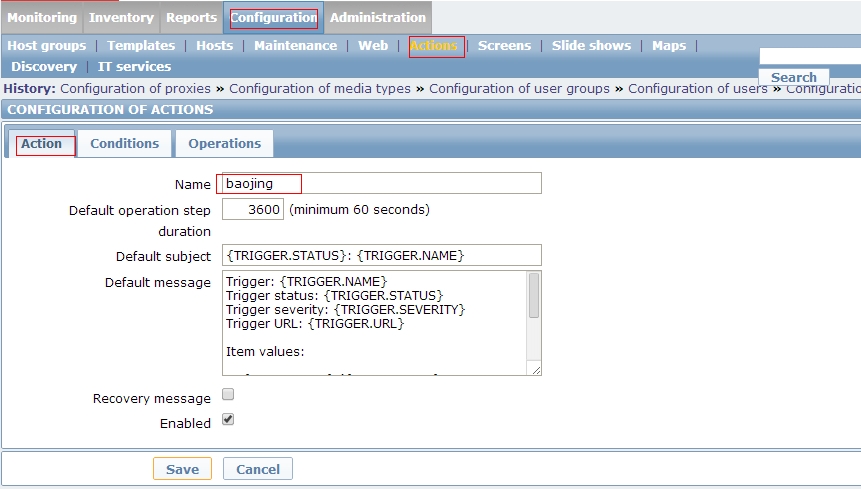
[root@localhost ~]# vim /home/zabbix/bin/baojing.sh
#! /bin/bash
echo "$3" |/bin/mail -s "$2" $1
[root@localhost ~]# chmod +x /home/zabbix/bin/baojing.sh

![]D8$UU)TMH)J4](BCZF_EFD.jpg wKioL1NbBKSzL0wvAAKrRgfOVJU997.jpg](https://s3.51cto.com/wyfs02/M00/25/3B/wKioL1NbBKSzL0wvAAKrRgfOVJU997.jpg)

![4]UMHZ)G]CBTB50PQ[V@)5P.jpg wKiom1NbIgvhyOhEAAOILMl5-tg220.jpg](https://s3.51cto.com/wyfs02/M02/25/3C/wKiom1NbIgvhyOhEAAOILMl5-tg220.jpg)


![0TB@Z}NB[OY~C(`OF[]CB_M.jpg wKioL1NbKn6BgEltAAKWT6_D5bE789.jpg](https://s3.51cto.com/wyfs02/M01/25/3C/wKioL1NbKn6BgEltAAKWT6_D5bE789.jpg)
![ZVX9H1%0HO6X26Z}GQ[]0`O.jpg wKiom1NbMGmhylWAAAHfeeHUxVI533.jpg](https://s3.51cto.com/wyfs02/M02/25/3C/wKiom1NbMGmhylWAAAHfeeHUxVI533.jpg)
![831@]6BM]%6WOT2C$$MLM4L.jpg wKioL1NbMGXzebrrAAL6NMiI45w528.jpg](https://s3.51cto.com/wyfs02/M02/25/3C/wKioL1NbMGXzebrrAAL6NMiI45w528.jpg)
