


OCSNG Client 安裝
下載客戶端
Client (Windows)
URL:http://launchpad.net/ocsinventory-windows-agent/2.0/2.0.4/+download/OCSNG-Windows-Agent-2.0.4.0.zip
Client (Linux/BSD/AIX/Solaris/MacOS X/HPUX)
URL:https://launchpad.net/ocsinventory-unix-agent/stable-2.0/2.0.5/+download/Ocsinventory-Unix-Agent-2.0.5.tar.gz
一、for Windows
1.雙擊OCS-NG-Windows-Agent-Setup.exe
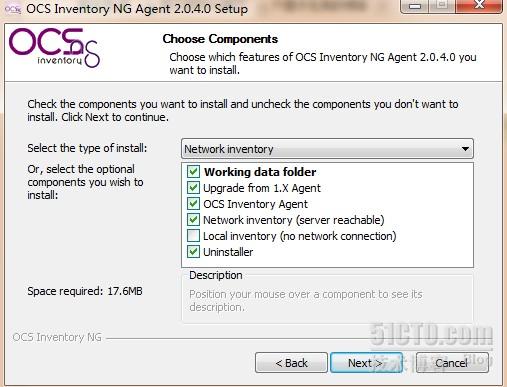
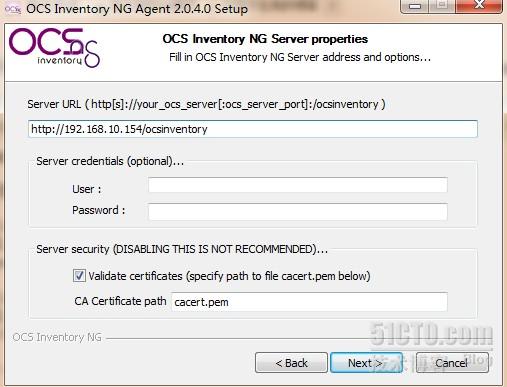
注意:下面的那個/ocsinventory是服務端裏的一個虛擬目錄,不需要進行任何操作,但是必須保留
Enable verbose log:開啓日誌;Never ask for TAK:給安裝這個客戶端的PC添加標籤,便於識別;Immediatly launch inventory(=/NOW):立即向服務端更新


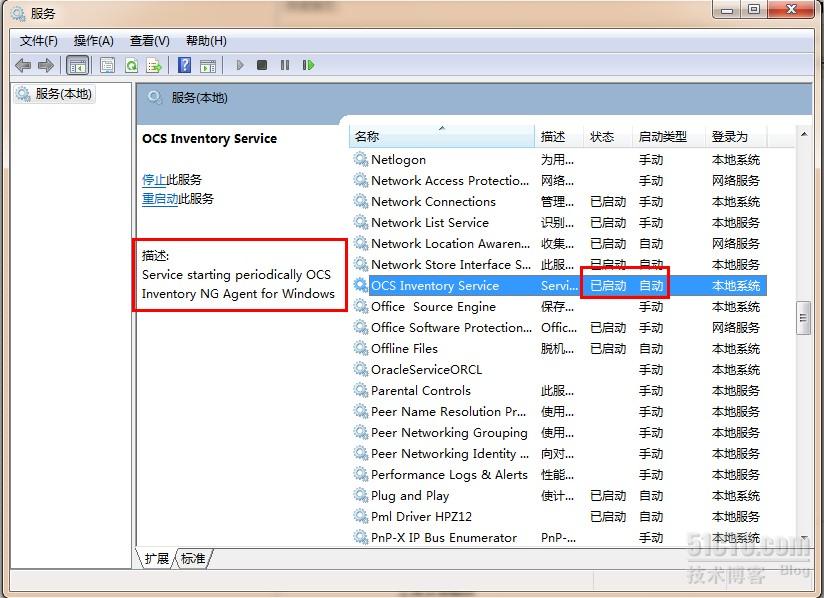
查OCS服務有沒有啓動
運行裏輸入:services.msc
二、for Unix/Linux
- #安裝所需要的模塊
- [root@sh151-xen ~]# yum install -y perl-XML-Simple perl-Compress-Zlib perl-Net-IP perl-Net-SSLeay perl-Crypt-SSLeay perl-XML-SAX perl-XML-LibXML
- #切換到"/data"目錄,並下載Ocsinventory-Unix-Agent (或者之前下載了,上傳過來)
- [root@sh151-xen ~]# cd /data/
- [root@sh151-xen data]# wget https://launchpad.net/ocsinventory-unix-agent/stable-2.0/2.0.5/+download/Ocsinventory-Unix-Agent-2.0.5.tar.gz
- [root@sh151-xen data]# tar -zxvf Ocsinventory-Unix-Agent-2.0.5.tar.gz
- [root@sh151-xen data]# cd Ocsinventory-Unix-Agent-2.0.5
- [root@sh151-xen Ocsinventory-Unix-Agent-2.0.5]# perl Makefile.PL
- [root@sh151-xen Ocsinventory-Unix-Agent-2.0.5]# cp ipdiscover /usr/sbin/ipdiscover
- [root@sh151-xen Ocsinventory-Unix-Agent-2.0.5]# make
- [root@sh151-xen Ocsinventory-Unix-Agent-2.0.5]# make install
- [root@sh151-xen Ocsinventory-Unix-Agent-2.0.5]# ocsinventory-agent -debug #調試,與Server同步