前言 :HAProxy提供高可用性、負載均衡以及基於TCP和HTTP應用的代理,支持虛擬主機,它是免費、快速並且可靠的一種解決方案。而mysql一主多從是比較通用的架構,我們可以利用haproxy在tcp層對數據庫的讀請求進行代理,從而實現多個從庫讀的負載均衡。
目前公司的業務都是一主多從,想要把查詢分到多個從庫上,都是通過開發維護多個從庫的配置來實現,這樣比較麻煩,通過haproxy開發只需要一個配置項,開發不用理會後端有多少從庫,而且可以把多個從庫都利用起來,同時後臺db有故障haproxy可以自動摘除,不需要像原先那樣需要開發改數據庫配置。
一 環境說明:
我這裏都是debian系統
haproxy +mysql_master  192.168.6.123
mysql_slave1  192.168.4.21
mysql_slave2  192.168.9.53
二 haprox安裝
下載,解壓,下載連接 http://down.51cto.com/data/2458810
 make TARGET=linux26 ARCH=x86_64 PREFIX=/home/yx/server/haproxy  # 編譯

make install PREFIX=/home/yx/server/haproxy # 安裝
二 配置文件默認沒有,需要手動創建
global
        log 127.0.0.1 local2
       # chroot /var/lib/haproxy
        pidfile /home/yx/server/haproxy/haproxy.pid
        maxconn 4000
        #user haproxy
        #group haproxy
        daemon
defaults
        mode tcp
        log global
        option httplog
        option dontlognull
        retries 3
        timeout http-request 10s
        timeout queue 1m
        timeout connect 10s
        timeout client 1m
        timeout server 1m
        timeout http-keep-alive 10s
        timeout check 10s
        maxconn 3000
## 定義一個監控頁面,監聽在1080端口,並啓用了驗證機制
listen stats
        mode http
        bind 192.168.6.123:1080
        stats enable
        stats hide-version
        stats uri /haproxyadmin?stats
        stats realm Haproxy\ Statistics
        stats auth admin:admin
        stats admin if TRUE
frontend mysql
        bind *:3306
        mode tcp
        #log global
        option tcplog
        default_backend mysqlservers
backend mysqlservers
        balance leastconn
        server zook-3 192.168.4.21:3306 check port 3306 rise 1 fall 2 maxconn 300
        server zook-2 192.168.9.53:3306 check port 3306 rise 1 fall 2 maxconn 300
配置文件參數介紹
backup:設定爲備用服務器,僅在負載均衡場景中的其它server均不可用於啓用此server;

check:啓動對此server執行健康狀態檢查,其可以藉助於額外的其它參數完成更精細的設定,如:

inter <delay>:設定健康狀態檢查的時間間隔,單位爲毫秒,默認爲2000;也可以使用fastinter和downinter來根據服務器端狀態優化此時間延遲;

rise <count>:設定健康狀態檢查中,某離線的server從離線狀態轉換至正常狀態需要成功檢查的次數;

fall <count>:確認server從正常狀態轉換爲不可用狀態需要檢查的次數;

cookie <value>:爲指定server設定cookie值,此處指定的值將在請求入站時被檢查,第一次爲此值挑選的server將在後續的請求中被選中,其目的在於實現持久連接的功能;

maxconn <maxconn>:指定此服務器接受的最大併發連接數;如果發往此服務器的連接數目高於此處指定的值,其將被放置於請求隊列,以等待其它連接被釋放;
三 啓動
yx@es-2:~/server/haproxy$ sudo ./sbin/haproxy -f etc/haproxy.cfg -c  #檢測配置文件是否正確
 出現 Configuration file is valid  是正常

    sudo ./sbin/haproxy -f etc/haproxy.cfg  啓動服務
    sudo /etc/init.d/haproxy start  # 用腳本啓動

  用ps aux | grep haprox查看
啓動腳本實例
#!/bin/bash
    #
    # haproxy
    #
    # chkconfig: 35 85 15
    # description: HAProxy is a free, very fast and reliable solution \
    # offering high availability, load balancing, and \
    # proxying for TCP and HTTP-based applications
    # processname: haproxy
    # config: /etc/haproxy.cfg
    # pidfile: /var/run/haproxy.pid
    # Source function library.
#    . /etc/rc.d/init.d/functions
. /lib/lsb/init-functions
   # Source networking configuration.
#    . /etc/sysconfig/network
#/run/network
   # Check that networking is up.
    [ "$NETWORKING" = "no" ] && exit 0
    config="/home/yx/server/haproxy/etc/haproxy.cfg" # 根據自己安裝的路徑來寫
    exec="/home/yx/server/haproxy/sbin/haproxy" #根據自己安裝的路徑來寫
    prog=$(basename $exec)
    [ -e /etc/sysconfig/$prog ] && . /etc/sysconfig/$prog
    lockfile=/run/lock/haproxy
    check() {
        $exec -c -V -f $config
    }
    start() {
        $exec -c -q -f $config
        if [ $? -ne 0 ]; then
            echo "Errors in configuration file, check with $prog check."
            return 1
        fi
        echo -n $"Starting $prog: "
        # start it up here, usually something like "daemon $exec"
        start-stop-daemon --quiet --oknodo --start --pidfile /var/run/"$prog.pid"  \
--exec "$exec" -- -f "$config"  -D -p /var/run/"$prog.pid" || return 2
        retval=$?
        echo
        [ $retval -eq 0 ] && touch $lockfile
        return $retval
    }
    stop() {
        echo -n $"Stopping $prog: "
        # stop it here, often "killproc $prog"
        killproc $prog
        retval=$?
        echo
        [ $retval -eq 0 ] && rm -f $lockfile
        return $retval
    }
    restart() {
        $exec -c -q -f $config
        if [ $? -ne 0 ]; then
            echo "Errors in configuration file, check with $prog check."
            return 1
        fi
        stop
        start
    }
    reload() {
        $exec -c -q -f $config
        if [ $? -ne 0 ]; then
            echo "Errors in configuration file, check with $prog check."
            return 1
        fi
        echo -n $"Reloading $prog: "
        $exec -D -f $config -p /var/run/$prog.pid -sf $(cat /var/run/$prog.pid)
        retval=$?
        echo
        return $retval
    }
    force_reload() {
        restart
    }
    fdr_status() {
        status
    }
    case "$1" in
        start|stop|restart|reload)
            $1
            ;;
        force-reload)
            force_reload
            ;;
        checkconfig)
            check
            ;;
        status)
            fdr_status
            ;;
        condrestart|try-restart)
          [ ! -f $lockfile ] || restart
        ;;
        *)
            echo $"Usage: $0 {start|stop|status|checkconfig|restart|try-restart|reload|force-reload}"
            exit 2
    esac
把上面的腳本放到/etc/init.d/目錄下,加上執行權限即可
用腳本啓動的時候如果報下面的錯誤
Proxy 'admin_stats': stats admin will not work correctly in multi-process mode.
[./haproxy.main()] FD limit (16384) too low for maxconn=20000/maxsock=40014. Please raise 'ulimit-n' to 40014 or more to avoid any trouble.

請設置參數ulimit-n 的值等於maxconn的2倍
四 瀏覽器訪問
http://192.168.6.123:1080/haproxyadmin?stats # 後面的路徑跟你配置文件裏面的要一致 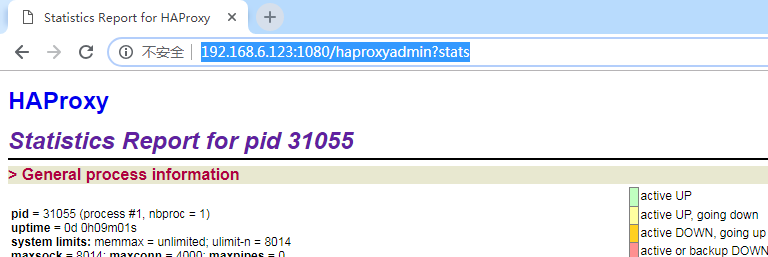
五 開啓haproxy日誌
創建日誌目錄   mkdir -p /home/yx/server/haproxy/log

更改 sudo vim /etc/rsyslog.conf  這個配置文件
 $ModLoad imudp # 把前面的#號去掉
$UDPServerRun 514 # 把前面的#號去掉
local2.* /home/yx/server/haproxy/log/haproxy.log  # 手動添加,local2.* 要跟你haproxy配置文件裏面的一致

 sudo  etc/init.d/rsyslog  restart  # 重啓rsylog服務
六 從數據庫設置
在slave1和slave2上分別給haproxy的ip授權:
> grant all privileges on *.* to [email protected] identified by '123456';
grant all privileges on *.* to 'yx1'@'192.168.6.123' identified by '123456';
> flush privileges;
在6.123上面及haproxy上面,測試能否用新創建的賬戶登錄slave上面的數據庫,如果能正常登錄纔可以
mysql -uyx1 -p123456 -h192.168.4.21 -P3306
用瀏覽器查看,兩個從數據庫也正常了
七 負責均衡測試:
在兩個從上面分別在一個數據庫裏面建立兩個不同的表,我這裏一個只有一個tb1 ,另一個有兩個表分別是tb1,和tb2
#slave1:
create table tb1 (`id` int(4),`name` char(40));
# slave2
create table tb1 (`id` int(4),`name` char(40));
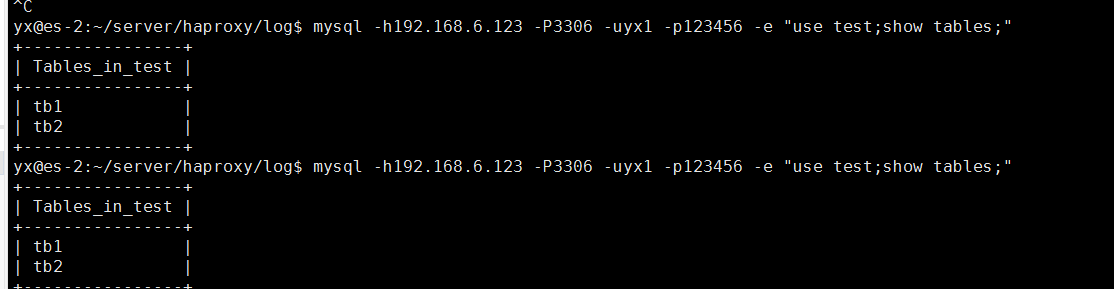
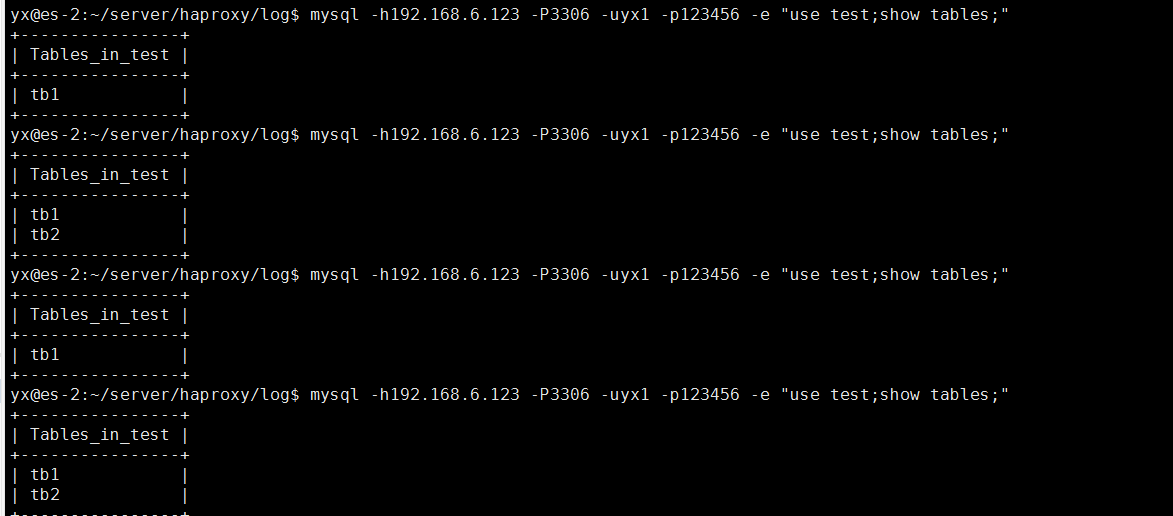
create table tb2 (`id` int(4),`name` char(40));然後用下面的命令在haproxy上面執行,查詢得到的結果
mysql -h192.168.6.123 -P3306 -uyx1 -p123456 -e "use test;show tables;"如下圖所示:
八 failover測試,把其中一個slave服務停掉
查詢日誌顯示
2019-01-10T14:50:10+08:00 localhost haproxy[8445]: Server mysqlservers/zook-3 is DOWN, reason: Layer4 connection problem, info: "Connection refused", check duration: 0ms. 1 active and 0 backup servers left. 0 sessions active, 0 requeued, 0 remaining in queueweb界面顯示,紅色代表故障
查詢返回的結果只顯示其中一個