


Kotlin Coroutines(協程)
發表 2017-08-20
在前面的文章,我們提到了kotlin的基本語法、爲什麼選用kotlin、根據《Effective Java》Kotlin語法層面的優化、kotlin單元測試編寫以及kotlin對包大小影響、kotlin與Java對比運行時性能等,今天我們談談在Kotlin 1.1引入的強大且實用的Coroutines,本文詳細介紹了Coroutines的概念與常見的使用場景。
I. 引入Coroutines
首先,Coroutines是一個單獨的包,如果你是普通Java開發者,建議使用官方的教程進行引入,如果你和我一樣是Android開發者,建議直接使用Anko-Coroutines):
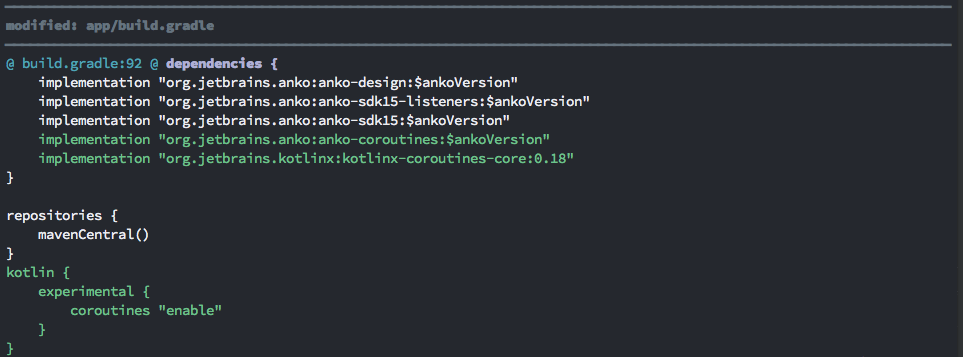
本文所有案例均在kotlin 1.1.4與kotlinx-coroutines-core 0.18版本進行實驗(由於我引入anko時,anko引用的coroutines時0.15版本因此這裏引入0.18版本進行替換(至於爲什麼高版本會自動替換低版本可以參考這篇文章))。
從kotlin 1.3起,coroutine已經進入了1.0並且不再是experimental了,相關引入如下, 我們直接參照kotlinx.coroutines中,進行引入:
implementation "org.jetbrains.kotlinx:kotlinx-coroutines-core:1.0.1"
implementation 'org.jetbrains.kotlinx:kotlinx-coroutines-android:1.0.1'
簡單案例
我們使用kotlin 1.0.1版本做一個簡單的案例,案例中我們在主線程中異步的執行一個耗時操作,然後再在最後彈一個Toast:
首先引入上面提到的kotlinx-coroutines-core與kotlinx-coroutines-android 兩個依賴,然後在MainActivity中:
class MainActivity : AppCompatActivity() {
  override fun onCreate(savedInstanceState: Bundle?){
    super.onCreate(savedInstanceState)
    ...
    GlobalScope.launch(Dispatchers.Main) {
      async(Dispatchers.IO) { delay(5000) }.await()
      Toast.makeText(this@MainActivity, "finish async job but not block main thread", Toast.LENGTH_LONG).show()
    }
  }
}
II. 什麼是Kotlin Coroutines
Coroutines中文名”協程”,簡單來說就是使用suspend來代替線程阻塞,可以理解爲無阻塞的異步編寫方式,基本原理是使用更輕的協程來代替繁重的阻塞操作(爲什麼阻塞是繁重的,可以參考這篇文章),並且複用原本阻塞的線程資源。
綜合C#、Lua等中的Coroutine對於suspend的翻譯,文中爲了便於理解,將suspend的操作(如delay)稱爲”掛起”。kotlin協程的掛起是十分廉價的,相反的線程的阻塞是十分昂貴的。
協程中每個coroutine都是運行在對應的CoroutineContext中的,爲了便於理解,文中將CoroutineContext稱爲”coroutine上下文”。而coroutine上下文可以是爲coroutine提供運行線程的CoroutineDispatcher(如newSingleThreadContext創建的單線程coroutine上下文、CommonPool公共的擁有與CPU覈實相當線程數的線程池等),可以是用於管理coroutine的Job、甚至可以是繼承自Job的可以爲異步任務帶回數返回值的的Deferred等。
Kotlin協程的特徵
我們知道協程的概念並不是kotlin第一個提出的,在此之前已經有很多語言有協程的概念,但是kotlin協程有自己的特徵:
- koltin的協程完全是通過編譯實現的(不愧是IDE公司出的^ ^),沒有修改JVM或者是底層邏輯
- 相比其他語言的協程,kotlin的協程可謂非常的全面,其不僅支持C#和
ECMAScript的async/await、Go的channels與select,還支持C#和Python的build sequence/yield等
本質
本質上,協程是在在用戶態直接對線程進行管理,不同於線程池,協程進一步的管理了不同協程切換的上下文,協程間通訊,協程的掛起,相對於線程而言,協程更輕;在並行邏輯的發展進階過程中,可以理解爲進程->線程->協程。
下圖我根據源碼理解畫的kotlin協程中對掛起的基本實現:


帶來的好處
- 通過協程我們可以很簡單的使用
async來讓原本需要使用異步+回調的編寫方式,可以通過看似同步的編寫方式寫代碼 - 提供多種線程間通信的方式,如
channel,以及延伸出的producer、pipeline等 - 在多協程(原本的線程)管理方面更加靈活,如通過多個協程綁定同一
job進行全局管控 - 減少了所需要的線程數,由於使用協程的概念在用戶態接管線程,完成各協程的調配,通過掛起代替阻塞,有效利用閒置的線程資源。
可能帶來的問題
- 目前kotlin協程還處在試驗期
- 生搬硬套會使得代碼更加複雜
- 在一些場景上使用協程使得反覆利用使用同一個線程,反而多核處理器的優勢無法發揮
需要注意
我們可以通過目前kotlinx.coroutines所在包名(kotlin.coroutines.experimental)獲知目前kotlin協程還是實驗性的,並且根據官方文檔,等到完全設計完成後最終API會移到kotlin.coroutines中,正因爲這個原因,官方建議給基於協程API的包添加experimental後綴(如:cn.dreamtobe.experimental),等到最終發佈後,再遷移到無experimental後綴的包中,並且官方表明會做兼容以最小化遷移成本。
III. 掛起是很輕的操作
我測試瞭如下兩個代碼(不過其實這塊代碼是一個極端情況,並且是體現掛起優勢的代碼):
// 使用協程
println("Coroutines: start")
val jobs = List(100_000) {
    // 創建新的coroutine
    launch(CommonPool) {
        // 掛起當前上下文而非阻塞1000ms
        delay(1000L)
        println("." + Thread.currentThread().name)
    }
}
jobs.forEach { it.join() }
println("Coroutines: end")

println("No Coroutines: start")
// 使用阻塞
val noCoroutinesJobs = List(100_000) {
    // 創建新的線程
    thread {
        // 阻塞
        Thread.sleep(1000L)
        println("." + Thread.currentThread().name)
    }
}
noCoroutinesJobs.forEach { it.join() }
println("No Coroutines: end")
在Nexus6P上:使用協程的大約在8s左右完成所有輸出;而不使用協程的大約2min才完成所有輸出
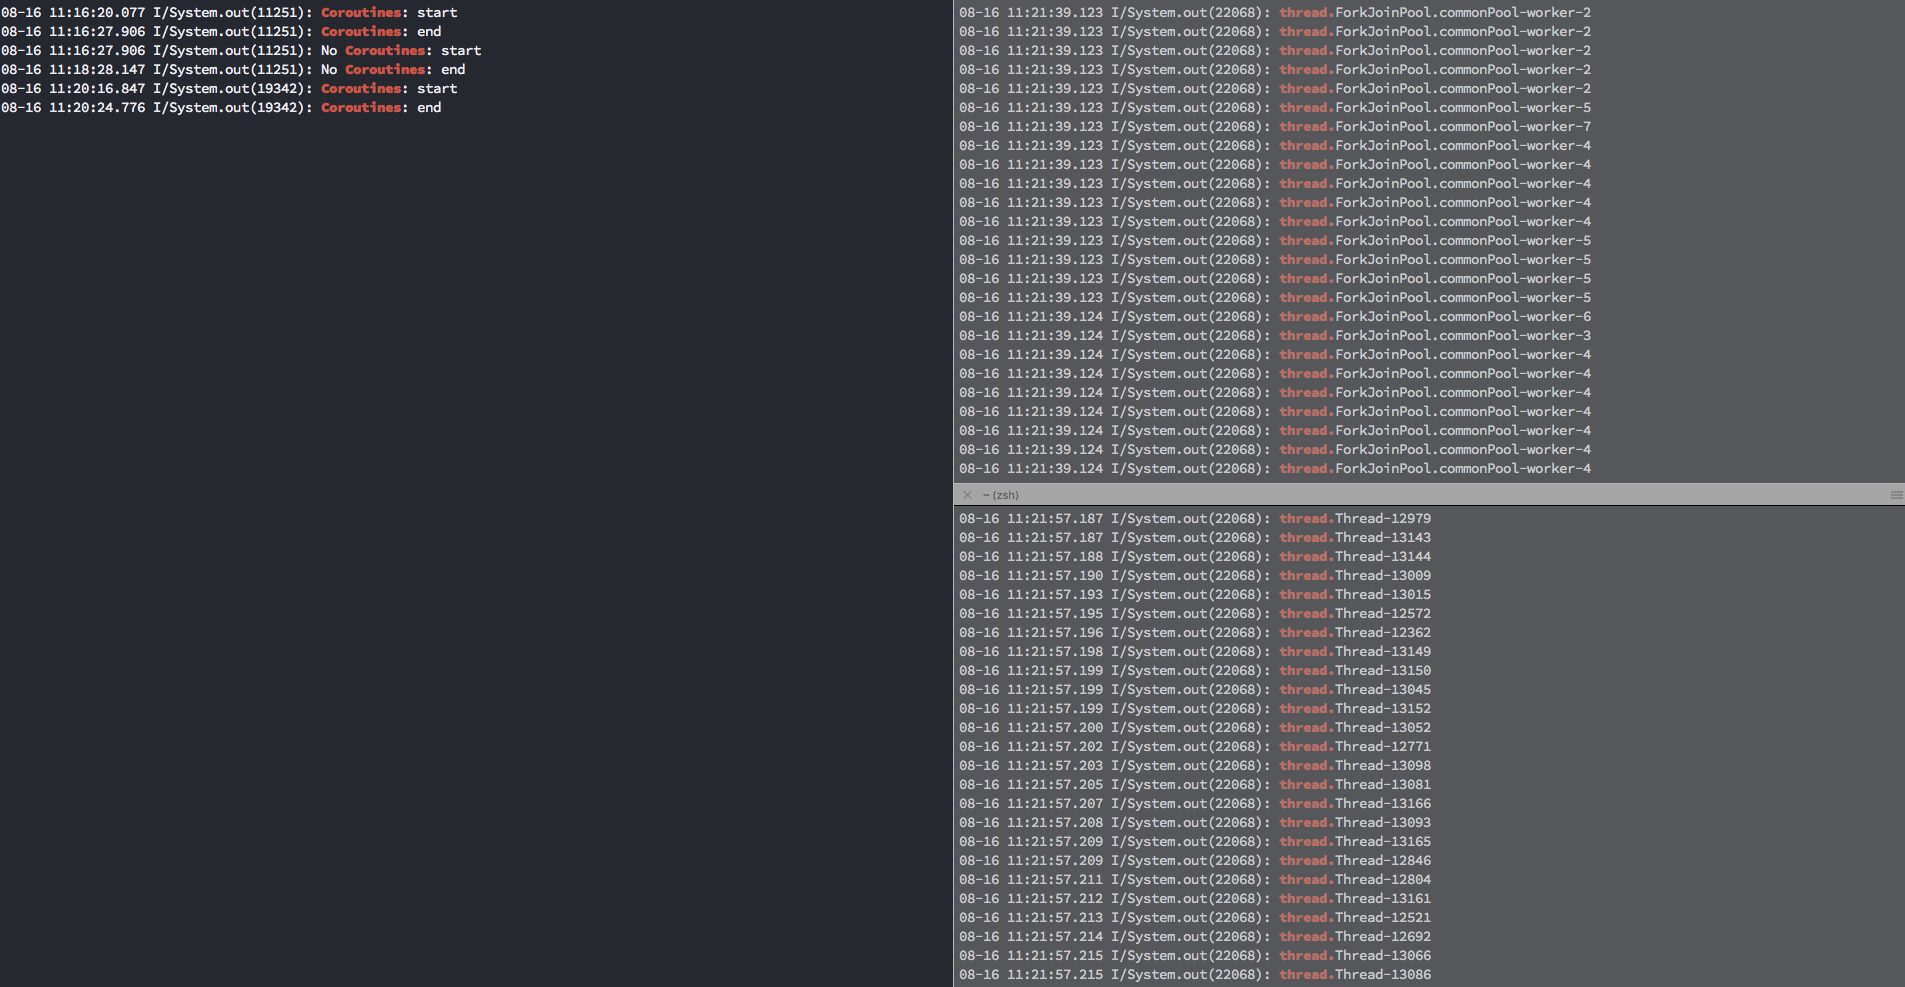
這裏你可能會提出,這裏很大程度是複用了線程?
是的,這就是協程的特性,使用掛起當前上下文替代阻塞,使得可以複用被delay的線程,大量減少了這塊的資源浪費。
而使用阻塞的情況是,不斷創建新的線程然後阻塞,因此哪怕是我們使用線程池,也無法複用其中的任何線程,由於這裏所有的線程都被阻塞了。如果這塊不明白,可以直接使用以下的代碼,讓阻塞的測試用例也跑在一個儘可能提供線程複用的常規線程池中,結果相同大約2min才完成所有輸出:
val noCoroutinesPool: ExecutorService = Executors.newCachedThreadPool()
println("No Coroutines: start")
// 使用阻塞
val noCoroutinesJobs = List(100_000) {
    Executors.callable {
        Thread.sleep(1000L)
        println("thread." + Thread.currentThread().name)
    }
}

noCoroutinesPool.invokeAll(noCoroutinesJobs)
println("No Coroutines: end")
IV. 如何使用協程
run(CoroutineContext) { ... }: 創建一個運行在CoroutineContext制定線程中的區塊,效果是運行在CoroutineContext線程中並且掛起父coroutine上下文直到區塊執行完畢runBlocking(CoroutineContext) { ... }: 創建一個coroutine並且阻塞當前線程直到區塊執行完畢,這個一般是用於橋接一般的阻塞試編程方式到coroutine編程方式的,不應該在已經是coroutine的地方使用launch(CoroutineContext) { ... }: 創建運行在CoroutineContext中的coroutine,返回的Job支持取消、啓動等操作,不會掛起父coroutine上下文;可以在非coroutine中調用suspend fun methodName() { ... }: 申明一個suspend方法,suspend方法中能夠調用如delay這些coroutine特有的非阻塞方法;需要注意的是suspend方法只能在coroutine中執行async(CoroutineContext) { ... }: 創建運行在CoroutineContext中的coroutine,並且帶回返回值(返回的是Deferred,我們可以通過await等方式獲得返回值)
1. fun methodName(...) = runBlocking<Unit> { ... }
申明methodName方法是頂層主協程方法。一般是用於橋接一般的阻塞試編程方式到coroutine編程方式的,不應該在已經是coroutine的地方使用。
fun main(args: Array<String>) = runBlocking<Unit> {
    val job = launch(CommonPool) {
        // 掛起1000ms
        delay(1000L)
    }
    // 接口含義同Thread.join只是這裏是`suspension`
    job.join()
}

// 編譯失敗案例
fun noRunBlocking(args: Array<String>) {
    val job = launch(CommonPool) {
        delay(1000L)
    }
    // 這裏會報Suspend function 'join' should be called only from a coroutine or another suspend function
    job.join()
}
2. 在Coroutine中異步執行suspend方法
我們可以通過async在不同的Dispather提供的線程中運行以後,帶回返回值,如下:
fun main(args: Array<String>) = runBlocking<Unit> {
    // 計算總共需要執行多久,measureTimeMillis是kotlin標準庫中所提供的方法
    val time = measureTimeMillis {
        val one = async(CommonPool) { doOne() } // 這裏將doOne拋到CommonPool中的線程執行,並在結束時將結果帶回來。
        val two = async(CommonPool) { doTwo() } // 這裏將doTwo拋到CommonPool中的線程執行,並在結束時將結果帶回來。
        println("The answer is ${one.await() + two.await()}") // 這裏會輸出6
    }
    println("${time}ms") // 由於doOne與doTwo在異步執行,因此這裏輸出大概是700ms
}

suspend fun doOne() : Int {
    delay(500L)
    return 1
}
suspend fun doTwo() : Int {
    delay(700L)
    return 5
}
如果你希望在有使用到async結果返回值的時候再執行裏面的內容(有點類似lazy),只需要在構建async的時候傳入CoroutineStart.LAZY作爲start就可以了,比如:
val one = async(CommonPool, CoroutineStart.LAZY) { doOne() } // 這裏將doOne將不會立馬執行
println("${one.await()"} // 此時將會掛起當前上下文等待doOne執行完成,然後輸出返回值
可以使用fun asyncXXX() = async(CommonPool) { ... } 申明一個異步的suspending方法,與launch(CommonPool)相同可以在非coroutine的區域調用。
fun asyncDoOne() = async(CommonPool) { // 創建在CommonPool這個線程池中的coroutine,並且會帶回doOne的結果。
    doOne()
}

fun main(args: Array<String>) { // 普通方法
    val one = asyncDoOne()
    println("${one.await()}") // 輸出doOne結果
}
3. 爲Coroutine指定不同的線程(Dispaters)
在協程中包含了很多CoroutineDispatcher,這些Dispaters決定了Coroutine運行所在線程。比如:
Unconfined: 執行coroutine是在調用者的線程,但是當在coroutine中第一個掛起之後,後面所在的線程將完全取決於調用掛起方法的線程(如delay一般是由kotlinx.coroutines.DefaultExecutor中的線程調用)CoroutineScope#coroutineContext(舊版本這個變量名爲context): 執行coroutine始終都是在coroutineContext所在線程(coroutineContext就是CoroutineScope的成員變量,因此就是CoroutineScope實例所在coroutine的線程),CommonPool: 執行coroutine始終都是在CommonPool(ForkJoinPool)線程池提供的線程中;使用CommonPool這個context可以有效使用CPU多核,CommonPool中的線程個數與CPU核數一樣。newSingleThreadContext: 執行coroutine始終都是在創建的單線程中newFixedThreadPoolContext: 執行的coroutine始終都是在創建的fixed線程池中
如以下案例:
// 我們在主線程調用了main方法
fun main(args: Array<String>) = runBlocking<Unit> {
    val jobs = arrayListOf<Job>()
    jobs += launch(Unconfined) {
        println("      'Unconfined': I'm working in thread ${Thread.currentThread().name}") // 這裏將在主線程訪問
        delay(500)
        println("      'Unconfined': After delay in thread ${Thread.currentThread().name}") // 這裏將在DefaultExecutor中被訪問
    }
    jobs += launch(coroutineContext) { // 父coroutine的coroutineContext, runBlocking的coroutine,因此始終在主線程
        println("'coroutineContext': I'm working in thread ${Thread.currentThread().name}")
        delay(1000)
        println("'coroutineContext': After delay in thread ${Thread.currentThread().name}")
    }
    jobs.forEach { it.join() }
}
輸出(我們可以很清晰的看到,使用coroutineContext的始終運行在主線程,而Unconfined的在掛起後在delay的調用線程DefaultExecutor執行):
      'Unconfined': I'm working in thread main
'coroutineContext': I'm working in thread main
      'Unconfined': After delay in thread kotlinx.coroutines.DefaultExecutor
'coroutineContext': After delay in thread main
在不同線程間跳躍
// 創建一個方法在輸出前輸出當前線程名
fun log(msg: String) = println("[${Thread.currentThread().name}] $msg")

val ctx1 = newSingleThreadContext("Ctx1")
val ctx2 = newSingleThreadContext("Ctx2")
runBlocking(ctx1) {
    log("Started in ctx1")
    delay(1000L)
    run(ctx2) {
        log("Working in ctx2")
        delay(1000L)
    }
    log("Back to ctx1")
}
輸出:
[Ctx1] Started in ctx1
[Ctx2] Working in ctx2
[Ctx1] Back to ctx1
run方法使得運行在父coroutine,但是是在Ctx2線程中執行區塊,以此實現線程跳躍。
4. 對於Job的取消操作
我們知道launch返回回來的是一個Job用於控制其coroutine,並且我們也可以通過coroutineContext[Job]在在CoroutineScope中獲取當前Job對象。
而對於Job的取消操作可以理解爲類似線程中的Thread.interrupt(),我們可以通過Job#cancel對job進行取消。
需要特別注意的是默認的delay等都可以被取消的(delay對CancellationException默認的處理方式就是直接中斷所有操作達到被取消的目的),但是如果我們自己做一些邏輯操作,或者是select等沒有做取消檢查,取消是無效的,最簡單的方法是檢查CoroutineScope#isActive,在coroutine中都可以對其進行訪問。 如:
fun main(args: Array<String>) = runBlocking<Unit> {
    val job = launch(CommonPool) {
        ...
        while (isActive) { // 檢查是否需要結束當前自旋
            ...
        }
    }
    ...
    job.cancel() // 暫停該job
    ...
}
對父coroutine進行取消,除了取消了coroutine本身,還會影響使用其CoroutineScope#context的子job,但是不會影響使用其他CoroutineContext的job,如:
// 創建一個運行在CommonPool線程池中的Coroutine
val request = launch(CommonPool) {
        // 創建一個運行在CommonPool線程池中的coroutine
        val job1 = launch(CommonPool) {
            println("job1: I have my own context and execute independently!")
            delay(1000)
            println("job1: I am not affected by cancellation of the request")
        }
        // 創建一個運行在父CoroutineContext上的coroutine
        val job2 = launch(coroutineContext) {
            println("job2: I am a child of the request coroutine")
            delay(1000)
            println("job2: I will not execute this line if my parent request is cancelled")
        }
        // 讓當前coroutine只有在job1與job2完成之前都掛起
        job1.join()
        job2.join()
    }

delay(500)
request.cancel() // 取消
delay(1000) // delay a second to see what happens
println("main: Who has survived request cancellation?")
輸出(其中沒有使用父coroutineContext的job1不受父coroutine取消的影響):
job1: I have my own context and execute independently!
job2: I am a child of the request coroutine
job1: I am not affected by cancellation of the request
main: Who has survived request cancellation?
4.1 對於Job取消以後的處理
比如對delay之類的suspending期間,被取消了,我們應該如何捕捉到進行相關處理呢,這塊可以直接使用try{ ... } finally { ... }進行捕捉處理。
但是需要注意的是,一般來說對於已經取消的Job是無法進行suspending操作的,換句話說,你在上面提到的finnaly { ... }再做suspending相關操作會收到CancellationException的異常。
不過如果非常特殊的情景,需要在已經取消的Job中進行suspending操作,也是有辦法的,那就是放到run(NonCancellable) { ... }中執行,如:
fun main(args: Array<String>) = runBlocking<Unit> {
    val job = launch(CommonPool) {
        try {
            repeat(1000) { i ->
                ...
            }
        } finally {
            run(NonCancellable) {
                ...// 在已經取消的Job中
                delay(1000L) // 由於是在 run(NonCancellable) { ... }因此依然可以做suspending操作
            }
        }
    }
    ...
    job.cancel() // 取消當前job
    ...
}
5. 多個CoroutineContext進行+操作
這塊具體可以參看CoroutineContext#plus操作實現。
coroutine中支持多個CoroutineContext進行+操作,使得一個coroutine擁有多個CoroutineContext的特性。
5.1 CoroutineContext + CoroutineDispatcher
如果使用+將CoroutineContext與CoroutineDispatcher相加,那麼當前Coroutine將運行在CoroutineDispatcher分配的線程中,但是生命週期受CoroutineContext影響,如:
val request = launch(ctx1) {
    val job = launch(coroutineCotext + CommonPool) {
        // 當前Coroutine運行在CommonPool線程池中,但是如果ctx1被cancel了,當前Coroutine也會被cancel.
        delay(1000L)
    }
}

request.cancel() // job也會被cancel了。
5.2 CoroutineDispatcher + CoroutineName
當然也可以使用+將CoroutineDispatcher與CoroutineName相加,那麼便可以給當前Coroutine命名。
5.3 CoroutineContext + Job
我們可以使用+將CoroutineContext與Job對象相加,使得Job對象可以直接管理其coroutine,如:
val job = Job() // 創建一個Job對象
val coroutines = List(10) {
    launch(coroutineContext + job) { // 將運行的CoroutineContext與job相加,使得job對象可以直接控制創建的coroutine
        ...
    }
}
job.cancel() // 會cancel所有與其相加的coroutine
一個比較常見的常見,我們可以爲Activity創建一個job,所有需要綁定Activity生命週期的coroutine都加上這個job,在Activity銷燬的時候,直接使用這個job.cancel將所有coroutine取消。
6. 對Coroutine進行超時設計
可以在協程方法內,通過withTimeout或者withTimeoutOrNull創建一個一段時間還沒有完成便會自動被取消的Coroutine。
其中withTimeout在超時的時候,會拋出繼承自CancellationException的TimeoutException,如果超時是被允許的,你可以通過實現try { ... } catch ( e: CancellationException ) { ... }在其中做超時之後的操作(比如釋放之類的),或者是直接使用withTimeoutOrNull。
7. 線程安全
通常我們在多個線程同時共享同一個數據的時候,是存在線程安全問題的,如:
// counter 的初始值
var counter = 0

fun main(args: Array<String>) = runBlocking<Unit> {
    // 在CommonPool線程池中執行coutner自增
    massiveRun(CommonPool) {
        // 每次我們都自增一次coutiner
        counter++
    }
    println("Counter = $counter")
}

suspend fun massiveRun(context: CoroutineContext, action: suspend () -> Unit) {
    val n = 1000 // launch的個數
    val k = 1000 // 每個coroutine中執行action的次數
    val time = measureTimeMillis {
        val jobs = List(n) {
            launch(context) {
                repeat(k) { action() }
            }
        }
        jobs.forEach { it.join() }
    }
    println("Completed ${n * k} actions in $time ms")
}
上面的案例我們在CommonPool線程池中對counter並行執行了100萬次的自增,理論上coutiner最終值應該是1000000,但是由於多線程同時訪問,使得該最終值不符合預期:
completed 1000000 actions in 1308 ms
Counter = 680574
7.1 加上volatile
假如我們給coutiner加上volatile呢?
@Volatile
var counter = 0
我們會發現 依然無法保證 這裏的線程安全問題,由於volatile變量只能保證對該變量線性的一個讀寫操作(這塊的具體原理可以參考Java Synchronized機制這篇文章)進行保證,這裏的案例大量的原子操作是volatile無法保證的:
completed 1000000 actions in 1440 ms
Counter = 676243
7.2 使用同步
private val lock = Any()
fun main(args: Array<String>) = runBlocking {
    massiveRun(CommonPool) {
        synchronized(lock) {
            counter++
        }
    }
    ...
}
使用synchronized或是ReentrantLock顯然是可以的,雖然操作很小,但是由於高併發的一個線程加鎖,使得運行效率極低,全程消耗了11.687s:
completed 1000000 actions in 11687 ms
Counter = 1000000
7.3 使用Mutex進行掛起
val mutex = Mutex()
var counter = 0

fun main(args: Array<String>) = runBlocking<Unit> {
    massiveRun(CommonPool) {
        mutex.lock()
        try { counter++ }
        finally { mutex.unlock() }
    }
    ...
}
類似於Java的ReentrantLock,Mutex不同的是不是採用阻塞,而是採用Coroutine的掛起代替阻塞,在一些場景下是非常實用的,不過在這裏並沒有想象中那麼好,甚至比synchronized阻塞還差很多(48.894s),由於每一個操作都是很小的顆粒度,導致掛起線程資源很難有被利用的場景:
completed 1000000 actions in 48894 ms
Counter = 1000000
7.4 使用線程安全數據結構
private val counter = AtomicInteger()
fun main(args: Array<String>) = runBlocking {
    massiveRun(CommonPool) {
        counter.incrementAndGet()
    }
    ...
}
其實這個案例的 最佳方案 便是使用支持原子操作incrementAndGet的AtomicInteger來代替線程鎖達到線程安全,我們發現保證了線程安全並且只需要需要1.568s左右便完成了通過線程鎖需要11.687s的工作(相差了7倍之多!):
completed 1000000 actions in 1568 ms
Counter = 1000000
7.5 使用線程約束這邊的併發顆粒度
// 創建一個單線程
val counterContext = newSingleThreadContext("CounterContext")
var counter = 0

fun main(args: Array<String>) = runBlocking<Unit> {
    massiveRun(CommonPool) { // 依然是在CommonPool運行每一個Action
        run(counterContext) { // 但是在單線程中運行遞增操作
            counter++
        }
    }
    ...
}
這裏我們使用一個單線程的context來約束這個自增操作,這個方案也是可以的,但是 並不可取 ,原因是每一個自增都需要從CommonPool的上下文切換到單線程的上下文,這是累計起來是非常開銷的操作,雖然最終的答案符合預期,但是總耗時達到了22.853s之多:
completed 1000000 actions in 22853 ms
Counter = 1000000
7.6 線程合併
val counterContext = newSingleThreadContext("CounterContext")
var counter = 0

fun main(args: Array<String>) = runBlocking<Unit> {
    massiveRun(counterContext) { // 讓每一個Action在單線程的Context中運行
        counter++
    }
    ...
}
這個其實是一個權衡方案,類似這個案例,本身Action中的所有操作就是存在線程安全的需求,那麼考慮不要使用多線程,直接改爲單線程操作,結果中規中矩:
completed 1000000 actions in 3113 ms
Counter = 1000000
7.7 使用Actor
sealed class CounterMsg // 這裏我們剛好使用sealed class來定義,定義一個CounterMsg
object IncCounter : CounterMsg() // 定義一個用於自增的類型
class GetCounter(val response: CompletableDeferred<Int>) : CounterMsg() // 定義一個用戶獲取結果的類型(這裏我們使用CompletableDeferred用於帶回結果)

// 這個方法啓動一個新的Counter Actor
fun counterActor() = actor<CounterMsg>(CommonPool) {
    var counter = 0
    for (msg in channel) { // 不斷接收channel中的數據,這個channel是ActorScope的變量
        when (msg) {
            is IncCounter -> counter++ // 如果是IncCounter類型,我們就自增
            is GetCounter -> msg.response.complete(counter) // 如果是GetCounter類型,我們就帶回結果
        }
    }
}

fun main(args: Array<String>) = runBlocking<Unit> {
    val counter = counterActor() // 創建一個Actor
    massiveRun(CommonPool) {
        counter.send(IncCounter) // action發送自增類型,使得不斷執行action不斷的觸發自增
    }
    // 創建一個CompletableDeferred用於帶回結果
    val response = CompletableDeferred<Int>()
    counter.send(GetCounter(response)) // 發送GetCounter類型帶回結果
    println("Counter = ${response.await()}") // 輸出結果
    counter.close() // 關閉actor
}
Actor是一個coroutine的結合,所有的參數可以定義與封裝在這個coroutine中,並且通過channel與其他coroutine進行通信,由於Actor本身就是一個coroutine的結合,因此無論Actor運行在哪個CoroutineContext下面,Actor本身都是運行在自己的courtine中並且這是一個順序執行的coroutine,因此我們可以用它來做線程安全的一些操作,因此在這個案例中這個是可行的,並且由於它始終都運行在同一個coroutine中不需要進行context切換,因此性能比前面提到的Mutex更好。
completed 1000000 actions in 14192 ms
Counter = 1000000
當然對於Actor的使用,這個案例中我們簡單的通過編寫方法來生成一個Actor,但是複雜的情況最好是封裝爲一個類。
8. 通信
8.1 Channels
協程中可以通過Channel進行通道模式的在不同coroutine中傳遞數據,可以發送、接收、關閉等操作,並且對於接收者來說Channel是公平的,也就是先receive的會優先收到send的推送,其餘的掛主住等待,而Channel又分有緩衝區的與無緩衝區的。
8.1.1 公平的Channel
對於接收者來說Channel是公平的,也就是先receive的會優先收到send的推送,下面是一個很經典的打乒乓球的例子:
// 申明一個球的類
data class Ball(var hits: Int)

fun main(args: Array<String>) = runBlocking<Unit> {
    val table = Channel<Ball>() // 創建一個channel作爲桌子
    launch(coroutineContext) { player("ping", table) } // 選手一,先接球中
    launch(coroutineContext) { player("pong", table) } // 選手二,也開始接球
    table.send(Ball(0)) // 開球,發出第一個球
    delay(1000) // 打一秒鐘
    table.receive() // 接球,終止在player中的循環發球
}

suspend fun player(name: String, table: Channel<Ball>) {
    for (ball in table) { // 不斷接球
        ball.hits++
        println("$name $ball")
        delay(300) // 等待300ms
        table.send(ball) // 發球
    }
}
輸出:
ping Ball(hits=1)
pong Ball(hits=2)
ping Ball(hits=3)
pong Ball(hits=4)
ping Ball(hits=5)
這個案例利用了公平的Channel機制:
| receive隊列 | 發送觸發者 |
|---|---|
| 選手一 | 桌子 |
| 選手二 | 選手一 |
| 選手一 | 選手二 |
| 選手二 | 選手一 |
| … | … |
| 桌子 | 選手x |
8.1.2 無緩衝區Channel
如果send先執行,會掛起直到有地方receive,如果receive先執行會先掛起直到有地方send,如:
fun main(args: Array<String>) = runBlocking<Unit> {
    // 創建發送Int值的無緩存Channel。
    val channel = Channel<Int>()
    launch(CommonPool) {
        // 通過channel發送,將會掛起直到當前值有人接收或者當前Coroutine被cancel
        for (x in 1..5) channel.send(x * x)
        // 不一定需要關閉,但是使用關閉可以結束當前channel
        channel.close()
    }
    // 接收3個值
    repeat(3) { println(channel.receive()) }
    // 不斷接收剩餘的信息
    for (y in channel) println(y)

    println("Done!")
}
8.1.3 有緩衝區Channel
如果receive先執行並且緩衝區中沒有任何數據會先掛起,如果send先執行了,會一直send直到緩衝區滿了才掛起(類似BlockingQueue),如:
fun main(args: Array<String>) = runBlocking<Unit> {
    // 創建緩衝區大小爲4的Channel
    val channel = Channel<Int>(4)
    launch(coroutineContext) {
        repeat(10) {
            // 輸出正在發送的Int
            println("Sending $it")
            // 將會執行send直到緩衝區滿
            channel.send(it)
        }
    }
    // 這裏我們不進行接收,只是等待,來驗證最多可以緩衝多少個
    delay(1000)
}
輸出(緩衝了4個,並且嘗試發第5個):
Sending 0
Sending 1
Sending 2
Sending 3
Sending 4
8.2 Producer
生產消費者模式,可以創建生產者,以及進行消費調用,如:
// 創建一個生產者方法
fun produceSquares() = produce<Int>(CommonPool) {
    for (x in 1..5) send(x * x)
}

fun main(args: Array<String>) = runBlocking<Unit> {
    // 得到生產者
    val squares = produceSquares()
    // 對生產者生產的每一個結果進行消費
    squares.consumeEach { println(it) }
}
8.3 Pipeline
管道模式,可以先創造一個生產者,然後對生產結果進行加工,最後對加工結果進行消費調用,如:
// 創建一個生產者,返回的是一個ProducerJob
fun produceNumbers() = produce<Int>(CommonPool) {
    var x = 1
    while (true) send(x++) // infinite stream of integers starting from 1
}
// 創建一個用於加工生產者的生產者(ProducerJob是繼承自ReceiveChannel)
fun square(numbers: ReceiveChannel<Int>) = produce<Int>(CommonPool) {
    for (x in numbers) send(x * x)
}

fun main(args: Array<String>) = runBlocking<Unit> {
    val numbers = produceNumbers() // 生產者
    val squares = square(numbers) // 加工
    for (i in 1..5) println(squares.receive()) // 消費前5個結果

    squares.cancel() // cancel加工的coroutine(一般來說是不用主動cancel的,因爲協程就好像一個常駐線程,掛起也會被其他任務使用閒置資源,不過大型應用推薦cancel不使用的coroutine)
    numbers.cancel() // cancel生產者的coroutine
}
下面是利用pipeline計算前6位素數的案例:
// 創建一個生產者,這裏是無限輸出遞增整數的生產者,並且使用外界傳入的context,與初始值
fun numbersFrom(context: CoroutineContext, start: Int) = produce<Int>(context) {
    var x = start
    while (true) send(x++)
}

// 創建方法對生產結果進行加工,這裏是計算除數不爲零,我們都知道素數是大於1的自然數中除了1和本身無法被其他自然數整除
fun filter(context: CoroutineContext, numbers: ReceiveChannel<Int>, prime: Int) = produce<Int>(context) {
    for (x in numbers) if(x % prime != 0) send(x * x)
}

fun main(args: Array<String>) = runBlocking<Unit> {
    // 創建一個從2開始的自增的生產者
    var cur = numbersfrom(context, 2)
    for (i in 1..6) {
        // 取得當前素數
        val prime = cur.receive()
        // 輸出
        println(prime)
        // 添加一層過濾
        cur = filter(context, cur, prime)
    }}
整個計算素數的過程是一直在增加過濾器,抽象的流程如下:
// numbersFrom(2) -> filter(2)
// 2                    3%2 != 0 send 3
//                              -> filter(3)
// 3                    4%2 == 0, 5%2 != 0; 5%3 != 0; send 5
//                                          -> filter(5)
// 5                    6%2 == 0, 7%2 != 0; 7%3 != 0; 7%5 != 0; send 7
//                                                      -> filter(7)
// 7                    8%2 == 0, 9%2 != 0; 9%3 == 0;
//                      10%2 == 0, 11%2 != 0; 11%3 != 0; 11%5 != 0; 11%7 != 0; send 11
//                                                                  -> filter(11)
// 11                   12%2 == 0, 13%2 != 0; 13%3 != 0; 13%5 != 0; 13%7 != 0; 13%11 != 0; send 13
// 13
上面都是pipeline的一些案例,實際使用過程中,我們通常會用於一些異步的事務處理等。
9. Select
Select可以從多個正在掛起的suspension方法中選擇最先結束掛起的。
9.1 對channel消息的接收進行選擇其一
我們可以使用select來同時接收多個channel,並且每次只選擇第一個到達的channel:
// 每300ms發送一個channel1
fun channel1(context: CoroutineContext) = produce<String>(context) {
    while (true) {
        delay(300)
        send("channel1")
    }
}

// 每100ms發送一個channel2
fun channel2(context: CoroutineContext) = produce<String>(context) {
    while (true) {
        delay(100)
        send("channel2")
    }
}

// 每次選擇先到達的一個
suspend fun selectFirstChannel(channel1: ReceiveChannel<String>, channel2: ReceiveChannel<String>) {
    select<Unit> { // 這裏的<Unit>說明這個select沒有產生任何返回值
        channel1.onReceive { value ->
            println(value)
        }
        channel2.onReceive { value ->
            println(value)
        }
    }
}

fun main(args: Array<String>)  = runBlocking {
    val channel1 = channel1(coroutineContext)
    val channel2 = channel2(coroutineContext)
    repeat(5) {
        selectFirstChannel(channel1, channel2)
    }
}
輸出:
channel2
channel2
channel1
channel2
channel2
可以看到結果是符合預期的,由於receive操作本身如果沒有數據到達就會掛起等待,因此通過這種方式,我們可以有效每次只選擇先到達的一個,而無需每次都等待所有的channel被send。
上面的案例當channel被close的時候,select會拋異常,我們可以通過onReceiveOrNull讓channel被close時,立馬接收到null的值來取代拋異常:
suspend fun selectAorB(a: ReceiveChannel<String>, b: ReceiveChannel<String>): String =
    select<String> {
        a.onReceiveOrNull { value ->
            if (value == null)
                "Channel 'a' is closed"
            else
                "a -> '$value'"
        }
        b.onReceiveOrNull { value ->
            if (value == null)
                "Channel 'b' is closed"
            else
                "b -> '$value'"
        }
    }

fun main(args: Array<String>) = runBlocking {
    val a = produce<String>(coroutineContext) {
        repeat(4) { send("Hello $it") }
    }
    val b = produce<String>(coroutineContext) {
        repeat(4) { send("World $it") }
    }
    repeat(8) { // print first eight results
        println(selectAorB(a, b))
    }
}
輸出:
a -> 'Hello 0'
a -> 'Hello 1'
b -> 'World 0'
a -> 'Hello 2'
a -> 'Hello 3'
b -> 'World 1'
Channel 'a' is closed
Channel 'a' is closed
從中可以看到兩條結論:
- 當同時有消息過來的時候,優先處理在
select區塊中上面的onReceive - 當判斷到channl已經close時,會裏面返回
null而不會繼續進行下一個onReceive處理,如案例中輸出了兩個Channel 'a' is closed,就是第7次與第8次循環時判讀到a.onReceiveOrNull發現a已經close了,因此哪怕b還有消息可以接收也立即在a.onReceiveOrNull中立即返回了null而不繼續b的接收處理
下面的案例在同一個select中通過onReceiveOrNull與在onAwait中的receiveOrNull來對async返回的Deferred進行選擇:
// 創建一個選擇Deferred的生產者
fun switchMapDeferreds(input: ReceiveChannel<Deferred<String>>) = produce<String>(CommonPool) {
    var current = input.receive() // 從獲取第一個Deferred開始
    while (isActive) { // 循環直到被關閉或者被取消
        val next = select<Deferred<String>?> { // 選擇下一個Deferred<String>如果已經關閉便返回null
            input.onReceiveOrNull { update ->
                update // 如果input中有新的Deferred(這個案例中是通過async返回的Deferred)發送過來便更新爲當前的Deferred
            }
            // 如果在Deferred已經執行完成還沒有新的Deferred過來,便會進行下面的操作
            current.onAwait { value ->
                send(value) // 發送這個Deferred攜帶的值給當前channel
                input.receiveOrNull() // 等待並且從input中接收下一個Deferred,作爲返回值
            }
        }
        if (next == null) {
            println("Channel was closed")
            break // 結束循環
        } else {
            current = next
        }
    }
}

// 創建一個async的方法,其返回的是一個Deferred
fun asyncString(str: String, time: Long) = async(CommonPool) {
    delay(time)
    str
}

fun main(args: Array<String>) = runBlocking<Unit> {
    val chan = Channel<Deferred<String>>() // 創建一個傳遞Deferred<String>的channel
    launch(coroutineContext) { // 啓動一個coroutine用於輸出每次的選擇結果
        for (s in switchMapDeferreds(chan))
            println(s)
    }
    chan.send(asyncString("BEGIN", 100))
    delay(200) // 掛起200ms,讓在switchMapDeferreds中有足夠的時間讓BEGIN這個Deferred完成掛起與異步操作
    chan.send(asyncString("Slow", 500))
    delay(100) // 掛起100ms,讓在switchMapDeferreds中沒有足夠時間讓Slow這個Defferred完成掛起與異步操作
    chan.send(asyncString("Replace", 100)) // 在上面掛起 100ms毫秒以後,立馬發送這個Replace的
    delay(500) // 掛起500ms 讓上面的async有足夠時間
    chan.send(asyncString("END", 500))
    delay(1000) // 掛起500ms 讓上面的async有足夠時間
    chan.close() // 關閉channel
    delay(500) // 延緩500ms讓switchMapDeferreds有足夠的時間輸出'Channel was closed'
}
輸出:
BEGIN
Replace
END
Channel was closed
9.2 對channel消息的發送進行選擇其一
我們可以使用select來同時管理多個channel的發送,並且每次只選擇第一個有人在接收的channel:
fun produceNumbers(side: SendChannel<Int>) = produce<Int>(CommonPool) {
    for (num in 1..10) { // 產生從1到10 10個數字
        delay(100) // 每100ms選擇一個發送
        select<Unit> {
            // 哪個channel先有人接收,哪個將會被髮送出去,另一個會被丟棄
            onSend(num) {} // 發送給當前channel
            side.onSend(num) {} // 或者發送給side channel
        }
    }
}

fun main(args: Array<String>) = runBlocking<Unit> {
    val side = Channel<Int>() // 創建一個side channel,用於發送Int數據
    launch(coroutineContext) { // 創建一個快速接收side數據的消費者coroutine
        side.consumeEach { println("Side channel has $it") }
    }
    // 主channel每250ms接收一個數據
    produceNumbers(side).consumeEach {
        println("Consuming $it")
        delay(250)
    }
    println("Done consuming")
}
輸出:
Consuming 1
Side channel has 2
Side channel has 3
Consuming 4
Side channel has 5
Side channel has 6
Consuming 7
Side channel has 8
Side channel has 9
Consuming 10
Done consuming
總的來說,Kotlin的協程可以應用的場景非常的寬泛,也非常的實用,從對線程阻塞這塊資源利用的出發點,衍生出各種各樣的實用場景,如果能夠靈活使用,將能編寫出更優質,更高效的代碼,本文只是通過Kotlinx.coroutines的教程進行了解讀,更多的細節需要通過實踐來挖掘,歡迎大家多實踐,多拍磚。
爲了方便理解筆者準備了一個App
| 掃碼下載 | 示例圖 |
 |
 |