


linux網絡安裝
pxe安裝首先需要機器可以支持(pxe),(boot)
對此需要安裝server, ftp,yum,dhcp,tftp等服務器;
首先掛在光盤: mount /dev/cdrom /mnt/cdrom/
進到 cd /mnt/cdrom/Server目錄下
再次之前可以查看一下vsftp包安裝了沒有,如沒有安裝在進行安裝,如下說明沒有安裝
[root@server Server]# rpm -qa |grep vsftp
[root@server Server]#
安裝 vsftp包: rpm –ivh vsftp*
[root@server Server]# rpm -ivh vsftp*
warning: vsftpd-2.0.5-12.el5.i386.rpm: Header V3 DSA signature: NOKEY, key ID 37017186
Preparing... ########################################### [100%]
1:vsftpd ########################################### [100%]
如此說明已經安裝,
[root@server ~]# mount /dev/cdrom /mnt/cdrom/
[root@server ~]# cd /mnt/cdrom/Server
[root@server Server]# rpm -qa |grep vsftp
[root@server Server]# rpm -ivh vsftp*
ftp(安裝用的源文件) 首先在ftp下建一個庫用來存放源文件
ftp在var目錄下所以進到 [root@server ~]# cd /var/ftp
在這個目錄下有一個pub目錄 進到這個目錄下
把/mnt/cdrom下的文件全部拷到該目錄下
[root@server pub]# cp /mnt/cdrom/. ./
做yum服務器
在/etc/yum.repos.d/有一個文件rhel-debuginfo.repo 把它裏面的內容拷到server.repo裏
[root@server yum.repos.d]# cp rhel-debuginfo.repo server.repo
然後對server.repo進行編輯[root@server yum.repos.d]# vim server.repo
在未編輯之前如下圖:

對這六行進行復制,向下進行三次粘貼
然後進行修改,修改後如下圖:

如果是網絡安裝只需把file:///mnt/cdrom改爲ftp://192.168.100.27/pub就可以
完成後測試ftp可用不可用,如下圖:

如上圖說明可以用。
Tftp服務器
在裝之前先搜索一下看tftp包安裝了沒有,
[root@server ~]# yum list |grep tftp
Failed to set locale, defaulting to C
This system is not registered with RHN.
RHN support will be disabled.
tftp-server.i386 0.42-3.1 installed
tftp.i386 0.42-3.1 rhel-Server
這個說明我的已經安裝,如果沒有安裝,執行下列命令;
[root@server ~]#yum install tftp* 如果提示y/n選y
之後開始編寫文件tftp腳本tftp是在/etc/xinetd.d/下如:
[root@server ~]# vi /etc/xinetd.d/tftp
# default: off
# description: The tftp server serves files using the trivial file transfer \
# protocol. The tftp protocol is often used to boot diskless \
# workstations, download configuration files to network-aware printers, \
# and to start the installation process for some operating systems.
service tftp
{
socket_type = dgram
protocol = udp
wait = yes
user = root
server = /usr/sbin/in.tftpd
server_args = -s /tftpboot
disable = no
per_source = 11
cps = 100 2
flags = IPv4
}
~
進去之後把disable這一項改爲no
然後進入根目錄 [root@server ~]# cd ..
在該目錄裏有一個tftpboot目錄
進入到該目錄裏 [root@server /]# cd tftpboot/
[root@server tftpboot]# ll
total 8
drwxr-xr-x 4 root root 4096 Aug 25 01:14 linux-install
[root@server tftpboot]#
在此目錄下需要創建一個目錄 pxelinux.cfp [root@server tftpboot]# mkdir pxelinux.cfg
安裝系統時還需要一些文件如:pxelinux.0 initrd.img vmlinuz
所以需要把這些考到該目錄下:
[root@server tftpboot]# cp /usr/lib/syslinux/pxelinux.0 ./
[root@server tftpboot]# cp /mnt/cdrom/p_w_picpaths/pxeboot/initrd.img ./
[root@server tftpboot]# cp /mnt/cdrom/p_w_picpaths/pxeboot/vmlinuz ./
[root@server tftpboot]# cp /mnt/cdrom/isolinux/isolinux.cfg pxelinux.cfg/default
再次我們還要編輯一個文件就是pxelinux.cfg/default這個文件
[root@server tftpboot]# vi pxelinux.cfg/default
default linux
prompt 1
timeout 10
display boot.msg
F1 boot.msg
F2 options.msg
F3 general.msg
F4 param.msg
F5 rescue.msg
label linux
kernel vmlinuz
append ks=ftp://192.168.100.37/pub/ks.cfg ksdevice=eth0 initrd=initrd.img
label text
kernel vmlinuz
append initrd=initrd.img text
label ks
kernel vmlinuz
append ks initrd=initrd.img
label local
localboot 1
label memtest86
kernel memtest
append -
紅色爲修改的部分,修改之後保存。
Dhcp服務器
同樣需要安裝dhcp包如下:
[root@server ~]#yum install dhcp
安裝之後需要編寫dhcpd.conf 這個文件在/etc下
[root@server ~]# vi /etc/dhcpd.conf 進去之後是:
#
# DHCP Server Configuration file.
# see /usr/share/doc/dhcp*/dhcpd.conf.sample
#
它說看see /usr/share/doc/dhcp*/dhcpd.conf.sample這個文件所以 進這個文件:

進去之後如圖:

需要把它修改爲:

進行到這裏基本上差不多了,然後再安裝一個軟件包
[root@server Server]# yum install system-config-kickstart-2.6.19.8-2.el5.noarch.rpm
然後把服務器都啓動起來:

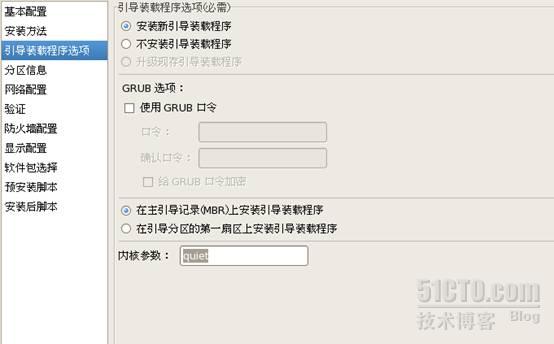
然後再圖形界面下執行system-config-kickstart

會出現如下圖:

然後根據自己的需要選擇需要安裝的條目如下圖:


這是本人在本機上使用虛擬機安裝的所以選擇如下:


設置完成後安裝如下:


如此說明安裝已經完成!!!!!!!!!!!!!!!!!!!!!!!!!!!!!!!!!!!!!!!!!!!!!!!!!!!!