這一節看看如何通過boto3來管理EC2的快照。在實際生產環境中,豆子使用的是AWS提供的解決方案 EBS Snapshot Scheduler, 直接導入Cloudformation的stack,會自動配置Lambda函數和DynamoDB數據庫,然後我們可以通過標籤來進行設置。從學習的角度,我們直接來弄一個超簡易的版本。我們可以直接寫兩個Lambda函數,一個進行創建,一個進行刪除。
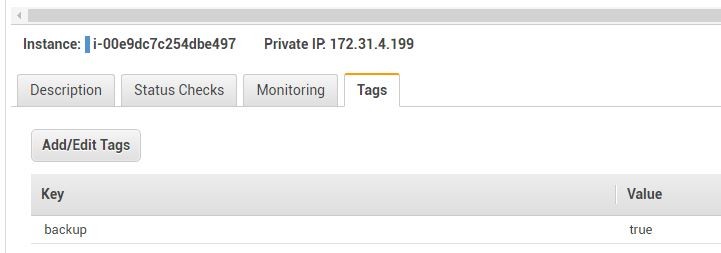
首先,設置一個tag標籤
接下來創建Lambda函數
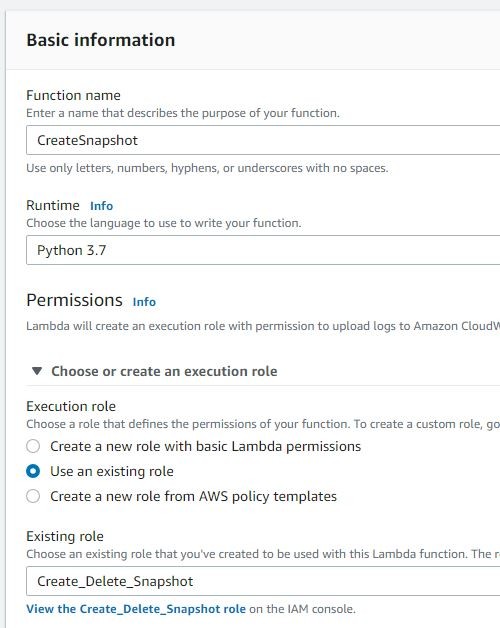
IAM Role的配置如下
{
  "Version": "2012-10-17",
  "Statement": [{
      "Effect": "Allow",
      "Action": [
        "logs:CreateLogGroup",
        "logs:CreateLogStream",
        "logs:PutLogEvents"
      ],
      "Resource": "arn:aws:logs:*:*:*"
    },
    {
      "Effect": "Allow",
      "Action": [
        "ec2:CreateSnapshot",
        "ec2:CreateTags",
        "ec2:DeleteSnapshot",
        "ec2:Describe*",
        "ec2:ModifySnapshotAttribute",
        "ec2:ResetSnapshotAttribute"
      ],
      "Resource": "*"
    }
  ]
}
具體函數如下所示:
from datetime import datetime

import boto3

def lambda_handler(event, context):

    ec2_client = boto3.client('ec2')

        #獲取所有region的名字
    regions = [region['RegionName']
               for region in ec2_client.describe_regions()['Regions']]

        #循環每一個region,找到所有標籤了backup的實例
    for region in regions:

        print('Instances in EC2 Region {0}:'.format(region))
        ec2 = boto3.resource('ec2', region_name=region)

        instances = ec2.instances.filter(
            Filters=[
                {'Name': 'tag:backup', 'Values': ['true']}
            ]
        )

                #獲取時間戳
        # ISO 8601 timestamp, i.e. 2019-01-31T14:01:58
        timestamp = datetime.utcnow().replace(microsecond=0).isoformat()

                #對每一個實例的每一個volume,都創建一個快照
        for i in instances.all():
            for v in i.volumes.all():

                desc = 'Backup of {0}, volume {1}, created {2}'.format(
                    i.id, v.id, timestamp)
                print(desc)

                snapshot = v.create_snapshot(Description=desc)

                print("Created snapshot:", snapshot.id)
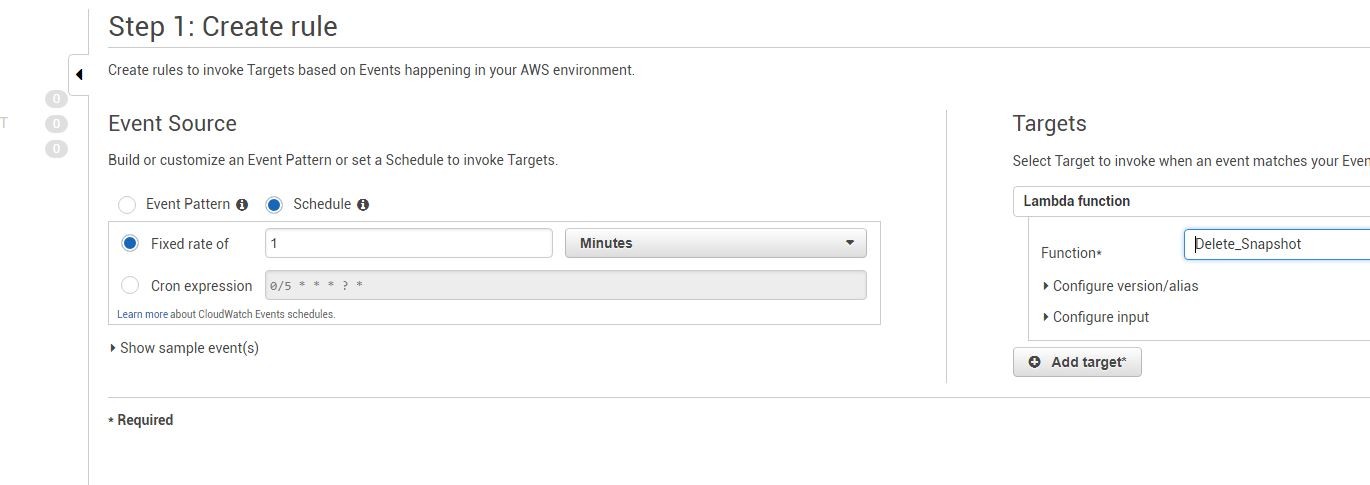
然後在Cloudwatch裏面設置一個計劃任務,定期執行這個函數

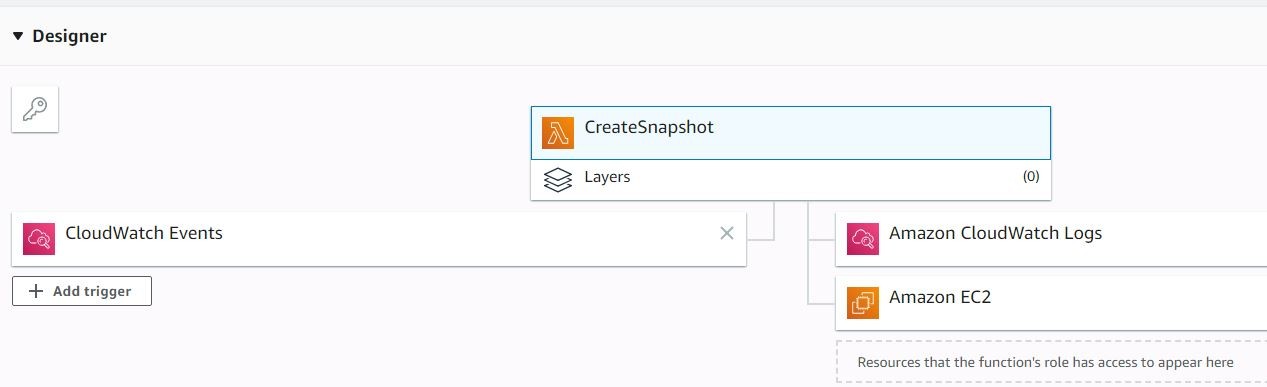
這個是綁定了Role和觸發器的示意圖
執行之後,可以查看快照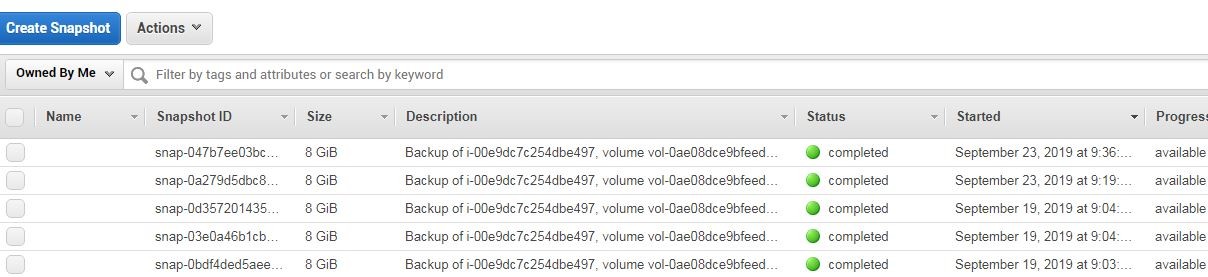
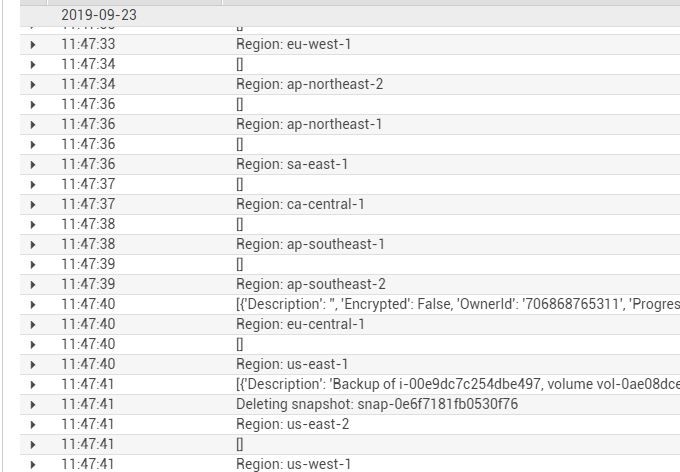
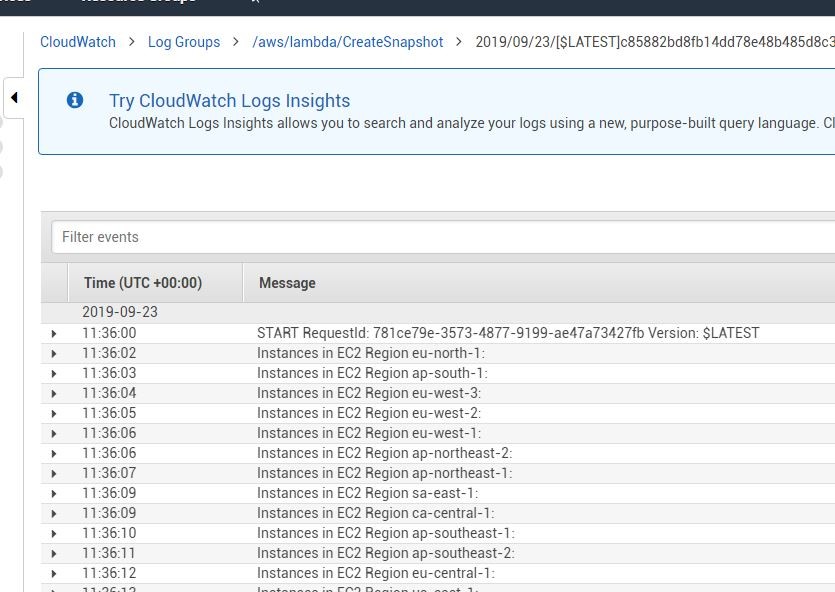
在Cloudwatch裏面查看print的輸出日誌,可以看見成功執行了
同樣的方式,我們可以創建一個Lambda函數來刪除快照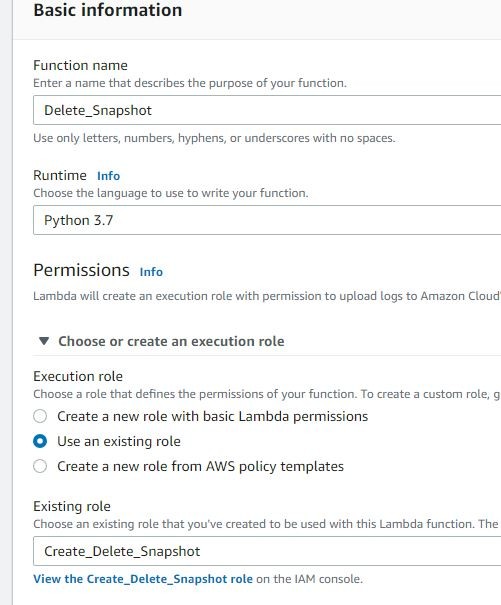
具體的函數如下:
import boto3

def lambda_handler(event, context):

    #sts 返回的是一個字典,通過get獲取當前賬號的ownerId,如果失敗則返回None
    account_id = boto3.client('sts').get_caller_identity().get('Account')

    ec2 = boto3.client('ec2')
    """ :type : pyboto3.ec2 """
    regions = [region['RegionName']
               for region in ec2.describe_regions()['Regions']]

    for region in regions:
        print("Region:", region)
        ec2 = boto3.client('ec2', region_name=region)
        """ :type : pyboto3.ec2 """
        response = ec2.describe_snapshots(OwnerIds=[account_id])

        snapshots = response["Snapshots"]
        print(snapshots)

        #Snapshot 是一個很長的列表,每個元素是一個字典結構;sort指定通過時間來排序
        #下面等同於
        # def sortTime(x):
        #     return x["StartTime"]
        # snapshots.sort(key=sortTime)

        # Sort snapshots by date ascending
        snapshots.sort(key=lambda x: x["StartTime"])

        # Remove snapshots we want to keep (i.e. 3 most recent)
        snapshots = snapshots[:-3]

        for snapshot in snapshots:
            id = snapshot['SnapshotId']
            try:
                print("Deleting snapshot:", id)
                ec2.delete_snapshot(SnapshotId=id)
            except Exception as e:
                print("Snapshot {} in use, skipping.".format(id))
                continue
同樣可以創建計劃任務執行函數
執行之後CloudWatch裏面的print日誌