一、LAMP動靜分離
當需要搭建一個高效的web架構時,採用動靜分離無疑是最好的選擇,這篇博文將寫下來LAMP的動靜分離部署方式。
所謂LAMP?LAMP架構是目前最成熟的企業網站應用模式之一,指的是協同工作的一整套系統和相關軟件,能夠提供動態web站點服務及其應用開發環境。與之並肩的還有LNMP、LTMP等,LAMP說白了就是Linux操作系統上安裝Apache網站服務,構建php/perl/Python運行環境來連接mysql數據庫,四個組件合起來就簡稱“LAMP”。 LNMP只不過是用Nginx來搭建了這個httpd服務。
PHP在LAMP環境下共有三種工作模式:CGI 模式、apache 模塊、FastCGI (FCGI)模式。CGI 模式下運行 PHP,性能不是很好。FastCGI 的方式和 apache 模塊的不同點在於:FastCGI 方式 PHP 是一處獨立的進程,所有 PHP 子進程都由 PHP 的一個叫做php-fpm 的組件負責管理;而 apache 模塊化方式運行的 PHP,則是 apache 負責調用 PHP 完成工作。PHP 的 FastCGI 方式性能要比 apache模塊化方式強很多。
這裏將以 FastCGI 方式編譯安裝 LAMP架構。
FastCGI 的工作機制:
客戶端發起請求,請求分爲 2 種,一種是靜態請求它可以直接由 Apache 直接響應返回;另一種是動態的請求,如其中包含中 php或者 Perl 這種腳本解釋性語言,則由 Apache 服務器通過fastcgi協議調用php服務器執行並返回給Apache由Apache返回解釋執行後的結果,如果這個過程中涉及到對數據的操作,此時 php 服務器還會還會通過 mysql 協議調用 mysql服務器。
如下圖: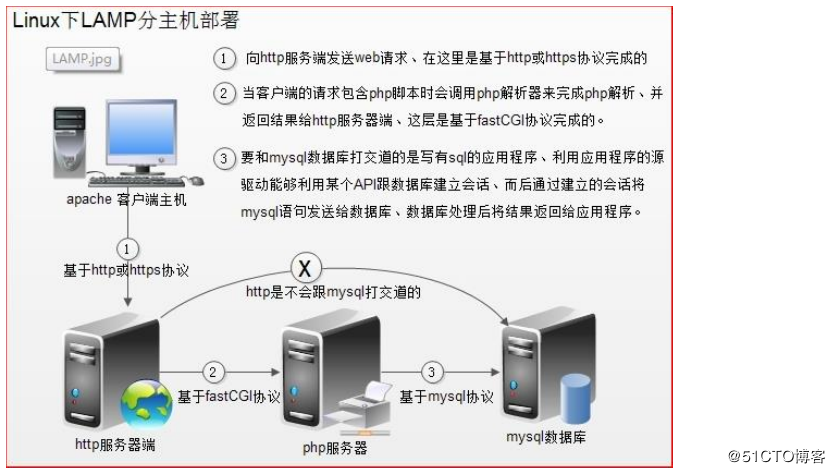
二、LAMP的安裝與配置
環境部署: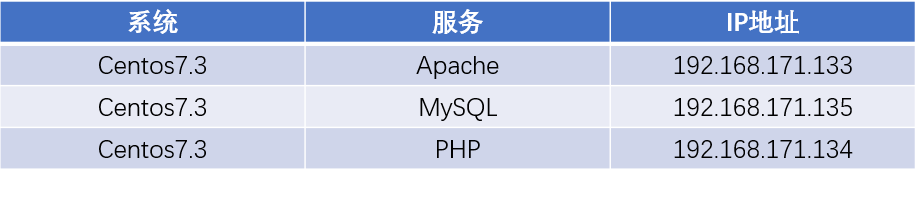
這裏我已經存在Apache和MySQL:
Apache安裝可參考:https://blog.51cto.com/14227204/2459749
MySQL安裝可參考:https://blog.51cto.com/14227204/2425596
1、部署PHP服務器:
下載我提供的PHP安裝包並上傳到PHP服務器:https://pan.baidu.com/s/1d2ETH7xgobxh23G7FYYvKw
提取碼:xs8u
#首先需要爲PHP安裝依賴包
[root@php php]# yum -y install libxml2-devel openssl-devel bzip2-devel
[root@php php]# tar zxf libmcrypt-2.5.7
[root@php php]# cd libmcrypt-2.5.7/
[root@php libmcrypt-2.5.7]# ./configure --prefix=/usr/local/libmcrypt && make && make install
[root@php libmcrypt-2.5.7]# cd ..
[root@php php]# tar zxf php-5.6.27.tar.gz
[root@php php]# cd php-5.6.27/
[root@php php-5.6.27]# ./configure --prefix=/usr/local/php5.6 --with-mysql=mysqlnd --with-pdo-mysql=mysqlnd --with-mysqli=mysqlnd --with-openssl --enable-fpm --enable-sockets --enable-sysvshm --enable-mbstring --with-freetype-dir --with-jpeg-dir --with-png-dir --with-zlib --with-libxml-dir=/usr --enable-xml --with-mhash --with-mcrypt=/usr/local/libmcrypt --with-config-file-path=/etc --with-config-file-scan-dir=/etc/php.d --with-bz2 --enable-maintainer-zts && make && make install
- --prefix=/usr/local/php5.6 #安裝位置
- --with-mysql=mysqlnd #支持 mysql
- --with-pdo-mysql=mysqlnd #支持 pdo 模塊
- --with-mysqli=mysqlnd #支持 mysqli 模塊
#上面的三選項的作用:數據庫與 php 不在一個服務器上,指定此種方式,安裝數據庫連接驅動。- --with-openssl #支持 openssl 模塊
- --enable-fpm #支持 fpm 模式
- --enable-sockets #啓用 socket 支持
- --enable-sysvshm #啓用系統共享內存支持
- --enable-mbstring #多字節字串、像我們的中文就是多字節字串
- --with-freetype-dir #支持 freetype、就要裝 freetype-devel、跟字體相關的、字體解析工具
- --with-jpeg-dir
- --with-png-dir
#上面的二選項的作用:處理 jpeg、png 圖片的、php 可以動態生成 jpeg 圖片- --with-zlib #是個壓縮庫、在互聯網傳輸時用來壓縮傳輸的
- --with-libxml-dir=/usr #這個 libxml 是用來解析 xml 的、指定/usr 下
- --enable-xml #支持 xml 的
- --with-mhash #支持 mhash
- --with-mcrypt=/usr/local/libmcrypt #libmcrypt-devel 這個程序包所指定的
- --with-config-file-path=/etc #指定配置文件的存放路徑的
- --with-config-file-scan-dir=/etc/php.d #配置文件掃描路徑
- --with-bz2 #支持 BZip2
爲了支持 apache 的 worker 或 event 這兩個 MPM,編譯時使用了--enable-maintainer-zts 選項。
#以下爲調整PHP的配置文件及控制服務的啓停
[root@php php-5.6.27]# cp php.ini-production /etc/php.ini    #複製源碼中中提供的PHP配置文件
[root@php php-5.6.27]# cp sapi/fpm/init.d.php-fpm /etc/init.d/php-fpm
#複製其服務控制腳本文件
[root@php php-5.6.27]# chmod +x /etc/init.d/php-fpm    #賦予執行權限
[root@php php-5.6.27]# chkconfig --add php-fpm    #添加爲系統服務,以便支持systemctl管理
[root@php php-5.6.27]# chkconfig php-fpm on   #開啓
#複製php-fpm提供的默認配置文件並編輯它
[root@php php-5.6.27]# cp /usr/local/php5.6/etc/php-fpm.conf.default /usr/local/php5.6/etc/php-fpm.conf
[root@php php-5.6.27]# vim /usr/local/php5.6/etc/php-fpm.conf
listen = 192.168.171.133:9000    #監聽地址是本機的IP9000端口
pm.max_children = 50         #最大啓動的進程數
pm.start_servers = 5          #初始啓動進程數
pm.min_spare_servers = 5     #最小空閒進程
pm.max_spare_servers = 35     #最大空閒進程
#修改完成後,保存退出即可
[root@php /]# service php-fpm restart              # 重啓PHP使配置生效
Gracefully shutting down php-fpm . done
Starting php-fpm  done
[root@php /]# netstat -anput | grep 9000                  # 查看是否運行
tcp        0      0 192.168.171.133:9000    0.0.0.0:*               LISTEN      3054/php-fpm: maste
[root@php /]# firewall-cmd --permanent --add-port=9000/tcp             # 配置防火牆放行流量
success
[root@php /]# firewall-cmd --reload                  # 重載防火牆使之生效
2、配置Apache服務器:
[root@apache /]# vim /usr/local/http-2.4.23/conf/httpd.conf              # 編輯主配置文件
#去掉以下兩行的#號
LoadModule proxy_module modules/mod_proxy.so
LoadModule proxy_fcgi_module modules/mod_proxy_fcgi.so
                        ....................................
#定位到Add Type開頭的這兩行,注意這兩行不要被註釋掉
    AddType application/x-compress .Z
    AddType application/x-gzip .gz .tgz
#添加以下兩行使apache可以識別php
    AddType application/x-httpd-php .php
    AddType application/x-httpd-php-source .php
                         ...........................................
<IfModule dir_module>
    DirectoryIndex index.php index.html                      # 定位到此處,在index.html前添加index.php
</IfModule>
                                  ..........................................
Include conf/extra/httpd-vhosts.conf           # 定位到此處,將#去掉,開啓虛擬主機
#到此就可以wq保存退出了
[root@apache /]# vim /usr/local/http-2.4.23/conf/extra/httpd-vhosts.conf              # 編輯虛擬主機配置文件
#虛擬主機配置如下
<VirtualHost *:80>
    ServerAdmin [email protected]
    DocumentRoot "/var/www/html"
    ServerName www.test.com
    ErrorLog "logs/test-error_log"
    CustomLog "logs/test-access_log" common
    ProxyRequests Off
ProxyPassMatch ^/(.*\.php(/.*)?)$ fcgi://192.168.171.133:9000/var/www/html/$1
<Directory "/var/www/html">
Options FollowSymLinks
AllowOverride None
Require all granted
</Directory>
</VirtualHost>
[root@apache /]# mkdir -p /var/www/html                        # 創建網站根目錄
[root@apache /]# echo test.com > /var/www/html/index.html               # 編寫測試網頁
[root@apache /]# apachectl restart                           # 重啓apache使配置生效
虛擬主機的配置文件解釋如下:
- ProxyRequests off #關閉正向代理
- ProxyPassMatch #把以.php 結尾的文件請求發送到 php-fpm 進程,php-fpm 至少需要知道運行的目錄和 URI,所以這裏直接在 fcgi://192.168.20.5:9000 後指明瞭這兩個參數,其它的參數的傳遞已經被 mod_proxy_fcgi.so 進行了封裝,不需要手動指定。
- 特別注意的是,/var/www/html/需要與<VirtualHost >中的 DocumentRoot 後的路徑一致
- ProxyPassMatch #只有滿足特定正則模式的內容纔會匹配並執行此規則,這裏的模式是,^/(..php(/.)?)$ ,從網站(虛擬主機<VirtualHost >的根目錄開始,匹配任何以 .php 結尾,或者在 .php 之後緊跟一個 / 再跟別的內容的路徑。
- ^ (caret) 和 $ (dollar)標誌要匹配的路徑的開始和結束
- ( )括號裏的內容可以用 $1 來表示,以方便後面引用它。
- fcgi://192.168.20.5:9000 通過 mod_proxy_fcgi 來轉發的代理,使用 fastCGI 協議,轉到PHP-FPM 監聽的端口。
- /var/www/html #非常重要!必須與虛擬主機的路徑匹配,且必須是對應 php 文件在操作系統中的絕對路徑,否則會找不到文件。
3、測試LAMP:
#在PHP服務器中編輯這兩個測試文件
[root@php /]# cat /var/www/html/index.php
<?php
phpinfo();
?>
[root@php /]# cat /var/www/html/test.php
<?php
$link=mysqli_connect('192.168.171.135','zyz','pwd@123');
if($link) echo "恭喜你,數據庫連接成功!!!"; else echo "connect shibai";
mysqli_close($link);
?>
4、MySQL 服務器上創建用戶並賦予遠程登錄的權限:
[root@mysql /]# mysql -u root -p                # 登錄
Enter password:                      # 輸入數據庫密碼
mysql> create database bbs;                   # 創建專用數據庫
Query OK, 1 row affected (0.00 sec)
mysql> grant all on bbs.* to [email protected] identified by 'pwd@123';               # 授權用戶zyz
Query OK, 0 rows affected, 1 warning (0.00 sec)
客戶端訪問www.test.com: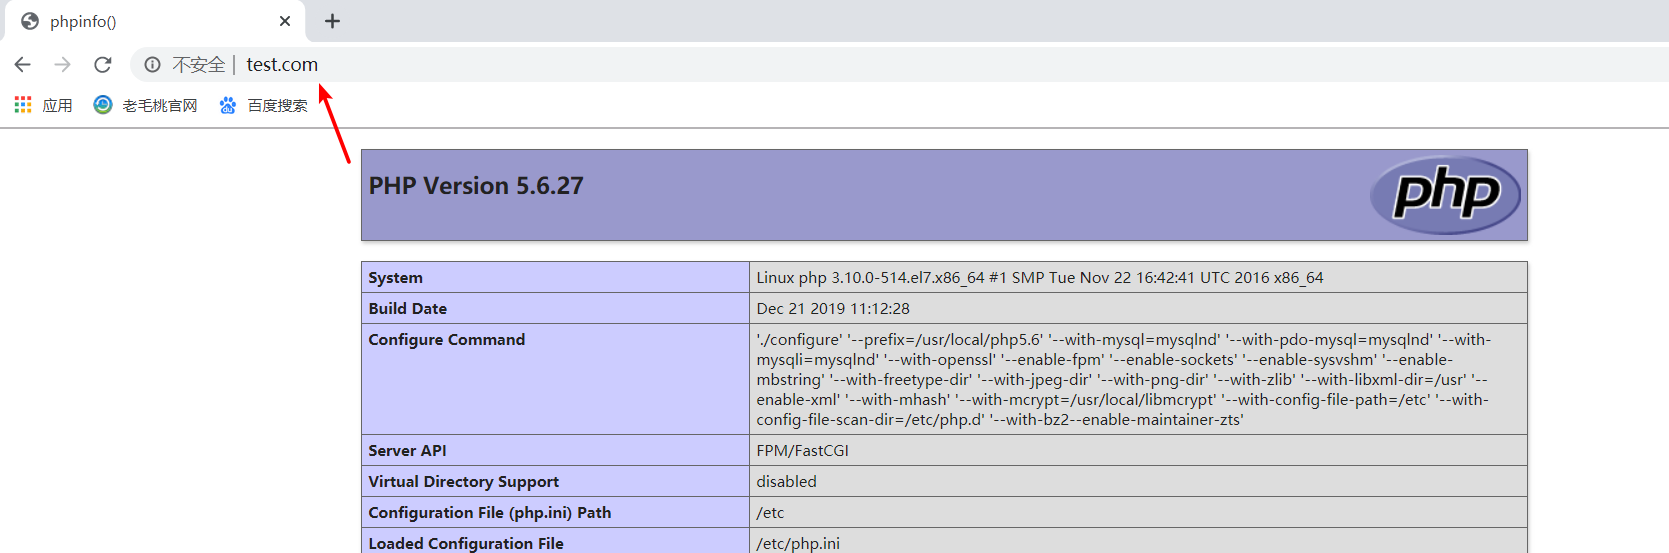
客戶端訪問web服務器的www.test.com/test.php 進行測試: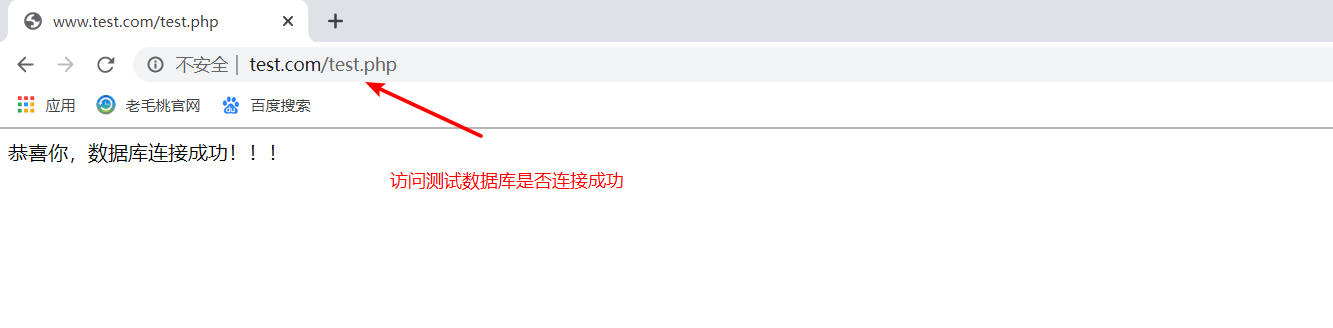
看到上面兩個測試頁就說明 apache、php、mysql 之間可以攜手工作了
三、web壓力測試
網站性能壓力測試是服務器網站性能調優過程中必不可缺少的一環。只有讓服務器處在高壓情況下,才能真正體現出軟件、硬件等各種設置不當所暴露出的問題。
性能測試工具目前最常見的有以下幾種:ab、http_load、webbench、siege。我比較習慣用apahce自帶的ab工具。
ab 非常實用,它不僅可以對 apache 服務器進行網站訪問壓力測試,也可以對或其它類型的服務器進行壓力測試。比如 nginx、tomcat、IIS 等。
1、ab 的原理:
ab 命令會創建多個併發訪問線程,模擬多個訪問者同時對某一 URL 地址進行訪問。它的測試目標是基於 URL 的,因此,它既可以用來測試 apache 的負載壓力,也可以測試 nginx、lighthttp、tomcat、IIS 等其它 Web 服務器的壓力。
ab 命令對發出負載的計算機要求很低,它既不會佔用很高 CPU,也不會佔用很多內存。但卻會給目標服務器造成巨大的負載,其原理類似 CC gong擊。自己測試使用也需要注意,否則一次上太多的負載。可能造成目標服務器資源耗完,嚴重時甚至導致死機。
2、ab的安裝:
ab 的安裝非常簡單,如果是源碼安裝 apache 的話,那就更簡單了。apache 安裝完畢後 ab命令存放在 apache 安裝目錄的 bin 目錄下。如下:
/usr/local/http2.4.23/bin/ab。
如果 apache 是通過 yum 的 RPM 包方式安裝的話,ab 命令默認存放在/usr/bin 目錄下。如下:
which ab
注意:如果不想安裝 apache 但是又想使用 ab 命令的話,我們可以直接安裝 apache 的工具包 httpd-tools。如下:
yum -y install httpd-tools
查看 ab 是否安裝成功,可以切換到上述目錄下,使用 ab –V 命令進行檢測。
[root@apache /]# ab -V             # 額..... 報錯了
ab: error while loading shared libraries: libssl.so.1.0.0: cannot open shared object file: No such file or directory
[root@apache /]# export    LD_LIBRARY_PATH="/usr/local/openssl/lib/"            # 執行此命令設置環境變量
[root@apache /]# ab -V
This is ApacheBench, Version 2.3 <$Revision: 1748469 $>
Copyright 1996 Adam Twiss, Zeus Technology Ltd, http://www.zeustech.net/
Licensed to The Apache Software Foundation, http://www.apache.org/
3、ab壓力測試:
[root@apache /]# ab -c 500 -n 1000 127.0.0.1/index.html
#-c:在測試會話中所執行的請求個數(即總請求數)
#-n:一次產生的請求個數(即 併發用戶數 )
This is ApacheBench, Version 2.3 <$Revision: 1748469 $>
Copyright 1996 Adam Twiss, Zeus Technology Ltd, http://www.zeustech.net/
Licensed to The Apache Software Foundation, http://www.apache.org/

Benchmarking 127.0.0.1 (be patient)
Completed 100 requests
Completed 200 requests
Completed 300 requests
Completed 400 requests
Completed 500 requests
Completed 600 requests
Completed 700 requests
Completed 800 requests
Completed 900 requests
Completed 1000 requests
Finished 1000 requests

Server Software:        Apache/2.4.23
Server Hostname:        127.0.0.1
Server Port:            80

Document Path:          /index.html                  # 請求的資源頁面
Document Length:        9 bytes                      # HTTP 響應數據的正文長度

Concurrency Level:      500             # 併發個數
Time taken for tests:   0.807 seconds        # 所有這些請求處理完成所花費的時間
Complete requests:      1000            # 完成請求數
Failed requests:        0              # 失敗的請求數
Total transferred:      251000 bytes
#表示所有請求的響應數據長度總和,包括每個HTTP響應數據的頭信息和正文數據的長度
HTML transferred:       9000 bytes     # 網頁文件的大小(去除響應頭部的大小)
Requests per second:    1238.40 [#/sec] (mean)
#吞吐量,計算方式:請求的次數/用戶等待時間(Complete requests/Time taken for tests)
Time per request:       403.748 [ms] (mean)
#用戶平均等待一個頁面的時間,計算方式:用戶等待時間/完成請求的次數(Complete requests/Concurrency Level)
Time per request:       0.807 [ms] (mean, across all concurrent requests)
#服務器處理一個請求花費的時間,計算方式:用戶等待時間/完成請求的次數(Time taken for tests/Complete requests)
Transfer rate:          303.55 [Kbytes/sec] received
#用戶請求的數據大小,計算方式:數據的總長度/用戶等待時間(Total trnasferred/ Time taken for tests)
#這個統計很好的說明服務器的處理能力達到極限時,其出口寬帶的需求量。(即平均每秒網絡上的流量)

Connection Times (ms)
              min  mean[+/-sd] median   max
Connect:        0    2   1.6      1       5
Processing:     1   78 138.1      9     802
Waiting:        1   77 138.3      8     802
Total:          2   79 139.2     11     805

Percentage of the requests served within a certain time (ms)
  50%     11
  66%     16
  75%    206
  80%    208
  90%    209
  95%    405
  98%    406
  99%    805
 100%    805 (longest request)
以上部分的數據用於描述每個請求處理時間的分佈情況,比如以上測試,80%的請求處理時間都不超過 834ms,這個處理時間是指前面的 Time per request,即對於單個用戶而言,平均每個請求的處理時間。
4、ab性能指標:
在進行性能測試過程中有幾個指標比較重要:
吞吐率(Requests per second)
服務器併發處理能力的量化描述,單位是 reqs/s,指的是在某個併發用戶數下單位時間內處理的請求數。某個併發用戶數下單位時間內能處理的最大請求數,稱之爲最大吞吐率。
注:吞吐率是基於併發用戶數的。這句話代表了兩個含義:
- 吞吐率和併發用戶數相關;
- 不同的併發用戶數下,吞吐率一般是不同的。
計算公式:總請求數/處理完成這些請求數所花費的時間,即
Request per second=Complete requests/Time taken for tests
必須要說明的是,這個數值表示當前機器的整體性能,值越大越好。
併發連接數(The number of concurrent connections)
併發連接數指的是某個時刻服務器所接受的請求數目,簡單的講,就是一個會話。
併發用戶數(Concurrency Level)
要注意區分這個概念和併發連接數之間的區別,一個用戶可能同時會產生多個會話,也即連接數。
用戶平均請求等待時間(Time per request)
計算公式:處理完成所有請求數所花費的時間/(總請求數/併發用戶數),即:
Time per request=Time taken for tests/(Complete requests/Concurrency Level)服務器平均請求等待時間(Time per request:across all concurrent requests)
計算公式:處理完成所有請求數所花費的時間/總請求數,即:
Time taken for/testsComplete requests
可以看到,它是吞吐率的倒數。
同時,它也等於用戶平均請求等待時間/併發用戶數,即
Time per request/Concurrency Level
四、部署PHP加速軟件Xcache
Xcache是一款用來爲PHP頁面做緩存的工具。當然,實際工作環境中,是不會對PHP動態頁面來做緩存的,意義不大(動態頁面嘛,數據更新較快)又佔用內存空間。這裏只是爲了表現出,PHP動態頁面,也是可以做緩存的。
1、安裝xcache:
之前下載的軟件包中就包含着xcache的源碼包
[root@php php]# tar zxf xcache-3.2.0.tar.gz
[root@php php]# cd xcache-3.2.0/
[root@php xcache-3.2.0]# /usr/local/php5.6/bin/phpize                   # 使用PHP中的phpize生成configure文件
Configuring for:
PHP Api Version:         20131106
Zend Module Api No:      20131226
Zend Extension Api No:   220131226
[root@php xcache-3.2.0]# ./configure  --enable-xcache  --enable-xcache-coverager --enable-xcache-optimizer --with-php-config=/usr/local/php5.6/bin/php-config && make && make install
#安裝完畢後記住最後結尾提示的路勁,會用到:
/usr/local/php5.6/lib/php/extensions/no-debug-non-zts-20131226/
2、創建xcache緩存文件:
[root@php /]# touch /tmp/xcache
[root@php /]# chmod 777 /tmp/xcache          # 需要有寫入權限
3、複製xcache後臺管理程序到網站根目錄:
[root@php /]# cd /php/xcache-3.2.0/
[root@php xcache-3.2.0]# cp -r htdocs/ /var/www/html/xcache
4、配置PHP支持xcache:
[root@php /]# vim /etc/php.ini
#在配置文件末尾添加以下內容
[xcache-common]
extension = /usr/local/php5.6/lib/php/extensions/no-debug-non-zts-20131226/xcache.so
# 這個就是指定安裝xcache後返回的目錄
[xcache.admin]
xcache.admin.enable_auth = Off
[xcache]
xcache.shm_scheme ="mmap"
xcache.size=60M
xcache.count =1
xcache.slots =8K
xcache.ttl=0
xcache.gc_interval =0
xcache.var_size=64M
xcache.var_count =1
xcache.var_slots =8K
xcache.var_ttl=0
xcache.var_maxttl=0
xcache.var_gc_interval =300
xcache.test =Off
xcache.readonly_protection = Off
xcache.mmap_path ="/tmp/xcache"
xcache.coredump_directory =""
xcache.cacher =On
xcache.stat=On
xcache.optimizer =Off
[xcache.coverager]
xcache.coverager =On
xcache.coveragedump_directory =""
#寫完後保存退出
[root@php /]# service php-fpm restart
Gracefully shutting down php-fpm . done
Starting php-fpm  done
5、配置NFS,並回到Apache服務器掛載NFS共享目錄,以便同步網頁根目錄下的文件:
[root@php /]# vim /etc/exports
/var/www/html/       192.168.171.0/24(rw,sec=sys,sync,no_root_squash)
[root@php /]# systemctl restart nfs               # 重啓nfs使之生效
#回到Apache服務器
[root@apache /]# showmount -e 192.168.171.133            # 確認可以查看到PHP共享的目錄
Export list for 192.168.171.133:
/var/www/html 192.168.171.0/24
[root@apache /]# mount -t nfs 192.168.171.133:/var/www/html/ /var/www/html/            # 掛載到本地網站根目錄
[root@apache /]# df -hT
192.168.171.133:/var/www/html nfs4       50G  4.8G   46G  10% /var/www/html
6、測試:
訪問www.test.com/xcache 即可看到如下頁面: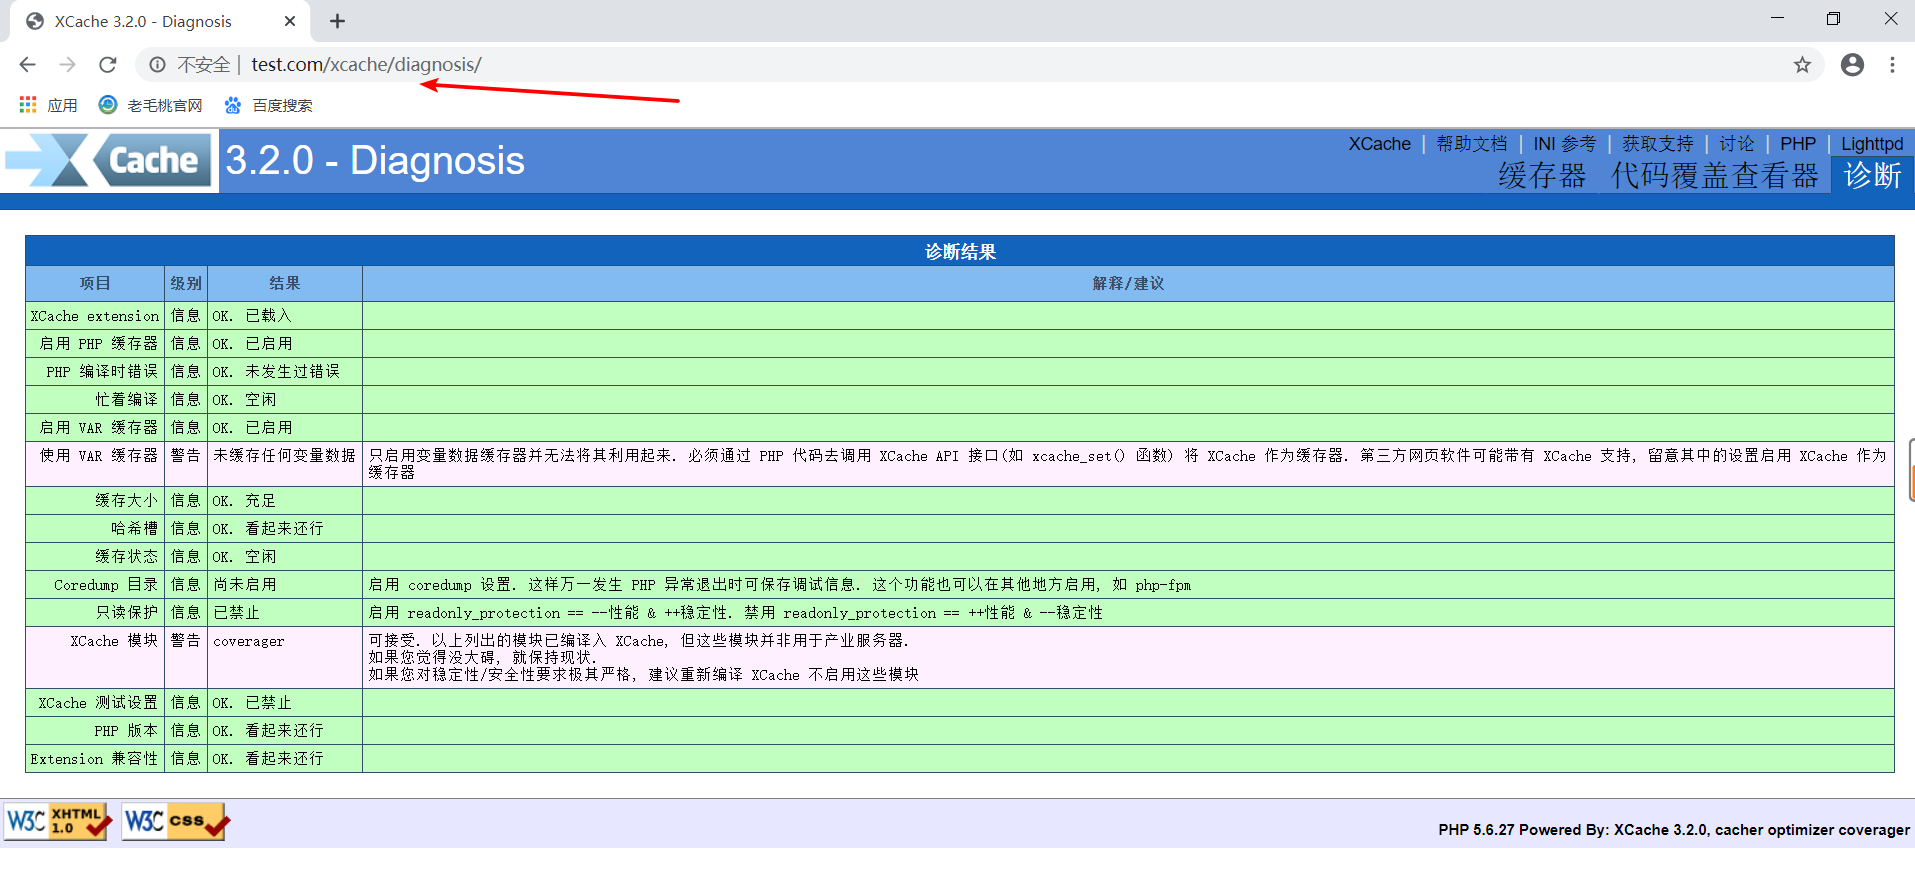
到此,php的加速軟件xcache就安裝完成
7、對Apache動態頁面測試:
[root@apache /]# ab -c 100 -n 1000   http://192.168.171.134/index.php                    # 第一次測試
.............................    //
Time taken for tests:   0.787 seconds
.............................     //
Requests per second:    1270.78 [#/sec] (mean)
.............................    //
[root@apache /]# ab -c 100 -n 1000  http://192.168.171.134/index.php                  # 第二次測試
.............................       //
Time taken for tests:   0.755 seconds
.............................      //
Requests per second:    1325.23 [#/sec] (mean)
.............................     //
查看Xcache的命中率: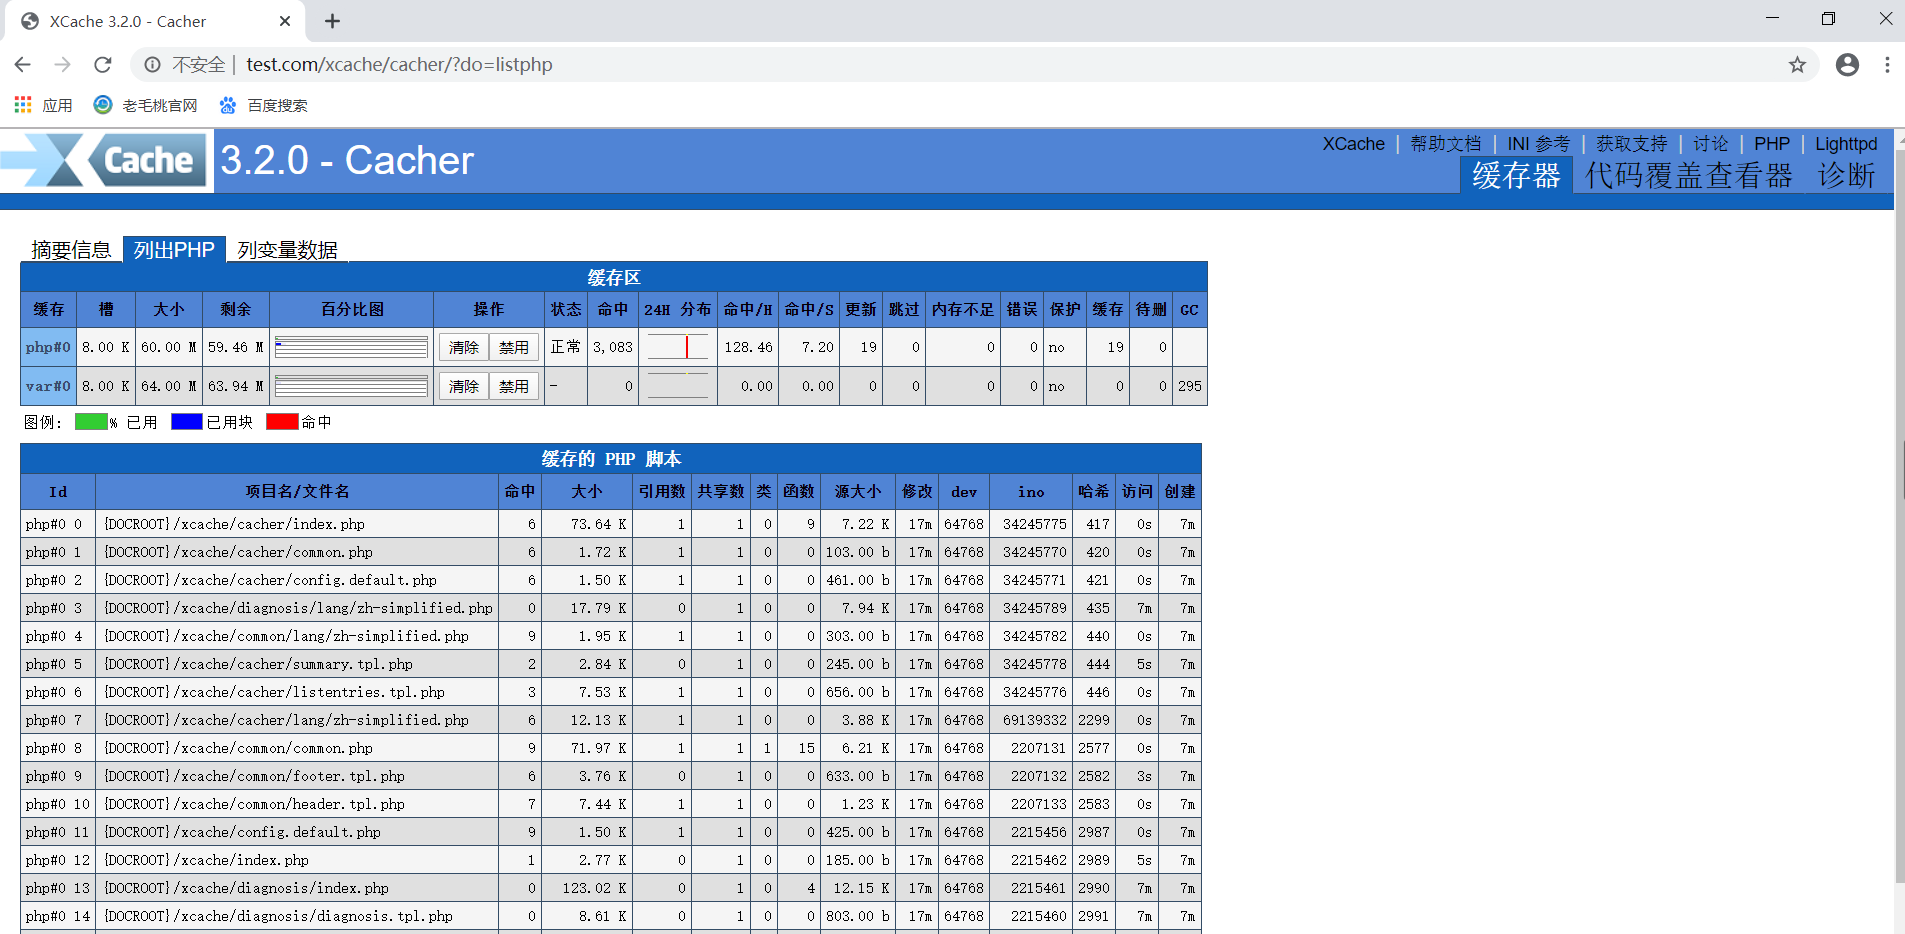
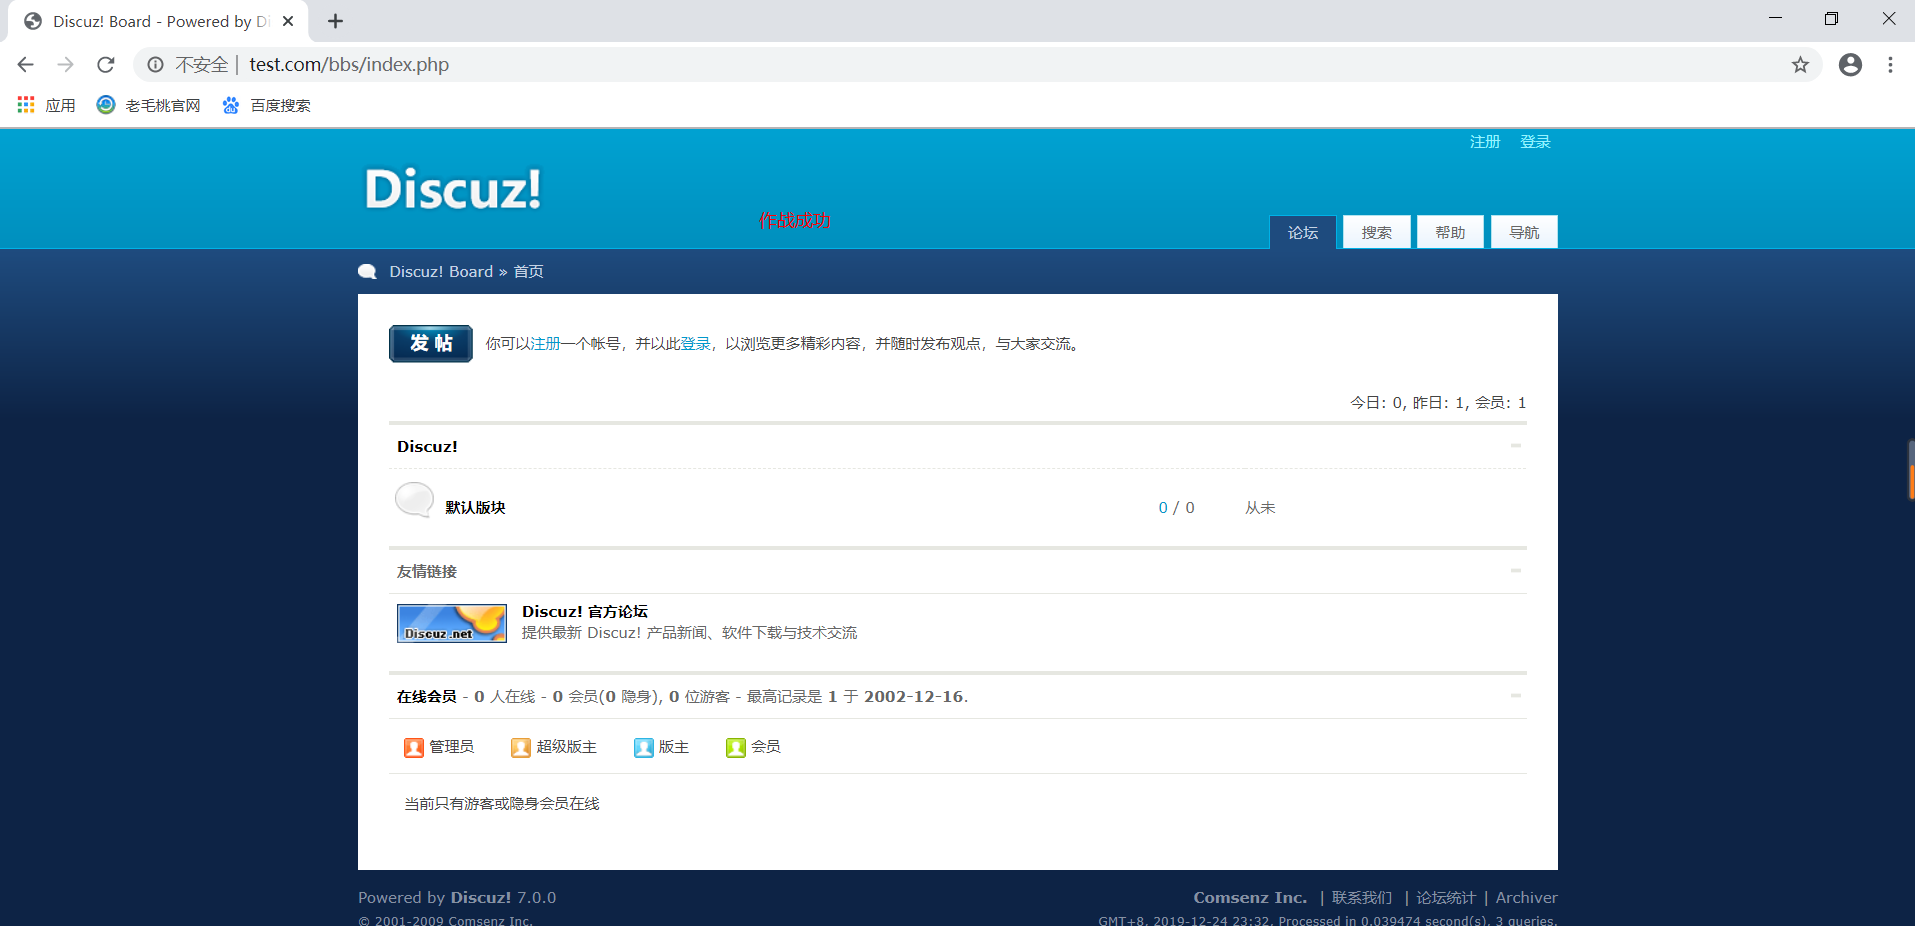
五、部署bbs論壇
PHP服務器上操作:
之前下載的軟件包中有bbs論壇的源碼包,拉過來用即可
[root@php php]# unzip Discuz_7.0.0_FULL_SC_UTF8.zip
[root@php php]# cd Discuz_7.0.0_FULL_SC_UTF8/
[root@php Discuz_7.0.0_FULL_SC_UTF8]# cp -r upload/ /var/www/html/bbs
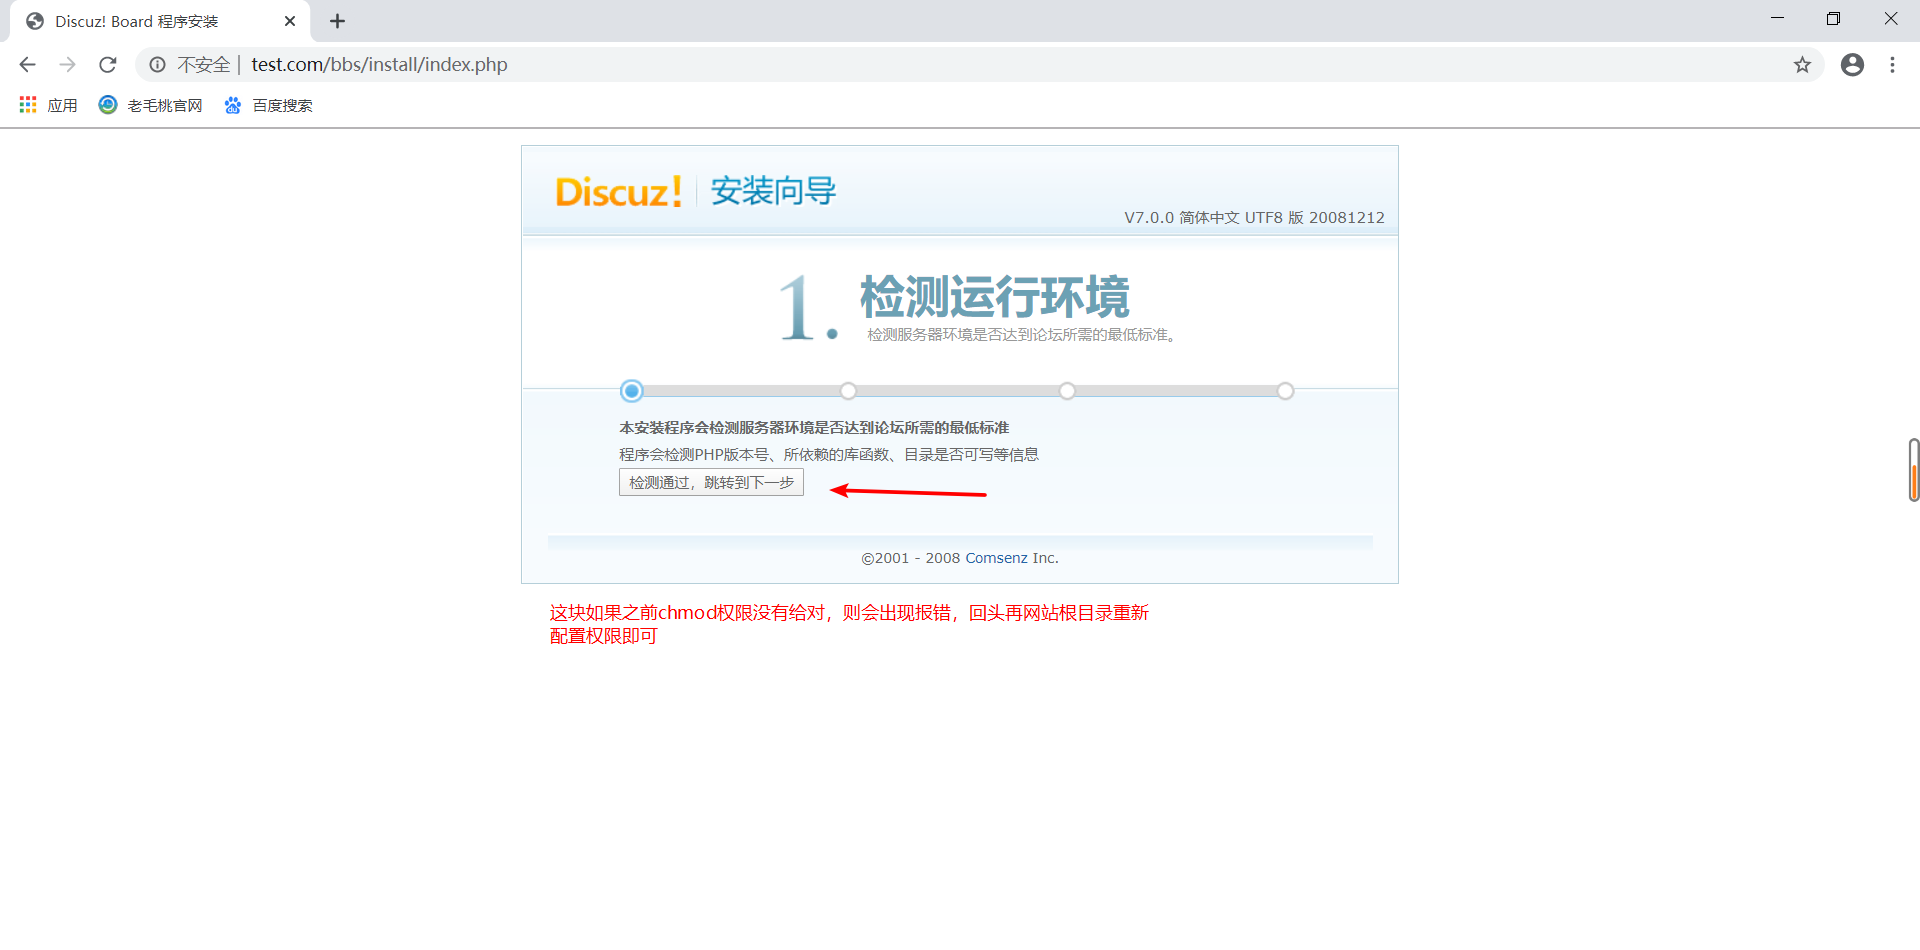
[root@php Discuz_7.0.0_FULL_SC_UTF8]# chmod -R 777 /var/www/html/bbs
[root@php /]# vim /etc/php.ini
...................... // 省略部分內容
short_open_tag = On # 定位到此行,修改Off爲On
[root@php /]# service php-fpm restart
Gracefully shutting down php-fpm . done
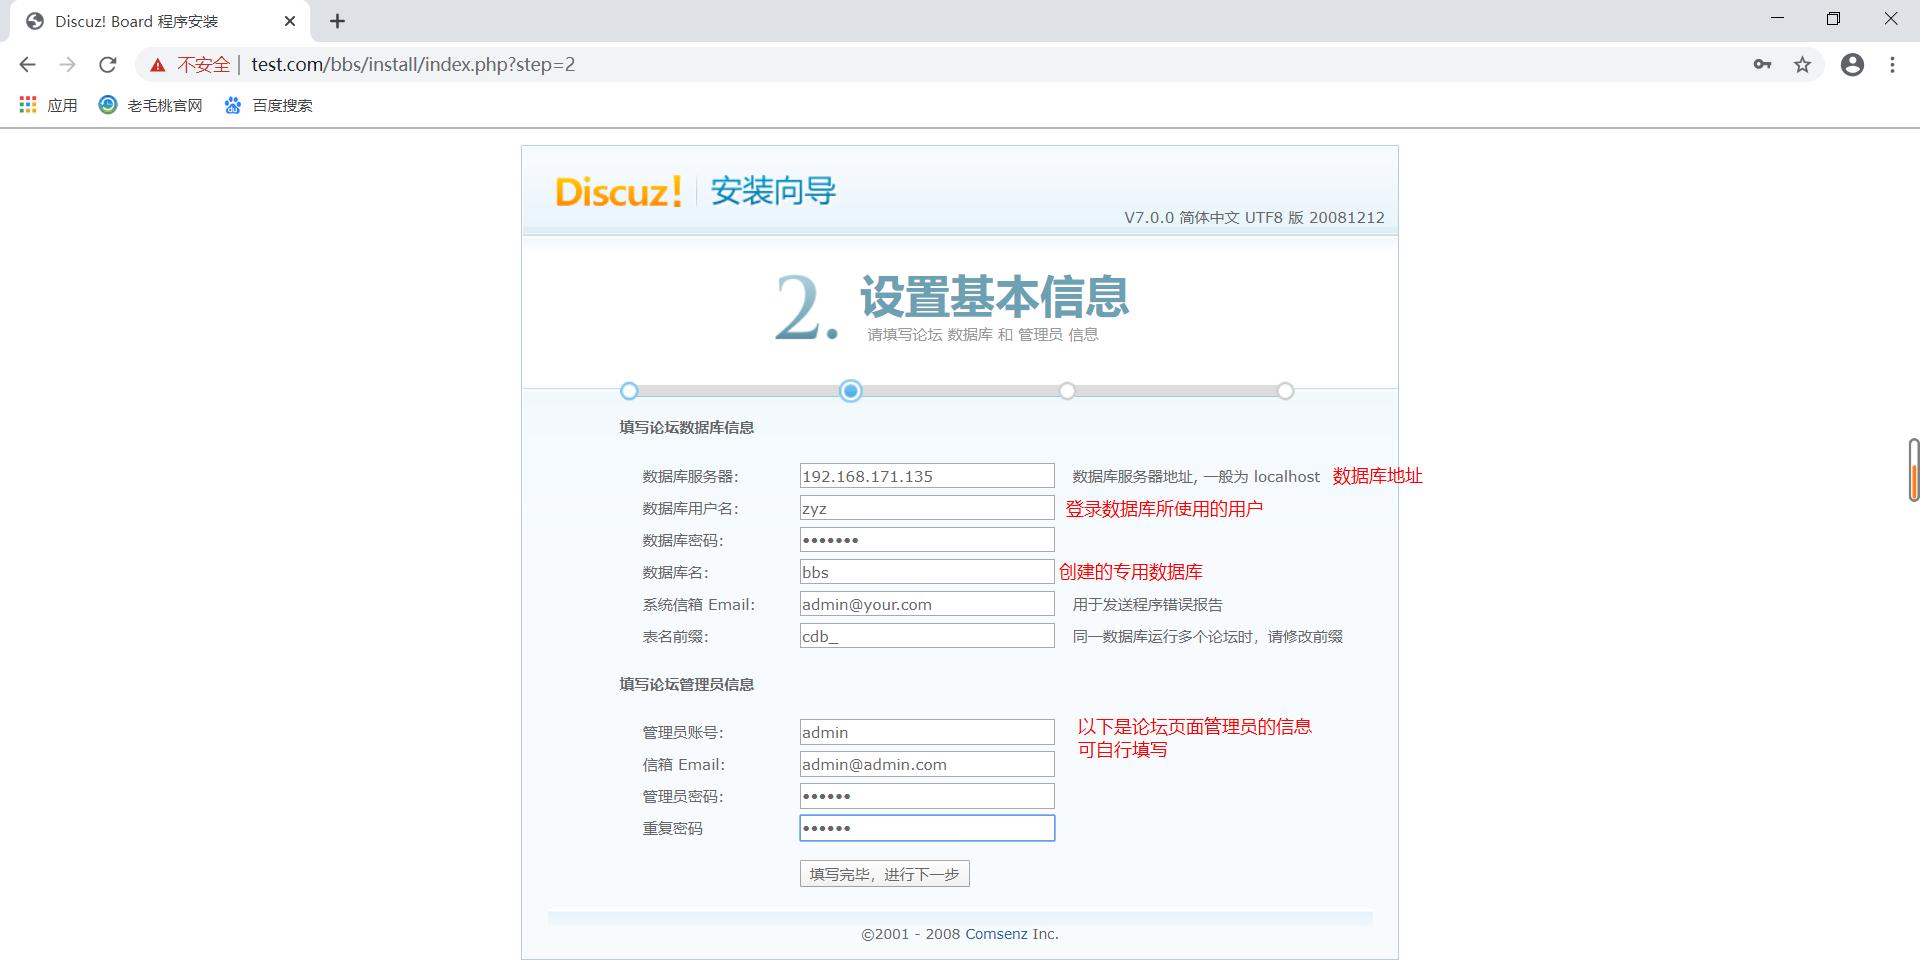
Starting php-fpm done配置bbs(使用之前用來測試鏈接數據庫的用戶給bbs論壇使用即可)
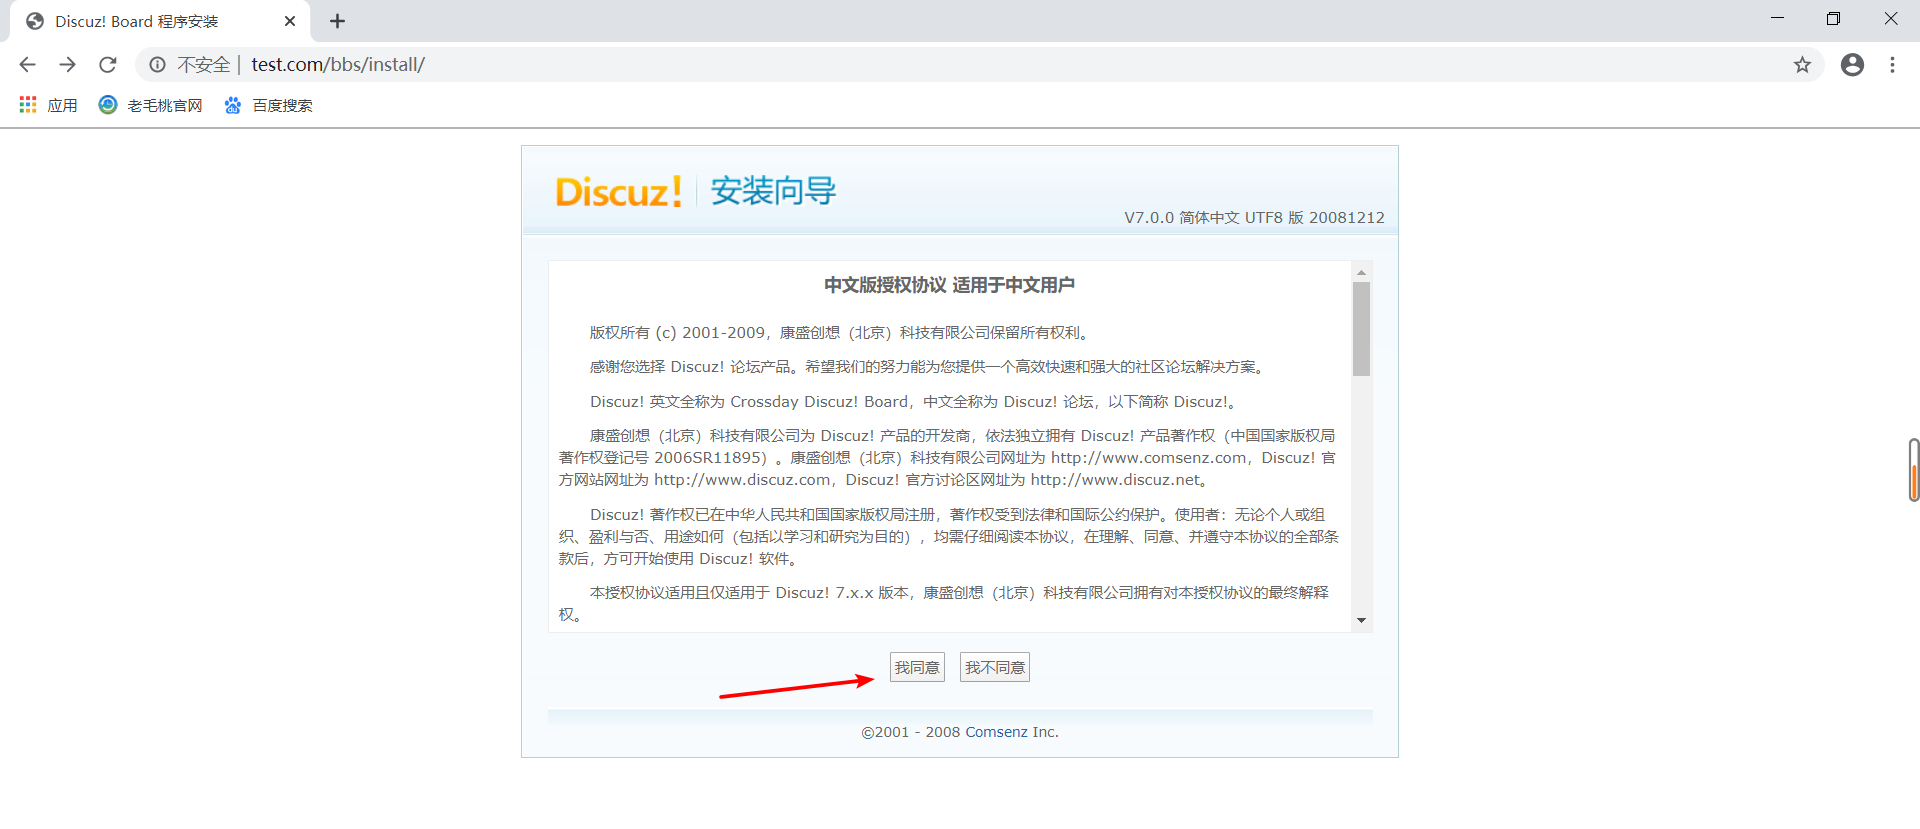
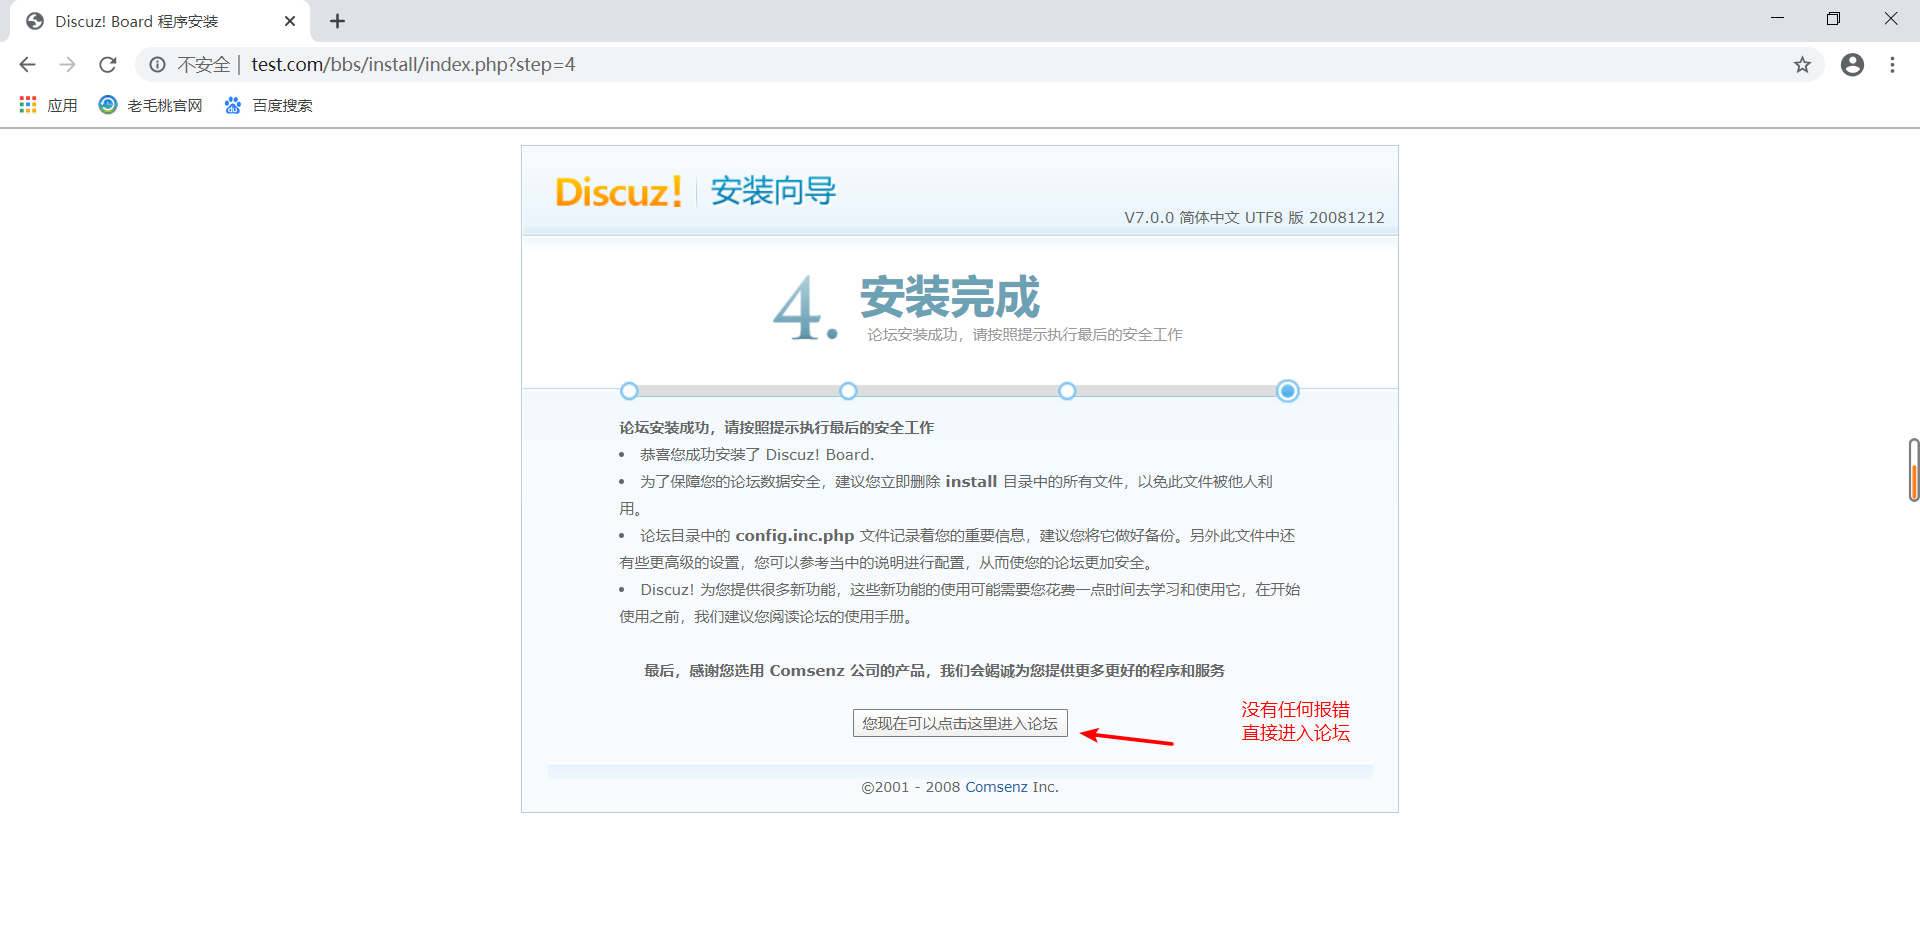
訪問www.test.com/bbs/install