實驗環境
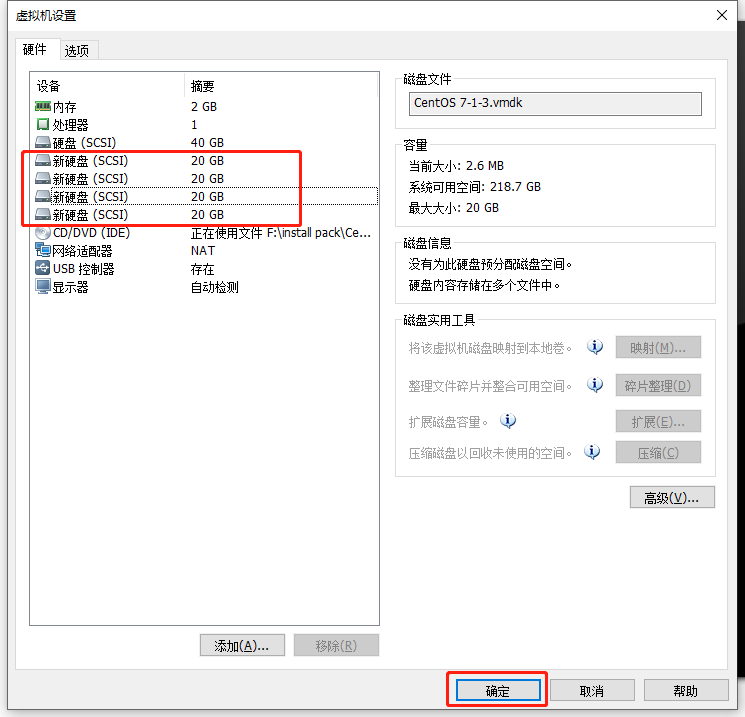
#開啓5臺虛擬機(centos7),四條節點服務器分別添加四塊硬盤
node1:192.168.52.149
node2:192.168.52.132
node3:192.168.52.128
node4:192.168.52.135
client:192.168.52.133
![GFS分佈式文件存儲系統(實戰!!!)]()
#分別設置虛擬機名稱,方便識別
hostnamectl set-hostname node1
hostnamectl set-hostname node2
hostnamectl set-hostname node3
hostnamectl set-hostname node4
hostnamectl set-hostname client
實驗操作
1、在node1上添加自動掛載磁盤的腳本,並推送到其它node節點
[root@node1 ~]# cd /opt/
[root@node1 opt]# vim disk.sh
#! /bin/bash
echo "the disks exist list:"
fdisk -l |grep '磁盤 /dev/sd[a-z]'
echo "=================================================="
PS3="chose which disk you want to create:"
select VAR in `ls /dev/sd*|grep -o 'sd[b-z]'|uniq` quit
do
    case $VAR in
    sda)
        fdisk -l /dev/sda
        break ;;
    sd[b-z])
        #create partitions
        echo "n
                p

                w"  | fdisk /dev/$VAR

        #make filesystem
        mkfs.xfs -i size=512 /dev/${VAR}"1" &> /dev/null
    #mount the system
        mkdir -p /data/${VAR}"1" &> /dev/null
        echo -e "/dev/${VAR}"1" /data/${VAR}"1" xfs defaults 0 0\n" >> /etc/fstab
        mount -a &> /dev/null
        break ;;
    quit)
        break;;
    *)
        echo "wrong disk,please check again";;
    esac
done
[root@node1 opt]# chmod +x disk.sh   ##添加執行權限

[root@node1 opt]# scp disk.sh [email protected]:/opt/   ##推送到node2

[root@node1 opt]# scp disk.sh [email protected]:/opt/   ##推送到node3

[root@node1 opt]# scp disk.sh [email protected]:/opt/   ##推送到node4
2、分別在四個node節點上執行腳本"disk.sh"腳本,將添加的磁盤掛載好
[root@node1 opt]# ./disk.sh
##按腳本提示,分別掛載四塊新磁盤
[root@node1 opt]# df -hT   ##查看掛載是否成功
文件系統       類型      容量  已用  可用 已用% 掛載點
/dev/sda2      xfs        20G  3.3G   17G   17% /
devtmpfs       devtmpfs  898M     0  898M    0% /dev
tmpfs          tmpfs     912M     0  912M    0% /dev/shm
tmpfs          tmpfs     912M  9.0M  903M    1% /run
tmpfs          tmpfs     912M     0  912M    0% /sys/fs/cgroup
/dev/sda3      xfs        10G   33M   10G    1% /home
/dev/sda1      xfs       6.0G  174M  5.9G    3% /boot
tmpfs          tmpfs     183M   12K  183M    1% /run/user/42
tmpfs          tmpfs     183M     0  183M    0% /run/user/0
/dev/sdc1      xfs        20G   33M   20G    1% /data/sdc1
/dev/sdd1      xfs        20G   33M   20G    1% /data/sdd1
/dev/sde1      xfs        20G   33M   20G    1% /data/sde1
/dev/sdb1      xfs        20G   33M   20G    1% /data/sdb1
[root@node1 opt]#
##這是node1節點的演示,其它節點相同操作,不做演示
3、在所有虛擬機中配置主機名解析(包括client)
[root@node1 opt]# vim /etc/hosts
##末行添加
192.168.52.149 node1
192.168.52.132 node2
192.168.52.128 node3
192.168.52.135 node4
[root@node1 opt]# scp /etc/hosts [email protected]:/etc/hosts   ##推送到node2
[email protected]'s password:
hosts                                                                  100%  242    27.2KB/s   00:00
[root@node1 opt]# scp /etc/hosts [email protected]:/etc/hosts   ##推送到node3
[email protected]'s password:
hosts                                                                  100%  242   232.7KB/s   00:00
[root@node1 opt]# scp /etc/hosts [email protected]:/etc/hosts   ##推送到node4
[email protected]'s password:
hosts                                                                  100%  242    24.3KB/s   00:00
[root@node1 opt]# scp /etc/hosts [email protected]:/etc/hosts   ##推送到client
[email protected]'s password:
hosts                                                                  100%  242    192.7KB/s   00:00
4、分別在四個node節點上配置本地yum倉庫,安裝所需軟件包
#四個node操作相同
[root@node1 opt]# mkdir /abc
[root@node1 opt]# mount.cifs //192.168.100.100/tools /abc/   ##掛載
Password for root@//192.168.100.100/tools:
[root@node1 opt]# cd /etc/yum.repos.d/
[root@node1 yum.repos.d]# ls
CentOS-Base.repo  CentOS-Debuginfo.repo  CentOS-Media.repo    CentOS-Vault.repo
CentOS-CR.repo    CentOS-fasttrack.repo  CentOS-Sources.repo
[root@node1 yum.repos.d]# mkdir bak
[root@node1 yum.repos.d]# mv CentOS-* bak/   ##備份原有文件
[root@node1 yum.repos.d]# ls
bak
[root@node1 yum.repos.d]# vim GLFS.repo   ##創建yum倉庫
[GLFS]
name=glfs
baseurl=file:///abc/gfsrepo
gpgcheck=0
enabled=1
[root@node1 yum.repos.d]# yum list   ##加載列表

[root@node1 yum.repos.d]# yum install glusterfs glusterfs-server glusterfs-fuse glusterfs-rdma -y   ##安裝
5、分別在四個node節點開啓glusterd服務
[root@node1 yum.repos.d]# cd
[root@node1 ~]# systemctl stop firewalld.service   ##關閉防火牆
[root@node1 ~]# setenforce 0   ##關閉增強型安全功能
[root@node1 ~]#
[root@node1 ~]# systemctl start glusterd.service   ##開啓服務
[root@node1 ~]# systemctl enable glusterd.service   ##設置開啓自啓
Created symlink from /etc/systemd/system/multi-user.target.wants/glusterd.service to /usr/lib/systemd/system/glusterd.service.
[root@node1 ~]# ntpdate ntp1.aliyun.com   ##同步時間
19 Dec 07:05:18 ntpdate[2651]: adjust time server 120.25.115.20 offset -0.000497 sec
[root@node1 ~]#
6、在任意一臺node上,添加其他節點
##在一臺節點上添加即可
[root@node1 ~]# gluster peer probe node2   ##添加node2
peer probe: success.
[root@node1 ~]# gluster peer probe node3   ##添加node3
peer probe: success.
[root@node1 ~]# gluster peer probe node4   ##添加node4
peer probe: success.
[root@node1 ~]#
[root@node1 ~]# gluster peer status    ##查看狀態
Number of Peers: 3

Hostname: node2
Uuid: 4f077ec5-212b-4b67-bf3d-46a811bf9aca
State: Peer in Cluster (Connected)

Hostname: node3
Uuid: 1cdb5a37-8a26-4e7a-b7c8-ae092809d220
State: Peer in Cluster (Connected)

Hostname: node4
Uuid: 0b5d9651-808c-4fc9-8e0a-47d75952b267
State: Peer in Cluster (Connected)
[root@node1 ~]#
7、在client主機上安裝glusterfs工具包
[root@client ~]# systemctl stop firewalld.service   ##關閉防火牆
[root@client ~]# setenforce 0   ##關閉增強型安全功能
[root@client ~]#
[root@client ~]# mkdir /abc
[root@client ~]# mount.cifs //192.168.100.100/tools /abc/   ##掛載
Password for root@//192.168.100.100/tools:
[root@client ~]# cd /etc/yum.repos.d/
[root@client yum.repos.d]# ls
CentOS-Base.repo  CentOS-Debuginfo.repo  CentOS-Media.repo    CentOS-Vault.repo
CentOS-CR.repo    CentOS-fasttrack.repo  CentOS-Sources.repo
[root@client yum.repos.d]# mkdir bak
[root@client yum.repos.d]# mv CentOS-* bak/   ##備份文件
[root@client yum.repos.d]# ls
bak
[root@client yum.repos.d]# vim GLFS.repo   ##創建本地yum倉庫
[GLFS]
name=glfs
baseurl=file:///abc/gfsrepo
gpgcheck=0
enabled=1
[root@client yum.repos.d]# yum list   ##加載yum列表
[root@client yum.repos.d]# yum install glusterfs glusterfs-fuse -y   ##安裝工具包
分佈式卷
1、創建
[root@node1 ~]# gluster volume create dis-vol node1:/data/sdb1 node2:/data/sdb1 force
volume create: dis-vol: success: please start the volume to access data
2、查看卷組信息
[root@node1 ~]# gluster volume info dis-vol

Volume Name: dis-vol
Type: Distribute
Volume ID: 03b2da8d-516a-45a8-9d2e-e6c84d2a389c
Status: Created
Snapshot Count: 0
Number of Bricks: 2
Transport-type: tcp
Bricks:
Brick1: node1:/data/sdb1
Brick2: node2:/data/sdb1
Options Reconfigured:
transport.address-family: inet
nfs.disable: on
3、查看卷組列表
[root@node1 ~]# gluster volume list
dis-vol
4、啓動卷組
[root@node1 ~]# gluster volume start dis-vol
volume start: dis-vol: success
5、查看卷組狀態
[root@node1 ~]# gluster volume status dis-vol
Status of volume: dis-vol
Gluster process                             TCP Port  RDMA Port  Online  Pid
------------------------------------------------------------------------------
Brick node1:/data/sdb1                      49152     0          Y       2742
Brick node2:/data/sdb1                      49152     0          Y       2663

Task Status of Volume dis-vol
------------------------------------------------------------------------------
There are no active volume tasks
6、客戶端掛載
[root@client ~]# mkdir -p /text/dis   ##創建掛載點
[root@client ~]# mount.glusterfs node1:dis-vol /text/dis/   ##掛載
[root@client ~]# df -hT
文件系統                類型            容量  已用  可用 已用% 掛載點
/dev/sda2               xfs              20G  3.3G   17G   17% /
devtmpfs                devtmpfs        898M     0  898M    0% /dev
tmpfs                   tmpfs           912M     0  912M    0% /dev/shm
tmpfs                   tmpfs           912M  9.0M  903M    1% /run
tmpfs                   tmpfs           912M     0  912M    0% /sys/fs/cgroup
/dev/sda5               xfs              10G   37M   10G    1% /home
/dev/sda1               xfs             6.0G  174M  5.9G    3% /boot
tmpfs                   tmpfs           183M   12K  183M    1% /run/user/42
tmpfs                   tmpfs           183M     0  183M    0% /run/user/0
//192.168.100.100/tools cifs            311G   93G  218G   30% /abc
node1:dis-vol           fuse.glusterfs   40G   65M   40G    1% /text/dis   ##掛載成功
[root@client ~]#
條帶卷
1、創建
[root@node1 ~]# gluster volume create stripe-vol stripe 2 node1:/data/sdc1 node2:/data/sdc1 force
volume create: stripe-vol: success: please start the volume to access data
2、查看卷組列表
[root@node1 ~]# gluster volume list
dis-vol
stripe-vol
3、查看卷組信息
[root@node1 ~]# gluster volume info stripe-vol

Volume Name: stripe-vol
Type: Stripe
Volume ID: 64a01a34-2cd7-4e76-b960-c5399a1e9158
Status: Created
Snapshot Count: 0
Number of Bricks: 1 x 2 = 2
Transport-type: tcp
Bricks:
Brick1: node1:/data/sdc1
Brick2: node2:/data/sdc1
Options Reconfigured:
transport.address-family: inet
nfs.disable: on
4、啓動卷組
[root@node1 ~]# gluster volume start stripe-vol
volume start: stripe-vol: success
5、客戶端掛載
[root@client ~]# mkdir /text/strip   ##創建掛載點
[root@client ~]# mount.glusterfs node1:stripe-vol /text/strip/   ##掛載
[root@client ~]# df -hT
文件系統                類型            容量  已用  可用 已用% 掛載點
/dev/sda2               xfs              20G  3.3G   17G   17% /
devtmpfs                devtmpfs        898M     0  898M    0% /dev
tmpfs                   tmpfs           912M     0  912M    0% /dev/shm
tmpfs                   tmpfs           912M  9.0M  903M    1% /run
tmpfs                   tmpfs           912M     0  912M    0% /sys/fs/cgroup
/dev/sda5               xfs              10G   37M   10G    1% /home
/dev/sda1               xfs             6.0G  174M  5.9G    3% /boot
tmpfs                   tmpfs           183M   12K  183M    1% /run/user/42
tmpfs                   tmpfs           183M     0  183M    0% /run/user/0
//192.168.100.100/tools cifs            311G   93G  218G   30% /abc
node1:dis-vol           fuse.glusterfs   40G   65M   40G    1% /text/dis
node1:stripe-vol        fuse.glusterfs   40G   65M   40G    1% /text/strip   ##掛載成功
[root@client ~]#
複製卷
1、創建
[root@node1 ~]# gluster volume create rep-vol replica 2 node3:/data/sdb1 node4:/data/sdb1 force
volume create: rep-vol: success: please start the volume to access data
2、查看卷組列表
[root@node1 ~]# gluster volume list
dis-vol
rep-vol
stripe-vol
3、啓動卷組
[root@node1 ~]# gluster volume start rep-vol
volume start: rep-vol: success
4、查看卷組信息
[root@node1 ~]# gluster volume info rep-vol

Volume Name: rep-vol
Type: Replicate
Volume ID: 161ab1f4-f738-43a7-89c9-b07c25e57a5b
Status: Started
Snapshot Count: 0
Number of Bricks: 1 x 2 = 2
Transport-type: tcp
Bricks:
Brick1: node3:/data/sdb1
Brick2: node4:/data/sdb1
Options Reconfigured:
transport.address-family: inet
nfs.disable: on
[root@node1 ~]#
5、客戶端掛載
[root@client ~]# mkdir /text/rep
[root@client ~]# mount.glusterfs node3:rep-vol /text/rep/
[root@client ~]# df -hT
文件系統                類型            容量  已用  可用 已用% 掛載點
/dev/sda2               xfs              20G  3.3G   17G   17% /
devtmpfs                devtmpfs        898M     0  898M    0% /dev
tmpfs                   tmpfs           912M     0  912M    0% /dev/shm
tmpfs                   tmpfs           912M  9.0M  903M    1% /run
tmpfs                   tmpfs           912M     0  912M    0% /sys/fs/cgroup
/dev/sda5               xfs              10G   37M   10G    1% /home
/dev/sda1               xfs             6.0G  174M  5.9G    3% /boot
tmpfs                   tmpfs           183M   12K  183M    1% /run/user/42
tmpfs                   tmpfs           183M     0  183M    0% /run/user/0
//192.168.100.100/tools cifs            311G   93G  218G   30% /abc
node1:dis-vol           fuse.glusterfs   40G   65M   40G    1% /text/dis
node1:stripe-vol        fuse.glusterfs   40G   65M   40G    1% /text/strip
node3:rep-vol           fuse.glusterfs   20G   33M   20G    1% /text/rep
[root@client ~]#
分佈式條帶卷
1、創建
[root@node1 ~]# gluster volume create dis-stripe stripe 2 node1:/data/sdd1 node2:/data/sdd1 node3:/data/sdd1 node4:/data/sdd1 force
volume create: dis-stripe: success: please start the volume to access data
2、開啓卷組
[root@node1 ~]# gluster volume start dis-stripe
volume start: dis-stripe: success
3、查看卷組信息
[root@node1 ~]# gluster volume info dis-stripe

Volume Name: dis-stripe
Type: Distributed-Stripe
Volume ID: fb3949d3-591d-4379-8b52-3202bb206762
Status: Started
Snapshot Count: 0
Number of Bricks: 2 x 2 = 4
Transport-type: tcp
Bricks:
Brick1: node1:/data/sdd1
Brick2: node2:/data/sdd1
Brick3: node3:/data/sdd1
Brick4: node4:/data/sdd1
Options Reconfigured:
transport.address-family: inet
nfs.disable: on
[root@node1 ~]#
4、客戶端掛載
[root@client ~]# mkdir /text/dis-stripe
[root@client ~]# mount.glusterfs node2:dis-stripe /text/dis-stripe
[root@client ~]# df -hT
文件系統                類型            容量  已用  可用 已用% 掛載點
/dev/sda2               xfs              20G  3.3G   17G   17% /
devtmpfs                devtmpfs        898M     0  898M    0% /dev
tmpfs                   tmpfs           912M     0  912M    0% /dev/shm
tmpfs                   tmpfs           912M  9.0M  903M    1% /run
tmpfs                   tmpfs           912M     0  912M    0% /sys/fs/cgroup
/dev/sda5               xfs              10G   37M   10G    1% /home
/dev/sda1               xfs             6.0G  174M  5.9G    3% /boot
tmpfs                   tmpfs           183M   12K  183M    1% /run/user/42
tmpfs                   tmpfs           183M     0  183M    0% /run/user/0
//192.168.100.100/tools cifs            311G   93G  218G   30% /abc
node1:dis-vol           fuse.glusterfs   40G   65M   40G    1% /text/dis
node1:stripe-vol        fuse.glusterfs   40G   65M   40G    1% /text/strip
node3:rep-vol           fuse.glusterfs   20G   33M   20G    1% /text/rep
node2:dis-stripe        fuse.glusterfs   80G  130M   80G    1% /text/dis-stripe
[root@client ~]#
分佈式複製卷
1、創建
[root@node1 ~]# gluster volume create die-replica replica 2 node1:/data/sde1 node2:/data/sde1 node3:/data/sde1 node4:/data/sde1 force
volume create: die-replica: success: please start the volume to access data
2、啓動卷組
[root@node1 ~]# gluster volume start die-replica
volume start: die-replica: success
3、查看卷組信息
[root@node1 ~]# gluster volume info die-replica

Volume Name: die-replica
Type: Distributed-Replicate
Volume ID: 6b5af491-229e-4342-ab28-454551304b38
Status: Started
Snapshot Count: 0
Number of Bricks: 2 x 2 = 4
Transport-type: tcp
Bricks:
Brick1: node1:/data/sde1
Brick2: node2:/data/sde1
Brick3: node3:/data/sde1
Brick4: node4:/data/sde1
Options Reconfigured:
transport.address-family: inet
nfs.disable: on
4、查看卷組列表
[root@node1 ~]# gluster volume list
die-replica
dis-stripe
dis-vol
rep-vol
stripe-vol
[root@node1 ~]#
5、客戶端掛載
[root@client ~]# mkdir /text/dis-replica
[root@client ~]# mount.glusterfs node4:die-replica /text/dis-replica
[root@client ~]# df -hT
文件系統                類型            容量  已用  可用 已用% 掛載點
/dev/sda2               xfs              20G  3.3G   17G   17% /
devtmpfs                devtmpfs        898M     0  898M    0% /dev
tmpfs                   tmpfs           912M     0  912M    0% /dev/shm
tmpfs                   tmpfs           912M  9.0M  903M    1% /run
tmpfs                   tmpfs           912M     0  912M    0% /sys/fs/cgroup
/dev/sda5               xfs              10G   37M   10G    1% /home
/dev/sda1               xfs             6.0G  174M  5.9G    3% /boot
tmpfs                   tmpfs           183M   12K  183M    1% /run/user/42
tmpfs                   tmpfs           183M     0  183M    0% /run/user/0
//192.168.100.100/tools cifs            311G   93G  218G   30% /abc
node1:dis-vol           fuse.glusterfs   40G   65M   40G    1% /text/dis
node1:stripe-vol        fuse.glusterfs   40G   65M   40G    1% /text/strip
node3:rep-vol           fuse.glusterfs   20G   33M   20G    1% /text/rep
node2:dis-stripe        fuse.glusterfs   80G  130M   80G    1% /text/dis-stripe
node4:die-replica       fuse.glusterfs   40G   65M   40G    1% /text/dis-replica
[root@client ~]#
數據存儲測試
1、在client上創建5個測試文件,demo1、demo2、demo3、demo4、demo5
[root@client ~]# dd if=/dev/zero of=/demo1.log bs=1M count=40
記錄了40+0 的讀入
記錄了40+0 的寫出
41943040字節(42 MB)已複製,0.10165 秒,413 MB/秒
[root@client ~]# dd if=/dev/zero of=/demo2.log bs=1M count=40
記錄了40+0 的讀入
記錄了40+0 的寫出
41943040字節(42 MB)已複製,0.234021 秒,179 MB/秒
[root@client ~]# dd if=/dev/zero of=/demo3.log bs=1M count=40
記錄了40+0 的讀入
記錄了40+0 的寫出
41943040字節(42 MB)已複製,0.267065 秒,157 MB/秒
[root@client ~]# dd if=/dev/zero of=/demo4.log bs=1M count=40
記錄了40+0 的讀入
記錄了40+0 的寫出
41943040字節(42 MB)已複製,0.256854 秒,163 MB/秒
[root@client ~]# dd if=/dev/zero of=/demo5.log bs=1M count=40
記錄了40+0 的讀入
記錄了40+0 的寫出
41943040字節(42 MB)已複製,0.43331 秒,96.8 MB/秒
[root@client ~]#
[root@client ~]# ll -h /
-rw-r--r--.   1 root root  40M 12月 19 07:29 demo1.log
-rw-r--r--.   1 root root  40M 12月 19 07:29 demo2.log
-rw-r--r--.   1 root root  40M 12月 19 07:29 demo3.log
-rw-r--r--.   1 root root  40M 12月 19 07:29 demo4.log
-rw-r--r--.   1 root root  40M 12月 19 07:30 demo5.log
2、分別複製到五種卷組的掛載點
[root@client ~]# cp /demo* /text/dis
[root@client ~]# cp /demo* /text/strip
[root@client ~]# cp /demo* /text/rep
[root@client ~]# cp /demo* /text/dis-stripe
[root@client ~]# cp /demo* /text/dis-replica
[root@client ~]#
3、查看分佈式卷,通過哈希算法分佈式存儲
[root@node1 ~]# ll -h /data/sdb1/
總用量 160M
-rw-r--r--. 2 root root 40M 12月 19 07:33 demo1.log
-rw-r--r--. 2 root root 40M 12月 19 07:33 demo2.log
-rw-r--r--. 2 root root 40M 12月 19 07:33 demo3.log
-rw-r--r--. 2 root root 40M 12月 19 07:33 demo4.log
[root@node1 ~]#

[root@node2 ~]# ll -h /data/sdb1/
總用量 40M
-rw-r--r--. 2 root root 40M 12月 19 07:33 demo5.log
[root@node2 ~]#
4、查看條帶卷,兩個節點各存儲一半
[root@node1 ~]# ll -h /data/sdc1
總用量 100M
-rw-r--r--. 2 root root 20M 12月 19 07:33 demo1.log
-rw-r--r--. 2 root root 20M 12月 19 07:33 demo2.log
-rw-r--r--. 2 root root 20M 12月 19 07:33 demo3.log
-rw-r--r--. 2 root root 20M 12月 19 07:33 demo4.log
-rw-r--r--. 2 root root 20M 12月 19 07:33 demo5.log
[root@node1 ~]#

[root@node2 ~]# ll -h /data/sdc1
總用量 100M
-rw-r--r--. 2 root root 20M 12月 19 07:33 demo1.log
-rw-r--r--. 2 root root 20M 12月 19 07:33 demo2.log
-rw-r--r--. 2 root root 20M 12月 19 07:33 demo3.log
-rw-r--r--. 2 root root 20M 12月 19 07:33 demo4.log
-rw-r--r--. 2 root root 20M 12月 19 07:33 demo5.log
[root@node2 ~]#
5、查看複製卷,兩個節點分別存放兩份完整的數據 相當於鏡像卷
[root@node3 ~]# ll -h /data/sdb1
總用量 200M
-rw-r--r--. 2 root root 40M 12月 19 07:33 demo1.log
-rw-r--r--. 2 root root 40M 12月 19 07:33 demo2.log
-rw-r--r--. 2 root root 40M 12月 19 07:33 demo3.log
-rw-r--r--. 2 root root 40M 12月 19 07:33 demo4.log
-rw-r--r--. 2 root root 40M 12月 19 07:33 demo5.log
[root@node3 ~]#

[root@node4 ~]# ll -h /data/sdb1
總用量 200M
-rw-r--r--. 2 root root 40M 12月 19 07:33 demo1.log
-rw-r--r--. 2 root root 40M 12月 19 07:33 demo2.log
-rw-r--r--. 2 root root 40M 12月 19 07:33 demo3.log
-rw-r--r--. 2 root root 40M 12月 19 07:33 demo4.log
-rw-r--r--. 2 root root 40M 12月 19 07:33 demo5.log
[root@node4 ~]#
6、查看分佈式條帶卷,根據哈希算法將部分數據分佈到前兩個節點各存儲一般,另一部分數據分配到另外兩個節點各存儲一半
[root@node1 ~]# ll -h /data/sdd1/
總用量 80M
-rw-r--r--. 2 root root 20M 12月 19 07:34 demo1.log
-rw-r--r--. 2 root root 20M 12月 19 07:34 demo2.log
-rw-r--r--. 2 root root 20M 12月 19 07:34 demo3.log
-rw-r--r--. 2 root root 20M 12月 19 07:34 demo4.log
[root@node1 ~]#

[root@node2 ~]# ll -h /data/sdd1/
總用量 80M
-rw-r--r--. 2 root root 20M 12月 19 07:34 demo1.log
-rw-r--r--. 2 root root 20M 12月 19 07:34 demo2.log
-rw-r--r--. 2 root root 20M 12月 19 07:34 demo3.log
-rw-r--r--. 2 root root 20M 12月 19 07:34 demo4.log
[root@node2 ~]#

[root@node3 ~]# ll -h /data/sdd1/
總用量 20M
-rw-r--r--. 2 root root 20M 12月 19 07:34 demo5.log
[root@node3 ~]#

[root@node4 ~]# ll -h /data/sdd1/
總用量 20M
-rw-r--r--. 2 root root 20M 12月 19 07:34 demo5.log
[root@node4 ~]#
7、查看分佈式複製卷,通過哈希算分佈在兩個節點上存儲,另外兩個節點分別保存副本
[root@node1 ~]# ll -h /data/sde1/
總用量 160M
-rw-r--r--. 2 root root 40M 12月 19 07:34 demo1.log
-rw-r--r--. 2 root root 40M 12月 19 07:34 demo2.log
-rw-r--r--. 2 root root 40M 12月 19 07:34 demo3.log
-rw-r--r--. 2 root root 40M 12月 19 07:34 demo4.log
[root@node1 ~]#

[root@node2 ~]# ll -h /data/sde1/
總用量 160M
-rw-r--r--. 2 root root 40M 12月 19 07:34 demo1.log
-rw-r--r--. 2 root root 40M 12月 19 07:34 demo2.log
-rw-r--r--. 2 root root 40M 12月 19 07:34 demo3.log
-rw-r--r--. 2 root root 40M 12月 19 07:34 demo4.log
[root@node2 ~]#

[root@node3 ~]# ll -h /data/sde1/
總用量 40M
-rw-r--r--. 2 root root 40M 12月 19 07:34 demo5.log
[root@node3 ~]#

[root@node4 ~]# ll -h /data/sde1/
總用量 40M
-rw-r--r--. 2 root root 40M 12月 19 07:34 demo5.log
[root@node4 ~]#
故障測試
1、關閉node2節點,模擬故障
[root@node2 ~]# init 0
2、在client主機上查看文件
[root@client ~]# ls /text/dis
demo1.log  demo2.log  demo3.log  demo4.log  #分佈式存儲中5沒有了
[root@client ~]# ls /text/rep
demo1.log  demo2.log  demo3.log  demo4.log  demo5.log   #複製卷保存完整
[root@client ~]# ls /text/dis-replica/    #分佈式複製卷保存信息完整
demo1.log  demo2.log  demo3.log  demo4.log  demo5.log
[root@client ~]# ls /text/dis-stripe/   #分佈式條帶卷中1、2、3、4數據丟失
demo5.log
[root@client ~]# ls /text/strip/    #條帶卷中數據全部丟失
3、刪除卷(注意開啓node2)
[root@node1 ~]# gluster volume list
die-replica
dis-stripe
dis-vol
rep-vol
stripe-vol
[root@node1 ~]# gluster volume stop rep-vol    ##關閉卷組(刪除卷組前,需要關閉)
Stopping volume will make its data inaccessible. Do you want to continue? (y/n) y
volume stop: rep-vol: success
[root@node1 ~]# gluster volume delete rep-vol    ##刪除卷組
Deleting volume will erase all information about the volume. Do you want to continue? (y/n) y
volume delete: rep-vol: success
[root@node1 ~]#  gluster volume list
die-replica
dis-stripe
dis-vol
stripe-vol
[root@node1 ~]#
4、訪問控制
gluster volume set dis-vol auth.reject 192.168.52.133   #設置拒絕主機訪問、掛載
gluster volume set dis-vol auth.allow 192.168.52.133   #設置允許主機訪問、掛載