項目基本配置參考SpringBoot入門一,使用myEclipse新建一個SpringBoot項目,使用myEclipse新建一個SpringBoot項目即可。此示例springboot的版本已經升級到2.2.1.RELEASE,具體步驟如下:
1. pom.xml添加以下配置信息
<!-- 4. 引入websocket支持 -->
<dependency>
        <groupId>org.springframework.boot</groupId>
        <artifactId>spring-boot-starter-websocket</artifactId>
</dependency>
完整pom.xml
<?xml version="1.0" encoding="UTF-8"?>
<project xmlns="http://maven.apache.org/POM/4.0.0"
    xmlns:xsi="http://www.w3.org/2001/XMLSchema-instance"
    xsi:schemaLocation="http://maven.apache.org/POM/4.0.0 http://maven.apache.org/xsd/maven-4.0.0.xsd">

    <!-- 項目基本信息 -->
    <modelVersion>4.0.0</modelVersion>
    <groupId>com.qfx</groupId>
    <artifactId>qfxSpringbootWebsocketServerDemo</artifactId>
    <version>1.0</version>
    <packaging>war</packaging>
    <name>qfxSpringbootWebsocketServerDemo</name>
    <description>Springboot和Websock整合的示例</description>

    <!-- 設置父類,整合第三方常用框架依賴信息(各種依賴信息),這裏繼承SpringBoot提供的父工程 -->
    <parent>
        <groupId>org.springframework.boot</groupId>
        <artifactId>spring-boot-starter-parent</artifactId>
        <version>2.2.1.RELEASE</version>
        <relativePath /> <!-- lookup parent from repository -->
    </parent>

    <!-- 設置公共參數 -->
    <properties>
        <project.build.sourceEncoding>UTF-8</project.build.sourceEncoding>
        <project.reporting.outputEncoding>UTF-8</project.reporting.outputEncoding>
        <java.version>1.8</java.version>
        <!-- Maven install 時,測試環境@Test中如果有中文輸出是亂碼,加上這句話試試 -->
        <argLine>-Dfile.encoding=UTF-8</argLine>
    </properties>

    <dependencies>
        <!-- 1.開啓springboot核心包,整合SpringMVC Web組件 -->
        <!-- 實現原理:Maven依賴繼承關係,相當於把第三方常用Maven依賴信息,在parent項目中已經封裝好了 -->
        <dependency>
            <groupId>org.springframework.boot</groupId>
            <artifactId>spring-boot-starter-web</artifactId>
            <exclusions><!-- 去掉默認日誌配置 -->
                <exclusion>
                    <groupId>org.springframework.boot</groupId>
                    <artifactId>spring-boot-starter-logging</artifactId>
                </exclusion>
            </exclusions>
        </dependency>

        <!-- 2.引入log4j2支持 -->
        <dependency>
            <groupId>org.springframework.boot</groupId>
            <artifactId>spring-boot-starter-log4j2</artifactId>
        </dependency>

        <!-- 3.打war包時加入此項, 告訴spring-boot tomcat相關jar包用外部的,不要打進去 -->
        <dependency>
            <groupId>org.springframework.boot</groupId>
            <artifactId>spring-boot-starter-tomcat</artifactId>
            <scope>provided</scope>
        </dependency>

        <!-- 4. 引入websocket支持 -->
        <dependency>
            <groupId>org.springframework.boot</groupId>
            <artifactId>spring-boot-starter-websocket</artifactId>
        </dependency>
    </dependencies>

    <build>
        <!-- 指定war包名稱,以此處爲準,否則會帶上版本號 -->
        <finalName>qfxSpringbootWebsocketServerDemo</finalName>
        <pluginManagement>
            <plugins>
                <plugin>
                    <groupId>org.springframework.boot</groupId>
                    <artifactId>spring-boot-maven-plugin</artifactId>
                    <dependencies>
                        <!-- spring熱部署 -->
                        <dependency>
                            <groupId>org.springframework</groupId>
                            <artifactId>springloaded</artifactId>
                            <version>1.2.8.RELEASE</version>
                        </dependency>
                    </dependencies>
                </plugin>
            </plugins>
        </pluginManagement>
    </build>
</project>
2. 添加Websocket配置類
如果使用外部Tomcat部署的話,則不需要此配置,否則啓動會報異常
import org.springframework.context.annotation.Bean;
import org.springframework.context.annotation.Configuration;
import org.springframework.web.socket.server.standard.ServerEndpointExporter;

/**
 * <h5>描述:如果使用外部Tomcat部署的話,則不需要此配置</h5>
 *
 */
@Configuration
public class WebSocketConfig {
    @Bean
    public ServerEndpointExporter serverEndpointExporter() {
        return new ServerEndpointExporter();
    }
}
3. 添加Websocket服務類
import org.slf4j.Logger;
import org.slf4j.LoggerFactory;
import org.springframework.stereotype.Component;

import javax.websocket.*;
import javax.websocket.server.PathParam;
import javax.websocket.server.ServerEndpoint;
import java.io.IOException;
import java.util.concurrent.CopyOnWriteArraySet;

/**
 * <h5>描述:WebSocket服務端</h5>
 *  WebSocket是類似客戶端服務端的形式(採用ws協議),
 *  所以 WebSocketServer其實就相當於一個ws協議的 Controller,
 *  可以在裏面實現 @OnOpen、@onClose、@onMessage等方法
 */
@ServerEndpoint("/websocket/{cid}")
@Component
public class WebSocketSer {
    private static final Logger LOG = LoggerFactory.getLogger(WebSocketSer.class);

    // 靜態變量,用來記錄當前在線連接數。應該把它設計成線程安全的。
    private static int onlineCount = 0;

    // concurrent包的線程安全Set,用來存放每個客戶端對應的MyWebSocket對象。
    private static CopyOnWriteArraySet<WebSocketSer> webSocketSet = new CopyOnWriteArraySet<WebSocketSer>();

    //與某個客戶端的連接會話,需要通過它來給客戶端發送數據
    private Session session;

    // 接收cid
    private String cid = "";

    /**
     * 連接建立成功調用的方法
     */
    @OnOpen
    public void onOpen(Session session, @PathParam("cid") String cid) {
        this.session = session;
        webSocketSet.add(this);     // 加入set中
        addOnlineCount();           // 在線數加1
        LOG.info("客戶端: " + cid + " 連接成功, 當前在線人數爲:" + getOnlineCount());
        this.cid = cid;
        try {
            sendMessage("連接成功");
        } catch (IOException e) {
            LOG.error("發送消息異常:", e);
        }
    }

    /**
     * 連接關閉調用的方法
     */
    @OnClose
    public void onClose() {
        webSocketSet.remove(this);  // 從set中刪除
        subOnlineCount();           // 在線數減1
        LOG.info("有一個連接關閉,當前在線人數爲:" + getOnlineCount());
    }

    /**
     * 收到客戶端消息後調用的方法
     *
     * @param message 客戶端發送過來的消息
     */
    @OnMessage
    public void onMessage(String message, Session session) {
        LOG.info("收到來自客戶端 " + cid + " 的信息: " + message);
        // 羣發消息
        for (WebSocketSer item : webSocketSet) {
            try {
                item.sendMessage(message);
            } catch (IOException e) {
                e.printStackTrace();
            }
        }
    }

    /**
     * @param session
     * @param error
     */
    @OnError
    public void onError(Session session, Throwable error) {
        LOG.error("發生錯誤");
        error.printStackTrace();
    }

    /**
     * 實現服務器主動推送
     */
    public void sendMessage(String message) throws IOException {
        this.session.getBasicRemote().sendText(message);
    }

    /**
     * 羣發自定義消息
     */
    public static void sendInfo(String message, @PathParam("cid") String cid) {
        LOG.info("推送消息到客戶端:" + cid + ",內容: " + message);
        for (WebSocketSer item : webSocketSet) {
            try {
                // 這裏可以設定只推送給這個cid的,爲null則全部推送
                if (cid == null) {
                    item.sendMessage(message);
                } else if (item.cid.equals(cid)) {
                    item.sendMessage(message);
                }
            } catch (IOException e) {
                continue;
            }
        }
    }

    public static synchronized int getOnlineCount() {
        return onlineCount;
    }

    public static synchronized void addOnlineCount() {
        WebSocketSer.onlineCount++;
    }

    public static synchronized void subOnlineCount() {
        WebSocketSer.onlineCount--;
    }
}
4. 添加Websocket測試webSocket.html和webSocket2.html頁面
webSocket.html 與 webSocket2.html 中的cid 分別是cid_0001 和 cid_0002,只要指定爲不一樣的即可
<!DOCTYPE HTML>
<html>
<head>
    <meta charset="UTF-8">
    <title>My WebSocket test page</title>
</head>

<body>
    Welcome<br/>
    <input id="text" type="text"/>
    <button onclick="send()">Send</button>
    <button onclick="closeWebSocket()">Close</button>
    <div id="message"></div>
</body>

<script type="text/javascript">
    var websocket = null;

    //判斷當前瀏覽器是否支持WebSocket
    if ('WebSocket' in window) {
        // 端口默認爲當前tomcat的端口,根據自己實際情況改變即可,"cid_0001"就是後端接收的參數cid
        // webSocket.html 配置
        websocket = new WebSocket("ws://localhost:80/qfxSpringbootWebsocketServerDemo/websocket/cid_0001");
        // webSocket2.html 配置
        // websocket = new WebSocket("ws://localhost:80/qfxSpringbootWebsocketServerDemo/websocket/cid_0002");
    } else {
        alert('Not support websocket')
    }

    //連接發生錯誤的回調方法
    websocket.onerror = function () {
        setMessageInnerHTML("error");
    };

    //連接成功建立的回調方法
    websocket.onopen = function (event) {
        setMessageInnerHTML(event.data);
    }

    //接收到消息的回調方法
    websocket.onmessage = function (event) {
        setMessageInnerHTML(event.data);
    }

    //連接關閉的回調方法
    websocket.onclose = function () {
        setMessageInnerHTML("close");
    }

    //監聽窗口關閉事件,當窗口關閉時,主動去關閉websocket連接,防止連接還沒斷開就關閉窗口,server端會拋異常。
    window.onbeforeunload = function () {
        websocket.close();
    }

    //將消息顯示在網頁上
    function setMessageInnerHTML(innerHTML) {
        if (undefined != innerHTML) {
            document.getElementById('message').innerHTML += innerHTML + '<br/>';
        }
    }

    //關閉連接
    function closeWebSocket() {
        websocket.close();
    }

    //發送消息
    function send() {
        var message = document.getElementById('text').value;
        websocket.send(message);
    }
</script>
</html>
5. 編寫一個發送消息的Controller
import org.springframework.web.bind.annotation.RequestMapping;
import org.springframework.web.bind.annotation.RestController;
import com.qfx.demo.common.service.WebSocketSer;
/**
* <h5>描述:測試發送消息</h5>
*
*/
@RestController
@RequestMapping("message")
public class SendCtl {
/**
* <h5>功能:發送信息給正在連接websocket的所有用戶</h5>
*
* @param msg 消息內容
* @return
*/
@RequestMapping("sendAllInfo")
public String sendAllInfo(String msg) {
WebSocketSer.sendInfo(msg, null);
return "success";
}
/**
* <h5>功能:發送信息給正在連接websocket的指定所有用戶</h5>
*
* @param msg 消息內容
* @param cid 用戶id
* @return
*/
@RequestMapping("sendInfo")
public String sendInfo(String msg, String cid) {
WebSocketSer.sendInfo(msg, cid);
return "success";
}
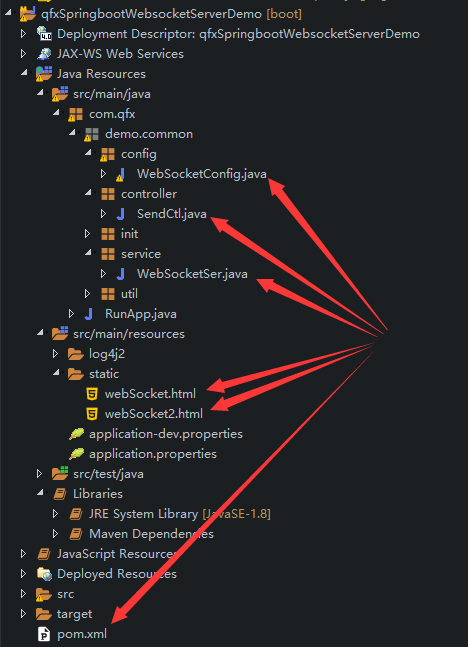
}6. 完整目錄結構
7. 測試連接
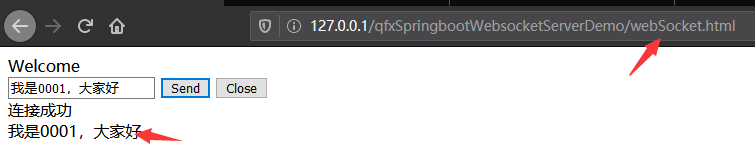
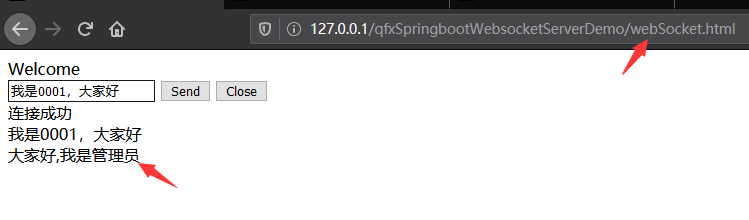
7.1 Html頁面連接websocket服務端,分別打開webSocket.html和webSocket2.html頁面,webSocket.html發送一條信息
http://127.0.0.1/qfxSpringbootWebsocketServerDemo/webSocket.html
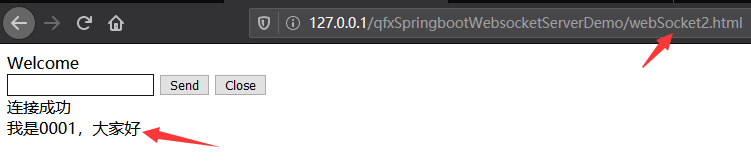
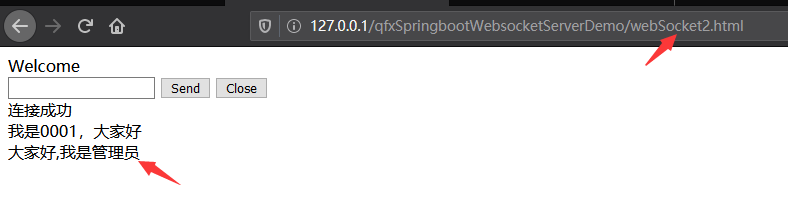
http://127.0.0.1/qfxSpringbootWebsocketServerDemo/webSocket2.htmlwebSocket.html發送信息,兩個頁面都能夠接收到,因爲WebSocketSer.java的onMessage方法裏面會進行羣發
webSocket.html(cid_0001)發送信息
webSocket2.html(cid_0002)不做操作,也接收到了cid_0001發送的信息
後臺輸出

7.2 通過Controller給所有在線用戶發送一條信息

後臺輸出

兩個Html頁面都接收到信息
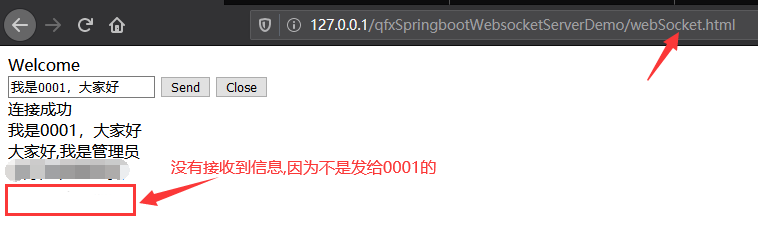
7.3 通過Controller給指定在線用戶發送一條信息
發送指定信息給cid_0002

後臺輸出

webSocket2.html(cid_0002)接收到信息

webSocket.html(cid_0001)沒有接收到信息,因爲不是發給他的