


一.Intent的介紹
Intent的中文意思是“意圖,意向”,在Android中提供了Intent機制來協助應用間的交互與通訊,Intent負責對應用中一次操作的動作、動作涉及數據、附加數據進行描述,Android則根據此Intent的描述,負責找到對應的組件,將 Intent傳遞給調用的組件,並完成組件的調用。Intent不僅可用於應用程序之間,也可用於應用程序內部的Activity/Service之間的交互。因此,可以將Intent理解爲不同組件之間通信的“媒介”專門提供組件互相調用的相關信息。
二.Inten啓動組件的方法
Intent可以啓動一個Activity,也可以啓動一個Service,還可以發起一個廣播Broadcasts。具體方法如下:
|
組件名稱 |
方法名稱 |
|
Activity |
startActvity( ) startActivity( ) |
|
Service |
startService( ) bindService( ) |
|
Broadcasts |
sendBroadcasts( ) sendOrderedBroadcasts( ) sendStickyBroadcasts( ) |
三.Intent的屬性
Intent有以下幾個屬性:
動作(Action),數據(Data),分類(Category),類型(Type),組件(Compent)以及擴展信(Extra)。其中最常用的是Action屬性和Data屬性。
1.Intent的Action屬性
Action是指Intent要完成的動作,是一個字符串常量。SDK中定義了一些標準的Action常量如下表所示。
|
Constant |
Target component |
Action |
|
ACTION_CALL |
activity |
Initiate a phone call. |
|
ACTION_EDIT |
activity |
Display data for the user to edit. |
|
ACTION_MAIN |
activity |
Start up as the initial activity of a task, with no data input and no returned output. |
|
ACTION_SYNC |
activity |
Synchronize data on a server with data on the mobile device. |
|
ACTION_BATTERY_LOW |
broadcast receiver |
A warning that the battery is low. |
|
ACTION_HEADSET_PLUG |
broadcast receiver |
A headset has been plugged into the device, or unplugged from it. |
|
ACTION_SCREEN_ON |
broadcast receiver |
The screen has been turned on. |
|
ACTION_TIMEZONE_CHANGED |
broadcast receiver |
The setting for the time zone has changed. |
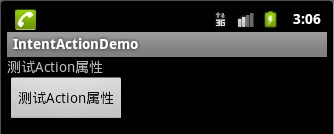
下面是一個測試Action常量的例子:
main.xml
- <?xml version="1.0" encoding="utf-8"?>
- <LinearLayout xmlns:android="http://schemas.android.com/apk/res/android"
- android:orientation="vertical"
- android:layout_width="fill_parent"
- android:layout_height="fill_parent"
- >
- <TextView
- android:layout_width="fill_parent"
- android:layout_height="wrap_content"
- android:text="@string/hello"
- />
- <Button
- android:text="測試Action屬性"
- android:id="@+id/getBtn"
- android:layout_width="wrap_content"
- android:layout_height="wrap_content"
- />
- </LinearLayout>
strings.xml
- <?xml version="1.0" encoding="utf-8"?>
- <resources>
- <string name="hello">測試Action屬性</string>
- <string name="app_name">IntentActionDemo</string>
- </resources>
MainActivity.java
- package com.android.action.activity;
- import android.app.Activity;
- import android.content.Intent;
- import android.os.Bundle;
- import android.view.View;
- import android.view.View.OnClickListener;
- import android.widget.Button;
- public class MainActivity extends Activity {
- private Button getBtn;
- @Override
- public void onCreate(Bundle savedInstanceState) {
- super.onCreate(savedInstanceState);
- setContentView(R.layout.main);
- getBtn=(Button)findViewById(R.id.getBtn);
- getBtn.setOnClickListener(new OnClickListener() {
- @Override
- public void onClick(View v) {
- Intent intent = new Intent();
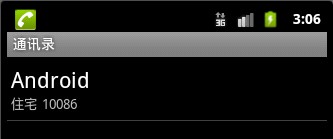
- intent.setAction(Intent.ACTION_GET_CONTENT);// 設置Intent Action屬性
- intent.setType("vnd.android.cursor.item/phone");// 設置Intent Type 屬性
- //主要是獲取通訊錄的內容
- startActivity(intent); // 啓動Activity
- }
- });
- }
- }
效果圖:
2.Intent的Data屬性
Intent的Data屬性是執行動作的URI和MIME類型,不同的Action有不同的Data數據指定。比如:ACTION_EDIT Action應該和要編輯的文檔URI Data匹配,ACTION_VIEW應用應該和要顯示的URI匹配。
3.Intent的Category屬性
Intent中的Category屬性是一個執行動作Action的附加信息。比如:CATEGORY_HOME則表示放回到Home界面,ALTERNATIVE_CATEGORY表示當前的Intent是一系列的可選動作中的一個。下表是SDK文檔中關於Category的信息。
|
Constant |
Meaning |
|
CATEGORY_BROWSABLE |
The target activity can be safely invoked by the browser to display data referenced by a link — for example, an image or an e-mail message. |
|
CATEGORY_GADGET |
The activity can be embedded inside of another activity that hosts gadgets. |
|
CATEGORY_HOME |
The activity displays the home screen, the first screen the user sees when the device is turned on or when the HOME key is pressed. |
|
CATEGORY_LAUNCHER |
The activity can be the initial activity of a task and is listed in the top-level application launcher. |
|
CATEGORY_PREFERENCE |
The target activity is a preference panel. |
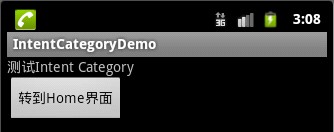
下面是一個回到Home界面的例子:
main.xml
- <?xml version="1.0" encoding="utf-8"?>
- <LinearLayout xmlns:android="http://schemas.android.com/apk/res/android"
- android:orientation="vertical" android:layout_width="fill_parent"
- android:layout_height="fill_parent"
- >
- <TextView
- android:layout_width="fill_parent"
- android:layout_height="wrap_content"
- android:text="測試Intent Category"
- />
- <Button
- android:id="@+id/Button1"
- android:layout_width="wrap_content"
- android:layout_height="wrap_content"
- android:text="轉到Home界面"
- />
- </LinearLayout>
strings.xml
- <?xml version="1.0" encoding="utf-8"?>
- <resources>
- <string name="hello">Hello World, MainActivity!</string>
- <string name="app_name">IntentCategoryDemo</string>
- </resources>
MainActivity.java
- package com.android.category.activity;
- import android.app.Activity;
- import android.content.Intent;
- import android.os.Bundle;
- import android.view.View;
- import android.view.View.OnClickListener;
- import android.widget.Button;
- public class MainActivity extends Activity {
- private Button btn;
- @Override
- public void onCreate(Bundle savedInstanceState) {
- super.onCreate(savedInstanceState);
- setContentView(R.layout.main);
- btn = (Button)findViewById(R.id.Button1);
- btn.setOnClickListener(new OnClickListener() {
- @Override
- public void onClick(View v) {
- Intent intent = new Intent();
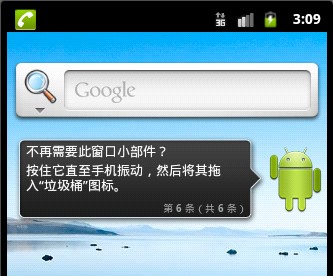
- intent.setAction(Intent.ACTION_MAIN);// 添加Action屬性
- intent.addCategory(Intent.CATEGORY_HOME);// 添加Category屬性
- startActivity(intent);// 啓動Activity
- }
- });
- }
- }
效果圖:
4.Intent的Type屬性
Intent的Type屬性顯式指定Intent的數據類型(MIME)。一般Intent的數據類型能夠根據數據本身進行判定,但是通過設置這個屬性,可以強制採用顯式指定的類型而不再進行推導。
5.Intent的Compent屬性
Intent的Compent屬性指定Intent的的目標組件的類名稱。通常 Android會根據Intent 中包含的其它屬性的信息,比如action、data/type、category進行查找,最終找到一個與之匹配的目標組件。但是,如果 component這個屬性有指定的話,將直接使用它指定的組件,而不再執行上述查找過程。指定了這個屬性以後,Intent的其它所有屬性都是可選的。
6.Intent的Extra屬性
Intent的Extra屬性是添加一些組件的附加信息。比如,如果我們要通過一個Activity來發送一個Email,就可以通過Extra屬性來添加subject和body。
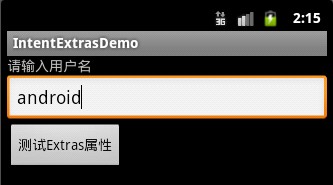
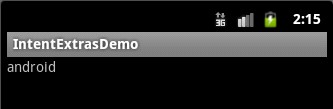
下面的例子在第一個Activity的EditText輸入用戶名,該年齡保存在Intent的Extras屬性中。當單擊Button時,會在第二個Activity中顯示用戶名。
first.xml
- <?xml version="1.0" encoding="utf-8"?>
- <LinearLayout xmlns:android="http://schemas.android.com/apk/res/android"
- android:orientation="vertical"
- android:layout_width="fill_parent"
- android:layout_height="fill_parent"
- >
- <TextView
- android:layout_width="wrap_content"
- android:layout_height="wrap_content"
- android:text="請輸入用戶名"
- />
- <EditText
- android:id="@+id/EditText1"
- android:layout_width="fill_parent"
- android:layout_height="wrap_content"
- />
- <Button
- android:id="@+id/Button1"
- android:layout_width="wrap_content"
- android:layout_height="wrap_content"
- android:text="測試Extras屬性"
- />
- </LinearLayout>
second.xml
- <?xml version="1.0" encoding="utf-8"?>
- <LinearLayout xmlns:android="http://schemas.android.com/apk/res/android"
- android:orientation="vertical"
- android:layout_width="fill_parent"
- android:layout_height="fill_parent"
- >
- <TextView
- android:id="@+id/TextView1"
- android:layout_width="wrap_content"
- android:layout_height="wrap_content"
- />
- </LinearLayout>
strings.xml
- <?xml version="1.0" encoding="utf-8"?>
- <resources>
- <string name="hello">Hello World, FirstActivity!</string>
- <string name="app_name">IntentExtrasDemo</string>
- </resources>
FirstActivity.java
- package com.android.extras.activity;
- import android.app.Activity;
- import android.content.Intent;
- import android.os.Bundle;
- import android.view.View;
- import android.view.View.OnClickListener;
- import android.widget.Button;
- import android.widget.EditText;
- public class FirstActivity extends Activity {
- private Button btn;
- private EditText etx;
- @Override
- public void onCreate(Bundle savedInstanceState) {
- super.onCreate(savedInstanceState);
- setContentView(R.layout.first);
- btn = (Button)findViewById(R.id.Button1);
- etx = (EditText)findViewById(R.id.EditText1);
- btn.setOnClickListener(new OnClickListener() {
- @Override
- public void onClick(View v) {
- Intent intent = new Intent();
- //設置Intent的class屬性,跳轉到SecondActivity
- intent.setClass(FirstActivity.this, SecondActivity.class);
- //爲intent添加額外的信息
- intent.putExtra("useName", etx.getText().toString());
- //啓動Activity
- startActivity(intent);
- }
- });
- }
- }
SecondActivity.java
- package com.android.extras.activity;
- import android.app.Activity;
- import android.content.Intent;
- import android.os.Bundle;
- import android.widget.TextView;
- public class SecondActivity extends Activity {
- private TextView tv;
- @Override
- public void onCreate(Bundle savedInstanceState) {
- super.onCreate(savedInstanceState);
- //設置當前的Activity的界面佈局
- setContentView(R.layout.second);
- //獲得Intent
- Intent intent = this.getIntent();
- tv = (TextView)findViewById(R.id.TextView1);
- //從Intent獲得額外信息,設置爲TextView的文本
- tv.setText(intent.getStringExtra("useName"));
- }
- }
注意:在添加第二個Activity SecondActivity的時候,要在AndroidManifest.xml裏面添加上SecondActivity,具體如下,即是在15行</activity>的後面添加上16~18行的代碼。如果不這樣做,就會在模擬器上出現錯誤。
- <?xml version="1.0" encoding="utf-8"?>
- <manifest xmlns:android="http://schemas.android.com/apk/res/android"
- package="com.android.extras.activity"
- android:versionCode="1"
- android:versionName="1.0">
- <uses-sdk android:minSdkVersion="10" />
- <application android:icon="@drawable/icon" android:label="@string/app_name">
- <activity android:name=".FirstActivity"
- android:label="@string/app_name">
- <intent-filter>
- <action android:name="android.intent.action.MAIN" />
- <category android:name="android.intent.category.LAUNCHER" />
- </intent-filter>
- </activity>
- <activity android:name=".SecondActivity"
- android:label="@string/app_name">
- </activity>
- </application>
- </manifest>
效果圖:
本文出自 “IT的點點滴滴” 博客,請務必保留此出處http://liangruijun.blog.51cto.com/3061169/634411

