一、首先eclipse配置好maven環境,並且創建好一個SSM框架的工程
這個操作在之前有說,自己去研究。
二、在pom.xml中添加plugin
|
1
2
3
4
5
6
7
8
9
10
11
12
13
14
15
16
17
18
19
20
21
22
23
24
25
26
27
28
29
30
31
32
33
34
35
36
37
38
|
<build> <finalName>ssm_web</finalName> <pluginManagement> <plugins> <plugin> <groupId>org.mybatis.generator</groupId> <artifactId>mybatis-generator-maven-plugin</artifactId> <version>1.3.2</version> <configuration> <configurationFile>src/main/resources/mybatis-generator/generatorConfig.xml</configurationFile> <verbose>true</verbose> <overwrite>true</overwrite> </configuration> <executions> <execution> <id>Generate MyBatis Artifacts</id> <goals> <goal>generate</goal> </goals> </execution> </executions> <dependencies> <dependency> <groupId>org.mybatis.generator</groupId> <artifactId>mybatis-generator-core</artifactId> <version>1.3.2</version> </dependency> <dependency> <groupId>mysql</groupId> <artifactId>mysql-connector-java</artifactId> <version>5.1.40</version> <scope>runtime</scope> </dependency> </dependencies> </plugin> </plugins> </pluginManagement> </build> |
注意:
1、pom中添加插件要在<build></build>標籤裏面,並且在這裏指定數據庫驅動,那麼在下一步配置generatorConfig.xml的時候就不用在指定數據庫驅動的本地路徑;
2、src/main/resources/mybatis-generator/generatorConfig.xml指定的是generatorConfig.xml配置文件的路徑,大家可以根據自己的實際情況調整;
三、generatorConfig.xml配置文件
|
1
2
3
4
5
6
7
8
9
10
11
12
13
14
15
16
17
18
19
20
21
22
23
24
25
26
27
28
29
30
31
32
|
<?xml version="1.0"encoding="UTF-8"?><!DOCTYPE generatorConfiguration PUBLIC"-//mybatis.org//DTD MyBatis Generator Configuration 1.0//EN"<generatorConfiguration> <!-- <classPathEntry location="E:/maven/repository/mysql/mysql-connector-java/5.1.40/mysql-connector-java-5.1.40.jar"/>
--> <context id="my"targetRuntime="MyBatis3"> <commentGenerator> <property name="suppressDate"value="false"
/> <property name="suppressAllComments"value="true"
/> </commentGenerator> <jdbcConnection driverClass="com.mysql.jdbc.Driver" password="root"/>
<javaModelGenerator targetPackage="com.xdw.model" targetProject="F:/javawebworkspace/ssm_web/src/main/java"> <property name="enableSubPackages"value="true"
/> <property name="trimStrings"value="true"
/> </javaModelGenerator> <sqlMapGenerator targetPackage="com.xdw.mapping" targetProject="F:/javawebworkspace/ssm_web/src/main/java"> <property name="enableSubPackages"value="true"
/> </sqlMapGenerator> <javaClientGenerator targetPackage="com.xdw.dao" targetProject="F:/javawebworkspace/ssm_web/src/main/java"type="XMLMAPPER"> <property name="enableSubPackages"value="true"
/> </javaClientGenerator> <table tableName="house_type"domainObjectName="HouseType"> <!-- <property name="useActualColumnNames"value="true"/>
--> </table> </context></generatorConfiguration> |
配置講解:
1、classPathEntry location在這裏可以不用配置,因爲之前pom中已經配置了數據庫驅動;
2、jdbcConnection按照自己的數據庫配置相應的驅動類,URL,用戶名和密碼;
3、javaModelGenerator,sqlMapGenerator,javaClientGenerator配置相應要生成的pojo類,DAO類和mapper對應的xml文件,targetPackage屬性指定包名,targetProject指定自己工程的路徑,
4、table標籤配置數據庫表和實體類的映射,tableName屬性指定表名,domainObjectName指定生成的pojo類名;<property name="useActualColumnNames" value="true"/>如果配置的話,那麼生成的實體類的屬性名稱就和數據庫
表的每個字段的名稱一樣,如果不配置,會將數據表裏面的字段名稱通過_連接的字段自動生成經典的駝峯表示法,比如我這裏有個字段名爲type_id,生成的屬性名稱爲typeId;
建議大家在數據庫建表的時候採用_將單詞分隔;
四、創建好之後點擊maven build
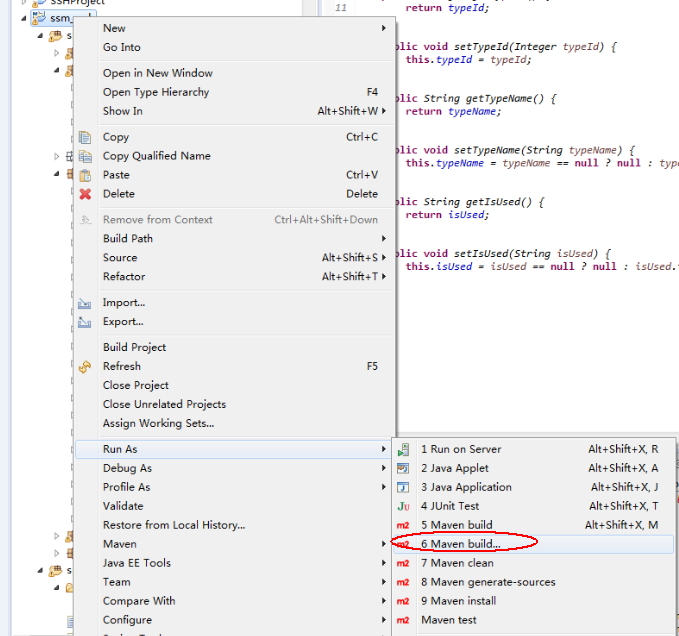
彈出

在goals中填入mybatis-generator:generate,然後點擊Run
也可以用maven命令行輸入mvn mybatis-generator:generate
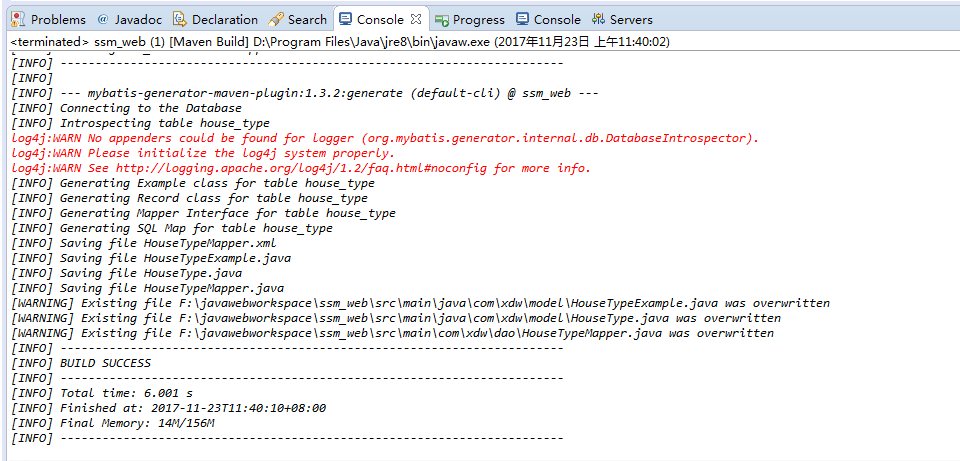
五、執行結果如下: