


http://zbar.sourceforge.net/iphone/sdkdoc/optimizing.html
2.4. Optimizing the Reader
As good as the iPhone performance is for a mobile device, the reality from an image processing perspective is that it represents a lower performance target. While the default configuration of the iPhone reader has been carefully tuned for the general case, you can often obtain much better results if you optimize for your specific application.
Note
Performance is a complex topic. The only way to tune performance is by changing settings and comparing measured results. If you are not comfortable with the concepts presented here, it is recommended that you leave the settings at the defaults and avoid compromising reliability.
Performance of the barcode reader is generally evaluated by two factors:
- The latency - how quickly it “recognizes” a barcode. Specifically this is the time from when the user puts a barcode in the frame or selects an image until a response is indicated back to the them.
- The reliability - it does not matter how quickly an image is scanned if an incorrect result is returned. That may seem obvious, but bad decodes are possible and you need to keep this in mind when changing settings that affect the reliability of the reader.
Basically our goal is to optimize the latency without sacrificing reliability. There are several factors that contribue to latency:
- The quality of the barcode image. Quality includes the available resolution, focus, lighting, noise, etc. We have more control over some of these than others.
- The camera. When scanning from the camera, the time for the autoexposure and autofocus to converge on an image that can be decoded is a significant contribution to the overall latency.
- The frame rate of the reader - this translates to the time it takes the scanner to process an image.
- The effort level of the reader - some of the available settings control “how hard” the reader tries to find barcodes in each frame.
- The delegate latency - the time spent in your application after a barcode has been detected until the user is notified.
Most of these factors are interrelated. We will discuss those we can control in detail, as well the settings you use to affect them. Then we will provide a few specific case examples.
2.4.1. Measuring Performance
Subjective response times are a good place to start (does it “feel” responsive to you?), and possibly the only way to evaluate the overall experience, but to compare incremental changes to interrelated settings and have meaningful performance discussions with others, we need a more quantitative approach.
The mach_absolute_time() function is a good tool for accurately measuring small delays. Research this function and learn how to apply it. As when measuring any real-world value, keep in mind that some variance is to be expected - even if you perform exactly the same operation multiple times, you will not see exactly the same measurement. You should collect several samples, discard any obvious outliers, and average the remaining measurements.
One way that the overall reader latency may be evaluated is by manually marking the time when the barcode is presented to the reader. Add a control to your overlay that captures the start time when tapped and compare this to the end time, just before your delegate returns.
The reader continually monitors the frame rate at which it is running. The measured value may be displayed for debugging purposes by enabling the showsFPSproperty. The readertest example does this and also provides control over many of the available settings, so you can quickly test how each setting affects the frame rate. You should target your optimization efforts to achieve a frame rate of at least 8-10fps, although 12-15fps is preferable.
You can measure the latency of your delegate using mach_absolute_time(). The measured value should be less than about 100ms, the smaller the better, to avoid noticeable lag.
The readertest is a good tool for testing the performance of the reader. You can tune the settings appropriately for your application and evaluate the effect each change has on the performance.
2.4.2. Delegate Latency
This latency contributor is the easiest for you to effect (and sometimes the easiest to overlook). You delegate method should update the interface - dismiss the controller or update your overlay to indicate success - and nothing else. All other processing should be deferred until after the animations have started.
2.4.3. Image Quality
2.4.3.1. Resolution
One might think that “more is better” in terms of resolution, but this is not necessarily the case. Given average image quality, the ideal resolution for scanning is right around three pixels per barcode “module” (the width of the smallest bar or space). Note that this measure is not an absolute image size or even a measure of the physical dimensions represented by a pixel sample, it only describes the sampled size of the barcode in the image.
As the resolution decreases below about two pixels per module, edge fidelity is lost and the bars and spaces start to merge together, making it impossible (for this library) to scan. This affects the density (feature size) and maximum size (data capacity) of the barcodes that can be detected. Conversely, as the resolution increases above about 4 pixels per module, noise can interfere with the edge detection and images will take longer to process.
Other quality factors, such as poor focus, bad lighting or even excessive noise, can increase (or decrease) the resolution requirement.
When scanning from the camera, the reader defaults to 640x480, which is good for most applications. On the iPhone 4, you can increase this using a capturesession preset. The iPhone 3GS does not have a higher resolution option available.
For scanning images, you can use maxScanDimension to control the scaled size of the converted image, or resort to converting them yourself.
If you want to read long linear barcodes or dense 2-D symbols, you will probably want to increase the resolution by adjusting these settings.
Keep in mind that more pixels will take longer to scan, refer to the frame rate discussion for ways to compensate.
2.4.3.2. Focus
Ideally we would fix the focus at a calculated optimum distance and optimize the aperture selection to maximize the depth of field. Unfortunately the APIs do not currently give us control over any of these settings, the best we can do (as of iOS 4) is continuous auto-focus mode - this mode is configured by the reader automatically. It can still take the device as long as 1-2 seconds to find the appropriate macro focus setting, but there just isn’t much we can do about that.
2.4.3.3. Lighting and Exposure
An image that is too bright or overexposed can completely wash out any barcodes. An image that is too dark or underexposed will not provide sufficient contrast for the scanner. Low light levels also tend to produce noisier images, possibly because the driver uses a faster “ISO” setting to compensate for the lighting.
The camera defaults to continuous automatic exposure and white balance. Since there are no other useful values, the reader leaves these unchanged from their default setting.
For the iPhone 4 device, the “torch” can be enabled to provide additional illumination for the camera in low-light conditions. The reader sets the torch to automatic by default, so it should turn on only when needeed... There have been some reports that the torch turns on inappropriately, washing out the image. If you find that this occurs, you should instead set the torchMode property of the ZBarReaderView to Off.
For scanning images from another source, you are again stuck with the available image quality. If you have any control over the image source, you should do what you can to fix quality problems there.
2.4.3.4. Noise
Some level of noise is filtered by the reader, but excessive noise levels create additional edges in the image which corrupt barcodes and increase scanning time (decreasing the frame rate).
As mentioned with lighting and exposure, noise mostly becomes a problem when the light-level is too low, but high-resolution images may also increase exposure to sensor noise.
We compensate for noise by reducing the resolution from the sensor maximum. Scaling the image down has the effect of averaging several pixels into one value, filtering out the high-frequency noise component.
2.4.4. Frame Rate
The time it takes to scan and decode an image/frame is roughly proportional to the number of pixels that are processed. The number and type of enabled symbologies and image noise can also affect the processing time.
We have several knobs available that affect the frame rate. Most of these are geared toward reducing the number of image pixels that are scanned.
2.4.4.1. Decrease the Resolution
Adjusting the resolution of the image is an easy way to quickly reduce the number of pixels. Smaller images also mean there is less data to carry around, which helps performance in other ways. For example, reducing each image dimension by 30% (eg, from 640x480 to 448x336) will about double the speed of the reader (to a point). [FIXME verify!]
Adjusting the resolution is described above. As mentioned there, reducing the resolution will negatively impact the minimum feature size and maximum barcode size that can be scanned, but it will help filter noise.
2.4.4.2. Crop the Scan Region
It may not always be necessary for an application to scan all the way to the edges of the image. By cropping the scan area, you can get most of the benefits of reduced resolution without sacrificing the minimum feature size. Cropping will also not affect image noise, but similar to decreasing the resolution, it does affect the maximum size barcode that can be scanned.
For all cases you set the crop rectangle scanCrop property. Note that the rectangle provided to the controller is normalized across image size and rotation. This means that the coordinates range from 0 to 1 and the axes will be arranged such that the x-axis of the crop rectangle corresponds to the major (longer) image axis.
Your interface will typically need to indicate the cropped scan area to the user with visual queues. Use the cameraOverlayView to provide this.
By default, the ZBarReaderView recognizes a pinch gesture to digitally zoom the preview around the center of the image. This zoom does not affect the resolution of the image, but it does crop the scan region to the visible area. You can also disable the pinch gesture and set the zoom programmatically.
2.4.4.3. Limit the Scan Density
The scanner works by making scan passes across the pixel rows and colums of the image. The density of the passes is configured at the scanner as a pixel stride for each axis. ZBAR_CFG_Y_DENSITY (ZBAR_CFG_X_DENSITY) controls the number of pixel rows (columns) that are skipped between successive horizontal (vertical) scan passes. (Note that “density” is really not a good name for the configuation settings... “stride” might be more appropriate.)
Decreasing the scan density (by increasing the stride setting) is a great way to limit the processing (increasing the frame rate) without sacrificing scan resolution - each scan pass is still made at full image resolution, there are just fewer passes (less redundancy).
Setting the stride value to 0 completely disables scanning in that direction. This is very useful when reading linear codes with a visual alignment guide - scanning parallel to the bars is a waste of cycles which may be better applied to support higher resolution or increased density of scans across the symbol. Note that some 2-D symbologies (QR Code) require scans in both directions.
Setting the stride to a very large value will generate a single scan pass through the center of the image. Note that some symbologies will not be detected without multiple successful passes; it is usually better to combine this setting with cropping to generate a number of closely clustered scan passes in the target area.
Note that the density also affects the aspect ratio and rotation that can be tolerated. If you set it too large, some barcodes will become more difficult to read.
In general, 2 to 4 is a good target for the stride setting, unless you have very high or low resolution images.
2.4.4.4. Disable unused symbologies
Limiting the symbologies to the set of interest should provide a small performance boost. It also improves decode reliability - it is impossible to receive an incorrect or unexpected decode result from a symbology that is disabled.
The reader does support full auto-discrimination among the supported symbologies, but with all of them enabled you may need to compensate elsewhere to get a good frame rate.
For example, if you are only interested in QR codes, disable the others. The robust way to do this is by disabling all symbologies and then reenabling only those you want. This helps isolate you from encountering new symbologies that may be added in future versions of the library until you are ready to handle them:
[scanner setSymbology: 0
         config: ZBAR_CFG_ENABLE
         to: 0];
[scanner setSymbology: ZBAR_QRCODE
         config: ZBAR_CFG_ENABLE
         to: 1];
Even if you would like your application to support multiple symbologies, you may consider if there is a way to limit the enabled subset based on the scanning context, etc...
2.4.5. Examples
These examples demonstrate several scenarios for scanning from the camera with automatic capture using iOS 4. You can try them yourself using the readertest. For each example, start with the default settings (by tapping the ZBarReaderViewController class), then enable continuous mode and the custom overlay (by disablingshowsZBarControls). You should also use a release build and avoid running in the debugger.
Frame rates are approximate, measured on an iPhone 3GS running iOS 4.0.1 in a well lit room. Two measurements are taken for each sample: the rate with the camera pointed at a blank white page such that it fills the frame, and the rate while continuously decoding the provided example. For best results, it is recommended that you print the examples rather than scanning them from the screen.
For reference, the base frame rates with default settings are 12fps for a blank white page, 7.5fps for this basic EAN symbol and 2.2fps for this basic QR symbol.
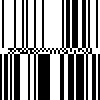
2.4.5.1. Long Linear Symbols
For this example, we will use a relatively long Code 128 barcode.
While it should be possible to read this symbol with the default settings, you may notice that it is not very reliable. You will have to stretch the symbol across the entire screen, and even then the default settings will only give you about 1.6 pixels per module, well below the ideal target of 3. To improve these results, we want to maximize scanning resolution for the long image axis.
- Disable the default zoom/crop - zoom all the way out by hitting “Scan” and pinching the preview; the frame rate immediately drops to 8fps / 4.8fps.
We should compensate for this reduction in the frame rate:
- Crop the image to a long, skinny rectangle - set the scanCrop setting to {{0, 0.3}, {1, 0.4}}; The frame rate jumps up to 18fps / 8.7fps.
- Disable scans across the short image axis - set the CFG_X_DENSITY setting to 0. The frame rate goes all the way to 30fps / 13fps.
Since we have plenty of margin with the frame rate, we can minimize the total decode latency by performing more scan passes through the symbol:
- Increase the scan density - set the CFG_Y_DENSITY setting to 1 (13.5fps / 5fps) or 2 (24fps / 9fps).
You should now be able to quickly and reliably decode long linear symbols.
If have an iPhone 4, you may also try increasing the resolution to support even longer symbols (NB there is no readertest setting for resolution). You may have to compensate elsewhere to bring the frame rate back to a reasonable level.
2.4.5.2. High Density QR Symbols
For this example we will use a version 29 QR Code symbol.
In this case we still want to maximize the resolution, but we also need to increase the scan density to reliably pick up the small finder patterns:
- Maximize scan density in both directions - set the CFG_X_DENSITY and CFG_Y_DENSITY settings both to 1. You should be able to scan the symbol now, although the frame rate drops to 4.5fps / 1fps
- Disable the default zoom/crop - zoom all the way out by hitting “Scan” and pinching the preview; the frame rate drops further to 3fps / 0.7fps
We can compensate somewhat for the reduced frame rate:
- Crop the image to a square - set scanCrop to {{0.125, 0}, {.75, 1}}. This boosts the frame rate slightly to 3.7fps / 0.75fps.
- Disable linear symbologies - set the symbologies such that only QR Code is enabled (4fps / 1fps)
Even though the frame rate is still pretty bad, the QR recognition latency should be acceptable.
If have an iPhone 4, you may also try increasing the resolution to support even denser QR symbols (NB there is no readertest setting for resolution). You may have to compensate elsewhere to bring the frame rate back to a reasonable level.
2.4.5.3. Small DataBar Symbols
For this example we will use a DataBar symbol printed with a small feature size, typical of the stickers used to tag produce. Scale it when printing such that the printed dimensions are about 1cm square. This symbol should scan with the default settings, but we will attempt to optimize the scan latency for this case.
As well as high barcode resolution, we also want high density passes in both directions to minimize sensitivity to rotation:
- Maximize scan density in both directions - set the CFG_X_DENSITY and CFG_Y_DENSITY settings both to 1. The frame rate drops to 4.5fps / 3fps.
Compensate for the reduction in frame rate by zooming in on the small symbol, which crops the scanned image. Zooming also helps the user see the small barcode:
- Zoom all the way in - hit “Scan” and un-pinch the preview. The frame rate recovers to 11fps / 6.2fps.
- Crop the image to a square - set scanCrop to {{0.125, 0}, {0.75, 1}} (14fps / 7.5fps)
- Disable all symbologies except DataBar and DataBar Expanded (14.5fps / 9fps)
The reader should now be very sensitive to DataBar, even when scanned at an angle.