通過修改文件實現DNS委派

前面我們說了很多關於DNS的配置的問題,但那些都是在圖形界面操作的,下面我們就來聊聊通過修改文件來實現DNS的一些常用的功能。

相信熟悉DNS的朋友都應該知道在我們服務器的磁盤當中有這樣一個路徑的文件:C:\Windows\System32\dns,這個文件就是我們前面經常提到的DNS在服務器中所存在的位置,在dns文件夾裏面有一個名字叫:boot的文件,這個文件是DNS服務的引導文件,但是在系統默認情況下DNS服務不是從文件引導,而是從註冊表引導,那麼怎麼能讓系統從boot文件引導DNS呢,下面我們就通過實驗來了解:

server01上的DNS負責解析tom.com,通過修改文件將sh.tom.com委派給server02解析,具體實驗拓撲如下:

650) this.width=650;" width="644" height="310" title="委派" style="margin-right:auto;margin-left:auto;border-top-width:0px;border-right-width:0px;border-bottom-width:0px;float:none;" alt="委派" src="http://s3.51cto.com/wyfs02/M00/5C/07/wKiom1UZCbGBcGQNAACOrTyazFg801.jpg" border="0" />

1、在server01上創建委派:

鼠標右鍵server01的DNS服務器,點擊屬性:
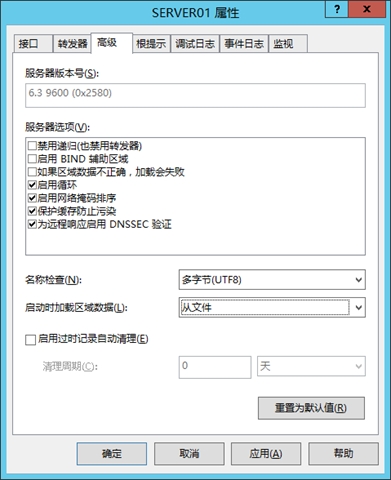
650) this.width=650;" width="395" height="484" title="image" style="margin-right:auto;margin-left:auto;border-top-width:0px;border-right-width:0px;border-bottom-width:0px;float:none;" alt="image" src="http://s3.51cto.com/wyfs02/M01/5C/07/wKiom1UZCbLBJ0RcAAEQrEFJatw113.jpg" border="0" />

點擊高級:

650) this.width=650;" width="395" height="484" title="image" style="margin-right:auto;margin-left:auto;border-top-width:0px;border-right-width:0px;border-bottom-width:0px;float:none;" alt="image" src="http://s3.51cto.com/wyfs02/M02/5C/07/wKiom1UZCbOybKYPAAFyGrRfB7s385.jpg" border="0" />

點擊啓動時加載區域數據,選擇從文件:

650) this.width=650;" width="395" height="484" title="image" style="margin-right:auto;margin-left:auto;border-top-width:0px;border-right-width:0px;border-bottom-width:0px;float:none;" alt="image" src="http://s3.51cto.com/wyfs02/M02/5C/01/wKioL1UZCu-h8eq1AAFmeqaE1s8870.jpg" border="0" />   

點擊應用然後點擊確定。

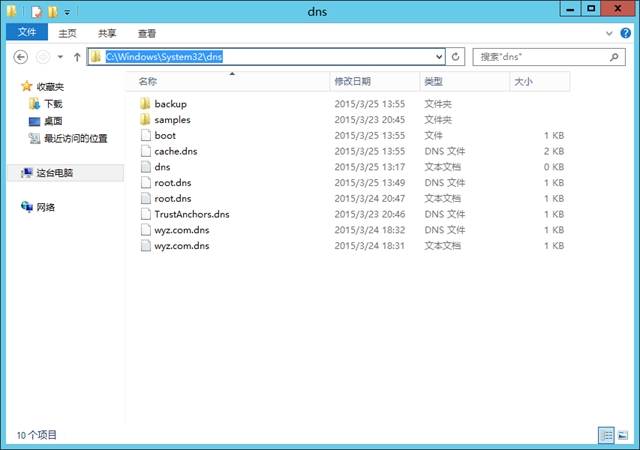
打開C:\Windows\System32\dns這個目錄:

650) this.width=650;" width="644" height="454" title="image" style="margin-right:auto;margin-left:auto;border-top-width:0px;border-right-width:0px;border-bottom-width:0px;float:none;" alt="image" src="http://s3.51cto.com/wyfs02/M00/5C/01/wKioL1UZCvCSVZGoAAGTJluynOo449.jpg" border="0" /> 

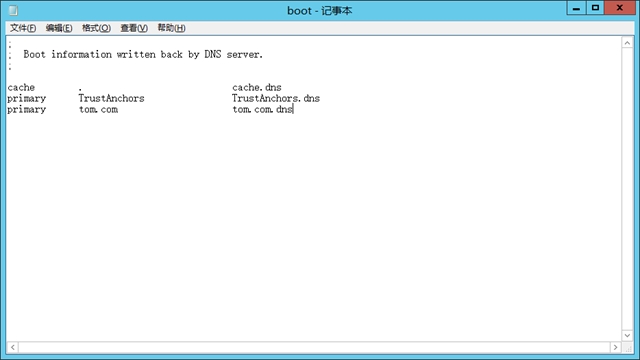
鼠標右鍵boot文件,選擇從記事本打開:

650) this.width=650;" width="644" height="364" title="image" style="margin-right:auto;margin-left:auto;border-top-width:0px;border-right-width:0px;border-bottom-width:0px;float:none;" alt="image" src="http://s3.51cto.com/wyfs02/M01/5C/01/wKioL1UZCvDBD31nAACfw1fIDZc390.jpg" border="0" />

創建tom.com這個區域:

650) this.width=650;" width="644" height="364" title="image" style="margin-right:auto;margin-left:auto;border-top-width:0px;border-right-width:0px;border-bottom-width:0px;float:none;" alt="image" src="http://s3.51cto.com/wyfs02/M02/5C/01/wKioL1UZCvDzQYuSAACqmf_5Qco750.jpg" border="0" />

保存文件,然後在  C:\Windows\System32\dns這個目錄下創建tom.com.dns這個文件:

650) this.width=650;" width="644" height="454" title="image" style="margin-right:auto;margin-left:auto;border-top-width:0px;border-right-width:0px;border-bottom-width:0px;float:none;" alt="image" src="http://s3.51cto.com/wyfs02/M00/5C/01/wKioL1UZCvHQK2o9AAGZta9R71M909.jpg" border="0" />

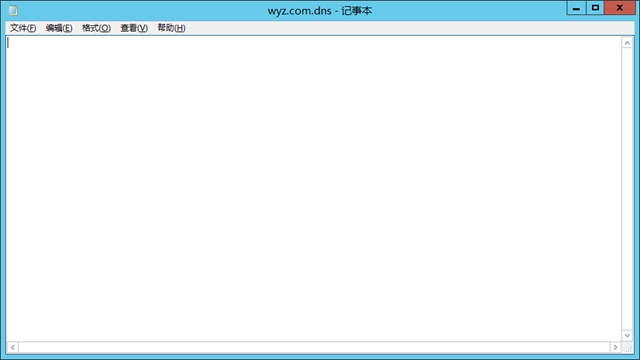
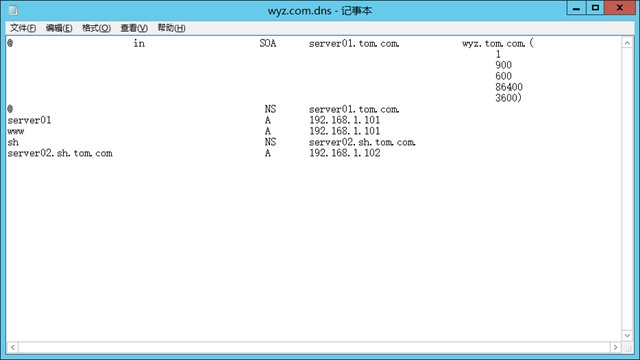
鼠標右鍵wyz.com.dns這個文件選擇從記事本打開:

650) this.width=650;" width="644" height="364" title="image" style="margin-right:auto;margin-left:auto;border-top-width:0px;border-right-width:0px;border-bottom-width:0px;float:none;" alt="image" src="http://s3.51cto.com/wyfs02/M00/5C/07/wKiom1UZCbbBEVciAAB9UegZgN0131.jpg" border="0" />

下面我們開始創建tom.com這個區域的SOA記錄和NS記錄以及粘連A記錄等:

650) this.width=650;" width="644" height="364" title="image" style="margin-right:auto;margin-left:auto;border-top-width:0px;border-right-width:0px;border-bottom-width:0px;float:none;" alt="image" src="http://s3.51cto.com/wyfs02/M01/5C/01/wKioL1UZCvGz8_epAACk36dIVjs452.jpg" border="0" />

下面我們對server02進行委派:

650) this.width=650;" width="644" height="364" title="image" style="margin-right:auto;margin-left:auto;border-top-width:0px;border-right-width:0px;border-bottom-width:0px;float:none;" alt="image" src="http://s3.51cto.com/wyfs02/M02/5C/01/wKioL1UZCvGxyE9zAAC7Wehjv2A503.jpg" border="0" />

打開server01的DNS管理器並且重新啓動: 

650) this.width=650;" width="644" height="450" title="image" style="margin-right:auto;margin-left:auto;border-top-width:0px;border-right-width:0px;border-bottom-width:0px;float:none;" alt="image" src="http://s3.51cto.com/wyfs02/M00/5C/01/wKioL1UZCvKC_4uxAAFOb6fsl6M149.jpg" border="0" />

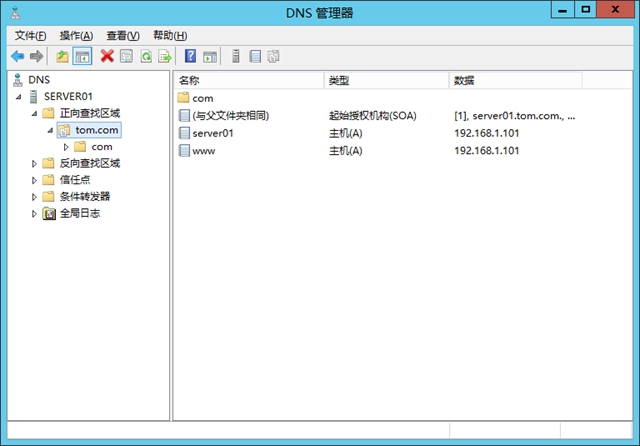
到這裏我們在server01端的DNS配置基本就完成。

2、在server02上創建sh.tom.com區域:

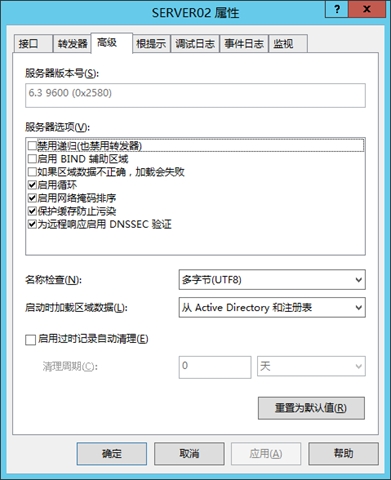
鼠標右鍵server02的DNS服務器,點擊屬性:

650) this.width=650;" width="395" height="484" title="image" style="margin-right:auto;margin-left:auto;border-top-width:0px;border-right-width:0px;border-bottom-width:0px;float:none;" alt="image" src="http://s3.51cto.com/wyfs02/M01/5C/01/wKioL1UZCvKAvavJAAEZDXBNuiI101.jpg" border="0" />

點擊高級:

 650) this.width=650;" width="395" height="484" title="image" style="margin-right:auto;margin-left:auto;border-top-width:0px;border-right-width:0px;border-bottom-width:0px;float:none;" alt="image" src="http://s3.51cto.com/wyfs02/M02/5C/01/wKioL1UZCvaDyHYgAAFyHe8n4YU699.jpg" border="0" />

點擊啓動時加載區域數據,選擇從文件:

650) this.width=650;" width="395" height="484" title="image" style="margin-right:auto;margin-left:auto;border-top-width:0px;border-right-width:0px;border-bottom-width:0px;float:none;" alt="image" src="http://s3.51cto.com/wyfs02/M00/5C/01/wKioL1UZCvaxOoRZAAFmbUbBQX0847.jpg" border="0" />

點擊應用,然後點擊確定。

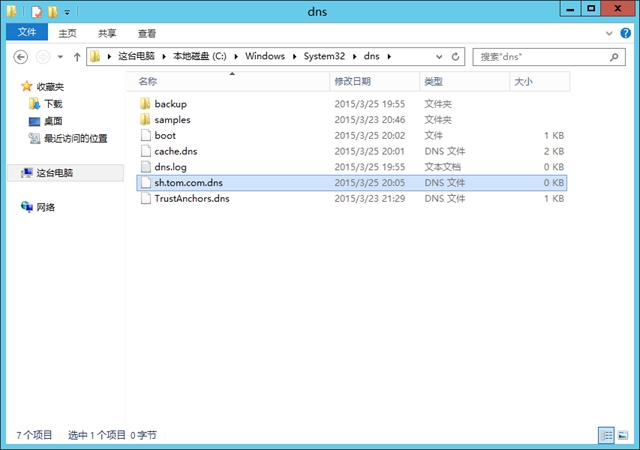
打開:C:\Windows\System32\dns:

650) this.width=650;" width="644" height="454" title="image" style="margin-right:auto;margin-left:auto;border-top-width:0px;border-right-width:0px;border-bottom-width:0px;float:none;" alt="image" src="http://s3.51cto.com/wyfs02/M01/5C/01/wKioL1UZCveTQsQsAAFeSVeH0_w434.jpg" border="0" />

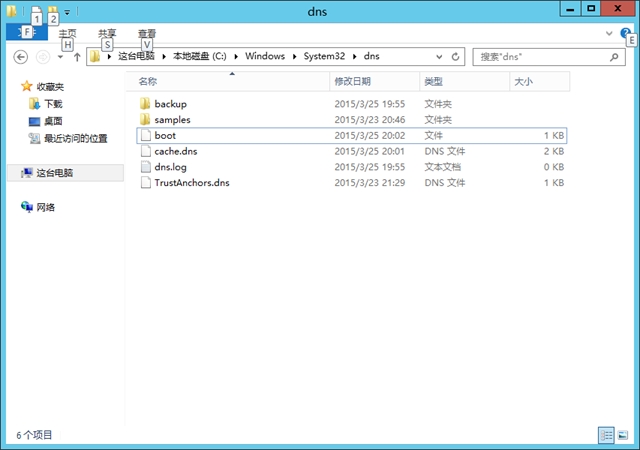
雙擊打開boot,然後新建sh.tom.com區域:

650) this.width=650;" width="644" height="437" title="image" style="margin-right:auto;margin-left:auto;border-top-width:0px;border-right-width:0px;border-bottom-width:0px;float:none;" alt="image" src="http://s3.51cto.com/wyfs02/M01/5C/07/wKiom1UZCbyxHkk_AAD0NAB1oY4327.jpg" border="0" />

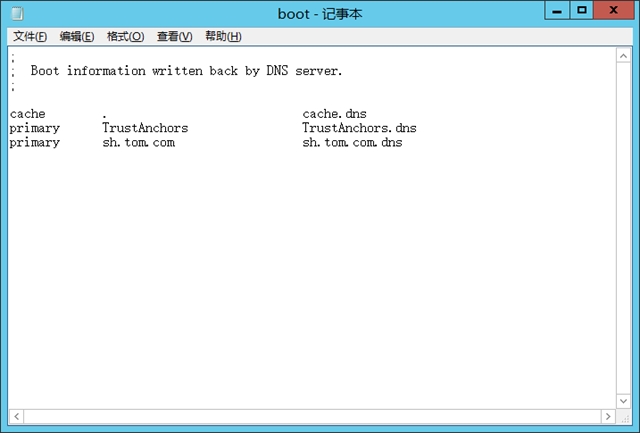
保存boot文件,然後在DNS根目錄下新建sh.tom.com文件:

650) this.width=650;" width="644" height="454" title="image" style="margin-right:auto;margin-left:auto;border-top-width:0px;border-right-width:0px;border-bottom-width:0px;float:none;" alt="image" src="http://s3.51cto.com/wyfs02/M02/5C/07/wKiom1UZCbzhe31rAAFzLz_ob1I072.jpg" border="0" />    

雙擊打開sh.tom.com然後新建SOA、NS、等記錄:
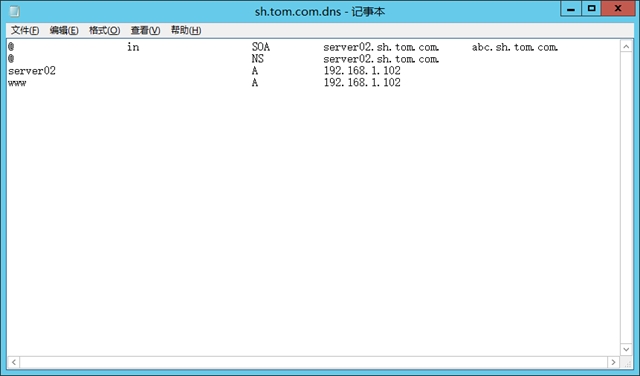
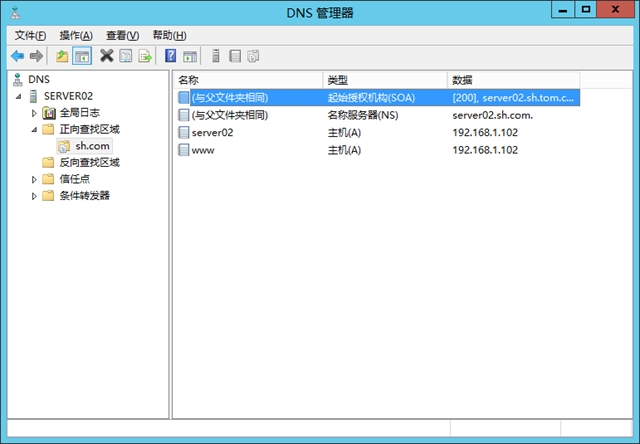
650) this.width=650;" width="644" height="380" title="image" style="margin-right:auto;margin-left:auto;border-top-width:0px;border-right-width:0px;border-bottom-width:0px;float:none;" alt="image" src="http://s3.51cto.com/wyfs02/M02/5C/07/wKiom1UZCb2AYl3lAAC7A67yVxs616.jpg" border="0" />

保存該文件,然後打開DNS管理器:


650) this.width=650;" width="644" height="450" title="image" style="margin-right:auto;margin-left:auto;border-top-width:0px;border-right-width:0px;border-bottom-width:0px;float:none;" alt="image" src="http://s3.51cto.com/wyfs02/M00/5C/01/wKioL1UZCvjBk5pHAAE-UA3XOrs405.jpg" border="0" />

重新啓動server02的DNS管理器:

650) this.width=650;" width="644" height="448" title="image" style="margin-right:auto;margin-left:auto;border-top-width:0px;border-right-width:0px;border-bottom-width:0px;float:none;" alt="image" src="http://s3.51cto.com/wyfs02/M01/5C/01/wKioL1UZCvjjd4fhAAFYHnMLrGo500.jpg" border="0" />

3、測試DNS委派是否成功:

開啓客戶機clent,DNS指向server01,然後用PING命令測試www.sh.tom.com

650) this.width=650;" height="423" title="image" style="border:0px;margin-right:auto;margin-left:auto;float:none;" alt="image" src="http://s3.51cto.com/wyfs02/M01/5C/07/wKiom1UZCb7hWjw7AAHDWKJVlfA953.jpg" border="0" />

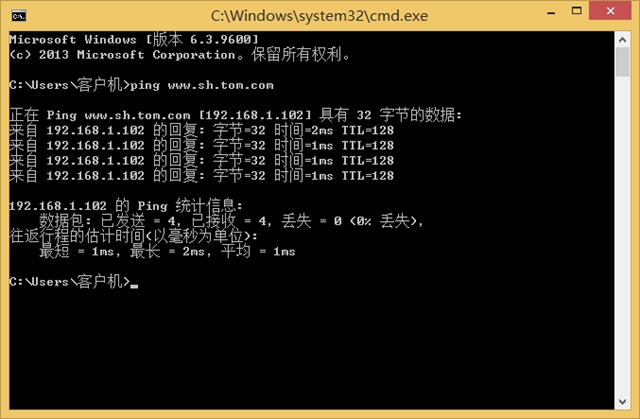
OK!通過上面的窗口可以看到已經成功的PING通了www.sh.tom.com,這就證明我們的實驗成功。

本文出自 “Mr、吳的微軟博客” 博客,請務必保留此出處http://wuyvzhang.blog.51cto.com/9992636/1626474

發表評論
所有評論
還沒有人評論,想成為第一個評論的人麼? 請在上方評論欄輸入並且點擊發布.
相關文章