BroadCastReceiver
什麼是BroadcastReceiver ?
BroadcastReceiver是廣播接收者安卓四大組件之一,應用於同一APP下多個組件之間傳遞數據(Activity/Fragment/Service之間傳遞數據)或兩個APP之間傳遞數據
BroadcastReceiver三要素
廣播三要素:
(1)廣播發送者 : 發送廣播
(2)廣播接收者(調頻): 用於接收廣播
(3)要處理的事情 :處理廣播的相關信息, Intent有圖對象
廣播的生命週期&註冊方式
靜態註冊和動態註冊的區別:假如說Activity是接受者:
動態註冊:
(1)廣播會跟Activity的生命週期的結束而結束;
(2)自由的控制註冊和取消,有很大的靈活性
     //創建一個廣播
     myReceiver = new MyReceiver();
     //添加廣播過濾器
     IntentFilter intentFilter = new IntentFilter();
     //添加action
     intentFilter.addAction(BroadcastConst.ACTION);
     //註冊
     registerReceiver(myReceiver,intentFilter);
靜態註冊:
(1)廣播不會跟隨Activity的生命週期的結束而結束,一直存在,即使應用程序關閉,也會被喚醒接受廣播
(2)全局的廣播
在清單文件中註冊
<!--我是一個廣播-->
        <receiver
            android:name=".MyReceiver"
            android:enabled="true"
            android:exported="true">
            <intent-filter>
                <action android:name="com.feng.broad"></action>
            </intent-filter>
        </receiver>
		<!--廣播結束-->
廣播的類型
無序廣播(標準廣播)
Intent intent = new Intent();
     intent.setAction("com.feng.broad");
     Bundle bundle = new Bundle();
     bundle.putString("msg","大風起兮雲飛揚,高薪就業創輝煌");
     intent.putExtras(bundle);
     sendBroadcast(intent);
有序廣播
Intent intent1 = new Intent();
 intent1.setAction("com.feng.broad");
 //第一個參數是intent 二是權限名.
 sendOrderedBroadcast(intent1,null);
使用步驟
1.寫一個MyReceiver類繼承BroadcastReceiver
2.清單文件中註冊並設置過濾器
3.廣播者發送廣播
4.廣播接收者判斷Action 接收數據
演示案例代碼
清單文件:
<?xml version="1.0" encoding="utf-8"?>
<manifest xmlns:android="http://schemas.android.com/apk/res/android"
   package="com.example.day12">

   <application
       android:allowBackup="true"
       android:icon="@mipmap/ic_launcher"
       android:label="@string/app_name"
       android:roundIcon="@mipmap/ic_launcher_round"
       android:supportsRtl="true"
       android:theme="@style/AppTheme">
       <receiver
           android:name=".MyReceiver2"
           android:enabled="true"
           android:exported="true">
           <intent-filter android:priority="1000">
               <action android:name="com.feng.broad"></action>
           </intent-filter>

       </receiver>
       <receiver
           android:name=".MyReceiver"
           android:enabled="true"
           android:exported="true">
           <intent-filter android:priority="900">
               <action android:name="com.feng.broad" />
           </intent-filter>
       </receiver>

       <activity android:name=".MainActivity">
           <intent-filter>
               <action android:name="android.intent.action.MAIN" />

               <category android:name="android.intent.category.LAUNCHER" />
           </intent-filter>
       </activity>
   </application>

</manifest>
MainActivity:
public class MainActivity extends AppCompatActivity implements View.OnClickListener {
    private Button sendId;
    private  MyReceiver myReceiver;
    private Button sendOrderId;
    @Override
    protected void onCreate(Bundle savedInstanceState) {
        super.onCreate(savedInstanceState);
        setContentView(R.layout.activity_main);


        sendOrderId = findViewById(R.id.send_order_id);
        sendOrderId.setOnClickListener(this);
        sendId = findViewById(R.id.send_id);
        sendId.setOnClickListener(this);
        //1,創建一個廣播
//        myReceiver = new MyReceiver();
//        //添加廣播過濾器
//        IntentFilter intentFilter = new IntentFilter();
//        //添加action
//        intentFilter.addAction(BroadcastConst.ACTION);
//        //註冊
//        registerReceiver(myReceiver,intentFilter);


    }

    @Override
    public void onClick(View v) {
        int id = v.getId();
        switch (id) {
            case R.id.send_id:
                Intent intent = new Intent();
                intent.setAction("com.feng.broad");
                Bundle bundle = new Bundle();
                bundle.putInt("msg",123);
                intent.putExtras(bundle);
                sendBroadcast(intent);
                break;

            case R.id.send_order_id:
                Intent intent1 = new Intent();
                intent1.setAction("com.feng.broad");
                sendOrderedBroadcast(intent1,null);
                break;

            default:
                break;
        }
    }

    @Override
    protected void onDestroy() {
        super.onDestroy();
        //註銷廣播
        unregisterReceiver(myReceiver);
    }
}
廣播接收者
	public class MyReceiver extends BroadcastReceiver {
   private static final String TAG = "MyReceiver";
   @Override
   public void onReceive(Context context, Intent intent) {
       //TODO 1:獲取action
       String action = intent.getAction();
       if(BroadcastConst.ACTION.equals(action)){
//            Bundle extras = intent.getExtras();
//            int msg = extras.getInt("msg");
           Log.i(TAG, "onReceive: ");
       }
   }
}
本地廣播
簡介:
發送的廣播事件不被其他應用程序獲取,也不能響應其他應用程序發送的廣播事件,並且只能使用LocalBroadcastManager通過動態註冊
PS:androidx需導入以下包纔可以正常使用LocalBroadcastManager類
`implementation 'androidx.localbroadcastmanager:localbroadcastmanager:1.0.0'`
特點:
可以明確的知道正在發送的廣播不會離開我們的程序,不用擔心機密數據泄露
其他程序無法將廣播發送到我們的程序內部,不需要擔心安全問題
發送本地廣播比系統全局的廣播效率高
代碼
//創建一個本地廣播
localBroadcastManager = LocalBroadcastManager.getInstance(this);

	    //動態註冊一個廣播
        myReceiver = new MyReceiver();
        IntentFilter intentFilter = new IntentFilter();
        intentFilter.addAction("com.feng");
        localBroadcastManager.registerReceiver(myReceiver,intentFilter);46
全局廣播
簡介:
發送的廣播事件可被其他應用程序獲取,也能響應其他應用程序發送的廣播事件(可以通過 exported–是否監聽其他應用程序發送的廣播 在清單文件中控制) 全局廣播既可以動態註冊,也可以靜態註冊
接收系統消息的廣播
只需要在清單文件中聲明相應的系統Action 即可實現對系統動作的廣播
案例:使用BroadCastReceiver發送消息更新UI
清單
<?xml version="1.0" encoding="utf-8"?>
<LinearLayout xmlns:android="http://schemas.android.com/apk/res/android"
    xmlns:app="http://schemas.android.com/apk/res-auto"
    xmlns:tools="http://schemas.android.com/tools"
    android:layout_width="match_parent"
    android:layout_height="match_parent"
    android:orientation="vertical"
    tools:context=".Main2Activity">

    <Button
        android:layout_width="wrap_content"
        android:layout_height="wrap_content"
        android:id="@+id/updata_ui_id"
        android:text="更新一個圖片"
        />

    <ImageView
        android:layout_width="wrap_content"
        android:layout_height="wrap_content"
        android:id="@+id/image_id"
        android:src="@mipmap/ic_launcher"
        />
</LinearLayout>
接收者
public class MyReceiver2 extends BroadcastReceiver {

    private Handler handler;
    private ImageView imageView;

    public MyReceiver2(Handler handler, ImageView imageView) {
        super();
        this.handler = handler;
        this.imageView = imageView;
    }

    @Override
    public void onReceive(Context context, Intent intent) {
        String action = intent.getAction();
        if ("com.feng.ui".equals(action)){
            handler.post(new Runnable() {
                @Override
                public void run() {
                    imageView.setImageResource(R.mipmap.ic_launcher_round);
                }
            });
        }
    }
}
MainActivity
public class MainActivity extends AppCompatActivity {
    private Button updataUiId;
    private ImageView imageId;
    private MyReceiver2 myReceiver2;

    private Handler handler = new Handler(){
        @Override
        public void handleMessage(Message msg) {
            super.handleMessage(msg);

        }
    };
    @Override
    protected void onCreate(Bundle savedInstanceState) {
        super.onCreate(savedInstanceState);
        setContentView(R.layout.activity_main);

        updataUiId = findViewById(R.id.updata_ui_id);
        imageId = findViewById(R.id.image_id);

        myReceiver2  = new MyReceiver2(handler,imageId);

        IntentFilter intentFilter = new IntentFilter();
        intentFilter.addAction("com.feng.ui");
        registerReceiver(myReceiver2,intentFilter);

        updataUiId.setOnClickListener(new View.OnClickListener() {
            @Override
            public void onClick(View v) {
                Intent intent = new Intent();
                intent.setAction("com.feng.ui");
                sendBroadcast(intent);
            }
        });
    }

    @Override
    protected void onDestroy() {
        super.onDestroy();
        unregisterReceiver(myReceiver2);
    }
}
EventBus
三個角色
Event:事件,它可以是任意類型,EventBus會根據事件類型進行全局的通知。
Subscriber:事件訂閱者,在EventBus 3.0之前我們必須定義以onEvent開頭的那幾個方法,分別是onEvent、onEventMainThread、onEventBackgroundThread和onEventAsync,而在3.0之後事件處理的方法名可以隨意取,不過需要加上註解@subscribe,並且指定線程模型,默認是POSTING。
Publisher:事件的發佈者,可以在任意線程裏發佈事件。一般情況下,使用EventBus.getDefault()就可以得到一個EventBus對象,然後再調用post(Object)方法即可。
四種線程模型
EventBus3.0有四種線程模型,分別是:
POSTING:默認,表示事件處理函數的線程跟發佈事件的線程在同一個線程。
MAIN:表示事件處理函數的線程在主線程(UI)線程,因此在這裏不能進行耗時操作。
BACKGROUND:表示事件處理函數的線程在後臺線程,因此不能進行UI操作。如果發佈事件的線程是主線程(UI線程),那麼事件處理函數將會開啓一個後臺線程,如果果發佈事件的線程是在後臺線程,那麼事件處理函數就使用該線程。
ASYNC:表示無論事件發佈的線程是哪一個,事件處理函數始終會新建一個子線程運行,同樣不能進行UI操作。
依賴導包(Androidx)
implementation 'org.greenrobot:eventbus:3.0.0'
用fragment接收eventbus代碼
fragment
public class BlankFragment extends Fragment {
    private TextView show;

    public BlankFragment() {
        // Required empty public constructor


    }
    @Override
    public void onCreate(@Nullable Bundle savedInstanceState) {
        super.onCreate(savedInstanceState);
        EventBus.getDefault().register(this);

    }
    @Override
    public View onCreateView(LayoutInflater inflater, ViewGroup container,Bundle savedInstanceState) {
        // Inflate the layout for this fragment
        View inflate = inflater.inflate(R.layout.fragment_blank, container, false);
        show = inflate.findViewById(R.id.show);
        return inflate;
    }
    @Subscribe(threadMode = ThreadMode.MAIN)
    public void getmsg(Message msg) {
        String msg1 = msg.getMsg();
        show.setText(msg1);
    }

    @Override
    public void onDestroy() {
        super.onDestroy();
        EventBus.getDefault().removeAllStickyEvents();
    }
}
MainActivity
public class EvevtBus extends AppCompatActivity {
    private EditText edit;
    private Button btn;

    @Override
    protected void onCreate(Bundle savedInstanceState) {
        super.onCreate(savedInstanceState);
        setContentView(R.layout.activity_evevt_bus);
        edit = (EditText) findViewById(R.id.edit);
        btn = (Button) findViewById(R.id.btn);

        btn.setOnClickListener(new View.OnClickListener() {
            @Override
            public void onClick(View view) {
                String msg = edit.getText().toString();
                Message message = new Message(msg);
                EventBus.getDefault().post(message);
            }
        });
    }
}
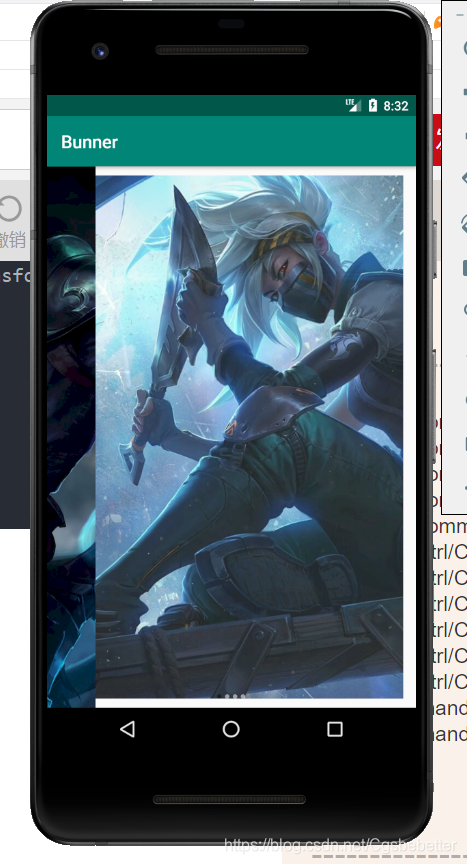
Banner
依賴&權限
導入依賴
compile 'com.youth.banner:banner:1.4.10'
清單文件權限
<!-- if you want to load images from the internet -->
<uses-permission android:name="android.permission.INTERNET" />

<!-- if you want to load images from a file OR from the internet -->
<uses-permission android:name="android.permission.READ_EXTERNAL_STORAGE" />
案例代碼
XML:
<LinearLayout xmlns:android="http://schemas.android.com/apk/res/android"
    xmlns:app="http://schemas.android.com/apk/res-auto"
    xmlns:tools="http://schemas.android.com/tools"
    android:layout_width="match_parent"
    android:layout_height="match_parent"
    tools:context=".Bunner">

    <com.youth.banner.Banner
        android:id="@+id/banner"
        android:layout_width="match_parent"
        android:layout_height="match_parent">

    </com.youth.banner.Banner>

</LinearLayout>
外部類圖片下載器
public class imgLoader extends ImageLoader {
    @Override
    public void displayImage(Context context, Object path, ImageView imageView) {
        Glide.with(context).load(path).into(imageView);
    }
}
MainActivity
protected void onCreate(Bundle savedInstanceState) {
super.onCreate(savedInstanceState);
setContentView(R.layout.activity_bunner);
banner = (Banner) findViewById(R.id.banner);
//綁定下載器
banner.setImageLoader(new imgLoader());
//創建圖片集合作爲數據源
ArrayList<String> list = new ArrayList<>();
list.add("https://timgsa.baidu.com/timg?image&quality=80&size=b9999_10000&sec=1571309316416&di=b25fb8a2fee660ae963a41c56c067cc6&imgtype=0&src=http%3A%2F%2Fi0.hdslb.com%2Fbfs%2Farticle%2F49c607dbba21551282e97ac4c71294373b4a488e.jpg");
list.add("https://timgsa.baidu.com/timg?image&quality=80&size=b9999_10000&sec=1571309316412&di=f8e4ac3d1788a1419a961d169eac8504&imgtype=0&src=http%3A%2F%2Fi0.hdslb.com%2Fbfs%2Farticle%2Fc4f07739f34bc111ee50c84b2780a49d850b9cd5.jpg");
list.add("https://timgsa.baidu.com/timg?image&quality=80&size=b9999_10000&sec=1571309316410&di=71bed840c95a5bd8a9dc4899526981bb&imgtype=0&src=http%3A%2F%2Fi0.hdslb.com%2Fbfs%2Farchive%2Fc65f0fb7343516425d1b0750094c111175a4cfb4.jpg");
list.add("https://timgsa.baidu.com/timg?image&quality=80&size=b9999_10000&sec=1571309316406&di=ed83b7a2eb9c9d5ab90ed112d4912bd4&imgtype=0&src=http%3A%2F%2Fpic1.win4000.com%2Fwallpaper%2F0%2F58a3c9d34cf61.jpg");
banner.setImages(list);
//設置banner樣式
banner.setBannerStyle(BannerConfig.CIRCLE_INDICATOR);
//設置動畫效果
banner.setBannerAnimation(Transformer.DepthPage);
//設置輪播間隔時間
banner.setDelayTime(1000);
//啓動banner
banner.start();
}
}
```