


git
git 是軟件版本管理的利器。想起當年陳同學給我展示 git 的情形,簡直目瞪口呆,直呼神奇,從此受不釋手。
jerry@jerry-virtual-machine:~/Desktop$ sudo apt install git
jerry@jerry-virtual-machine:~/Desktop$ git --version
git version 2.25.1
一行代碼搞定安裝,簡單不~~
以後也會開個專題記錄一下 git 的簡單使用。
Terminator
Ubuntu 自帶的終端不太好用,可以安裝這個強大的終端,從名字就知道它的野心~~
安裝 Terminator
jerry@jerry-virtual-machine:~/Desktop$ sudo apt-get install terminator
又一行代碼搞定安裝,有沒有感覺比在 Windows 的還要爽?好了,不拉仇恨了,我同時使用 Windows 和 Ubuntu的,大家各有各的好處,充分利用。
建立 Terminator 的快捷方式
因爲要經常使用終端的,有必要爲它設置一個 Dock 中的快捷方式:

我們雙擊就要可以進入這個終端,這裏演示一下分屏的效果(一個終端可以打開N個終端):

優化 Terminator
上面可以看到,Terminator 的界面也不咋的,我們來弄個養眼的方案:
jerry@jerry-virtual-machine:~$ cd .config/terminator/
jerry@jerry-virtual-machine:~/.config/terminator$ gedit config
打開的文檔,我的配置如下(看個人的喜好來修改):
[global_config]
suppress_multiple_term_dialog = True
[keybindings]
[profiles]
[[default]]
background_color = "#002b36"
background_darkness = 0.92
background_type = transparent
cursor_color = "#3036ec"
font = Ubuntu Mono 15
foreground_color = "#839496"
show_titlebar = False
login_shell = True
custom_command = tmux
use_system_font = False
[layouts]
[[default]]
[[[window0]]]
type = Window
parent = ""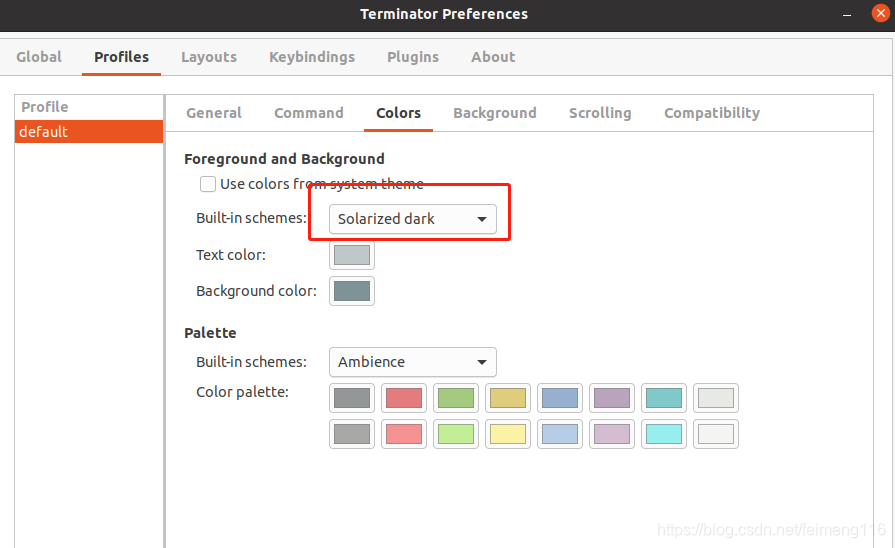
[[[child1]]]
type = Terminal
parent = window0
[plugins]
另外,我還選擇了好看的顏色方案, 右鍵->Preferences->profiles->colors:

最終的效果圖如下:

將 Terminator 設置爲默認的終端
(1)首先安裝 dconf-editor
jerry@jerry-virtual-machine:~$ sudo apt-get install dconf-editor
(2)用命令行打開 dconf-editor 進行設置
jerry@jerry-virtual-machine:~$ dconf-editor

依次打開 org --> gnome --> desktop --> terminal, 輸入以下內容:
exec:  x-terminal-emulator
exec-arg:  -e

(3)設置完成了,我們以後可以直接使用快捷鍵 “Ctrl + Alt + T” 啓動 Terminator 了
zsh
zsh是一種十分好用的 shell, 號稱可以替代 bash
安裝 zsh
jerry@jerry-virtual-machine:~$ sudo apt-get install zsh
jerry@jerry-virtual-machine:~$ zsh --version
zsh 5.8 (x86_64-ubuntu-linux-gnu)
設置 zsh 爲默認的 shell
 # 這裏不用sudo
 jerry@jerry-virtual-machine:~$ chsh -s /bin/zsh
接着註銷重新登錄後,我們看看是否成功地將 zsh 設置爲默認的 shell:
jerry@jerry-virtual-machine:~$ echo $SHELLL
/usr/bin/zsh
安裝 oh-my-zsh
配置 zsh 還是比較麻煩的,我們直接使用大神造好的輪子。
# 先安裝 curl
sudo apt install curl
# 安裝 oh-my-zsh
sh -c "$(curl -fsSL https://raw.github.com/robbyrussell/oh-my-zsh/master/tools/install.sh)"
oh-my-zsh 的默認主題也不好看,我喜歡"ys"和"jtriley", 配置文件在 ~/.zshrc:
$ gedit .zshrc

最終的界面如下,是不是好看多了~~:

zsh 插件
可以安裝一些插件,讓 zsh 更好使
語法高亮插件 zsh-syntax-highlighting
git clone https://github.com/zsh-users/zsh-syntax-highlighting.git ${ZSH_CUSTOM:-~/.oh-my-zsh}/plugins/zsh-syntax-highlighting
自動提示插件 zsh-autosuggestions
git clone https://github.com/zsh-users/zsh-autosuggestions ${ZSH_CUSTOM:-~/.oh-my-zsh}/plugins/zsh-autosuggestions
在 .zshrc 文件添加插件
plugins=(git zsh-syntax-highlighting zsh-autosuggestions)
最好 source 一下,使配置生效:
$ source .zshrc
typora
Markdown作爲傳統文字處理軟件的替代方法正變得越來越流行, 而Typora是一種Markdown的編輯器,所見所得,十分的好用。
$ wget -qO - https://typora.io/linux/public-key.asc | sudo apt-key add -
# add Typora's repository
$ sudo add-apt-repository 'deb https://typora.io/linux ./'
$ sudo apt-get update
# install typora
$ sudo apt-get install typora

ifconfig
ifconfig 可以很方便地查看網絡信息,但在 Ubuntu 20.04 中,是沒有安裝 ifconfig 工具的:

安裝下面的軟件包即可同時安裝 ifconfig:
$ sudo apt-get install net-tools

minicom
minicom是一個串口通信工具,調試嵌入式系統必備的一個工具:
sudo apt install minicom