java開發微信公衆號的環境搭建
前言:這段時間接觸了下微信公衆號的開發,回顧下學習的過程,做了學習的總結。微信公衆號的開發有兩種模式,第一種微信公衆號提供的編輯模式,使用起來還是挺方便的。可以進行信息回覆,自定義菜單等等。第二種提供了開發者模式。本學習系列採用的是java語言做後臺服務器開發。當然也可以用其他語言實現,例如PHP等。本系列採用的是SpringBoot框架基礎上開發,實現自定義菜單的建立,自定義回覆消息,圖片,音樂,實現智能翻譯等等。
一、完成個人訂閱號的認證
進行微信公衆平臺進行個人訂閱號的註冊和個人認證,官網地址https://mp.weixin.qq.com/。註冊流程,課點擊註冊流程查看,個人訂閱號註冊完成進入主頁,如下圖

有興趣的可以在編輯模式進行嘗試
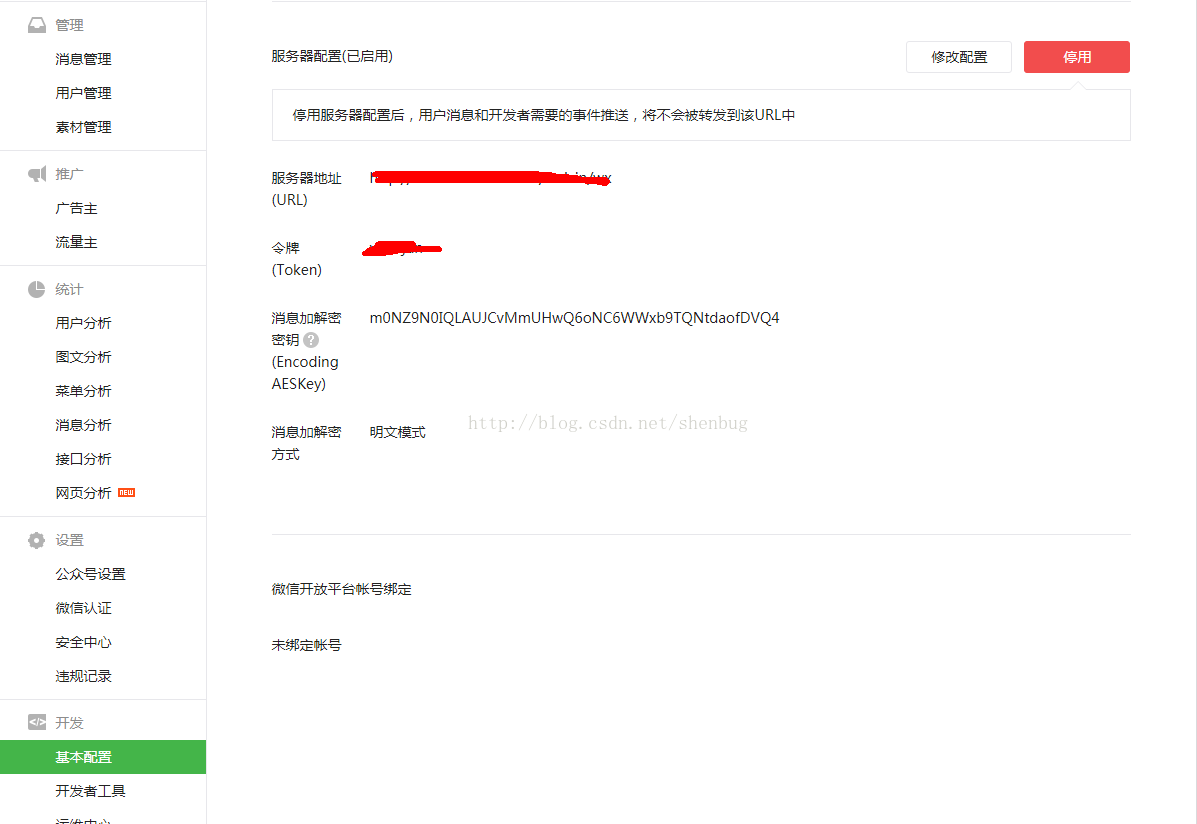
二、進入開發者模式下的配置
在左側的導航欄下方,選擇開發下的基本配置

說明:URL爲java服務器的地址,此處需要用到內網穿透功能,實現的將內網的tomcat'服務的地址映射到公網的80端口,實現的方式有不少,這裏推薦的是自己嘗試的兩種方式,相信大家也有所瞭解,一種ngrok,推薦使用的國內的服務器,低延時,實現域名固定。第二種,採用花生殼進行穿透。具體實現網上也有挺多,註冊了一個,認證時需要6元。token與後臺設置的保持一致就行。
三.java後臺配置
3.1 springBoot項目搭建
springBoot近段時間流行的微框架,減少了大量的xml配置,簡化環境的搭建。介紹一種簡單的springboot項目搭建,在官網http://start.spring.io/配置自己需要的組件,下載到本地,Myeclipse通過Maven導入,即可完成


3.2 微信接入後臺服務器
參考官網api文檔,https://mp.weixin.qq.com/wiki?t=resource/res_main&id=mp1421135319
代碼實現
配置後臺服務處理微信平臺請求的處理器
/**
 *
 * 類名稱: LoginController
 * 類描述: 與微信對接登陸驗證
 * @author yuanjun
 * 創建時間:2017年12月5日上午10:52:13
 */
@Controller
public class LoginController {
	@RequestMapping(value = "wx",method=RequestMethod.GET)
	public void login(HttpServletRequest request,HttpServletResponse response){
		System.out.println("success");
		String signature = request.getParameter("signature");
		String timestamp = request.getParameter("timestamp");
		String nonce = request.getParameter("nonce");
		String echostr = request.getParameter("echostr");
		PrintWriter out = null;
		try {
			  out = response.getWriter();
			if(CheckUtil.checkSignature(signature, timestamp, nonce)){
				out.write(echostr);
			}
		} catch (IOException e) {
			// TODO Auto-generated catch block
			e.printStackTrace();
		}finally{
			out.close();
		}

	}
}
import java.util.Arrays;
/**
*
* 類名稱: CheckUtil
* 類描述: 請求校驗
* @author yuanjun
* 創建時間:2017年12月8日上午10:54:16
*/
public class CheckUtil {
private static final String token = "自己設置,要與微信頁面設置的一致";
public static boolean checkSignature(String signature,String timestamp,String nonce){
String[] str = new String[]{token,timestamp,nonce};
//排序
Arrays.sort(str);
//拼接字符串
StringBuffer buffer = new StringBuffer();
for(int i =0 ;i<str.length;i++){
buffer.append(str[i]);
}
//進行sha1加密
String temp = SHA1.encode(buffer.toString());
//與微信提供的signature進行匹對
return signature.equals(temp);
}
}SHA1加密
import java.security.MessageDigest;

/**
 *
 * 類名稱: SHA1
 * 類描述: sha1加密
 * @author yuanjun
 * 創建時間:2017年12月5日上午11:10:01
 */
public final  class SHA1 {
	 private static final char[] HEX_DIGITS = {'0', '1', '2', '3', '4', '5',
         '6', '7', '8', '9', 'a', 'b', 'c', 'd', 'e', 'f'};

	/**
	* Takes the raw bytes from the digest and formats them correct.
	*
	* @param bytes the raw bytes from the digest.
	* @return the formatted bytes.
	*/
	private static String getFormattedText(byte[] bytes) {
		int len = bytes.length;
		StringBuilder buf = new StringBuilder(len * 2);
		// 把密文轉換成十六進制的字符串形式
		for (int j = 0; j < len; j++) {
		buf.append(HEX_DIGITS[(bytes[j] >> 4) & 0x0f]);
		buf.append(HEX_DIGITS[bytes[j] & 0x0f]);
		}
		return buf.toString();
	}

	public static String encode(String str) {
		if (str == null) {
		return null;
		}
		try {
		MessageDigest messageDigest = MessageDigest.getInstance("SHA1");
		messageDigest.update(str.getBytes());
		return getFormattedText(messageDigest.digest());
		} catch (Exception e) {
		throw new RuntimeException(e);
		}
	}
}
3.3 application的配置,也可以不配置數據源,在啓用項目時,則需要排除數據庫的連接
server.port = 8080
server.context-path = /weixin
spring.datasource.driver-class-name=com.mysql.jdbc.Driver
spring.datasource.url=jdbc:mysql://localhost:3306/websocket
spring.datasource.username=root
spring.datasource.password=123456
3.4 啓動tomcat服務,即運行主方法即可
將內網穿透映射搭建好,將URL和token配置到微信平臺的基本配置中,點擊確認,成功後,服務器配置變成已啓用。完成配置