


爬過得那些坑
前言:在整個Vue的過程中,遇到了不少坑。查找不同的資料,把這些坑給填了,記錄下這些坑,以及解決辦法。
一、Http請求的那些坑
1.不支持http請求
表現爲:程序啓動正常,點擊按妞不跳轉,後臺無響應,瀏覽器調試出現
Uncaught TypeError: Cannot read property 'post' of undefined解決辦法:添加vue-resource支持,在main.js添加
import  VueResource  from 'vue-resource'

Vue.use(VueResource);
2.post請求,後臺接收參數爲null
表現爲:後臺響應但是參數爲null,正確的登陸失效,調試時,參數爲from object
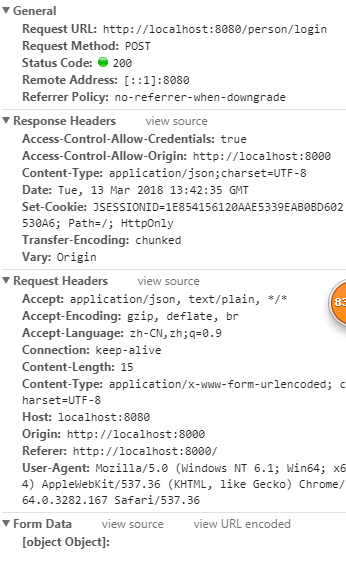
解決辦法:http請求中,添加
{emulateJSON:true}全部的Http請求部分代碼爲
_this.$http.post('http://localhost:8080/person/login', {
                username: _this.username,
                password: _this.password
          }
          ,{emulateJSON:true}
          )
            .then(function (response) {
              var errorcode = response.data.code;
              if (errorcode == "200") {
                _this.$router.push(
                  { path: '/HelloWorld',
                    query: {
                      user: response.data.data,
                    }
                  });
              } else {
                _this.$router.push({ path: '/Fail' });
              }
            })
            .catch(function (error) {
              console.log(error);
            });
3、正確處理後,跳轉到空頁面
原因:路由的url配置有問題,注意組件的引用的對應關係以及path的路徑問題
4.Request請求變成Options
解決辦法:設置頭格式
  http: {
        headers: {'Content-Type': 'application/x-www-form-urlencoded; charset=UTF-8'}
      },
二、Vue視圖之間的跳轉實現
1.引用router組件
2.在router.js添加對應的view,以及相對應的path的配置
3.this.$router.push({path:'url'})
4.可參照上文的Http請求部分代碼
三、Vue跳轉傳遞參數
採用編程式的實現方式
傳遞參數
   _this.$router.push(
                  { path: '/HelloWorld',//跳轉的路徑
                    query: {//query 代表傳遞參數
                      user: response.data.data,//參數名key,以及對應的value
                    }
                  });
接收參數
this.$route.query.useruser代表的參數名,不但可以傳遞單個參數,也可以傳遞對應,解析的方式user.屬性
四、實例,登陸頁面的Vue代碼
<template>
  <div class="login">
    {{ message }}<br/>
    <input v-model="username" placeholder="用戶名"><br/>
    <input v-model="password" placeholder="密碼"><br/>
    <button v-on:click="login">登陸 </button>
  </div>
</template>

<script>
    export default {
      name: "login",
      data() {
        return {
          message: 'Vue 登陸頁面',
          username: '',
          password: ''
        }
      },
      http: {
        headers: {'Content-Type': 'application/x-www-form-urlencoded; charset=UTF-8'}
      },
      methods: {
        login: function () {
          var _this = this;
          console.log(_this.username+_this.password);
          _this.$http.post('http://localhost:8080/person/login', {
                username: _this.username,
                password: _this.password
          }
          ,{emulateJSON:true}
          )
            .then(function (response) {
              var errorcode = response.data.code;
              if (errorcode == "200") {
                _this.$router.push(
                  { path: '/HelloWorld',
                    query: {
                      user: response.data.data,
                    }
                  });
              } else {
                _this.$router.push({ path: '/Fail' });
              }
            })
            .catch(function (error) {
              console.log(error);
            });
        }
      }

    }
</script>

<style scoped>

</style>
五、實例demo源碼下載
Vue源代碼地址:https://github.com/dgyuanjun/Vue-SpringBoot.git
SpringBoot源碼地址:https://github.com/dgyuanjun/SpringBoot-Vue.git
相關鏈接
前後端分離之Vue(一)Vue環境搭建 http://blog.csdn.net/shenbug/article/details/79541218
前後端分離之Vue(二)前後端整合http://blog.csdn.net/shenbug/article/details/79542717