


nginx
nginx是一款轻量级的web服务器/反向代理服务器及电子邮件(IMAP/POP3)代理服务器
nginx是个高性能web和反向代理服务器
nginx由内核和模块组成
nginx的特性与优点
'特性:
使用epoll  and  kqueue作为开发模型
在高连接并发的情况下,nginx是apache服务器不错的替代品,能够支持高达50000个并发连接数的响应
nginx作为负载均衡服务器,既可在内部直接支持和PHP程序对外进行服务,也可作为HTTP代理服务器对外进行服务
采用c语言进行编写'

'优点:
~~~模块化设计:模块可以动态编译
~~~稳定性高:用于反向代理
~~~节省带宽:支持GZIP压缩,可以添加浏览器本地缓存的Header头
~~~配置文件简单
~~~高并发连接:官方测试能支持5万并发连接,实际生产环境中跑2-3万并发连接数
~~~成本低廉:免费使用,购买F5 BIG-IP NetScaler 等硬件负载均衡交换机则需要十多万至几十万人名币
~~~内置的健康检查功能:Nginx Proxy后端如果某台web服务端宕机,不会影响前端访问
~~~外围支持好:文档全,二次开发和模块较多
~~~支持热部署:可以不停机重载配置文件
~~~支持事件驱动,AIO (Asycncl ,异步IO)、mmap(Memory Map,内存映射)等性能优化 '
nginx的模块从结构上分为核心模块、基础模块和第三方模块
核心模块:HTTP模块、event模块、mail模块
基础模块:http access模块、http fastcgl模块、http proxy模块、http rewrite模块
第三方模块:http upstream模块、request hash模块、notice模块、http access key模块(自己需要开发的模块都属于第三方模块)
nginx模块从功能fen'w分为三类:Handlers(处理器模块)、Filters(过滤器模块)、proxies(代理器模块)
'Handlers(处理器模块):直接处理请求,进行输出内容和修改headers信息等操作
Filters(过滤器模块):主要是对其他处理器模块输出的内容进行修改操作,最后由nginx输出
Proxies(代理器模块):nginx的HTTP upstream之类的模块,这些模块主要与后端一些服务比如fastcgi等操作交互,实现服务代理和负载均衡等功能。'
nginx的安装
'创建系统用户nginx'
[root@arongya ~]# useradd -r -M -s /sbin/nologin nginx
[root@arongya ~]# id nginx
uid=998(nginx) gid=996(nginx) groups=996(nginx)
'安装依赖环境'
[root@arongya ~]# yum -y install pcre-devel openssl openssl-devel gd-devel
[root@arongya ~]# yum -y groups mark install 'Development Tools'
'创建日志存放目录'
[root@arongya ~]# mkdir -p /var/log/nginx
[root@arongya ~]# chown -R nginx.nginx /var/log/nginx/
'下载nginx'
[root@arongya ~]# cd /usr/src/
[root@arongya src]# wget http://nginx.org/download/nginx-1.12.0.tar.gz
'编译安装'
[root@arongya src]# ls
debug  kernels  nginx-1.12.0.tar.gz
[root@arongya src]# tar xf nginx-1.12.0.tar.gz
[root@arongya src]# cd nginx-1.12.0
[root@arongya nginx-1.12.0]# ./configure \
> --prefix=/usr/local/nginx \
> --user=nginx \
> --group=nginx \
> --with-debug \
> --with-http_ssl_module \
> --with-http_realip_module \
> --with-http_image_filter_module \
> --with-http_gunzip_module \
> --with-http_gzip_static_module \
> --with-http_stub_status_module \
> --http-log-path=/var/log/nginx/access.log \
> --error-log-path=/var/log/nginx/error.log
[root@arongya nginx-1.12.0]# make -j 2 && make install
'配置环境变量'
[root@arongya ~]# echo 'export PATH=/usr/local/nginx/sbin:$PATH' > /etc/profile.d/nginx.sh
[root@arongya ~]# source /etc/profile.d/nginx.sh
'启动nginx'
[root@arongya ~]# nginx
[root@arongya ~]# ss -antl
State       Recv-Q Send-Q Local Address:Port               Peer Address:Port
LISTEN      0      128     *:80                  *:*
LISTEN      0      128     *:22                  *:*
LISTEN      0      100    127.0.0.1:25                  *:*
LISTEN      0      128    :::22                 :::*
LISTEN      0      100       ::1:25                 :::*
最后在浏览器通过IP访问,出现如下界面就是正确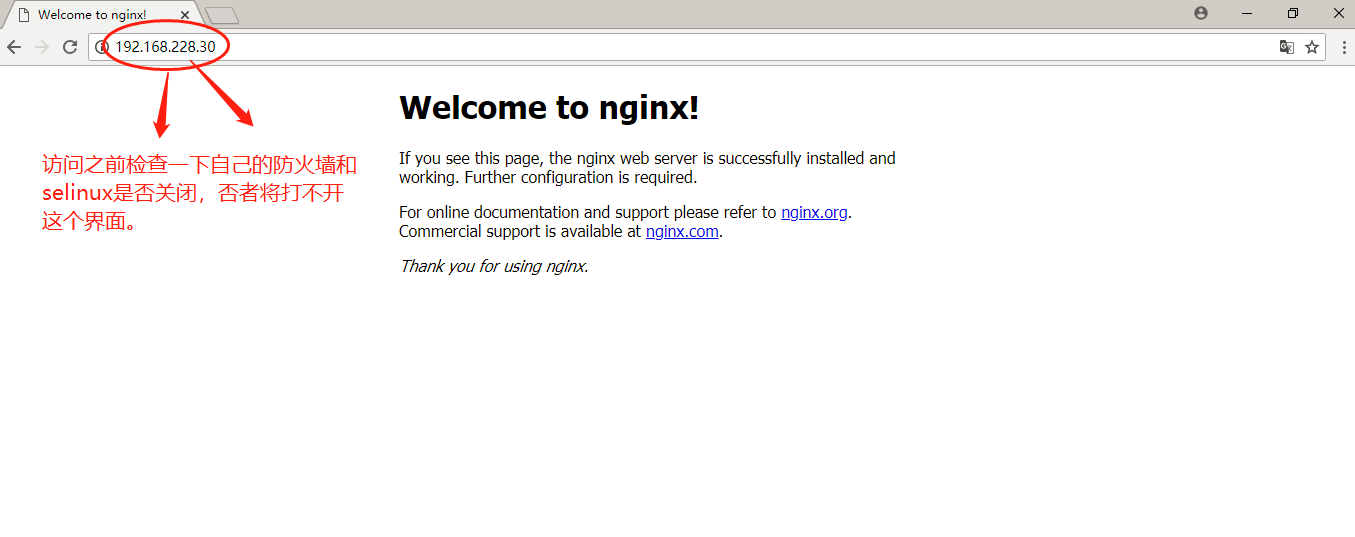
服务控制方式,使用nginx命令
-t   检查配置文件语法
-v   输出nginx的版本
-c   指定配置文件的路径
-s  发送服务控制信号,可选值有stop、quit、 reopen、reload
nginx的配置文件,nginx的基本配置文件在/usr/local/nginx/conf/nginx.conf,nginx.conf的内容分为以下几段:
main配置段:全局配置段,其中main配置段中可能包含event配置段
event{}:定义event模型工作特性
http{}:定义http协议相关的配置,要以分号结尾
/usr/local/nginx/conf/nginx.conf修改后的配置文件如下:
[root@arongya conf]# vim nginx.conf
user  nginx;      #'event配置段,指定运行worker进程的用户和组'
worker_processes  3;      #'启动n个worker进程,这里的n为了避免上下文切换,通常设置为cpu总核心数,设置几个人工作'
worker_cpu_affinity  00000001  00000010  00000100;    #'将进程绑定到某cpu中,避免频繁刷新缓存,优化性能的配置参数'
error_log  logs/error.log;    #'位置 级别;配置错误日志,相对路径,级别:notice、info'
lock_file   logs/nginx.lock;
pid        logs/nginx.pid;    '指定nginx守护进程的pid文件'
worker_rlimit_nofile 35000;

daemon on;   '#这行是添加的,daemon {on|off};   //是非法以守护进程方式运行nginx,调试时应设置为off'

events {
    worker_connections  35000;     #'每个进程能够接受的最大连接数'
        accept_mutex  on;       #'master调度用户请求至各worker进程使用的负载均衡锁'
}

http {      '//协议级别'
    include       mime.types;
    default_type  application/octet-stream;

    log_format  main  '$remote_addr - $remote_user [$time_local] "$request" '    #'远程主机的地址、远程主机的用户、本地时间、请求'
                      '$status $body_bytes_sent "$http_referer" '
                      '"$http_user_agent" "$http_x_forwarded_for"';

    access_log  logs/access.log  main;

    sendfile        on;

    keepalive_timeout  65;

    server {        '服务器级别,每个server类似于httpd中的一个<VirtualHost>,定义一个虚拟主机'
        listen       80;
        server_name  localhost;

        access_log  logs/host.access.log  main;

        location /       '请求级别,类似于httpd中的<Location>,用于定义URL与本地文件系统的映射关系'
            root   html;
            index  index.html index.htm;
        }

        error_page   500 502 503 504  /50x.html;
        location = /50x.html {
            root   html;
        }

        location ~ \.php$ {
            root           html;
            fastcgi_pass   127.0.0.1:9000;     //定义反向代理
            fastcgi_index  index.php;
            fastcgi_param  SCRIPT_FILENAME  $document_root$fastcgi_script_name;
            include        fastcgi_params;
        }

    }

    # another virtual host using mix of IP-, name-, and port-based configuration
    #
    #server {
    #    listen       8000;
    #    listen       somename:8080;
    #    server_name  somename  alias  another.alias;

    #    location / {
    #        root   html;
    #        index  index.html index.htm;
    #    }
    #}

    # HTTPS server
    #
    #server {
    #    listen       443 ssl;
    #    server_name  localhost;

    #    ssl_certificate      cert.pem;
    #    ssl_certificate_key  cert.key;

    #    ssl_session_cache    shared:SSL:1m;
    #    ssl_session_timeout  5m;

    #    ssl_ciphers  HIGH:!aNULL:!MD5;
    #    ssl_prefer_server_ciphers  on;

    #    location / {
    #        root   html;
    #        index  index.html index.htm;
    #    }
    #}

}
网络连接相关的配置参数
keepalive_timeout number;        '//长连接的超时时长,默认为75s'
keepalive_requests number;      '//在一个长连接上所能够允许请求的最大资源数'
keepalive_disable [msie6|safari|none];  '//为指定类型的UserAgeng禁用长连接'
tcp_nodelay on|off;     '是否对长连接使用TCP_nodelay选项,为了提升用户体验,通常设为on'
client_header_timeout number;     '//读取http请求报文首部的超时时长'
client_body_timeout number;        '//读取http请求报文body部分的超时时长'
send_timeout number;           '发送响应报文的超时时长'
访问控制,用于location段
allow:设定允许哪台或哪些主机访问,多个参数间用空格隔开
deny:设置禁止哪台或哪些主机访问,多个参数间用空格隔开
[root@arongya conf]# vim nginx.conf
....
        location / {
            root   html;
            index  index.html index.htm;
            allow 192.168.228.1;
            deny all;
        }
....
[root@arongya conf]# nginx -t
nginx: the configuration file /usr/local/nginx/conf/nginx.conf syntax is ok
nginx: configuration file /usr/local/nginx/conf/nginx.conf test is successful
[root@arongya conf]# nginx -s reload
如图: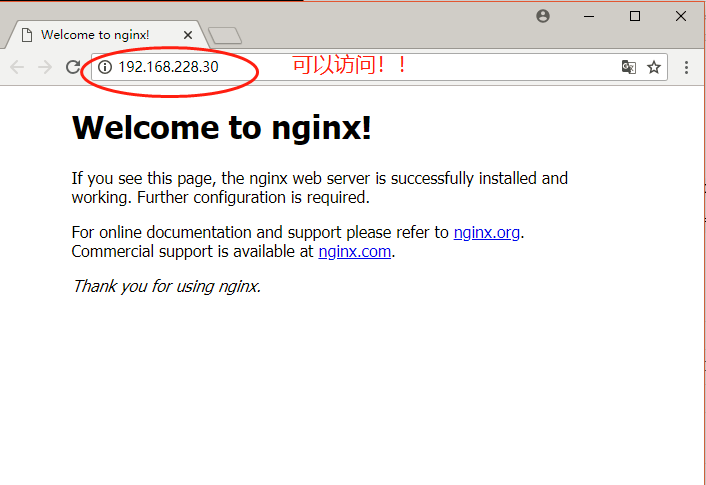
**设置拒绝本机访问***
[root@arongya conf]# vim nginx.conf

       access_log  logs/host.access.log  main;

        location / {
            root   html;
            index  index.html index.htm;
            deny 192.168.228.1;
            allow all;
        }
[root@arongya conf]# nginx -t
nginx: the configuration file /usr/local/nginx/conf/nginx.conf syntax is ok
nginx: configuration file /usr/local/nginx/conf/nginx.conf test is successful
[root@arongya conf]# nginx -s reload
如图: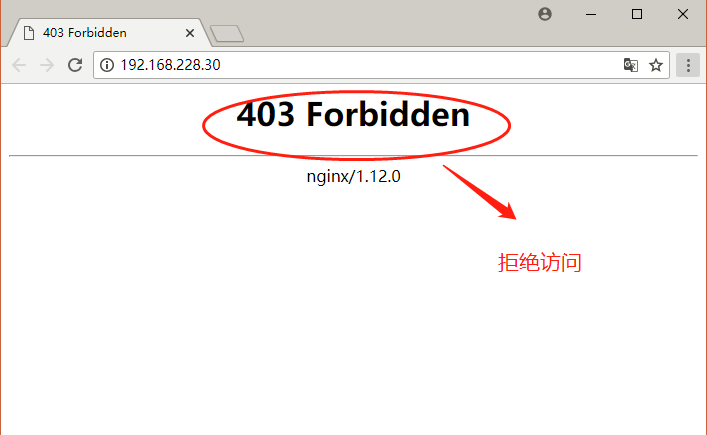
基于用户认证
[root@arongya ~]# cd /usr/local/nginx/
[root@arongya nginx]# mkdir auth
[root@arongya nginx]# cd auth
[root@arongya auth]# pwd
/usr/local/nginx/auth
[root@arongya auth]# yum provides *bin/htpasswd
[root@arongya auth]# yum -y install httpd-tools
[root@arongya auth]# htpasswd -c -m /usr/local/nginx/auth/.user_auth_file tom   '这里的密码为加密后的密码串,建议用htpasswd来创建此文件'
New password:             '此处设的密码是"yaoxiaorong!",可设为自己想设的密码'
Re-type new password:
Adding password for user tom
[root@arongya auth]# cat /usr/local/nginx/auth/.user_auth_file
tom:$apr1$VBVYAKxN$5wQz/LPtuebYWeWRwqnjq/
[root@arongya auth]# vim /usr/local/nginx/conf/nginx.conf
.....
        location / {
            root   html;
            index  index.html index.htm;
            auth_basic "welcome to there";
            auth_basic_user_file ../auth/.user_auth_file;     '路径要带上绝对路径,或者在/usr/local/nginx的相对路径'
        }
.....
[root@arongya auth]# nginx -t
nginx: the configuration file /usr/local/nginx/conf/nginx.conf syntax is ok
nginx: configuration file /usr/local/nginx/conf/nginx.conf test is successful
[root@arongya auth]# nginx -s reload
如图: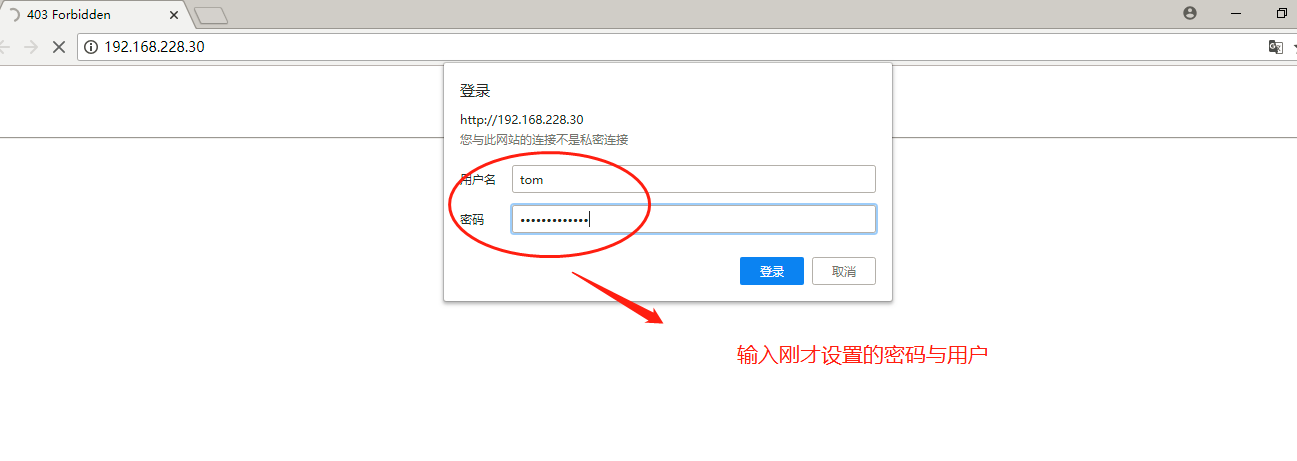
https配置
'openssl实现私有CA:CA的配置文件:/etc/pki/tls/openssl.cnf'
'CA生成一对密钥'
[root@arongya ~]# cd /etc/pki/CA
'生成密钥,括号必须要'
[root@arongya CA]# (umask 077;openssl genrsa -out private/cakey.pem 2048)
Generating RSA private key, 2048 bit long modulus
..........+++
............................................................................................................+++
e is 65537 (0x10001)
'提取公钥'
[root@arongya CA]# openssl rsa -in private/cakey.pem -pubout
writing RSA key
-----BEGIN PUBLIC KEY-----
MIIBIjANBgkqhkiG9w0BAQEFAAOCAQ8AMIIBCgKCAQEA0BlxNlixtsocqmF/DRHd
XhwarlksT+xpcaEHEdsawhY6OAR3eqC4zwXKp5SwhnI+fm8/u8+wRqaNQfYSsJjo
hn6TchI8jUKhPfI0AyJsJFCAu/n4TDLVZeJhOLYxkDw7SlyTcqMcjVEnoLboT3kK
OYjFSnEd6436B9N/kElJlizybmU/ThnzsgHWpd382QkxfDRa/yoE+jNgGfKzoSYQ
Rsr403+pvCuj7M/EdxEeUvl364CmUVk8y22W8kxKXq40K4/+M5Wb+6Io94ENwwoy
kh75h0aVbSN3o+AdD/ulxpv8IgC80JfXScjvfWKEBxYcPnuBo8QvLmzVve7vHSrJ
jQIDAQAB
-----END PUBLIC KEY-----
CA生成自签署证书
[root@arongya CA]# openssl req -new -x509 -key private/cakey.pem -out cacert.pem -days 365
You are about to be asked to enter information that will be incorporated
into your certificate request.
What you are about to enter is what is called a Distinguished Name or a DN.
There are quite a few fields but you can leave some blank
For some fields there will be a default value,
If you enter '.', the field will be left blank.
-----
Country Name (2 letter code) [XX]:cn
State or Province Name (full name) []:hb
Locality Name (eg, city) [Default City]:wh
Organization Name (eg, company) [Default Company Ltd]:www.yaoxiaorong.com
Organizational Unit Name (eg, section) []:www.yaoxiaorong.com
Common Name (eg, your name or your server's hostname) []:www.yaoxiaorong.com
Email Address []:[email protected]

'读出cacert.pem证书的内容'
[root@arongya CA]# openssl x509 -text -in cacert.pem
[root@arongya CA]# ls
cacert.pem  certs  crl  newcerts  private
[root@arongya CA]# touch index.txt && echo 01 > serial
[root@arongya CA]# cat serial
01
客户端(nginx)生成密钥
[root@arongya CA]# cd /usr/local/nginx/
[root@arongya nginx]# mkdir ssl
[root@arongya nginx]# cd ssl
[root@arongya ssl]# (umask 077;openssl genrsa -out nginx.key 2048)
Generating RSA private key, 2048 bit long modulus
..+++
....................................................+++
e is 65537 (0x10001)
客户端生成证书签署请求
[root@arongya ssl]# openssl req -new -key nginx.key -days 365 -out nginx.csr
You are about to be asked to enter information that will be incorporated
into your certificate request.
What you are about to enter is what is called a Distinguished Name or a DN.
There are quite a few fields but you can leave some blank
For some fields there will be a default value,
If you enter '.', the field will be left blank.
-----
Country Name (2 letter code) [XX]:cn
State or Province Name (full name) []:hb
Locality Name (eg, city) [Default City]:www.yaoxiaorong.com
Organization Name (eg, company) [Default Company Ltd]:www.yaoxiaorong.com
Organizational Unit Name (eg, section) []:www.yaoxiaorong.com
Common Name (eg, your name or your server's hostname) []:www.yaoxiaorong.com
Email Address []:[email protected]

Please enter the following 'extra' attributes
to be sent with your certificate request
A challenge password []:
An optional company name []:
[root@arongya ssl]# openssl ca -in ./nginx.csr -out nginx.crt -days 365
Using configuration from /etc/pki/tls/openssl.cnf
Check that the request matches the signature
Signature ok
Certificate Details:
        Serial Number: 1 (0x1)
        Validity
            Not Before: Aug 31 02:56:31 2018 GMT
            Not After : Aug 31 02:56:31 2019 GMT
        Subject:
            countryName               = cn
            stateOrProvinceName       = hb
            organizationName          = www.yaoxiaorong.com
            organizationalUnitName    = www.yaoxiaorong.com
            commonName                = www.yaoxiaorong.com
            emailAddress              = [email protected]
        X509v3 extensions:
            X509v3 Basic Constraints:
                CA:FALSE
            Netscape Comment:
                OpenSSL Generated Certificate
            X509v3 Subject Key Identifier:
                D5:16:FA:8F:F5:D8:36:CA:5E:6A:39:91:F9:80:50:A4:B7:06:AD:7A
            X509v3 Authority Key Identifier:
                keyid:15:9C:26:D9:2A:CC:D7:A7:0A:2A:8D:A1:8F:AB:2F:AB:68:34:27:07

Certificate is to be certified until Aug 31 02:56:31 2019 GMT (365 days)
Sign the certificate? [y/n]:y

1 out of 1 certificate requests certified, commit? [y/n]y
Write out database with 1 new entries
Data Base Updated
[root@arongya ssl]# ls
nginx.crt  nginx.csr  nginx.key
编辑配置文件
'取消下面的注释'
[root@arongya nginx]# vim /usr/local/nginx/conf/nginx.conf
    # HTTPS server
    #
    server {
        listen       443 ssl;
        server_name  www.yaoxiaorong.com;  '编辑此处'

        ssl_certificate      ../ssl/nginx.crt;   '编辑此处,添加路径'
        ssl_certificate_key  ../ssl/nginx.key;   '编辑此处,添加路径'

        ssl_session_cache    shared:SSL:1m;
        ssl_session_timeout  5m;

        ssl_ciphers  HIGH:!aNULL:!MD5;
        ssl_prefer_server_ciphers  on;

        location / {
            root   html;
            index  index.html index.htm;
        }
    }

}
[root@arongya nginx]# nginx -t
nginx: the configuration file /usr/local/nginx/conf/nginx.conf syntax is ok
nginx: configuration file /usr/local/nginx/conf/nginx.conf test is successful
[root@arongya nginx]# nginx -s reload
在C:\Windows\System32\drivers\etc修改hosts配置文件,将本主机的IP添加进去,还有自己设置的域名。
如图:
验证结果:
开启状态界面
'开启status'
[root@arongya nginx]# vim conf/nginx.conf
        location /status{
        stub_status on;
        allow 192.168.0.0/16;
        deny all;
            root   html;
            index  index.html index.htm;
        }

[root@arongya nginx]# nginx -t
nginx: the configuration file /usr/local/nginx/conf/nginx.conf syntax is ok
nginx: configuration file /usr/local/nginx/conf/nginx.conf test is successful
[root@arongya nginx]# nginx -s reload
如图:

rewrite
[root@arongya nginx]# cd html/
[root@arongya html]# ls
50x.html  index.html
[root@arongya html]# mkdir images
[root@arongya html]# ls
50x.html  images  index.html
[root@arongya html]# cd images/
[root@arongya images]# ls
1.jpg
[root@arongya nginx]# vim conf/nginx.conf
...
        location / {
            root   html;
            index  index.html index.htm;
        }

       location /images {        '//添加从这行开始以下的内容'
            root   html;
            index  index.html;
        }
....
[root@arongya nginx]# nginx -t
nginx: the configuration file /usr/local/nginx/conf/nginx.conf syntax is ok
nginx: configuration file /usr/local/nginx/conf/nginx.conf test is successful
[root@arongya nginx]# nginx -s reload
如图:
[root@arongya html]# mv images imgs
[root@arongya nginx]# vim conf/nginx.conf
        location / {
            root   html;
            index  index.html index.htm;
        }

       location /images {
            root   html;
            index  index.html;
            rewrite ^/images/(.*\.jpg)$ /imgs/$1 break;

        }

[root@arongya nginx]# nginx -t
nginx: the configuration file /usr/local/nginx/conf/nginx.conf syntax is ok
nginx: configuration file /usr/local/nginx/conf/nginx.conf test is successful
[root@arongya nginx]# nginx -s reload
如图:
[root@arongya nginx]# vim conf/nginx.conf
···
       location /images {
            root   html;
            index  index.html;
            rewrite ^/images/(.*\.jpg)$ http://www.baidu.com redirect;

        }
····
[root@arongya nginx]# nginx -t
nginx: the configuration file /usr/local/nginx/conf/nginx.conf syntax is ok
nginx: configuration file /usr/local/nginx/conf/nginx.conf test is successful
[root@arongya nginx]# nginx -s reload
如图:
[root@arongya nginx]# vim conf/nginx.conf
...
       location /images {
            root   html;
            index  index.html;
            rewrite ^/images/(.*\.jpg)$ http://192.168.228.30/index.html redirect;

        }

...
[root@arongya nginx]# nginx -t
nginx: the configuration file /usr/local/nginx/conf/nginx.conf syntax is ok
nginx: configuration file /usr/local/nginx/conf/nginx.conf test is successful
[root@arongya nginx]# nginx -s reload
'直接跳转到nginx首页'