


一、基本使用
1. 同一頁面中使用

首先,需要核心庫react.js與React的DOM操作組件react-dom.js
其次,如果需要在當前HTML頁面中直接寫react的代碼,就要引入browser.js文件,用於解析相關的JSX語法,同時,script標籤指定好type
引入browser是爲了在瀏覽器端能直接解析JSX,不過相當耗時,所以建議在本地解析之後再引入ES5的語法文件。當然,JSX語法是不必要的,只是推薦使用。
通過ReaactDOM.render方法渲染,參數1指定組件,參數2指定標籤元素
2. 獨立文件中使用


使用babel工具對文件進行解析,Sublime Text中怎麼配置babel編譯?
查看編譯後的文件

可以看到,JSX語法,核心就是React的createElement方法,我可以也直接使用這個方法創建。

這一丁點代碼就編譯了那麼久,確實應該在本地先編譯好
除了直接在瀏覽器引入react和react-dom之外,既然需要本地先編譯,也可以使用構建工具如Webpack,不僅支持ES6與JSX的解析,還提供了一系列如代碼壓縮文件合併的功能,也便於管理,不必每次都得手動編譯
可以通過npm工具安裝react和react-dom包後,引入直接使用(需要ES6基礎)

這裏就不展開說明了,有興趣的可以自行去查查相關用法
二、JSX
JSX是React中和重要的部分,直觀的表現是將HTML嵌入到了JS中,通過工具(如Babel)編譯成支持的JS文件

var Info = React.createClass({
    render: function() {        return <p className="user">{this.props.name}</p>    }
});

ReactDOM.render(    <Info name="Jack" />,
     document.getElementById('box')
);
可以看到,return關鍵字後接上一個<p>標籤,其中使用{}置入了JS語法。
1. 需要注意的是,return後面只能有一個父級標籤
var Info = React.createClass({
 render: function() {     return <p className="user">
         {             this.props.name == 'Jack' ?
             <span>is Jack</span>
             : ''
         }         </p> }
});
2. {}中可以嵌入JS表達式,常見的是三目運算符與map操作
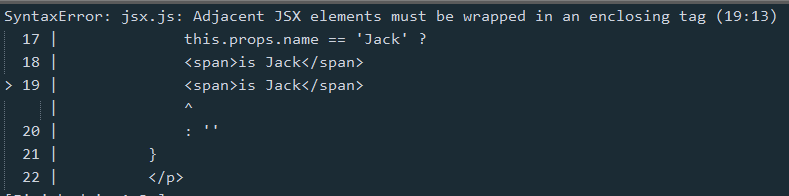
需要注意的是,三目運算符之後也只能接一個父級的標籤,否則會報錯
還可以置入組件
var Jack = React.createClass({
 render: function() {     return <p>I'm Jack</p>
 }
});
var Pual = React.createClass({
 render: function() {
     return <p>I'm Pual</p> }
});var Info = React.createClass({
 render: function() {     return (         <div className="user">
         {             this.props.name == 'Jack' ?
             <Jack />             :             <Pual />         }         </div>     )
 }
});

ReactDOM.render( <Info name="Pual" />,
  document.getElementById('box')
);
3. 在JSX中,HTML的屬性是受限的
在HTML標籤中使用非原始HTML支持的屬性(可加前綴data-),會被React忽略,class關鍵字需要換成className等
事件綁定需要使用camelCase形式(如onClick)
var Info = React.createClass({
 render: function() {     return <p className="user" me="me" name="myName">{this.props.name}</p> }
});
4. 智能的...展開操作符
JSX支持ES6中很多語法,包括...這個東西。有時不想一個個屬性寫,爲了代碼美觀,可以使用
var Info = React.createClass({
 render: function() {     var myAttr = {         'title': 'myTitle',         'age': 10,         'data-age': 10,         'onClick': function() {
             console.log('onClick');
         },         'onclick': function() {
             console.log('onclick');
         }
     }     return <p className="user" me="me" {...myAttr}>{this.props.name}</p> }
});

ReactDOM.render( <Info name="Jack" />,
  document.getElementById('box')
);
編譯後將自動展開,其中age被忽略,data-age被保留,onclick被忽略,onClick被保留

5. 事件的綁定與event對象傳值
由於React對事件的綁定處理忽略了原始支持的onclick屬性,在使用其他JS庫時,可能會遇到問題
如WdatePicker日期插件,它的使用方式是直接在HTML中綁定
<input type="text" name="" onclick="WdatePicker()" />
<input type="text" name="" onClick="WdatePicker()" />
但轉到React中就不適用了,onclick會直接被忽略,onClick因爲傳的不是函數也被忽略,所以需要換個法子
render() {        // return <input type="text" name="" onclick="WdatePicker()" />
        // return <input type="text" name="" onClick="WdatePicker()" />
        let clickEvent = {
            onClick: function(e) {
                console.log(e);
                WdatePicker(e);
            }
        };        return <input type="text" name="date" ref="date" {...clickEvent} />
    }
這樣一來就能綁定上事件,此日期插件需要一個event對象,然而點擊後報錯了,調試輸出該對象似乎有些奇特

再換種方式,在組件渲染之後直接綁定,成功
componentDidMount() {
        let date = ReactDOM.findDOMNode(this.refs.date);
        date.onclick = function(e) {
            console.log(e);
            WdatePicker(e);
        }
    }

雖說這是插件使用方式的不合理,但React傳過來的event對象也已經不是原始的event對象了
6. 支持自閉合的標籤,要顯示地給它關閉
舉個例子,對於<input>標籤
<input type="text" >
一般的HTML中這樣是支持的,但在JSX中會報錯

需要加個斜槓,同理用於<img>等標籤
<input type="text" />
三、屬性、狀態
React中有屬性與狀態之分,都是爲了方便存儲或管理數據
1. 屬性(props)
一旦定義,就不再改變的數據
一般來說,會通過在HTML標籤中添加屬性的方式,讓子組件獲取到該props
ReactDOM.render(    <Info name="Jack" />,
    document.getElementById('box')
);則Info組件中就可以通過this.props.name獲取到該屬性
也可以在組件中自己定義初始的屬性,如果父有傳name屬性,則該初始屬性被覆蓋
getDefaultProps: function() {        return {
            name: 'defaultName'
        };
    }
還可以定義屬性的類型,是否必須
propTypes: {
        name: React.PropTypes.string.isRequired
    }
這裏定義了name屬性必須有且爲字符串,假設傳入的是number類型(注意使用{}包裹,否則始終是字符串),則有警告
ReactDOM.render(    <Info name={10} />,
    document.getElementById('box')
);
雖然有修改props的方法,但不建議對props進行修改,如果要修改,就使用state吧
2. 狀態(state)
狀態是React中定義之後可改變的數據,只能在組件內部定義
getInitialState: function() {        return {
            age: 10
        };
    }
在需要修改狀態的時候,調用this.setState()方法即可(注意不能直接設置this.state = newObj)
this.setState({
    age: this.state.age + 1});
注意必須初始化state對象,即初始化時至少要返回一個空的state對象,age屬性的初始化是不必要的,只是爲了便於管理
React的setState方法是異步的,在其中取state.age可能取不到預期的值(不過目前還沒遇到過)
這裏的異步包含了兩個概念
2.1 調用的時機異步
React的組件有生命週期,在componentWillUpdate與render這兩個時期之間纔會調用
2.2 調用之後的異步
setState實際上是一個異步方法,可帶兩個參數
    this.setState({
            age: this.state.age + 1
        }, function() {

        });
更好的做法是直接在第一個參數使用函數,如此便保證了函數內部能取到正確的值,在大型複雜的組件中推薦如此
        this.setState(function(prevState, props) {            return {
                age: prevState.age + 1
            };
        });
四、組件的三種定義方式
React推薦將大部件劃分爲一個個小部件,解耦。而組件的定義,常見的有三種方式
1. 函數式定義
使用函數的方式定義,它的特點是無狀態,實際上它並沒有被實例化,所以無法訪問this對象,不能管理生命週期
多用於純展示的組件
function Info(props) {    return <p>{props.name}</p>}

ReactDOM.render(<Info name="Jack" />, document.getElementById('box'));
函數組件接受一個屬性參數,可直接獲取
2. React.createClass方式定義
這種方式看起來像是ES5的形式,較普遍,根據官方說明,將被類形式取代
var Info = React.createClass({
 getInitialState: function() {     return {
         name: 'myName'
     };
 },
 render: function() {     return <p>{this.state.name}</p> }
});
在其中也可以使用ES6的語法,爲了和類形式的做些區別,代碼多寫了點
let Info = React.createClass({
    getInitialState() {        return {
            name: this.props.name || 'myName'
        };
    },
    getDefaultProps() {        return {
            year: new Date().getFullYear()
        };
    },
    showYear(e) {
        console.log(this);

        let elem = ReactDOM.findDOMNode(e.target);
        console.log('year ' + elem.getAttribute('data-year'));
    },
    render() {        return <p onClick={this.showYear} data-year={this.props.year}>{this.state.name}</p>    }
});
綁定了點擊事件,在點擊函數處理中可以直接取到該組件的this對象

3. extends React.Component方式定義
extends一看就是ES6的類形式了,比較推薦使用
class Info extends React.Component {
    constructor(props) {
        super(props);        this.state = {
            name: this.props.name || 'myName'
        };
    }

    showYear(e) {
        console.log(this);

        let elem = ReactDOM.findDOMNode(e.target);
        console.log('year ' + elem.getAttribute('data-year'));
    }

    render() {        return <p onClick={this.showYear} data-year={this.props.year}>{this.state.name}</p>    }
}

Info.defaultProps = {
    year: new Date().getFullYear()
};

ReactDOM.render(<Info />, document.getElementById('box'));
可以看到一些區別,初始化props與state的方式不一樣
ES5形式中是直接在函數中return的方式,ES6形式的state是在構造函數中直接初始化this.state,而props初始化則需要在外部進行
再看看點擊事件,會發現輸出的this爲null,因在ES6的類形式中,React並不會自動綁定函數方法的this對象,需要自行綁定
一般來說,有三種綁定方式
3.1 直接在構造函數中統一綁定
constructor(props) {
        super(props);        this.state = {
            name: this.props.name || 'myName'
        };        this.showYear = this.showYear.bind(this);
    }
3.2 直接在onClick中綁定
相對在構造函數中綁定來說,這種方法會更有針對性,不過多個統一綁定就會顯得代碼冗餘
render() {        return <p onClick={this.showYear.bind(this)} data-year={this.props.year}>{this.state.name}</p>
    }
3.3 在onClick綁定中使用回調函數調用
render() {        return <p onClick={(e) => this.showYear(e)} data-year={this.props.year}>{this.state.name}</p>
    }
這種方式需要手動傳入event參數,而上述兩種不需要
五、組件的生命週期
圖片引自:組件的生命週期

React的組件有從產生到消亡,有個生命週期。宏觀來講有三個時期
1. 實例化期(Mounting)
實例化這個時期主要是組件的初始實例化階段,如圖

主要包括屬性和狀態的初始化階段、組件即將加載(componentWillMount)階段、組件渲染(render)階段、組件加載完成(componentDidMount)階段
除了render可在存在期的時候再次進行組件渲染之外,其他階段只會發生一次
class Info extends React.Component {
    constructor(props) {
        super(props);        this.state = {
            name: this.props.name,
            age: 0
        };
    }    // 組件將加載    componentWillMount() {
        console.log('componentWillMount: ', this.state.age)
    }    // 組件加載完成    componentDidMount() {
        console.log('componentDidMount: ', this.state.age)
    }    // 渲染    render() {
        console.log('Info render: ', this.state.age);        return <p>{this.state.name} {this.state.age}</p>    }
}

ReactDOM.render(<Info name="Jack" />, document.getElementById('box'));

2. 存在期間(Updating)
組件實例化之後,在組件存在的時期,隨着與用戶的交互,屬性或狀態的改變,組件可發生一些更新,如圖

componentWillReceiveProps(nextProps)
組件接收到屬性(通常是父級傳來的),帶一個參數,即爲該屬性對象
shouldComponentUpdate(nextProps, nextState)
組件是否應該更新,true|false,默認返回true,帶兩個參數,將要更新的屬性對象和狀態對象
需要注意的是,如果自定義了這個方法,就會直接覆蓋默認的方法(若定義之後不返回則表示返回了false)
componentWillUpdate(nextProps, nextState)
組件將更新,帶兩個參數,將要更新的屬性對象和狀態對象
render
再次進入渲染階段
componentDidUpdate(prevProps, prevState)
組件更新完成,帶兩個參數,之前(已經)更新的屬性對象和狀態對象
在這個時期,各個階段按照流程不斷地進行着,舉個栗子
這裏定義一個父組件InfoWrap和子組件Info
在實際開發中,爲了防止JS阻塞HTML結構的渲染,初始異步獲取數據時一般會放到componentDidMount中
class InfoWrap extends React.Component {
    constructor(props) {
        super(props);        this.state = {
            name: 'defaultName'
        };
    }

    componentDidMount() {
        setTimeout(() => {            this.setState({
                name: 'Jack'
            });
        }, 1000);

        setTimeout(() => {            this.setState({
                name: 'Jack'
            });
        }, 3000);
    }

    render() {
        console.log('InfoWrap render');        return <Info name={this.state.name} />    }
}

ReactDOM.render(<InfoWrap />, document.getElementById('box'));
通過setTimeout模擬異步,一段時間後改變狀態state中的name值,通過屬性name傳入子Info組件中
這裏要注意的是,兩次setState的name值相同,
基於React依照state狀態的diff來判斷是否需要重新渲染數據,在InfoWrap中不會更新兩次HTML,但還是會向子Info中傳入兩次屬性props
class Info extends React.Component {
    constructor(props) {
        super(props);        this.state = {
            name: this.props.name,
            age: 0
        };
    }

    increaseAge() {        this.setState({
            age: this.state.age + 1
        });
    }    // 組件將加載    componentWillMount() {
        console.log('componentWillMount: ', this.state.age)
    }    // 組件加載完成    componentDidMount() {
        console.log('componentDidMount: ', this.state.age)
    }    // 組件接收到新的props    componentWillReceiveProps(nextProps) {        if (nextProps.name !== this.state.name) {            this.setState({
                name: nextProps.name
            });
        }

        console.log('componentWillReceiveProps: ', nextProps)
    }    // 組件是否應該更新    shouldComponentUpdate(nextProps, nextState) {
        console.log('shouldComponentUpdate: ', nextProps, nextState);        // return nextProps.name !== this.state.name;

        return nextState.age !== 3;
    }    // 組件將更新    componentWillUpdate(nextProps, nextState) {
        console.log('componentWillUpdate: ', this.state.age)
    }    // 組件更新完成    componentDidUpdate(prevProps, prevState) {
        console.log('componentDidUpdate: ', this.state.age)
    }    // 組件將移除    componentWillUnmount() {
        console.log('componentWillUnmount: ', this.state.age)
    }    // 渲染    render() {
        console.log('Info render: ', this.state.age);        // 在這更改狀態將會無限循環
        // this.setState({
        //     age: this.state.age + 1
        // });

        return <p onClick={this.increaseAge.bind(this)} >{this.state.name} {this.state.age}</p>    }
}

由上圖,子Info被渲染了三次,而實際上第三次name並未改變,其實是不需要渲染的
在實際開發中,爲了防止無意義的渲染,通常會在shouldComponentUpdate添加判斷,自定義是否需要更新
將其中的return nextProps.name !== this.state.name;取消註釋,則不再被更新渲染

細心點可以看到,Info組件中的setState是放在了componentWillReceiveProps中
爲什麼不直接在shouldComponentUpdate中判斷是否需要更新後再更新狀態呢?
根據上方的流程圖,如果在這裏更新,就會再次觸發state改變,導致又多循環執行了一次
所以一般的做法是在componentWillReceiveProps中根據條件判斷是否需要更新狀態,然後在shouldComponentUpdate中再根據條件判斷是否需要更新渲染組件
同理,千萬不要在render的時候setState更新狀態,這更危險,會出現死循環,不注意的話可以直接把瀏覽器搞崩了

以上是子組件從父組件獲取數據後更新的情況,下面來看看在子組件中的自我更新(increaseAge方法)
假設現在點擊一次age屬性值自增一次,在age不等於3的時候才更新頁面

可以看到,在render和componentDidUpdate階段,state的值才被實實在在地更新了,所以在之前的階段取setState之後的新值,仍爲舊的值
3. 銷燬期(Unmounting)
銷燬期發生在組件被移除的時候,用於如果卸載組件後需要做一些特殊操作時,一般很少用

六、組件間的通信
組件一多起來,就涉及到不同組件之間的數據交流,主要有三種類型
1. 父子通信
React是單向的數據流動
父組件向子組件傳遞數據,其實就是通過props屬性傳遞的方式,父組件的數據更新,通過props數據的流動,子組件也得到更新
2. 子父通信
子組件與父組件通信,不同於Angular.js的數據雙向綁定,在React中默認支持子同步父的數據
若想實現父同步子的數據,則需要在子數據發生改變的時候,調用執行父props傳來的回調,從而達到父的同步更新
class InputItem extends React.Component {
    constructor(props) {
        super(props);        this.state = {};
    }

    inputChange(e) {        this.props.inputChange(e.target.value);
    }

    render() {        return <p title={this.props.title}>
            [InputItem]-input: <input type="text" onChange={this.inputChange.bind(this)} />
        </p>    }
}

class Page extends React.Component {
    constructor(props) {
        super(props);        this.state = {
            inputValue: ''
        };
    }

    inputChange(inputValue) {        this.setState({
            inputValue,
        });
    }

    render() {        return (            <div>
                <p>[Page]-input: <input type="input" value={this.state.inputValue} /></p>
                <InputItem title="myInput" inputChange={this.inputChange.bind(this)} />
                <InputItem title="myInput" inputChange={this.inputChange.bind(this)} />
            </div>        )
    }
}

ReactDOM.render(<Page />, document.getElementById('box'));
這裏定義了一個父組件Page,子組件InputItem
在父組件中<InputItem title="myInput" ... /> 其實就有了父與子的通信(props傳遞)
Page向InputItem傳遞了一個回調屬性,InputItem數據改變後調用此回調,數據得到更新

3. 兄弟通信
上述是父同步子的數據,如果要實現兄弟之間(或者兩個沒什麼關係的組件)的數據同步,就得結合父與子、子與父的方式
class InputItem extends React.Component {
    constructor(props) {
        super(props);        this.state = {};
    }

    inputChange(e) {        this.props.inputChange(e.target.value);
    }

    render() {        return <p title={this.props.title}>
        [InputItem]-input: <input type="text" onChange={this.inputChange.bind(this)} value={this.props.inputValue} />
        </p>    }
}

class Page extends React.Component {
    constructor(props) {
        super(props);        this.state = {
            inputValue: ''
        };
    }

    inputChange(inputValue) {        this.setState({
            inputValue,
        });
    }

    render() {        return (            <div>
                <p>[Page]-input: <input type="input" value={this.state.inputValue} /></p>
                <InputItem title="myInput" inputChange={this.inputChange.bind(this)} inputValue={this.state.inputValue} />
                <InputItem title="myInput" inputChange={this.inputChange.bind(this)} inputValue={this.state.inputValue} />

            </div>        )
    }
}

ReactDOM.render(<Page />, document.getElementById('box'));
子InputItem更新後,調用父Page的回調,在父Page中將更新後的數據通過props傳至子InputItem
不同組件之間數據得到同步

4. 事件發佈/訂閱
這個還沒用過 不清楚..
七、受控組件與非受控組件
在React中的表單Form系統中,有受控組件與非受控組件一說
1. 非受控組件
非受控,即表單項的value不受React的控制,不設初始value值,我們可以隨意更改
但不便於統一使用React進行管理,也不便於設置初始值
class Page extends React.Component {
    constructor(props) {
        super(props);        this.state = {
            inputValue: ''
        };
    }

    inputChange(e) {
        console.log(e.target.value)
    }

    render() {        return (            <div>
                <p><input type="input" onChange={this.inputChange.bind(this)} /></p>
            </div>        )
    }
}

ReactDOM.render(<Page />, document.getElementById('box'));
可以看到,此input項目似乎與React沒什麼關係,想獲取它的值就必須通過DOM獲取到該元素,不方便管理
2. 受控組件
受控組件,是爲了更好地管理表單項的值
但要注意的是,一旦設置了value,將不能通過直接在表單項輸入就能改變value值
因爲value已經被React控制,要更新value值,就得更新相應的state狀態值
對於受控組件,又有初始值和值兩種之分
2.1 初始值(defaultValue) -- 注:其實defaultValue應該是屬於非受控組件的
defaultValue這裏指的是input,select,textarea等,相應的checkbox radio是defaultChecked
初始值只是初始的一個值,在第一次設置定義之後就不可改變
在實際開發中,數據的獲取經常是異步的,大部分情況下會先初始設置input表單值爲空,獲取到數據後再放到input中(如編輯頁面)
便會有以下代碼
class InputItem extends React.Component {
    constructor(props) {
        super(props);        this.state = {
            inputValue: this.props.inputValue || ''
        };
    }

    componentWillReceiveProps(nextProps) {        this.setState({
            inputValue: nextProps.inputValue
        });
    }

    inputChange(e) {
        let inputValue = e.target.value;

        console.log(inputValue);        // this.setState({
        //     inputValue
        // });    }

    render() {        return <p><input type="input" onChange={this.inputChange.bind(this)} defaultValue={this.state.inputValue} /></p>
    }
}

class Page extends React.Component {
    constructor(props) {
        super(props);        this.state = {
            inputValue: ''
        };
    }

    componentDidMount() {
        setTimeout(() => {            this.setState({
                inputValue: 'myValue'
            });
        }, 1000);
    }

    render() {        return <InputItem inputValue={this.state.inputValue} />    }
}

ReactDOM.render(<Page />, document.getElementById('box'));
初始在InputItem中設置了defaultValue爲空,一段時間後獲取到父Page傳來的新值inputValue,然而InputItem中的defaultValue並不會更新
這種情況,就不適用與defaultValue了,換成用狀態控制的value即可
2.2 值(value)
render() {        return <p><input type="input" onChange={this.inputChange.bind(this)} value={this.state.inputValue} /></p>
}獲取到異步的數據後,通過componentWillReceiveProps中更新狀態值
加入onChange事件,在輸入的時候更新狀態值
而對於onChange事件的調用更新state,也有點點小技巧
假如input項目太多,爲每個input定義一個change回調並不實際
這時可以在bind中指定參數,指定是某個input項,或者直接在input項中添加屬性區分,調用的時候再獲取
class InputItem extends React.Component {
    constructor(props) {
        super(props);        this.state = {
            userName: this.props.userName || '',
            age: this.props.age || ''
        };
    }

    componentWillReceiveProps(nextProps) {        this.setState({
            userName: nextProps.userName,
            age: nextProps.age
        });
    }

    inputChange(name, e) {        this.setState({
            [name]: e.target.value
        });
    }    // inputChange(e) {
    //     this.setState({
    //         [e.target.getAttribute('name')]: e.target.value
    //     });
    // }
    render() {        return (            <div>
                <p><input type="input" name="userName" onChange={this.inputChange.bind(this, 'userName')} value={this.state.userName} /></p>
                <p><input type="input" name="age" onChange={this.inputChange.bind(this, 'age')} value={this.state.age} /></p>
            </div>        )
    }
}

class Page extends React.Component {
    constructor(props) {
        super(props);        this.state = {
            userName: '',
            age: ''
        };
    }

    componentDidMount() {
        setTimeout(() => {            this.setState({
                userName: 'Jack',
                age: 10
            });
        }, 1000);
    }

    render() {        return <InputItem userName={this.state.userName} age={this.state.age} />    }
}

ReactDOM.render(<Page />, document.getElementById('box'));
默認情況下,如果bind中不填第二個參數,在回調中第一個參數就是觸發的event對象
如果有第二個參數,回調中的第一個參數就是該參數,後續的參數纔是觸發的event對象
上述兩個inputChange方法調用之後結果一樣,這裏也利用了ES6支持對象屬性名爲變量的新特性
另外,由於設置了value值之後的React組件表單項不能直接更改value值,需要修改state相應值。
在使用一些插件的時候可能會遇到問題,如日期插件bootstrap-datepicker
class DatePicker extends React.Component {
    constructor(props) {
        super(props);        this.state = {
            timeFrom: '',
            timeEnd: ''
        };
    }

    combindDate(date) {
        let year = date.getFullYear(),
            month = date.getMonth() + 1,
            day = date.getDate();

        month = month < 10 ? '0' + month : month;
        day = day < 10 ? '0' + day : day;        return [year, month, day].join('-');
    }

    componentDidMount() {
        let $timeFrom = $(this.refs.timeFrom);

        $timeFrom.datepicker({
            format: 'yyyy-mm-dd',
            autoclose: true,
            language: 'zh-CN'
        }).on('changeDate', (ev) => {
            let day = ev.date.getDate();            if (day > 15) {
                $timeFrom.datepicker('update', '');                // this.setState({
                //     timeFrom: ''
                // });
            } else {                // this.setState({
                //     timeFrom: this.combindDate(ev.date)
                // });            }
        });
    }

    render() {        return (            <div>
                <p>timeFrom: <input type="input" ref="timeFrom" value={this.state.timeFrom} /></p>
                <p>timeEnd: <input type="input" ref="timeEnd"  value={this.state.timeEnd} /></p>
            </div>        )
    }
}

ReactDOM.render(<DatePicker />, document.getElementById('box'));
且看看這個timeFrom,假設現在的需求是選擇的日期不能大於15號
正常情況下,直接調用.datepicker('update', '');清空即可
但在React受控組件中,這關乎狀態state值,所以要同時進行顯示地setState(包括選成功的賦值與選失敗的清空,即註釋部分)
八、組件的複製
組件的複製也是一塊知識,不過我這裏應該不算是複製吧,其實只是一個具體的栗子
1. 彈窗中的組件並不是在彈窗之後才加載,其實是初始就加載
想象一下有這麼一個需求:
有很多道題,每道題會有一些附加的文件,需要有個文件的輪播,另外點擊文件還有彈窗預覽,彈窗中下方是文件輪播,上方是文件的預覽輪播
所以一個頁面會出現多個相似的輪播,點擊輪播中的文件可彈窗預覽該文件,在彈窗中下方還有這個相似的輪播
所以要做的其實就是三個組件,頁面組件,文件輪播組件,彈窗預覽組件(該組件中使用一個文件輪播組件)
思路很清晰,不過在實現過程中發現,並不是想象的樣子,彈窗中的文件輪播組件並不是在彈窗之後才加載,其實是頁面加載出來就加載了。
那例子太複雜,用幾個input項模擬一下吧
Page組件是頁面組件,InputItem是共享的,BoxBanner是彈窗組件
class InputItem extends React.Component {
    constructor(props) {
        super(props);        this.state = {
            inputIndex: this.props.inputIndex || 0,
            inputValue: this.props.inputValue || ''
        };
    }

    componentWillReceiveProps(nextProps) {        this.setState({
            inputIndex: nextProps.inputIndex,
            inputValue: nextProps.inputValue
        });
    }

    componentDidMount() {
        console.log('componentDidMount ', this.state.inputIndex);
    }

    inputChange(e) {        this.setState({
            inputValue: e.target.value
        });
    }

    inputClick() {
        console.log('inputClick');
    }

    render() {        return <p data-first="1" className="check-first">{this.state.inputIndex}、            <input
                type="input"
                onChange={this.inputChange.bind(this)}
                onClick={this.inputClick.bind(this)}
                value={this.state.inputValue}
                style={{'margin': '10px'}}            />
        </p>    }
}

class BoxBanner extends React.Component {
    constructor(props) {
        super(props);        this.state = {
            inputIndex: 0,
            inputValue: ''
        };
    }

    openBox(e) {
        let elem = e.target;        if (elem.tagName !== 'BUTTON') {            return;
        }        this.setState({
            inputIndex: elem.getAttribute('data-index'),
            inputValue: elem.getAttribute('title')
        });

        layer.open({
            type: 1,
            title: false,
            shadeClose: true,            // content: $('.template-box').html(),
            content: $('.template-box'),            // content: $(this.refs.templateBox),
            success: function(layero) {
                let $first = $(layero).find('.check-first');
                console.log('isFirst: ', $first.attr('data-first'));

                $first.attr('data-first', '0');
            }.bind(this),
            end: function(layero) {                // $('.check-first').attr('data-first', '1');            }
        });

    }

    render() {        return (            <div>
                <p onClick={this.openBox.bind(this)}>
                    <button data-index="1" title="box1">box1</button>
                    <button data-index="2" title="box1">box2</button>
                    <button data-index="3" title="box1">box3</button>
                </p>
                <div className="template-box" ref="templateBox" style={{display: 'none'}}>
                    <InputItem inputIndex={this.state.inputIndex} inputValue={this.state.title} />
                </div>
            </div>        )
    }
}

class Page extends React.Component {
    constructor(props) {
        super(props);
    }

    render() {        return (            <div>
                <BoxBanner />
            </div>         )
    }
}
ReactDOM.render(<Page />, document.getElementById('box'));
這裏有個要求是,判斷是否是首次彈窗進來,初始設置data-first屬性爲1,彈窗後即更新爲0

在BoxBanner組件中引入了一個InputItem組件,但InputItem組件被共享,只在頁面開始加載是被加載了
傳遞到layer中的content似乎只是加載後的結果,可以看到isFirst值不是預想的
在layer的content中指定InputItem組件明顯是不可行的,畢竟這是JSX
所以,就得在彈窗關閉之後恢複相關的值,即end回調中的註釋部分
上述的代碼中
        // content: $('.template-box').html(),
            content: $('.template-box'),            // content: $(this.refs.templateBox),
最開始用的是第一種方法,但這將只會傳遞html,其中的事件將不被執行
換成第二種,事件的傳遞得到解決,但在React中過多的DOM操作並不推薦,且如果存在多個.template-box時,基於彈窗中組件不會重新加載的問題,組件的獲取就不正確
建議是換成第三種,取該組件的ref映射
Page組件中加多一項
render() {        return (            <div>
                <BoxBanner />
                <BoxBanner />
            </div>         )
    }
