Windows上git的簡單使用
git客戶端安裝(略)
1)生成ssh密鑰:
$ ssh-keygen -t rsa -C "[email protected]"
Generating public/private rsa key pair.
Enter file in which to save the key (/c/Users/bunny/.ssh/id_rsa):
Created directory '/c/Users/bunny/.ssh'.
Enter passphrase (empty for no passphrase):
Enter same passphrase again:
Your identification has been saved in /c/Users/bunny/.ssh/id_rsa.
Your public key has been saved in /c/Users/bunny/.ssh/id_rsa.pub.
The key fingerprint is:
74:6e:f3:14:0a:95:c3:d8:8e:50:62:b3:b2:79:45:4d [email protected]
bunny@BUNNY-PC /E/gittest
將生成的公鑰文件id_rsa.pub內容拷貝至gitlab管理界面SSH Keys下:
2)從服務端clone一份project來測試
$ git clone [email protected]:bunny/com-gittest.git
Cloning into 'com-gittest'...
The authenticity of host 'git.olymtech.com (183.131.76.44)' can't be established
.
RSA key fingerprint is db:af:31:f4:1c:3f:38:39:48:84:24:ac:08:34:ad:bc.
Are you sure you want to continue connecting (yes/no)? yes
Warning: Permanently added 'git.olymtech.com,183.131.76.44' (RSA) to the list of
known hosts.
warning: You appear to have cloned an empty repository.
Checking connectivity... done.
$ cd com-gittest/

$ git init
Reinitialized existing Git repository in e:/gittest/com-gittest/.git/
bunny@BUNNY-PC /E/gittest/com-gittest (master)

$ touch README
bunny@BUNNY-PC /E/gittest/com-gittest (master)

$ git add README
bunny@BUNNY-PC /E/gittest/com-gittest (master)

$ git commit -m 'first commit test'
[master (root-commit) 9c37bb4] first commit test
1 file changed, 0 insertions(+), 0 deletions(-)
create mode 100644 README
bunny@BUNNY-PC /E/gittest/com-gittest (master)

$ git remote add origin [email protected]:bunny/com-gittest.git
fatal: remote origin already exists.
bunny@BUNNY-PC /E/gittest/com-gittest (master)

$ git push -u origin master
Counting objects: 3, done.
Writing objects: 100% (3/3), 206 bytes | 0 bytes/s, done.
Total 3 (delta 0), reused 0 (delta 0)
To [email protected]:bunny/com-gittest.git
* [new branch] master -> master
Branch master set up to track remote branch master from origin.
圖形化界面git分支管理使用方法
使用sourcetree的git客戶端(安裝略,安裝過程忽略安裝mercurial客戶端),下載地址http://www.sourcetreeapp.com/download/
1. 使用git自帶的git branch 分支管理命令:
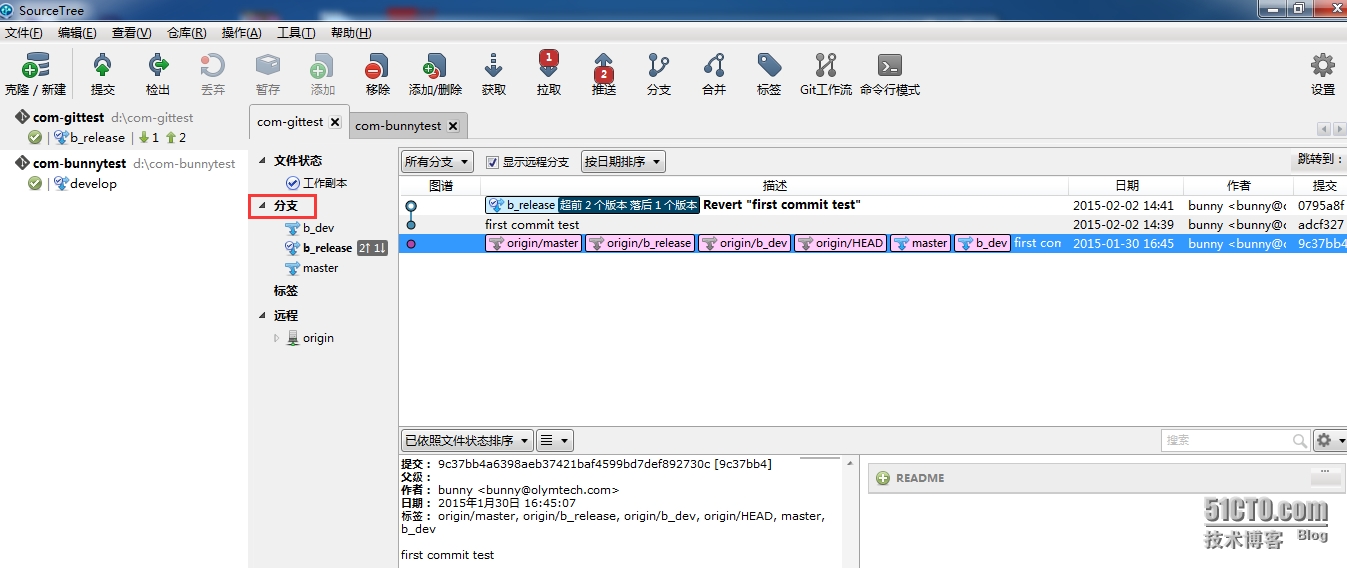
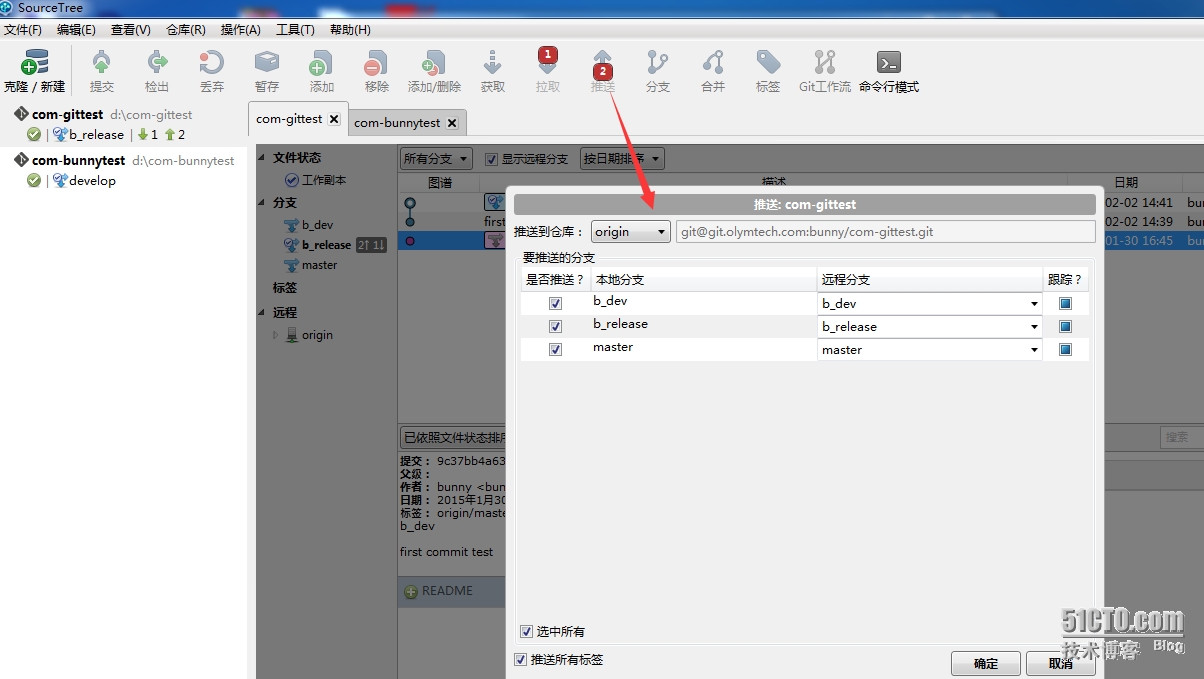
新建分支並推送:
找一臺機器clone下來驗證分支OK:
git@pubgit:/tmp$ git clone http://git.olymtech.com/bunny/com-gittest.git
Cloning into 'com-gittest'...
Username for 'http://git.olymtech.com': bunny
Password for 'http://bunny@git.olymtech.com':
remote: Counting objects: 3, done.
remote: Total 3 (delta 0), reused 0 (delta 0)
Unpacking objects: 100% (3/3), done.
Checking connectivity... done.
git@pubgit:/tmp/com-gittest$ git branch -r
origin/HEAD -> origin/master
origin/b_dev
origin/b_release
origin/master
2. 使用git flow來簡化分支管理:
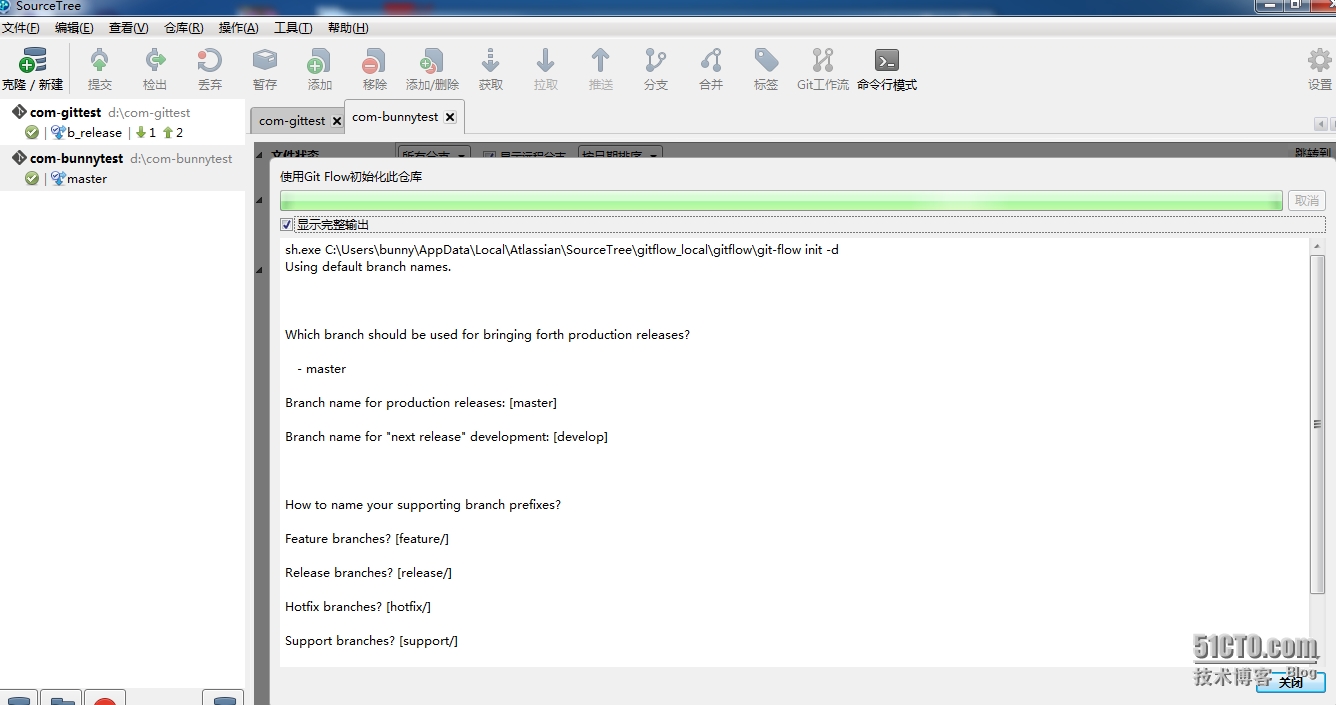
git flow 初始化倉庫(使用默認分支流):
找一臺客戶端機器驗證服務端分支:
git@pubgit:/tmp$ git clone http://git.olymtech.com/bunny/com-bunnytest.git
git@pubgit:/tmp/com-bunnytest$ git branch -r
origin/HEAD -> origin/master
origin/develop
origin/master
命令行下git分支的簡單使用:
git branch 不帶參數:列出本地已經存在的分支
git branch -r 列出遠程分支
git branch -a 列出本地分支和遠程分支
git branch 創建一個新的本地分支,需要注意,此處只是創建分支,不進行分支切換,例如:
#git branch newbranch2
git checkout newbranch2切換至新創建分支
git checkout master 切換回主分支
git branch -m | -M oldbranch newbranch 重命名分支,如果newbranch名字分支已經存在,則需要使用-M強制重命名,否則,使用-m進行重命名。
git branch -d | -D branchname 刪除branchname分支
git branch -d -r branchname 刪除遠程branchname分支
補充說明:
git flow定義了下列分支
主要分支
1. master: 永遠在 production-ready 狀態
2.develop: 最新的下次發佈開發狀態j
支援性分支
1. Feature branches: 開發新功能都從 develop 分支出來,完成後 merge 回 develop
2. Release branches: 準備要 release 的版本,只修 bugs。從 develop 分支出來,完成後 merge 回 master 和 develop
3. Hotfix branches: 等不及 release 版本就必須馬上修 master 上線的情況。會從 master 分支出來,完成後 merge 回 master 和 develop
http://blog.csdn.net/menxu_work/article/details/12494903
git如果需進行分支管理,兩種方式:
1. 本地建立分支提交至服務端,如果不行排查下權限或使用上的問題。
Git Bash+EGit在項目中配合使用最常用方法總結,可參考此博文寫的很詳細
http://blog.csdn.net/hongshan50/article/details/22582049
2. 使用git flow(約定俗成的開發規範), SourceTree工具: 既有GitBash的命令行,又有EGit的圖形化管理 有個git flow選項功能


