gitlab-ce安裝-使用國內源
GitLab是一個利用 Ruby on Rails 開發的開源應用程序,實現一個自託管的Git項目倉庫,可通過Web界面進行訪問公開的或者私人項目。
GitLab擁有與Github類似的功能,能夠瀏覽源代碼,管理缺陷和註釋。可以管理團隊對倉庫的訪問,它非常易於瀏覽提交過的版本並提供一個文件歷史庫。它還提供一個代碼片段收集功能可以輕鬆實現代碼複用,便於日後有需要的時候進行查找。
1.基礎環境準備
[root@linux-node2 ~]# yum install curl policycoreutils openssh-server openssh-clients postfix[root@linux-node2 ~]# systemctl start postfix
2.安裝gitlab-ce
curl -sS https://packages.gitlab.com/in ... pm.sh | sudo bash[root@linux-node2 ~]# yum install -y gitlab-ce
注:由於網絡問題,國內用戶,建議使用清華大學的鏡像源進行安裝:
[root@linux-node2 ~]# vim /etc/yum.repos.d/gitlab-ce.repo[gitlab-ce]
name=gitlab-ce
baseurl=http://mirrors.tuna.tsinghua.e ... m/el7repo_gpgcheck=0
gpgcheck=0
enabled=1
gpgkey=https://packages.gitlab.com/gpg.key[root@linux-node2 ~]# yum makecache[root@linux-node2 ~]# yum install gitlab-ce
3.配置並啓動gitlab-ce
[root@linux-node2 ~]# gitlab-ctl reconfigure
可以使用gitlab-ctl管理gitlab,例如查看gitlab狀態:
[root@linux-node2 ~]# gitlab-ctl status
run: gitlab-workhorse: (pid 12171) 231s; run: log: (pid 7817) 555s
run: logrotate: (pid 12175) 230s; run: log: (pid 7832) 548s
run: nginx: (pid 12181) 230s; run: log: (pid 7823) 549s
run: postgresql: (pid 12186) 229s; run: log: (pid 7683) 587s
run: redis: (pid 12194) 229s; run: log: (pid 7600) 592s
run: sidekiq: (pid 12198) 229s; run: log: (pid 7806) 558s
run: unicorn: (pid 14967) 6s; run: log: (pid 7774) 560s
關閉gitlab:[root@linux-node2 ~]# gitlab-ctl stop
啓動gitlab:[root@linux-node2 ~]# gitlab-ctl start
重啓gitlab:[root@linux-node2 ~]# gitlab-ctl restart
登錄gitlab
第一次登錄gitlab,需要爲root用戶修改密碼,root用戶也是gitlab的超級管理員。
管理gitlab
使用root用戶和剛纔創建的密碼登錄後,你就可以探索gitlab的奧祕了,可以點擊圖中紅框的按鈕進入管理區域。
持續集成之Jenkins安裝部署
安裝JDK
Jenkins是Java編寫的,所以需要先安裝JDK,這裏採用yum安裝,如果對版本有需求,可以直接在Oracle官網下載JDK。
[root@linux-node1 ~]# yum install -y java-1.8.0
安裝Jekins
[root@linux-node1 ~]# cd /etc/yum.repos.d/[root@linux-node1 yum.repos.d]# wget http://pkg.jenkins.io/redhat/jenkins.repo[root@linux-node1 ~]# rpm --import http://pkg.jenkins.io/redhat/jenkins.io.key[root@linux-node1 ~]# yum install -y jenkins[root@linux-node1 ~]# systemctl start jenkins
訪問Jenkins
爲了安全考慮,首先需要解鎖Jenkins,請在/var/lib/jenkins/secrets/initialAdminPassword中查看文件。
[root@linux-node1 ~]# cat /var/lib/jenkins/secrets/initialAdminPassword
98dc4fdeb47641bf93bfbd884d0d9b7f
選擇需要安裝的插件:
選擇默認即可,會安裝通用的社區插件,剩下的可以在使用的時候再進行安裝。
由於網絡原因,有一些插件會安裝失敗。
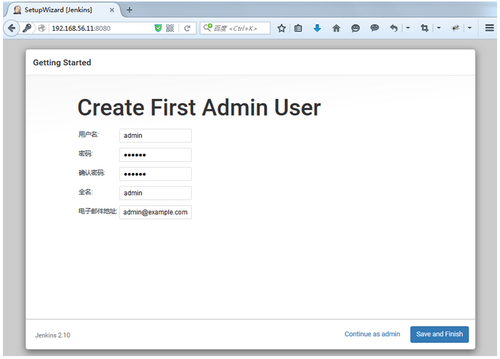
設置Admin用戶和密碼
登陸Jenkins
轉載自趙班長博客:https://www.unixhot.com/article/55


