8.模塊
8.1模塊的分類
8.1.1 Core Module
(1)不需要格外下載和配置就可以直接使用的
(2)常用的module
(3)都是經過嚴格測試的
8.1.2 Extra Module
(1)Extra Module需要下載和配置才能使用
(2)次常用的
(3)還有可能存在bug的
注意:在ansible module文檔上查看單個module的時候,每一個module文檔的底部都會標識,這是一個“Core Module”,或者這是一個“Extra Module”,比如yum就是一個core module,yum_repository就是一個extra module
8.2常見模塊
可以使用ansible-doc -l命令查看有哪些模塊
使用ansible-doc -s copy命令可以查看模塊的使用方法
8.2.1 command
(1)幫助:[root@pythion ~]# ansible-doc -s command
(2)簡介:Command模塊,命令模塊、默認模塊,用於在遠程執行命令
(3)選項:
free_form:要執行的linux指令
chdir:在執行指令之前,先切換到該目錄
removes:對應的文件不存在就執行command
creates:對應的文件存在就執行command
executable:切換shell來執行指令,該執行路徑必須是一個絕對路徑
(4)案例:遠程查看時間和文件
[root@pythion ansible]# ansible zhang -m command -a "date"
[root@pythion ansible]# ansible all -m command -a "date"
[root@pythion ansible]# ansible wang -m command -a "date"
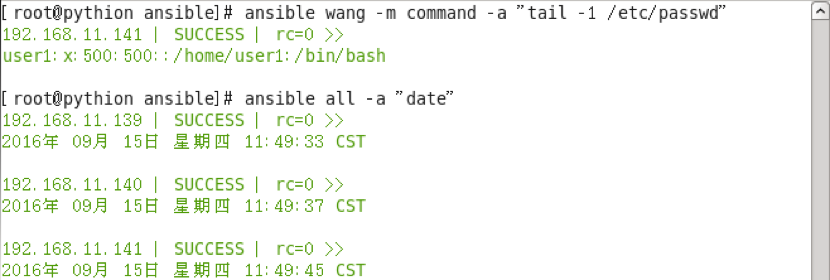
[root@pythion ansible]# ansible wang -m command -a "tail -1 /etc/passwd"
[root@pythion ansible]# ansible all -a "date"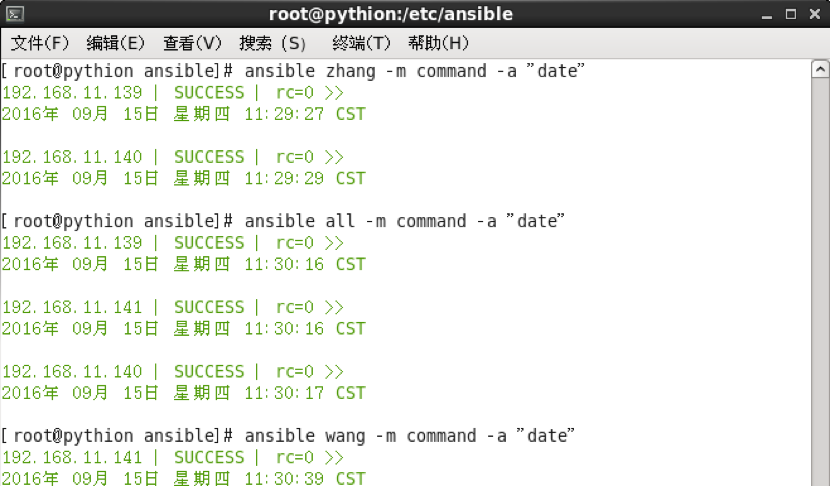
8.2.2 cron
(1)簡介:用來做計劃任務
(2)state:
present:安裝 默認爲安裝
absent:移除
如果需要移除的話,只需要寫上name和absent就可以了
(3)案例:寫入一個計劃任務,查看是否已經成功寫入。
需要注意的是不寫的默認都是 ,名字得寫,不寫就會報錯,狀態默認是安裝
[root@pythion ansible]# ansible zhang -m cron -a 'hour="/5" job="/bin/date" name="date test" state=present'
[root@pythion ansible]# ansible zhang -a "crontab -l"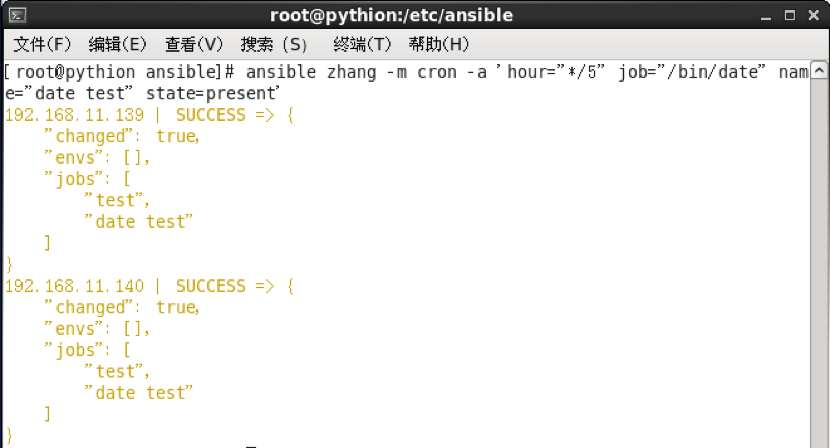
8.2.3 user、group
(1)簡介:實現用戶賬號管理的
(2)案例:創建用戶、創建組、創建組裏邊的成員
(3)注意:system 是否是系統組
[root@pythion ansible]# ansible all -m user -a 'name="user1" state=present' //創建用戶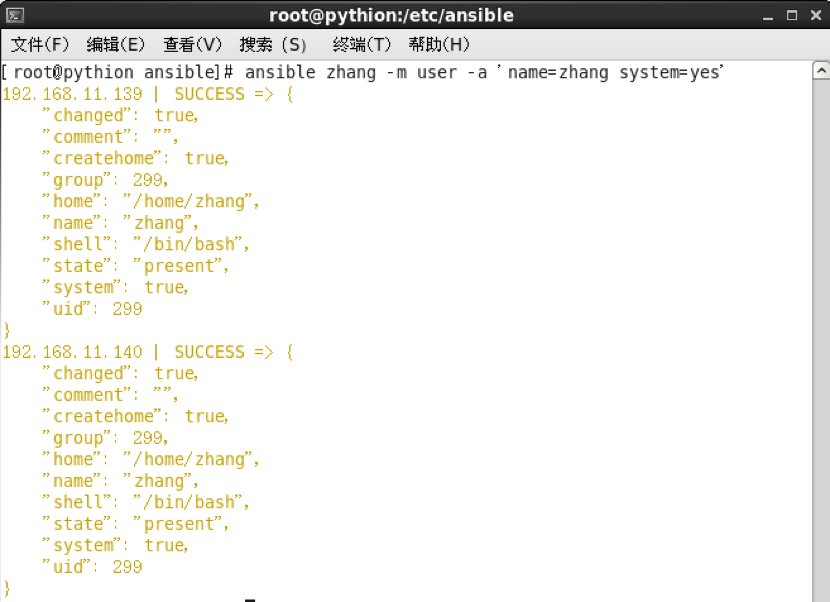
[root@pythion ~]# ansible zhang -m group -a 'name=pig gid=301 system=yes' //創建組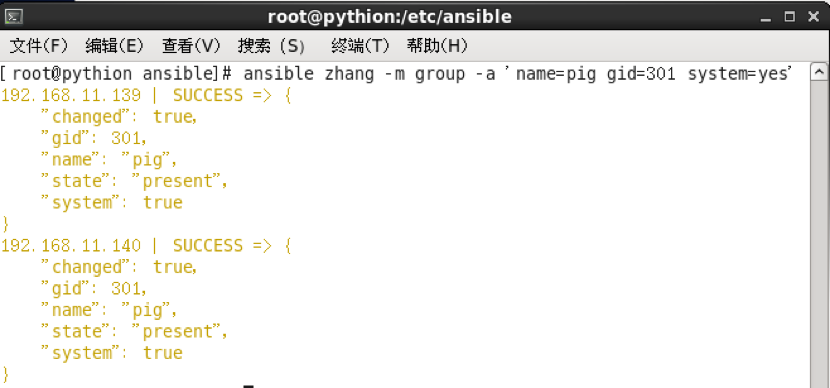
[root@pythion ~]# ansible zhang -m user -a 'name=pig uid=301 system=yes group=pig' //創建組裏邊的成員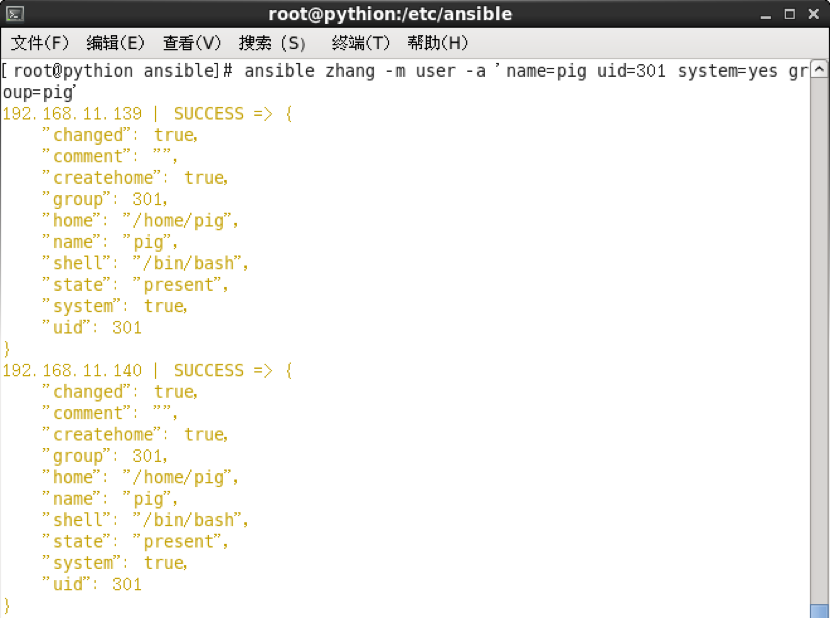
ansible user 的passwd參數的值需要接受加密後的值
[root@dev2 test_deploy]# echo Zmc2tG1m= | openssl passwd -1 -stdin
$1$XI3TNbug$Y14rSXX7JxTtlTub9Car/0
tasks:
- name: add user tech
user: name=tech password=$1$XI3TNbug$Y14rSXX7JxTtlTub9Car/0
8.2.4 copy
(1)簡介:用來操作文件,但是不能傳輸目錄,他不會遞歸目錄
(2)案例:複製文件、創建新文件,寫入指定內容
(3)注意:
src本地源文件路徑,可以相對,可以絕對
dest目標文件,必須絕對路徑
content:取代src,表示指定生成內容生成文件
遠端可以指定傳過去的文件名稱,沒有指定則爲默認名稱,目錄後邊+/和不加是一樣的
backup:可以備份原來的文件,前提是原來的文件必須和要推送的文件有不同的地方,默認爲no
state:directory,abset,file,directory會創建目錄,abset會刪除,默認是file
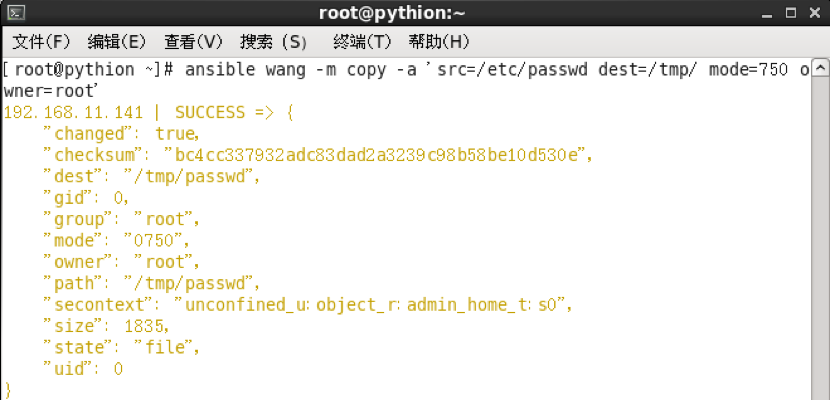
將本地文件複製到遠程主機
[root@pythion ~]# ansible wang -m copy -a 'src=/etc/passwd dest=/tmp/ mode=750 owner=root'![ansible常用模塊]()
創建一個新文件,並寫入指定內容
[root@pythion ~]# ansible wang -m copy -a 'content="hello\n world\n" dest=/tmp/1.txt![ansible常用模塊]()
如果要批量複製目錄下的文件到遠端某一個目錄中,可以使用with_fileglob模塊,使用案例如下
tasks: - name: unity build script
copy: src={{item}} dest=/data/shell/ owner=root mode=755 backup=yes
with_fileglob:- /data/conf/build/*
8.2.5 file
(1)簡介:設置文件屬主、屬組、權限、製作軟鏈接
(2)案例:設定遠程文件 歸屬關係和權限
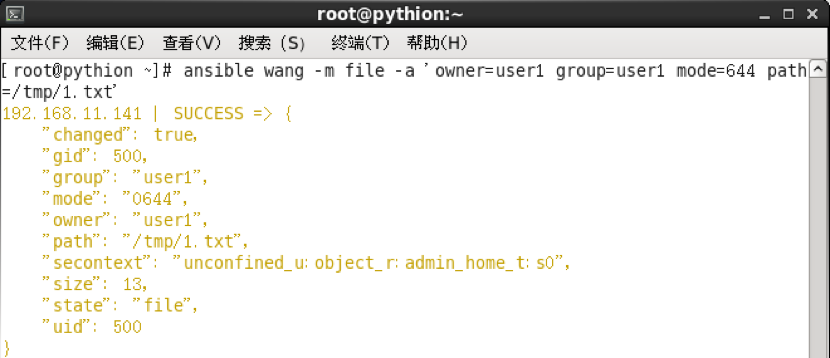
修改將遠程主機/tmp/1.txt的歸屬關係和權限
[root@pythion ~]# ansible wang –m file -a 'owner=user1 group=user1 mode=644 path=/tmp/1.txt'
注意:path:指定文件路徑,可以使用name或dest來替換![ansible常用模塊]()
案例:製作軟鏈接
[root@pythion ~]# ansible wang -m file -a 'path=/tmp/1.txt.link src=/tmp/1.txt state=link'
注意:
src:指定文件路徑,可以使用name或dest來替換
path:指明符號鏈接文件路徑
如果要刪除,則設爲state=absent![ansible常用模塊]()
創建目錄:
- /data/conf/build/*
- name: mkdir scripts in zabbix-agent
file: dest=/etc/zabbix/scripts mode=755 owner=root state=directory
8.2.6 ping
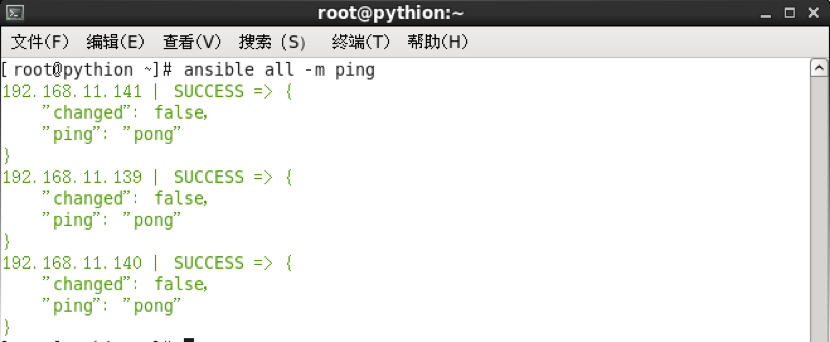
(1)簡介:檢測主機是否能連通
(2)案例:檢測所有主機連通性
[root@pythion ~]# ansible all -m ping![ansible常用模塊]()
8.2.7 service
(1)簡介:控制服務的運行狀態和開機啓動狀態
(2)案例:
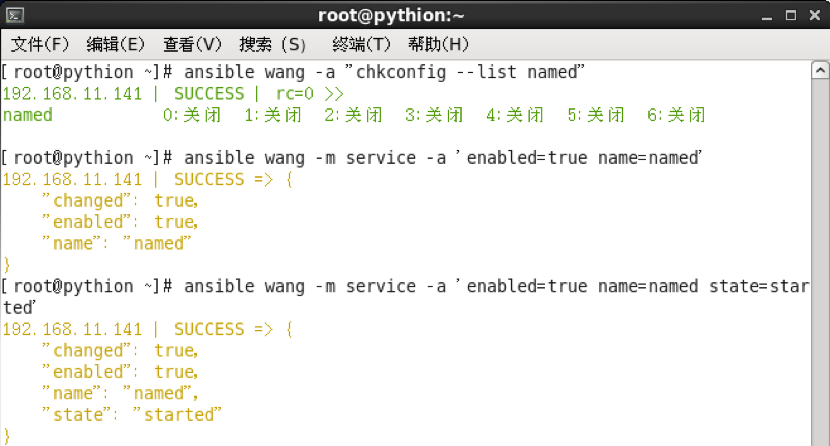
[root@pythion ~]# ansible wang -a "chkconfig --list named"
注意:
enabled:是否開機自動啓動,取值爲true爲false
name:服務名稱
state:狀態
[root@pythion ~]# ansible wang -a "chkconfig --list named" //查看named開機自啓級別
[root@pythion ~]# ansible wang -m service -a 'enabled=true name=named' //named開機自啓
named的開機自啓,並且保持運行狀態
[root@pythion ~]# ansible wang -m service -a 'enabled=true name=named state=started'![ansible常用模塊]()
8.2.8 shell
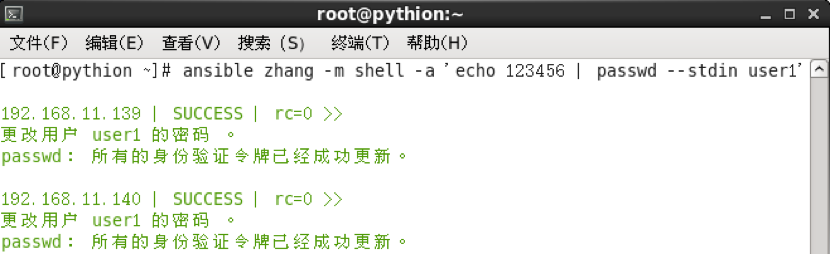
(1)簡介:Shell模塊,在遠程主機上執行命令
(2)注意:如果涉及管道、變量的最好使用shell模塊
(3)案例:
設置密碼
[root@pythion ~]# ansible zhang -m shell -a 'echo 123456 | passwd --stdin user1'![ansible常用模塊]()
8.2.9 script
(1)簡介:在遠程主機執行本地腳本
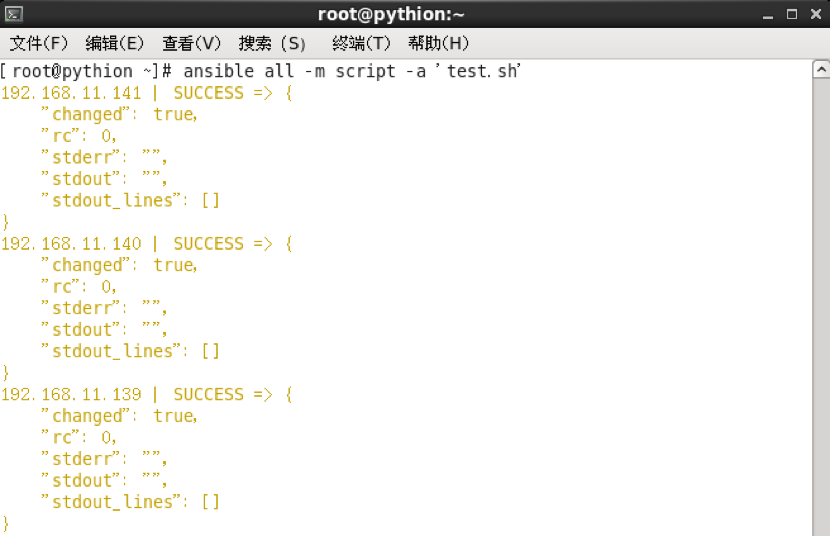
(2)案例:在遠程主機執行本地的test.sh腳本
(3)注意:
script:將本地腳本複製到遠程主機,並運行
相對絕對路徑都支持
[root@pythion ~]# ansible all -m script -a 'test.sh'![ansible常用模塊]()
8.2.10 yum
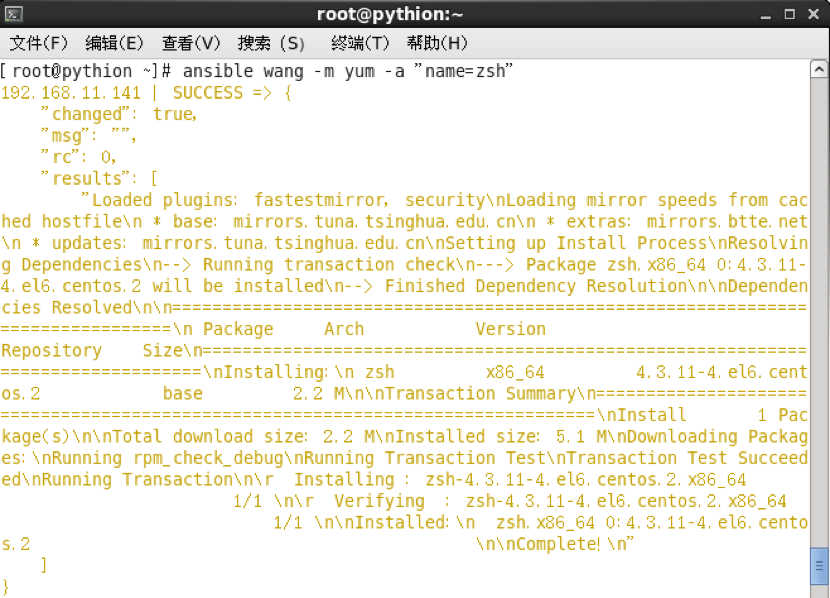
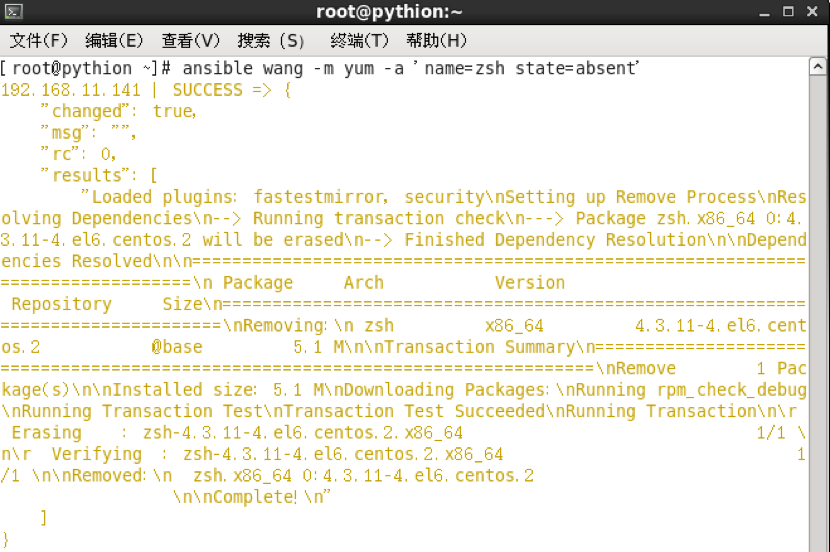
(1)簡介:程序包的安裝和卸載
(2)案例:安裝zsh包,卸載zsh包
(3)注意:
name:指定要安裝的程序包,可以帶上版本號
state:present,latest表示安裝,absent表示卸載
[root@pythion ~]# ansible wang -m yum -a "name=zsh" //安裝zsh包![ansible常用模塊]()
[root@pythion ~]# ansible wang -m yum -a 'name=zsh state=absent' //卸載zsh包![ansible常用模塊]()
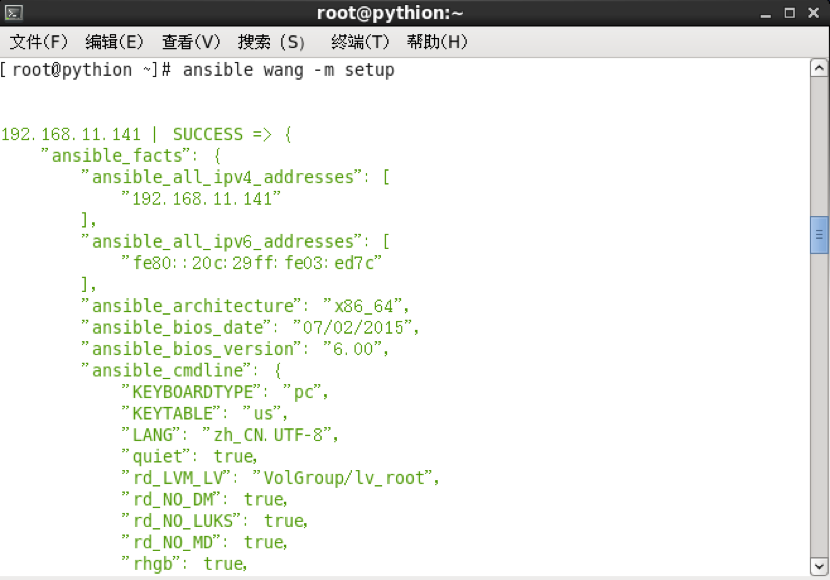
8.2.11 setup
(1)簡介:收集遠程主機的facts,每個被管理節點在接收管理命令之前會將自己主機相關的信息,如操作系統版本,ip地址等報告給遠程的ansbile主機。
(2)案例:收集wang組裏邊的所有遠程主機信息
[root@pythion ~]# ansible wang -m setup![ansible常用模塊]()
案例:把信息以主機名的方式存儲到/tmp/facts
[root@rsync facts]# ansible jingqu -m setup --tree /tmp/facts![ansible常用模塊]()
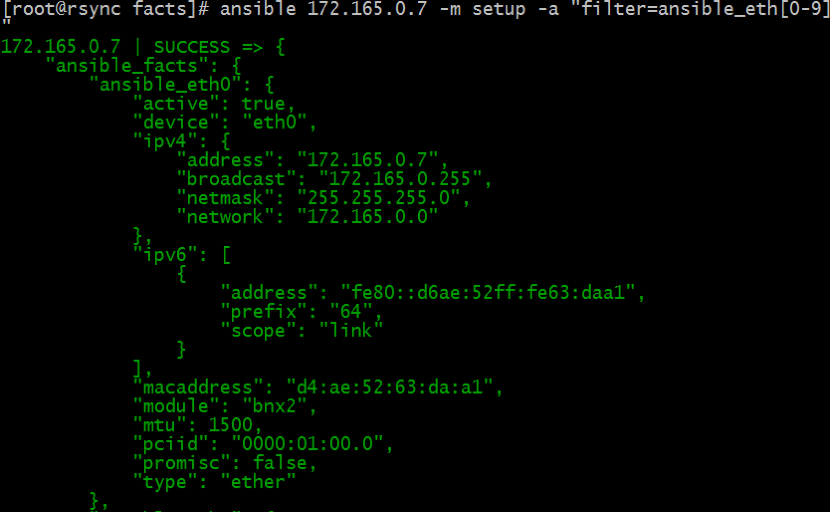
案例:收集網卡信息
[root@rsync facts]# ansible 172.165.0.7 -m setup -a "filter=ansible_eth[0-9]"![ansible常用模塊]()
8.2.12 synchronize模塊
(1)簡介:將src目錄的內容推送到遠端服務器的目錄之下
(2)案例1:將/home/zhang/目錄下的內容推送到遠端/tmp/wang/目錄下,會把源目錄的所有內容都推送到目標目錄,內容以本地爲主
[root@rsync ~]# ansible 172.165.0.6 -m synchronize -a 'src=/home/zhang/ dest=/tmp/wang/'
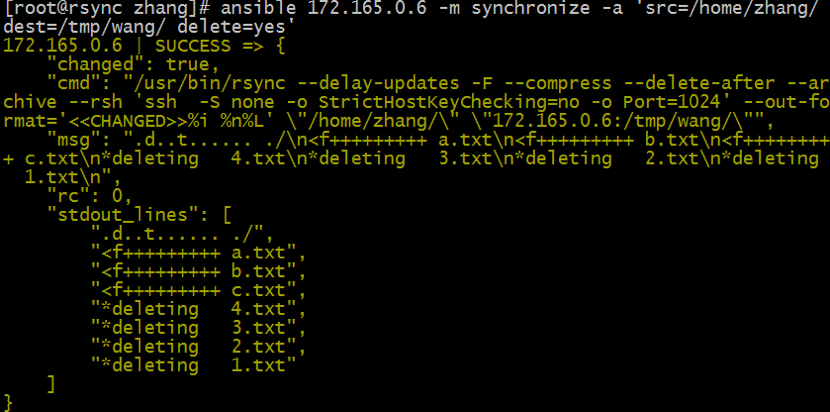
案例2:將/home/zhang/目錄下的內容推送到遠端/tmp/wang/目錄下,會把源目錄的所有內容都推送到目標目錄,內容以本地爲主,加delete=yes,會讓兩個目錄保持一致,目標目錄中原來的數據也會被刪除
[root@rsync ~]# ansible 172.165.0.6 -m synchronize -a 'src=/home/zhang/ dest=/tmp/wang/ delete=yes'![ansible常用模塊]()
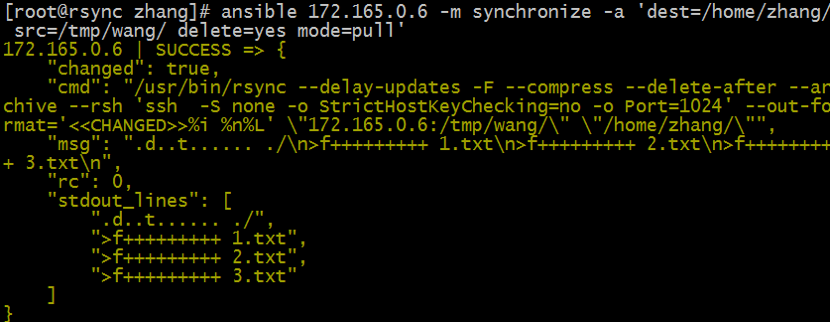
案例3:將遠方的文件同步到本地,使用mode選項,但是src就成爲了遠端服務器的目錄,正好相反
[root@rsync zhang]# ansible 172.165.0.6 -m synchronize -a 'dest=/home/zhang/ src=/tmp/wang/ delete=yes mode=pull'![ansible常用模塊]()
(3)參數:
delete=yes:使兩邊的內容一樣(以推送方爲主)
compress=yes:開啓壓縮,默認爲開啓
8.2.13 replace模塊
這個模塊可以說是相當於shell中的sed,我看了下他的光放文檔中講述的參數作用,基本和我的業務不沾邊,有一個正則,但是它使用的是Python的正則,現在還不懂,等以後把這個學會了,再彎過來學習這個模塊
8.2.14 raw模塊
可以使用管道,sed,awk之類的
ansible 192.168.70.78 -m raw -a "chdir=/data ifconfig eth0|head -1|grep Link|awk '{print \$1}'"
8.2.15unarchive模塊
copy:在解壓文件之前,是否先將文件複製到遠程主機,默認爲yes。若爲no,則要求目標主機上壓縮包必須存在。
creates:指定一個文件名,當該文件存在時,則解壓指令不執行
dest:遠程主機上的一個路徑,即文件解壓的路徑
grop:解壓後的目錄或文件的屬組
list_files:如果爲yes,則會列出壓縮包裏的文件,默認爲no,2.0版本新增的選項
mode:解決後文件的權限
src:如果copy爲yes,則需要指定壓縮文件的源路徑
owner:解壓後文件或目錄的屬主


#直接傳過去的
這個模塊可以把壓縮文件傳輸過去,並且傳輸過去之後解壓的目錄必須存在
- name: add docker tomcat
unarchive: src=/data/scripts/tms/tomcat.tar.gz dest=/data/docker119/ owner=root mode=755 exclude=Documentation
#需要下載的
- name: Unarchive a file that needs to be downloaded (added in 2.0)
unarchive:
src: https://example.com/example.zip
dest: /usr/local/bin
remote_src: yes
分爲3種,遠端目錄有的就設置copy=no,默認爲yes,然後如果要從網上下載在傳送,寫url即可
8.2.16 fetch模塊
fetch模塊可以把遠端服務器的文件拉到本地,並且生成一個以主機名命名的
[root@zabbix-server ~]# ansible test -m fetch -a "src=/etc/fstab dest=/tmp/"
8.2.17 jenkis_job模塊
- name: Test
hosts: jenkins
tasks:- name: Test jenkins_job module
jenkins_job:
name: '{{project}}' #jenkins job的名字
password: 45ec4d09e9870fd9eea4b92787bb6068 #jenkins server的認證密碼
url: http://114.55.227.11:8080 #jenkins server的訪問地址
user: jenkins #認證用戶
config: "{{ lookup('template', 'config.xml') }}"
8.2.18 supervisor模塊 - name: Start {{project}}0..3
supervisorctl: name="{{item}}" state=started
with_items:- '{{project}}:0'
- '{{project}}:1'
- '{{project}}:2'
- '{{project}}:3'
when: result | failed
ignore_errors: True
管理進程用的模塊
8.2.19 pause模塊![ansible常用模塊]()
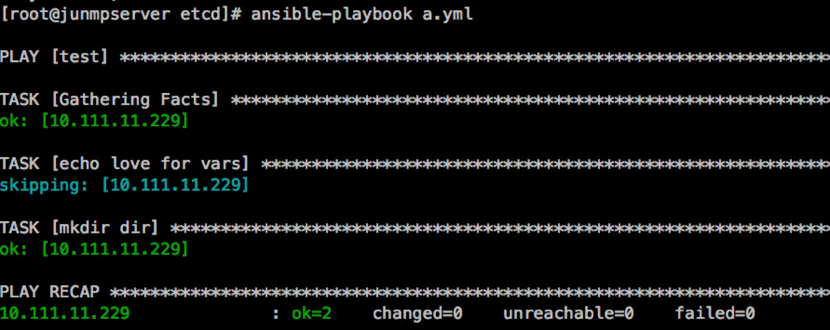
8.2.20debug
當滿足條件的時候,可以輸出指定的字符串,當不滿足條件時,則會跳過,不會輸出字符串
- name: Test jenkins_job module
-
name: test
hosts: self
vars:
bianliang: ''
tasks:-
name: echo love for vars
debug: msg='i love you'
when: ansible_os_family =="RedHatiiii" - name: mkdir dir
file: path=/root/etcd/{{ bianliang }} state=directory
-
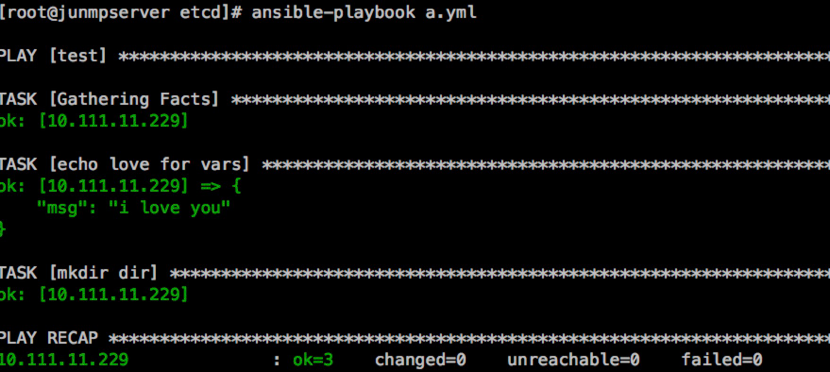
[root@junmpserver etcd]# vim a.yml
-
name: test
hosts: self
vars:
bianliang: ''
tasks:-
name: echo love for vars
debug: msg='i love you'
when: ansible_os_family =="RedHat" - name: mkdir dir
file: path=/root/etcd/{{ bianliang }} state=directory![ansible常用模塊]()
8.2.21jenkins_job模塊
-
-
name: Add jenkins job
hosts: jenkins
tasks:-
name: Add jenkins job
jenkins_job:
name: '{{project}}'
password: 45ec4d09e9870fd9eea4b92787bb6068
url: http://114.55.227.11:8080
user: jenkins
config: "{{ lookup('template', '/root/playbook/jenkins/config.xml') }}"
8.2.22 wait_for模塊
vars:
port: [] - name: port check
wait_for: port={{item}} delay=10 timeout=20
with_items:- "{{port}}"
-