前言
運維自動化在生產環境中佔據着舉足輕重的地位,尤其是面對幾百臺,幾千臺甚至幾萬臺的服務器時,僅僅是安裝操作系統,如果不通過自動化來完成,根本是不可想象的。記得前面我們探究了基於PXE實現系統全自動安裝,但PXE同時只能提供單一操作系統的批量部署,面對生產環境中不同服務器的需求,該如何實現批量部署多版本的操作系統呢?Cobbler便可以的滿足這一實際需求,本文帶來的是基於Cobbler實現多版本操作系統批量部署。
Cobbler
簡介
Cobbler是一款自動化操作系統部署的實現工具,由Python語言開發,是對PXE的二次封裝。融合多種特性,提供了CLI和Web的管理形式。同時,Cobbler也提供了API接口,方便二次開發使用。它不僅可以安裝物理機,同時也支持kvm、xen虛擬化、Guest OS的安裝。另外,它還能結合Puppet等集中化管理軟件,實現自動化管理。
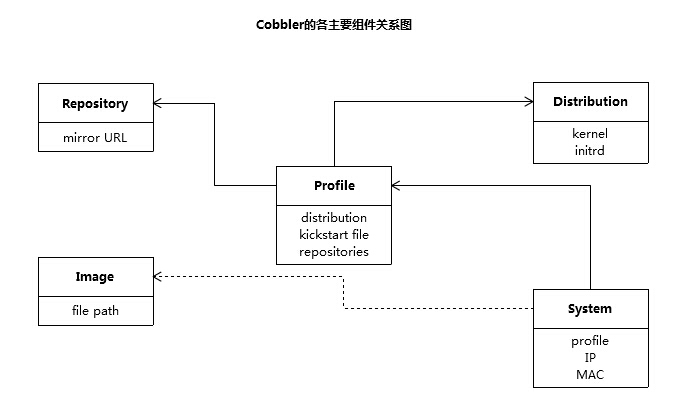
組件
Cobbler的各主要組件間關係如圖所示
實現過程
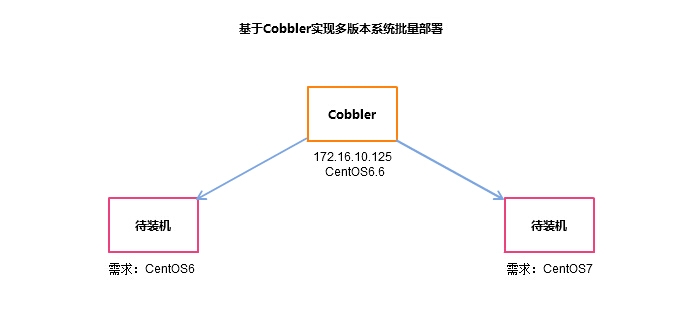
實驗拓撲
#注意事項:請確保selinux關閉,防火牆放行相關端口或關閉防火牆
安裝cobbler
[root@scholar ~]# yum install cobbler -y #需epel及updates支持
cobbler的運行依賴於dhcp、tftp、rsync及dns服務,其中dhcp可由dhcpd提供,也可由dnsmasq提供,tftp可由tftp-server程序包提供,也可由cobbler功能提供,rsync有rsync程序包提供,dns可由bind提供,也可由dnsmasq提供,此處獨立管理,即不通過cobbler來管理這些服務。
配置dhcp
#cobbler在安裝時會將依賴包tftp-server和xinetd安裝,dns服務非必需,所以還要手動安裝dhcp
[root@scholar ~]# yum install dhcp -y
[root@scholar ~]# cp /usr/share/doc/dhcp-4.1.1/dhcpd.conf.sample /etc/dhcp/dhcpd.conf
cp: overwrite `/etc/dhcp/dhcpd.conf'? y
[root@scholar ~]# vim /etc/dhcp/dhcpd.conf

option domain-name "scholar.com";
option domain-name-servers 172.16.0.1;
default-lease-time 43200;
max-lease-time 86400;
log-facility local7;
subnet 172.16.0.0 netmask 255.255.0.0 {
  range 172.16.10.60 172.16.10.70;
  option routers 172.16.0.1;
  next-server 172.16.10.125;
  filename "pxelinux.0";
}

[root@scholar ~]# service dhcpd start
配置rsync和tftp
[root@scholar ~]# chkconfig tftp on
[root@scholar ~]# chkconfig rsync on
[root@scholar ~]# service xinetd start
配置cobbler
#檢查需要修改的配置,需啓動httpd服務及cobblerd
[root@scholar ~]# service cobblerd start
[root@scholar ~]# service httpd start
[root@scholar ~]# cobbler check
The following are potential configuration items that you may want to fix:

1 : The 'server' field in /etc/cobbler/settings must be set to something other than loc
alhost, or kickstarting features will not work.  This should be a resolvable hostname o
r IP for the boot server as reachable by all machines that will use it.
2 : For PXE to be functional, the 'next_server' field in /etc/cobbler/settings must be
set to something other than 127.0.0.1, and should match the IP of the boot server on th
e PXE network.
3 : some network boot-loaders are missing from /var/lib/cobbler/loaders, you may run 'c
obbler get-loaders' to download them, or, if you only want to handle x86/x86_64 netboot
ing, you may ensure that you have installed a *recent* version of the syslinux package
installed and can ignore this message entirely.  Files in this directory, should you wa
nt to support all architectures, should include pxelinux.0, menu.c32, elilo.efi, and ya
boot. The 'cobbler get-loaders' command is the easiest way to resolve these requirements.
4 : debmirror package is not installed, it will be required to manage debian deployment
s and repositories
5 : ksvalidator was not found, install pykickstart
6 : The default password used by the sample templates for newly installed machines (def
ault_password_crypted in /etc/cobbler/settings) is still set to 'cobbler' and should be
 changed, try: "openssl passwd -1 -salt 'random-phrase-here' 'your-password-here'" to g
enerate new one
7 : fencing tools were not found, and are required to use the (optional) power manageme
nt features. install cman or fence-agents to use them

Restart cobblerd and then run 'cobbler sync' to apply changes.

#解決方法
1:# vim /etc/cobbler/settings
server: 172.16.10.125
2:# vim /etc/cobbler/settings
next_server: 172.16.10.125
3:# cobbler get-loaders  #需要可訪問互聯網,嘗試此法返回404錯誤,只好手動複製文件
# yum install syslinux -y
# cp -r /usr/share/syslinux/* /var/lib/cobbler/loaders/
4:忽略即可
5:# yum install pykickstart -y
6:]# openssl passwd -1 -salt `openssl rand -hex 4`
Password:
$1$ebcbf370$s8C9mNday5b.lE5nh4.7N1
  # vim /etc/cobbler/settings
default_password_crypted: "$1$ebcbf370$s8C9mNday5b.lE5nh4.7N1"
7:安裝cman或fence-agents   #可忽略

[root@scholar ~]# service cobblerd restart
添加distro(distribution)
#掛載光盤鏡像,每換一個系統鏡像都需重新掛載
[root@scholar ~]# mount /dev/cdrom /mnt
mount: block device /dev/sr0 is write-protected, mounting read-only
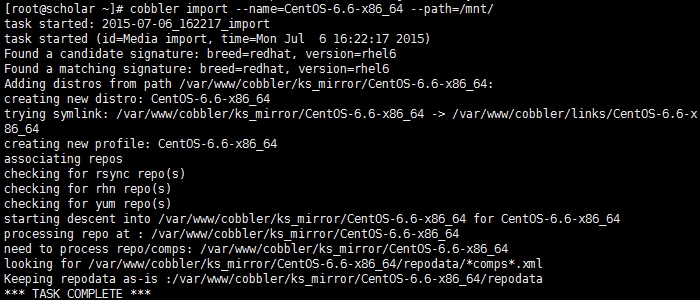
#導入CentOS6鏡像文件
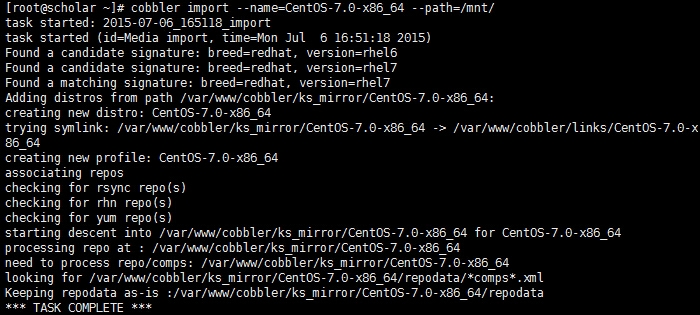
#導入CentOS7鏡像文件,請確保已重新掛載鏡像
驗證是否導入成功
添加profile
#kickstart文件可按實際需要製作,這裏直接修改/root/anaconda-ks.cfg,添加關鍵配置項如下:
url --url=http://172.16.10.125/cobbler/ks_mirror/CentOS-7.0-x86_64  #指定repo位置
#注:CentOS6與CentOS7文件系統不同,千萬不能用相同kickstart文件
同步數據
[root@scholar ~]# cobbler sync

#CentOS7與CentOS6安裝過程略有區別,CentOS7在數據同步完成後需要再次指定安裝源
[root@scholar ~]# vim /var/lib/tftpboot/pxelinux.cfg/default
#將此項加入CentOS7的append行內
inst.repo=http://172.16.10.125/cobbler/ks_mirror/CentOS-7.0-x86_64
部署測試
設置爲網卡啓動
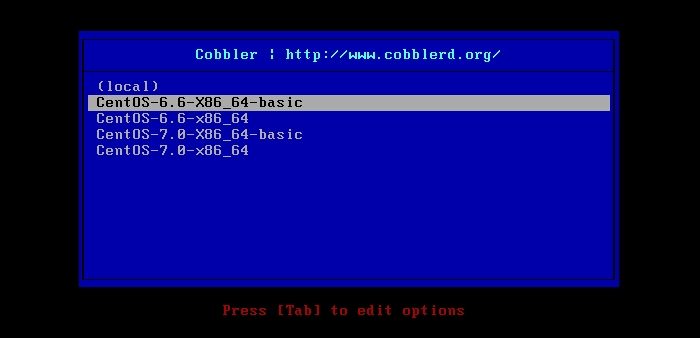
保存重啓後進入引導界面,我們先安裝CentOS6
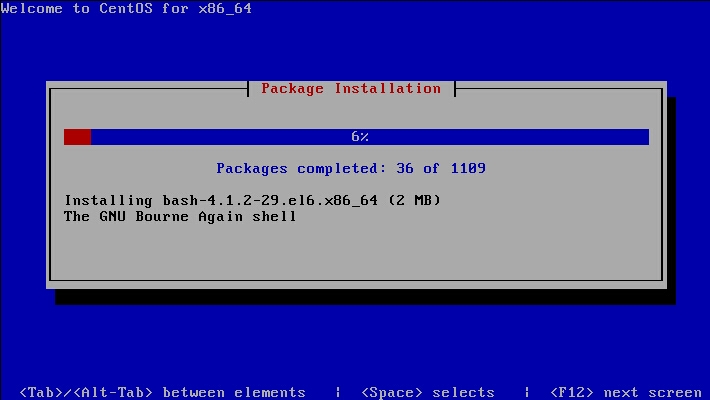
引導成功,開始安裝
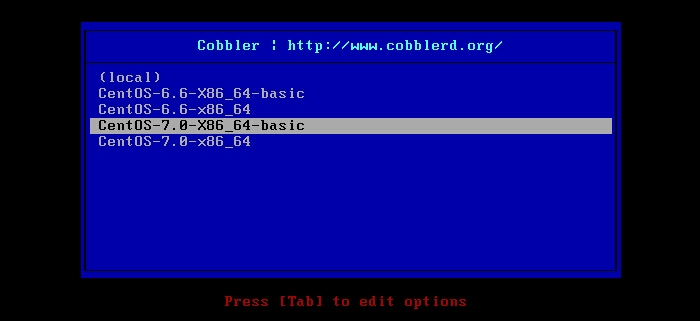
安裝CentOS7
引導成功,開始安裝
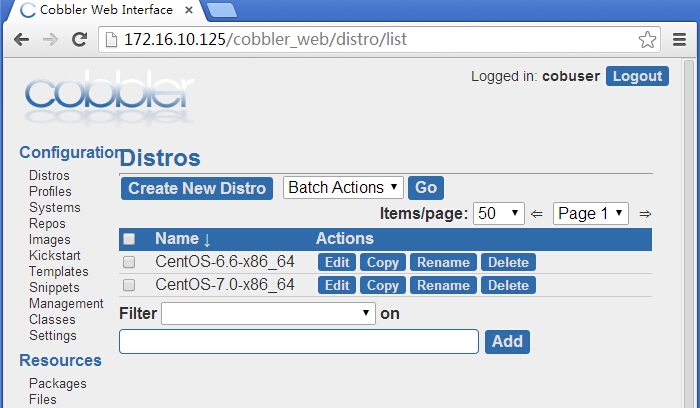
至此,基於Cobbler實現多版本系統批量部署已成功實現,其實以上配置過程可以使用web界面配置,這樣就可以不再刻意的去記繁瑣的命令,下面我們就來簡單看一下
CobblerWeb界面
安裝cobbler-web
[root@scholar ~]# yum install cobbler-web -y
cobbler-web支持多種認證方式,如authn_configfil、authn_ldap或authn_pam等,下面我們基於authn_pam做認證
#修改認證方式
[root@scholar ~]# vim /etc/cobbler/modules.conf

[authentication]
module = authn_pam

#添加系統用戶
[root@scholar ~]# useradd cobuser
[root@scholar ~]# echo 'cobpass' | passwd --stdin cobuser
#添加用戶至管理組
[root@scholar ~]# vim /etc/cobbler/users.conf
[admins]
admin = "cobuser"

[root@scholar ~]# service cobblerd restart
Stopping cobbler daemon:                                   [  OK  ]
Starting cobbler daemon:                                   [  OK  ]
[root@scholar ~]# service httpd restart
Stopping httpd:                                            [  OK  ]
Starting httpd:                                            [  OK  ]
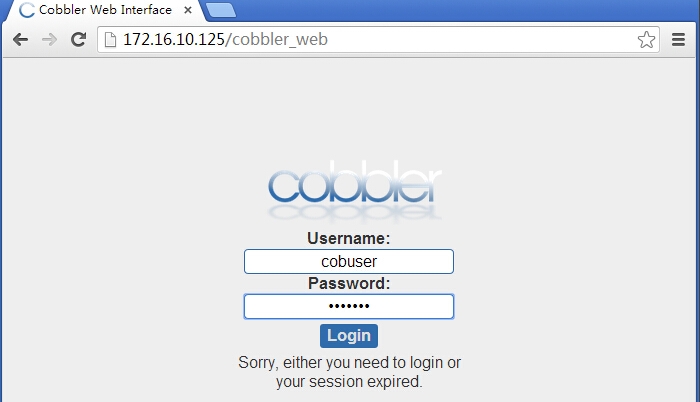
訪問測試
登陸成功便可配置根據選項來配置了
簡單介紹一下,就不做深入演示了,有興趣的朋友可以完整的通過web界面配置一下試試
The end
好了,以上便是基於Cobbler實現多版本系統批量部署的整個過程,部署過程中遇到問題可留言交流。以上僅爲個人學習整理,如有錯漏,大神勿噴~~

