飛書提供了豐富的api來實現消息的通知,包括文本消息、圖片消息、富文本消息,本次介紹使用飛書api發送文本消息,以下是實現思路
飛書API地址:https://open.feishu.cn/document/ukTMukTMukTM/uITNz4iM1MjLyUzM
實現思路

1.需要獲取三個授權憑證
- app_access_token :訪問App資源相關接口。
- tenant_access_token :訪問企業資源相關接口。
- user_access_token :訪問用戶資源相關接口。
2.根據zabbix報警的收信人手機號獲取user_id,用於後面在羣裏@相關負責人,或者直接發給某個責任人
3.chat_id用於發送給指定的羣,這裏我提供兩種方法獲取chat_id,後面會介紹
4.傳入zabbix報警消息,並艾特相關負責人發送到飛書羣裏或者個人
獲取授權憑證
1.獲取 App ID 和 App Secret
登錄開發者後臺,在“我的應用”頁面創建企業自建應用。進入企業自建應用詳情頁,獲取App ID和App Secret。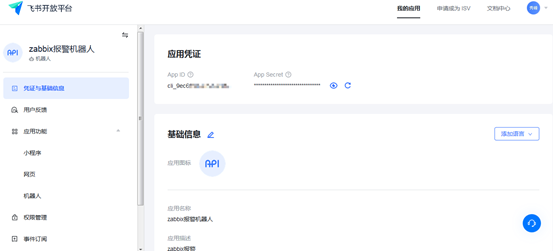
2.獲取 tenant_access_token
一種方法是通過企業自建應用方式獲取,另一種是通過應用商店應用獲取,這裏我使用第一種方法,直接創建應用即可 
3.創建完應用後可根據APP ID和 App Secret構造請求獲取
def gettenant_access_token():
    tokenurl="https://open.feishu.cn/open-apis/auth/v3/tenant_access_token/internal/"
    headers={"Content-Type":"application/json"}
    data={
        "app_id":"cli_9ec625abcdefg",
        "app_secret":"f716Gi27Yi25n5K0Wbafgwghhstv"

    }
    request=requests.post(url=tokenurl,headers=headers,json=data)
    response=json.loads(request.content)['tenant_access_token']
    return response
獲取user_id
user_id可以根據註冊的手機號或郵箱獲取,可以在zabbix中定義用戶的手機號,然後傳入參數獲取user_id
def getuserid(tenant_access_token):
    #mobiles="15101234584"
    userurl="https://open.feishu.cn/open-apis/user/v1/batch_get_id?mobiles=%s"%mobiles
    headers={"Authorization":"Bearer %s"%tenant_access_token}
    request=requests.get(url=userurl,headers=headers)
    response=json.loads(request.content)['data']['mobile_users'][mobiles][0]['user_id']
    return response
獲取chat_id
這裏我提供兩種方法獲取chat_id,一種是將機器人加入到羣裏,獲取羣信息中的chat_id;另一種是通過機器人創建羣聊獲取羣信息,當然還有其他的方法,這裏我就不過多介紹了,我將使用第一種方法來獲取chat_id
首先將機器人加入到羣聊
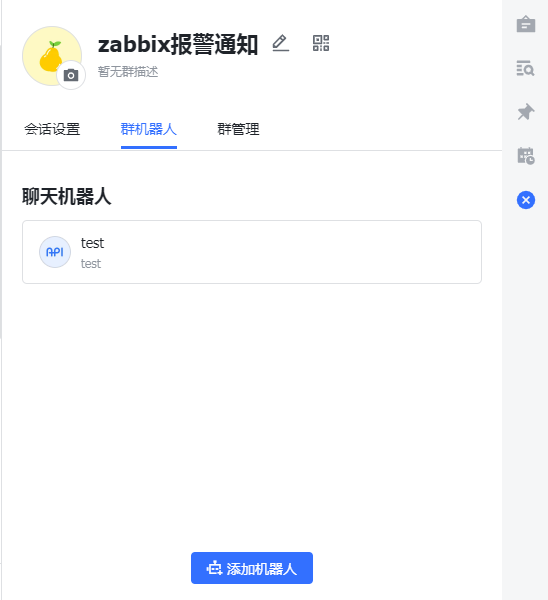
構造請求獲取chat_id
def getchatid(tenant_access_token):
    #獲取chatid
    chaturl="https://open.feishu.cn/open-apis/chat/v4/list?page_size=20"
    headers={"Authorization":"Bearer %s"%tenant_access_token,"Content-Type":"application/json"}
    request=requests.get(url=chaturl,headers=headers)
    response=json.loads(request.content)['data']['groups'][0]['chat_id']
    return response
向飛書羣裏或者飛書用戶發送消息
這裏需要三個參數,一個是user_id,一個是chat_id,另一個是tenant_access_token,並傳入報警信息即可發送
def sendmes(user_id,chat_id,tenant_access_token):
    #向羣裏發送消息
    sendurl="https://open.feishu.cn/open-apis/message/v4/send/"
    headers={"Authorization":"Bearer %s"%tenant_access_token,"Content-Type":"application/json"}
    data={"chat_id":chat_id,
        "msg_type":"text",
        "content":{
            "text":"%s<at user_id=\"%s\">test</at>"%(messages,user_id)
        }
    }
    #給個人發送消息
    # data={"user_id":user_id,
    #     "msg_type":"text",
    #     "content":{
    #         "text":"%s<at user_id=\"%s\">test</at>"%(messages,user_id)
    #     }
    # }
    request=requests.post(url=sendurl,headers=headers,json=data)
    print(request.content)
在ZABBIX上配置報警動作及接收人
配置報警媒介類型
注意參數順序不能亂 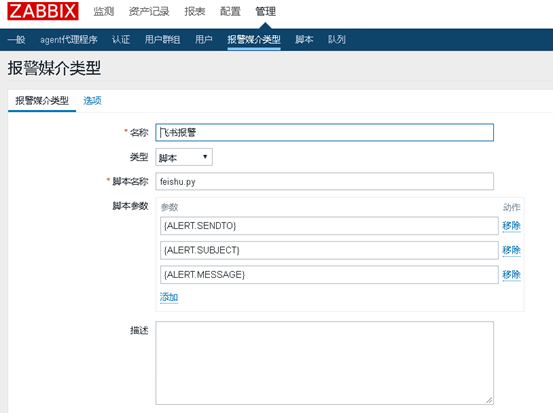
配置用戶的接收信息
也就是用戶註冊飛書的手機號 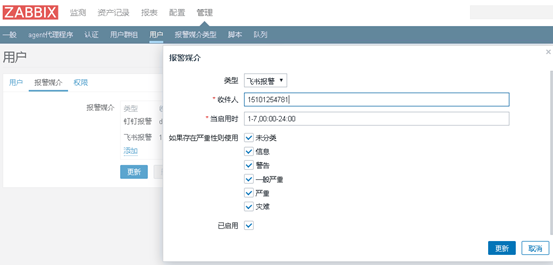
配置動作

報警測試
這裏我禁掉了其中一臺windows的agent進行測試
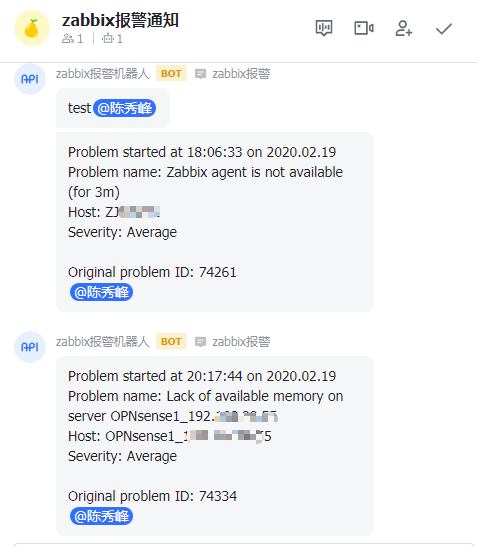
後續會添加帶有圖片信息的報警,完整代碼請訪問github組織遮陽筆記
https://github.com/sunsharing-note/zabbix/blob/master/feishu.py
歡迎關注個人公號“沒有故事的陳師傅”