


簡介
Gerrit 是一個基於 Web 的代碼評審和項目管理的工具,面向基於 Git 版本控制系統的項目.
下文以gerrit-2.1.7-rc1在Ubuntu10.04上的安裝爲例:
創建Gerrit用戶(可選)
$ sudo adduser gerrit2
$ sudo su gerrit2
$ cd ~gerrit2
安裝Gerrit
執行:
$ java -jar gerrit-$version-rc1.war init -d review_site
命令行交互的安裝過程如下:
Create '/home/gerrit2/review-site' [Y/n]?

*** Git Repositories
***

Location of Git repositories [git]:

*** SQL Database
***

Database server type [H2/?]:

*** User Authentication
***

Authentication method [OPENID/?]: http
Get username from custom HTTP header [y/N]? :
SSO logout URL :

*** Email Delivery
***

SMTP server hostname [localhost]:
SMTP server port [(default)]:
SMTP encryption [NONE/?]:
SMTP username [gerrit2]:
[email protected]'s password :
confirm password :

*** Container Process
***

Run as [gerrit2]:
Java runtime [/usr/lib/jvm/java-6-sun-1.6.0.24/jre]:
Copy gerrit.war to /home/gerrit2/review-site/bin/gerrit.war [Y/n]?
Copying gerrit.war to /home/gerrit2/review-site/bin/gerrit.war

*** SSH Daemon
***

Listen on address [*]:
Listen on port [29418]:


Gerrit Code Review is not shipped with Bouncy Castle Crypto v144
  If available, Gerrit can take advantage of features
  in the library, but will also function without it.
Download and install it now [Y/n]?
Downloading http://www.bouncycastle.org/download/bcprov-jdk16-144.jar ... OK
Checksum bcprov-jdk16-144.jar OK
Generating SSH host key ... rsa... dsa... done
*** HTTP Daemon
***

Behind reverse proxy           [y/N]? y
Proxy uses SSL (https://)      [y/N]?
Subdirectory on proxy server   [/]:
Listen on address              [*]:
Listen on port                 [8081]:

Initialized /home/gerrit2/review-site
Executing /home/gerrit2/review-site/bin/gerrit.sh start
Starting Gerrit Code Review: OK
上面大部分的回答是用回車默認的, 值得注意的地方有:
- 認證方式沒有選擇OpenId, 而是http, 因爲這樣會使得gerrit對外部系統有依賴, 目前gerrit支持google和yahoo提供的openid, 進試用均不穩定(也許是託GFW福);
- SMTP配置中,請選擇合適的服務地址和帳號;
- 選擇需要反向代理支持, 這和http認證有關;
- 配置完後, 安裝腳本會自動啓動gerrit.
配置Apache2反向代理
$ sudo apt-get install apache2
在/etc/apache2/httpd.conf中加入一下內容
<VirtualHost *>
  ServerName gerrit2.example.com
  ProxyRequests Off
  ProxyVia Off
  ProxyPreserveHost On

  <Proxy *>
        Order deny,allow
        Allow from all
  </Proxy>

  <Location /login/>
     AuthType Basic
     AuthName "Gerrit Code Review"
     AuthBasicProvider file
     AuthUserFile $gerrit.home/etc/passwords
     Require valid-user
  </Location>

  ProxyPass / http://$gerrit.host:8081/
</VirtualHost>
注意, ProxyPass中$gerrit.host最好用服務器對外的ip地址代替.
創建訪問Gerrit的用戶
由於是通過apache進行http basic認證, 故賬戶創建使用類似下面的命令即可:
$ htpassword $gerrit.home/etc/passwords $username
註冊訪問Gerrit的用戶
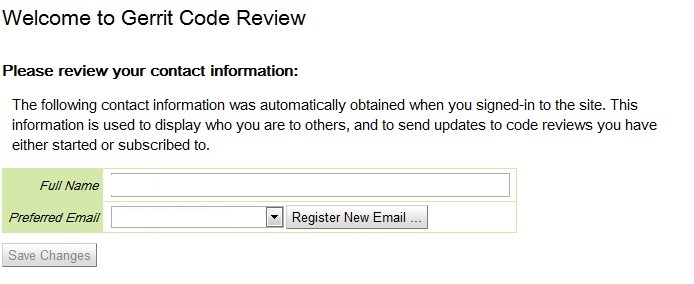
使用上面創建的帳號, 登錄http://$gerrit.host,瀏覽器會自動跳轉至註冊頁面, 輸入Full Name, 保存;
這裏順便可完成公鑰的上傳

點擊Continue, 完成註冊.
創建項目
添加公鑰後, 最好在$User.Home/.ssh中創建文件config, 裏面輸入以下內容:
Host $shortname
User $username
Port 29418
Hostname $gerrit.host
IdentityFile $path/to/private/key$
這個文件是可選的, 只是爲了方便執行ssh命令.
創建項目就通過下面的命令完成:
$ ssh $gerrit.host gerrit create-project -n $project.name
這個命令會在$gerrrit.home/git下初始一個bare庫, 相應的在webUI中也可看到新建的項目了.
更多命令行, 請見這裏.
其他
上述大部分內容參考了這篇blog,你也可以看看. 剩下的就靠官方文檔和Google了, Good luck!
http://my.oschina.net/zhongl/blog/33017