1安裝mariadb數據庫
1. 配置阿里雲源
參考鏈接: https://developer.aliyun.com/mirror
2. 使用阿里雲源安裝mariadb
dbf -y install mariadb-server mariadb-client
1.1 .1 使用systemctl進行mariadb服務管理
systemctl start mariadb  #啓動MariaDB
systemctl stop mariadb  #停止MariaDB
systemctl restart mariadb  #重啓MariaDB
systemctl enable mariadb  #設置開機啓動
1.1.2 初始化mariadb
mysql_secure_installation1.2 配置zabbix倉庫
[root@m01 ~]# rpm -Uvh https://repo.zabbix.com/zabbix/4.5/rhel/8/x86_64/zabbix-release-4.5-2.el8.noarch.rpm
或
[root@m01 ~]# rpm -Uvh https://mirrors.tuna.tsinghua.edu.cn/zabbix/zabbix/4.5/rhel/8/x86_64/zabbix-release-4.5-2.el8.noarch.rpm

[root@m01 ~]# dnf clean all
1.3 安裝Zabbix程序包, 以及Mysql, 前端,代理
dnf -y install zabbix-server-mysql zabbix-web-mysql zabbix-nginx-conf zabbix-agent如果出現以下報錯;
dnf -y install zabbix-server-mysql zabbix-web-mysql zabbix-nginx-conf zabbix-agent
Last metadata expiration check: 0:00:45 ago on Fri 13 Mar 2020 04:29:48 PM CST.
Error:
Problem: cannot install the best candidate for the job
- nothing provides libssh2.so.1()(64bit) needed by zabbix-server-mysql-5.0.0-0.2alpha2.el8.x86_64
(try to add '--skip-broken' to skip uninstallable packages or '--nobest' to use not only best candidate packages)
解決方法:
手動安裝libssh2
dnf -y install http://mirror.centos.org/centos/8.0.1905/AppStream/x86_64/os/Packages/libssh2-1.8.0-8.module_el8.0.0+189+f9babebb.1.x86_64.rp
注意:nginx軟件包在官方存儲庫中不可用。可以在epel資料庫中找到。
dnf -y install epel-release1.4 創建Zabbix數據庫及用戶
[root@centos8 ~]# mysql -u root -p
Enter password:
MariaDB [(none)]> create database zabbix character set utf8 collate utf8_bin;
Query OK, 1 row affected (0.000 sec)
MariaDB [(none)]> grant all privileges on zabbix.* to zabbix@'%' identified by 'zabbix';
Query OK, 0 rows affected (0.008 sec)
MariaDB [(none)]> flush privileges;
Query OK, 0 rows affected (0.008 sec)
1.5 導入 Zabbix數據至數據庫中
[root@centos8 ~]# zcat /usr/share/doc/zabbix-server-mysql/create.sql.gz | mysql -u zabbix -p zabbix
Enter password:
1.6 配置Zabbix服務器數據庫
編輯/etc/zabbix/zabbix_server.conf 文件, 修改數據庫配置
[root@centos8 ~]# cat /etc/zabbix/zabbix_server.conf
DBHost=localhost
DBName=zabbix
DBUser=zabbix
DBPassword=zabbix
1.7 爲zabbix前端配置php
編輯/etc/nginx/conf.d/zabbix.conf,取消註釋並設置'listen'和'server_name'指令
listen 80;
server_name 192.168.0.111;
進入配置文件/etc/nginx/nginx.conf裏面, 註釋掉server所有代碼塊
編輯文件/etc/php-fpm.d/zabbix.conf,取消註釋並設置正確的時區
php_value[date.timezone] = Asia/Shanghai注意: 必須關閉防火牆firewalld和selinux**(非常重要)**
1.8 啓動Zabbix 服務進程,並加入開機自啓動
[root@centos8 ~]# systemctl restart zabbix-server zabbix-agent nginx php-fpm
[root@centos8 ~]# systemctl enable zabbix-server zabbix-agent nginx php-fpm
2 WEB安裝步驟
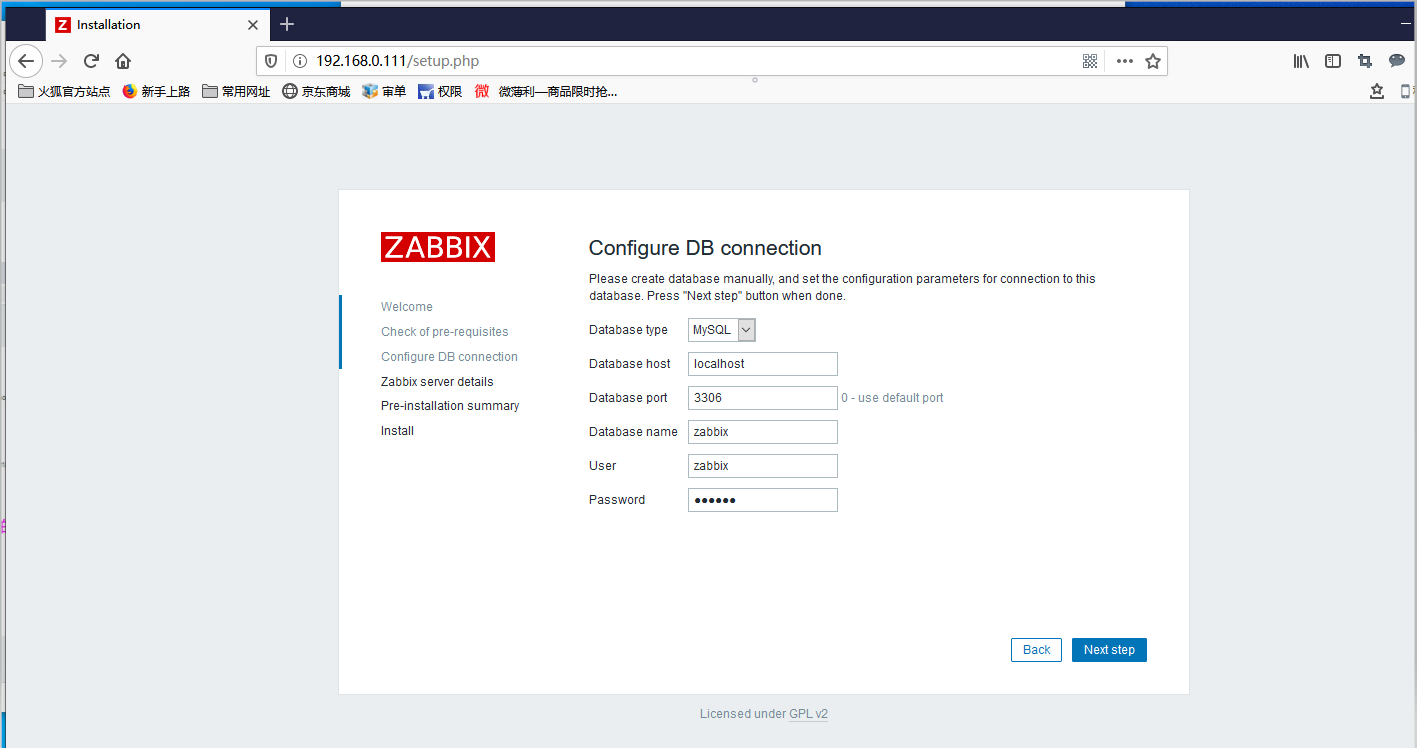
2.1 瀏覽器打開地址:http://192.168.0.111/setup.php
2.2 配置zabbix連接數據庫
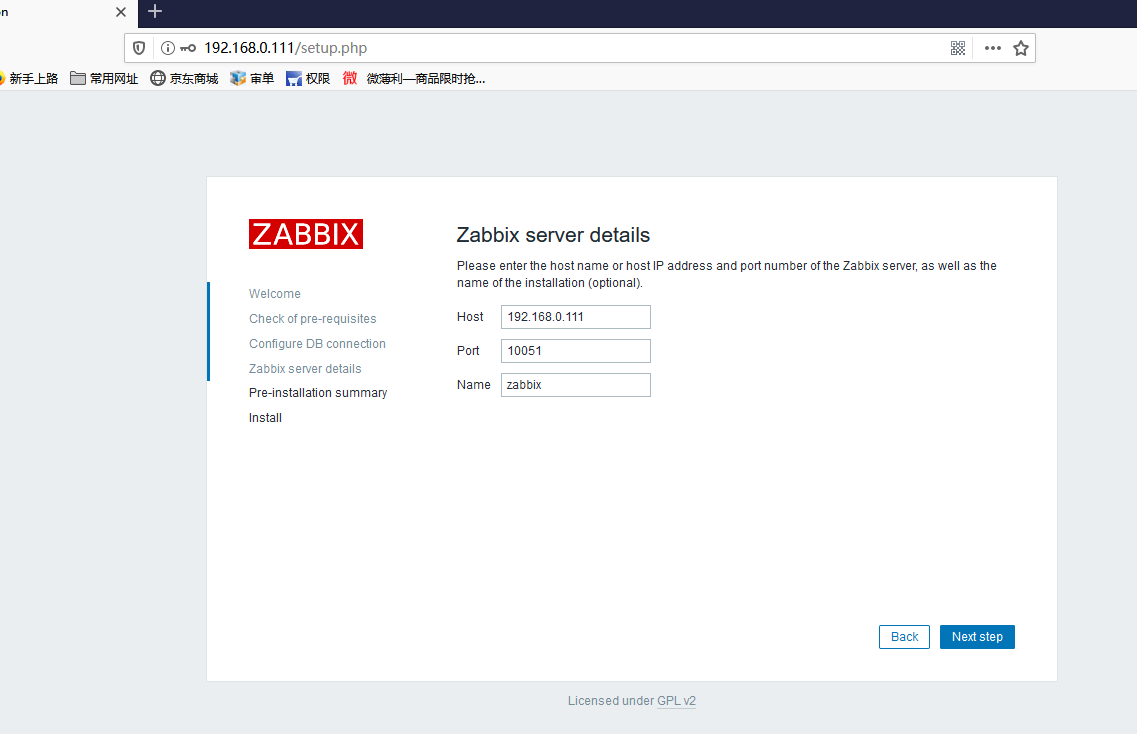
2.3 配置 ZabbixServer 服務器的信息
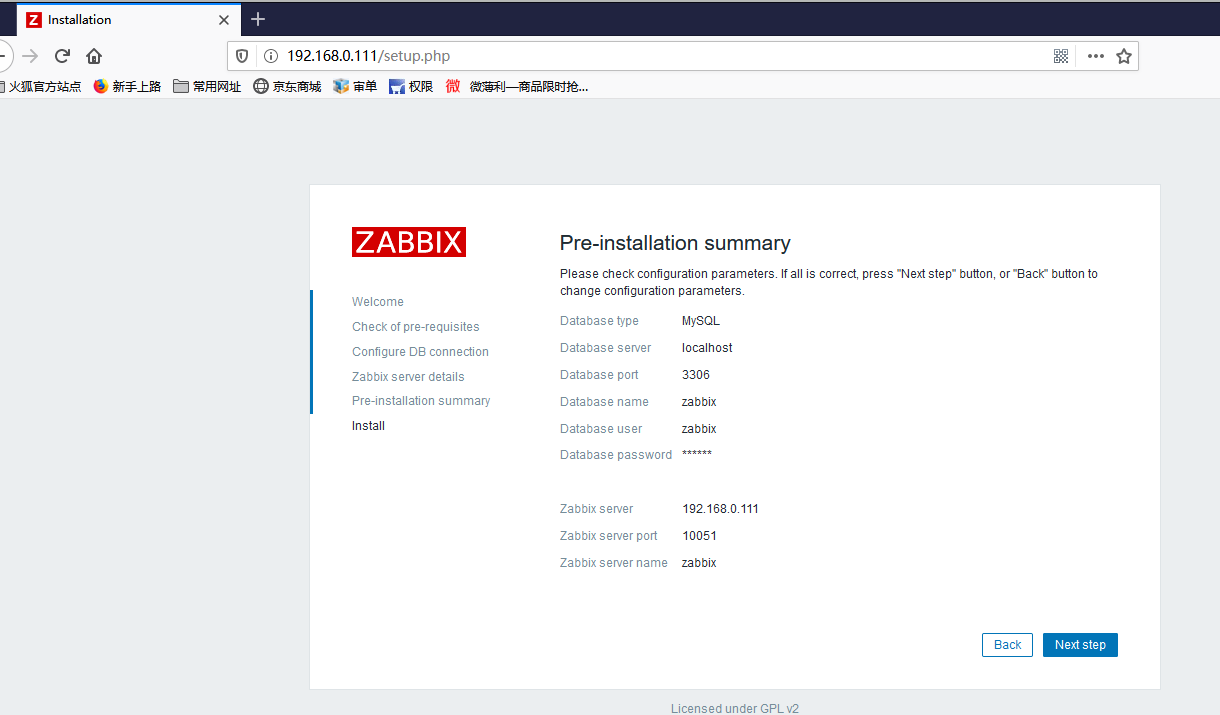
2.4 確認檢查
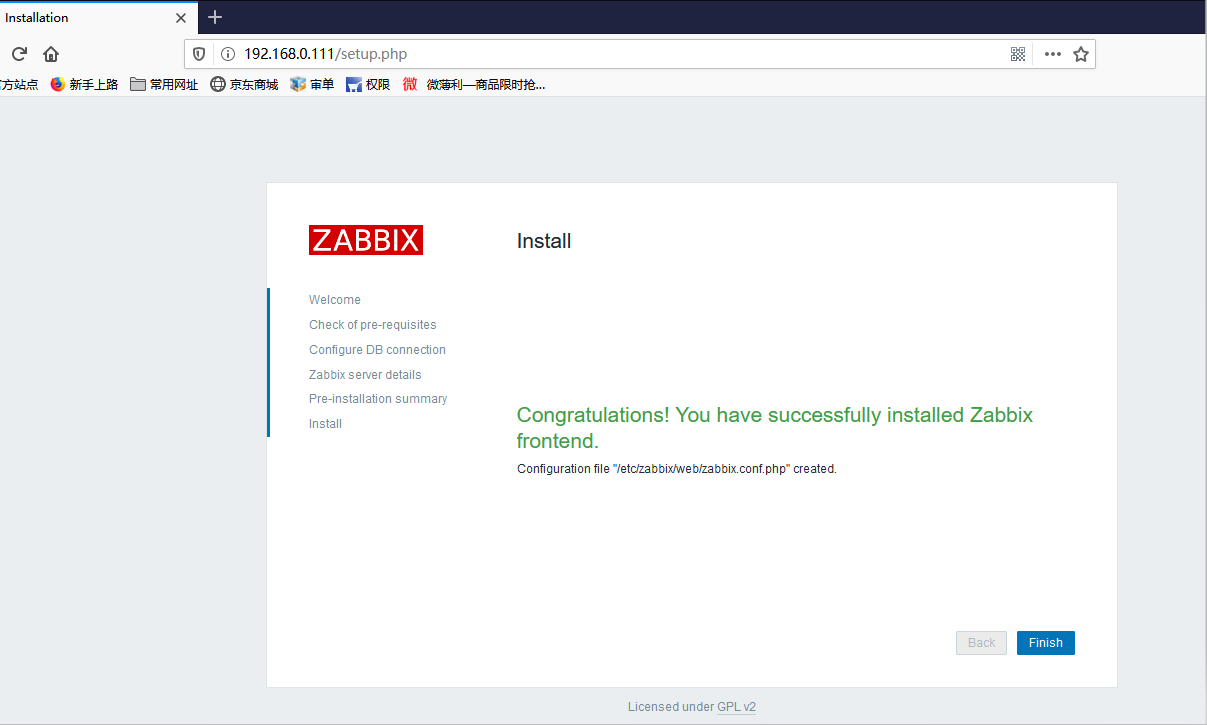
2.5 安裝成功
提示已成功地安裝了 Zabbix 前端。配置文件/etc/zabbix/web/zabbix.conf.php 被創建。
2.6 登錄zabbix
默認登錄zabbixweb的用戶名:Admin, 密碼:zabbix
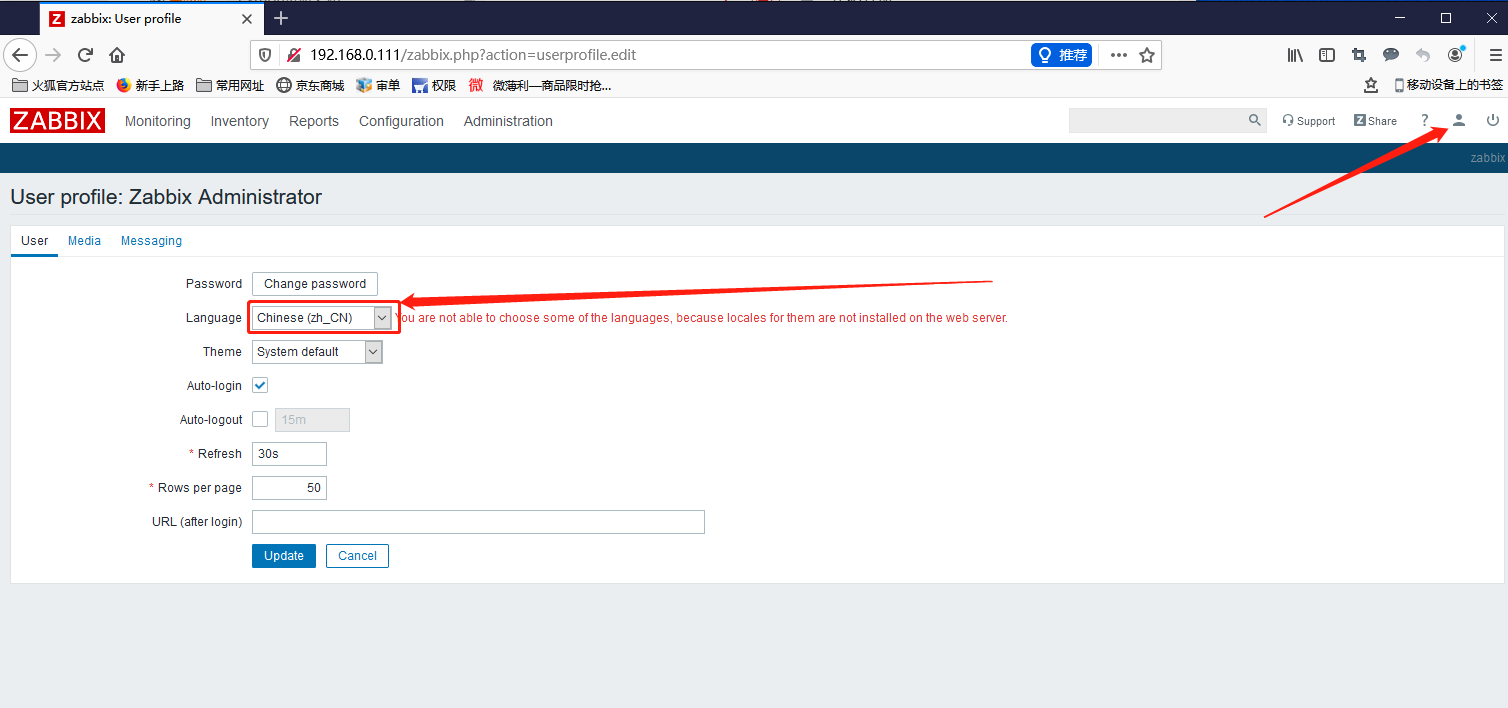
2.7 調整字符集爲中文並修復中文亂碼
如果沒有安裝中文字體包,使用dnf安裝"langpacks-zh_CN.noarch"
修復中文亂碼的解決方法:
安裝字體並替換現有字體
[root@centos8 ~]# dnf -y install wqy-microhei-fonts
[root@centos8 ~]# cp /usr/share/fonts/wqy-microhei/wqy-microhei.ttc /usr/share/zabbix/assets/fonts/graphfont.ttf
3. 安裝zabbix監控主機
3.1 安裝zabbix-agent
我這裏使用的監控主機是ubuntu18.04
root@ubuntu:~# apt-get install zabbix-agent3.2 配置zabbix-agent
root@ubuntu:~# vim /etc/zabbix/zabbix_agentd.conf
PidFile=/var/run/zabbix/zabbix_agentd.pid
LogFile=/var/log/zabbix/zabbix_agentd.log
LogFileSize=0
Server=192.168.0.111
ServerActive=192.168.0.111
Hostname=Zabbix server
Include=/etc/zabbix/zabbix_agentd.d/*.conf
3.3 啓動zabbix-agent並檢查
root@ubuntu:~# systemctl start zabbix-agent.service
root@ubuntu:~# systemctl enable zabbix-agent.service
root@ubuntu:~# netstat -ntlp |grep 10050
tcp        0      0 0.0.0.0:10050           0.0.0.0:*               LISTEN      5662/zabbix_agentd
tcp6       0      0 :::10050                :::*                    LISTEN      5662/zabbix_agentd
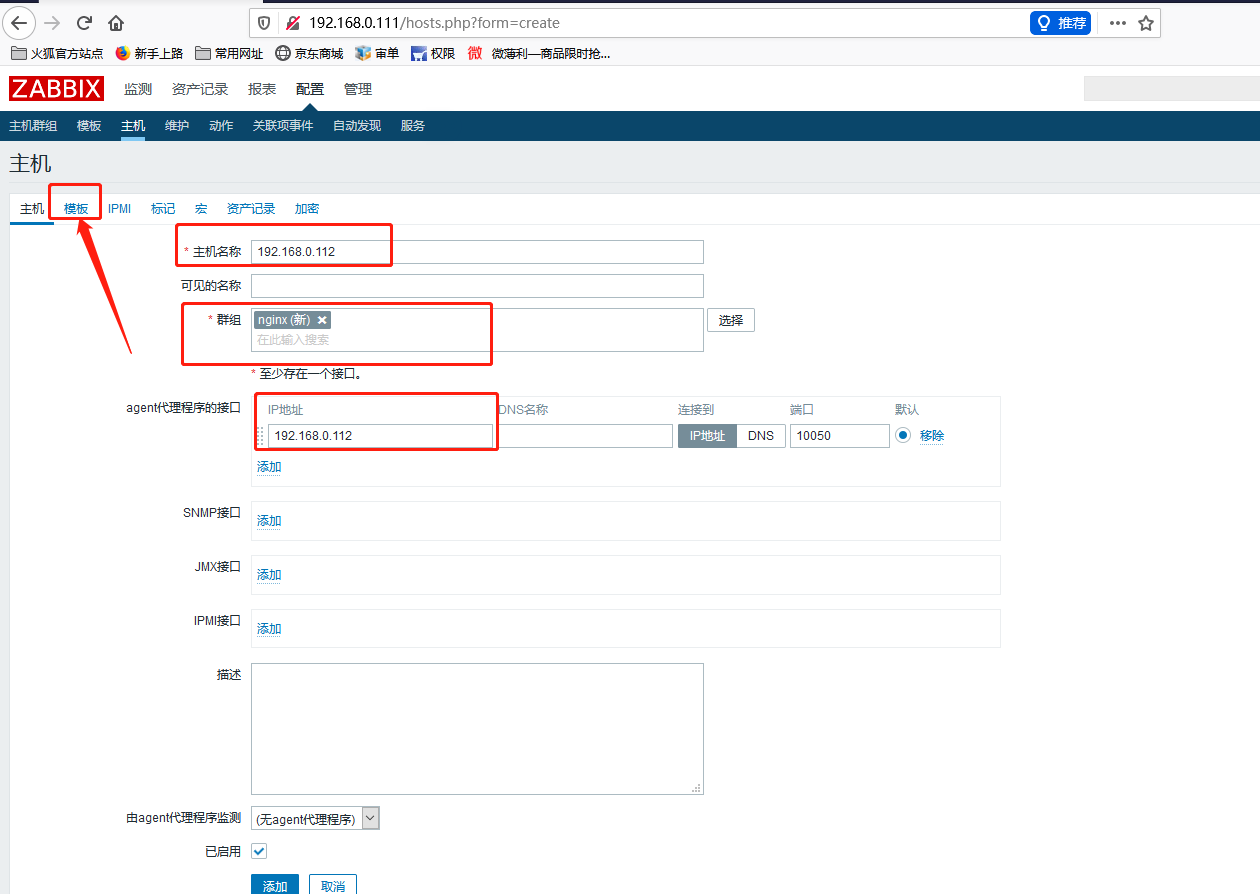
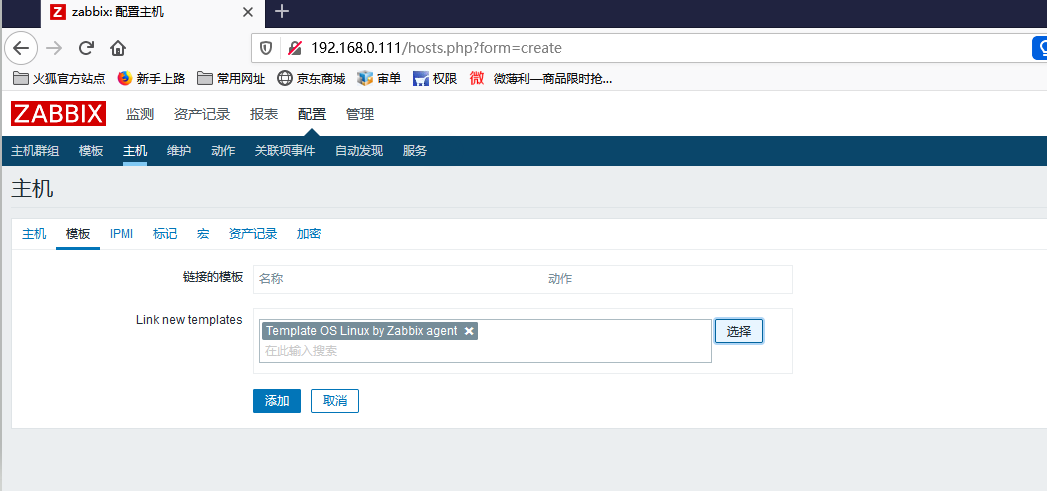
3.4 zabbix-web界面,添加主機