


lnmt架構
環境佈置:
配置安裝163的源
[root@localhost ~]# cd /etc/yum.repos.d/
//創建備份目錄
[root@localhost yum.repos.d]# mkdir /etc/repo-bf
//將原yum倉庫的文件備份到repo-bf
[root@localhost yum.repos.d]# mv * /etc/repo-bf
//下載163的源到yum倉庫
[root@localhost yum.repos.d]# curl -o 163.repo http://mirrors.163.com/.help/CentOS7-Base-163.repo
//將改爲版本的7
[root@localhost yum.repos.d]# sed -i 's/\$releasever/7/g' /etc/yum.repos.d/163.repo
[root@localhost yum.repos.d]# sed -i 's/enabled=0/enabled=1/g' /etc/yum.repos.d/163.repo
//自動配置yum的軟件倉庫,也可以自己配置
[root@localhost yum.repos.d]# yum -y install epel-release
[root@localhost yum.repos.d]# yum clean all
//安裝編譯環境
[root@localhost yum.repos.d]# yum -y install gcc gcc-c++
[root@localhost yum.repos.d]# yum -y install wget
tomcat項目部署
java環境安裝
[root@localhost yum.repos.d]# yum -y install java-1.8.0-openjdk java-1.8.0-openjdk-devel//查看安裝的版本
[root@localhost yum.repos.d]# java -version
openjdk version "1.8.0_181"
OpenJDK Runtime Environment (build 1.8.0_181-b13)
OpenJDK 64-Bit Server VM (build 25.181-b13, mixed mode)
tomcat部署
下載tomcat,在官網下載
這裏是下載核心的
[root@localhost yum.repos.d]# cd /usr/src/
[root@localhost src]# wget http://mirrors.hust.edu.cn/apache/tomcat/tomcat-9/v9.0.11/bin/apach
mcat-9.0.11.tar.gz
//解壓部署,只需要解壓無需安裝
//解壓部署,只需要解壓無需安裝

[root@localhost src]# ls
apache-tomcat-9.0.11.tar.gz debug  kernels
解壓到/usr/local/
[root@localhost src]# tar xf apache-tomcat-9.0.11.tar.gz -C /usr/local/

將解壓後的tomcat包的軟件接,命名tomcat
[root@localhost src]# cd /usr/local
[root@localhost local]# ln -s apache-tomcat-9.0.11/ tomcat
[root@localhost local]# ls
apache-tomcat-9.0.11  bin  etc  games  include  lib  lib64  libexec  sbin  share  src  tomcat
[root@localhost local]# ll           //軟連接
lrwxrwxrwx. 1 root root  20 9月   5 12:03 tomcat -> apache-tomcat-9.0.8/
因爲是java程序,一般服務器內存至少8-16g ,並且tomcat在一臺服務器上不可能只跑一個
進入tomcat包配置,以及介紹

[root@localhost local]# cd tomcat/
[root@localhost tomcat]# ls
bin     //二進制程序位置
startup.sh-啓動的腳本
startdown.sh-停止的腳本
catalina.sh -控制啓動和停止
configtest.sh -檢查配置文件有無錯誤
----
conf       //配置文件
server.xml  //運行了兩個則需要修改端口號
-----
lib
-----
logs    //日誌目錄

README.md

RUNNING.txt
-----
webapps    //程序與網頁都放這java的,在發版時,就是把開發的包放在這裏,解壓出來
開發寫的war包裏哪裏需要配置需要問開發,例:classes/config.properties配置程序參數
BUILDING.txt
CONTRIBUTING.md
LICENSE
NOTICE
RELEASE-NOTES
temp
work
//在webapps裏創建一個目錄並且在目錄裏編輯網頁,寫一個 hello worid 的java界面
[root@localhost local]# cd webapps/
[root@localhost webapps]# mkdir test
[root@localhost webapps]# cd test
[root@localhost test]# vim index.jsp
[root@localhost test]# cat index.jsp
<html>
<head>
<title>test page</title>
</head>
<body>
<%
out.println("Hellow World");
%>
</body>
</html>
啓動
//檢查
[root@localhost webapps]# /usr/local/tomcat/bin/configtest.sh
//啓動
[root@localhost webapps]# /usr/local/tomcat/bin/catalina.sh start
Using CATALINA_BASE:   /usr/local/tomcat
Using CATALINA_HOME:   /usr/local/tomcat
Using CATALINA_TMPDIR: /usr/local/tomcat/temp
Using JRE_HOME:        /usr
Using CLASSPATH:       /usr/local/tomcat/bin/bootstrap.jar:/usr/local/tomcat/bin/tomcat-juli.jar
Tomcat started.
[root@localhost webapps]# ss -anlt
State Recv-Q Send-Q Local Address:Port Peer Address:Port
LISTEN 0 100 :::8080 :::*
LISTEN 0 1 ::ffff:127.0.0.1:8005 :::*
LISTEN 0 100 :::8009 :::* 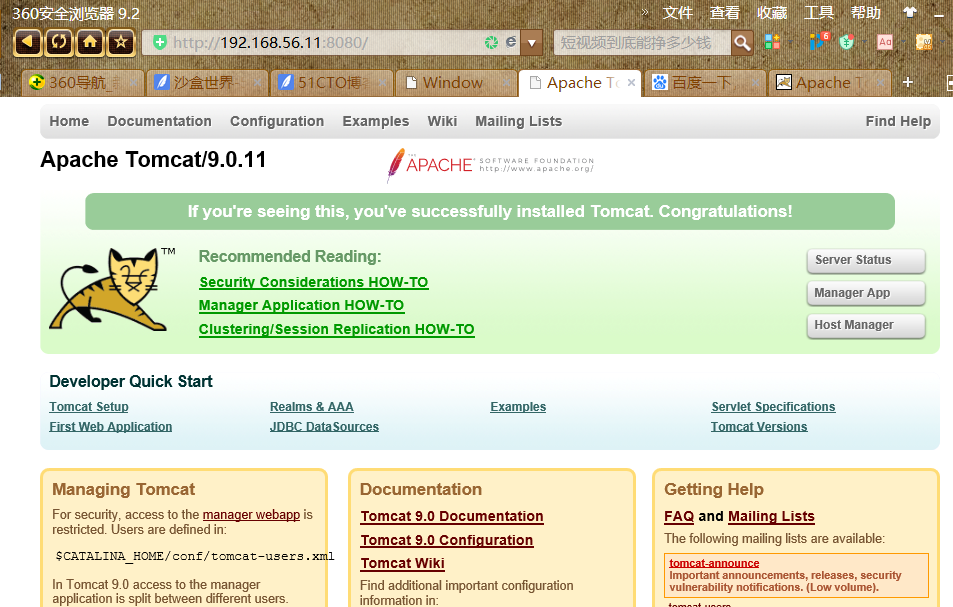

現在再來一個湯姆貓
再次回到tomcat包的目錄
[root@localhost local]# cd /usr/src/
解壓並將解壓後的文件移動到/usr/local/,重命名爲apache-tomcat-9.0.11-tom2
[root@localhost src]# tar xf apache-tomcat-9.0.11.tar.gz
[root@localhost src]# mv apache-tomcat-9.0.11 /usr/local/apache-tomcat-9.0.11-tom2

將解壓後的apache-tomcat-9.0.11-tom2包創建軟件接,命名tomcat2
[root@localhost src]# cd /usr/local
[root@localhost local]# ln -s apache-tomcat-9.0.11-tom2/ tomcat2
[root@localhost local]# ls
apache-tomcat-9.0.11       bin  games    lib    libexec  share  tomcat
apache-tomcat-9.0.11-tom2  etc  include  lib64  sbin     src    tomcat2
[root@localhost local]# ll           //軟連接
進入webapps,並配置網頁,在啓動tomcat2
先修改端口配置
[root@localhost local]# cd tomcat2/conf
[root@localhost conf]# ls
catalina.policy      context.xml           jaspic-providers.xsd  server.xml        tomcat-users.xsd
catalina.properties  jaspic-providers.xml  logging.properties    tomcat-users.xml  web.xml
[root@localhost conf]# vim server.xml        //在原有的端口稍作改變即可
<Server port="8015" shutdown="SHUTDOWN">
<Connector port="8081" protocol="HTTP/1.1"
<Connector port="8019" protocol="AJP/1.3" redirectPort="8453" />

[root@localhost conf]# cd /usr/local/tomcat2/webapps/
[root@localhost webapps]# ls
docs  examples  host-manager  manager  ROOT

[root@localhost webapps]# mkdir test
[root@localhost webapps]# cd test
[root@localhost test]# vim index.jsp
[root@localhost test]# cat index.jsp
<html>
<head>
<title>test page</title>
</head>
<body>
<%
out.println("123456");
%>
</body>
</html>
啓動
//檢查
[root@localhost webapps]# /usr/local/tomcat2/bin/configtest.sh
//啓動
[root@localhost webapps]# /usr/local/tomcat2/bin/catalina.sh start
[root@localhost webapps]# ss -anlt
State      Recv-Q Send-Q      Local Address:Port                     Peer Address:Port
LISTEN     0      128                     *:111                                 *:*
LISTEN     0      5           192.168.122.1:53                                  *:*
LISTEN     0      128                     *:22                                  *:*
LISTEN     0      128             127.0.0.1:631                                 *:*
LISTEN     0      100             127.0.0.1:25                                  *:*
LISTEN     0      1        ::ffff:127.0.0.1:8015                               :::*
LISTEN     0      128                    :::111                                :::*
LISTEN     0      100                    :::8080                               :::*
LISTEN     0      100                    :::8081                               :::*
LISTEN     0      100                    :::8019                               :::*
LISTEN     0      128                    :::22                                 :::*
LISTEN     0      128                   ::1:631                                :::*
LISTEN     0      100                   ::1:25                                 :::*
LISTEN     0      1        ::ffff:127.0.0.1:8005                               :::*
LISTEN     0      100                    :::8009                               :::*
[root@localhost webapps]# cd
不同端口

第二個tomcat同ip不同端口的網頁也搭建成功
下面開始搭建nging和數據庫
可以在其他服務器搭建也可以就在本服務器搭建,
使用nginx,實現負載均衡
可在本服務器設置,也可以在其他服務器設置反向代理tomcat網頁的ip和端口
安裝依賴包
//創建用戶
[root@localhost ~]# useradd -r -M -s /sbin/nologin nginx

//安裝編譯環境
[root@localhost ~]# yum -y groups list
[root@localhost ~]# yum -y install pcre-devel openssl openssl-devel gd-devel
//創建日誌存放目錄
[root@localhost ~]# mkdir -p /var/log/nginx
[root@localhost ~]# chown -R nginx.nginx /var/log/nginx
//下載nginx,編譯安裝
[root@localhost ~]# cd /usr/src/
[root@localhost src]#
[root@localhost src]# yum -y install wget
[root@localhost src]# wget http://64.123.28.133/files/21490000000827F6/nginx.org/download/nginx-1.14.0.tar.gz
[root@localhost src]# tar xf nginx-1.14.0.tar.gz
[root@localhost src]# cd nginx-1.14.0
[root@localhost nginx-1.14.0]# yum -y install gcc gcc-c++[root@localhost nginx-1.14.0]# ./configure \
--prefix=/usr/local/nginx \
--user=nginx \
--group=nginx \
--with-debug \
--with-http_ssl_module \
--with-http_realip_module \
--with-http_image_filter_module \
--with-http_gunzip_module \--with-http_gzip_static_module \
--with-http_stub_status_module \
--http-log-path=/var/log/nginx/access.log \
--error-log-path=/var/log/nginx/error.log
[root@localhost nginx-1.14.0]# make -j 4 && make install

//設置環境變量

[root@localhost nginx-1.14.0]# echo 'export PATH=/usr/local/nginx/sbin:$PATH' > /etc/profile.d/nginx.sh

[root@localhost nginx-1.14.0]# . /etc/profile.d/nginx.sh

//啓動
[root@localhost nginx-1.14.0]# nginx
nginx的配置文件
主配置文件 /usr/local/nginx/conf/nginx.conf
2.安裝mysql
//安裝依賴包
[root@guohui ~]# yum -y install ncurses-devel openssl-devel openssl cmake mariadb-devel
創建用戶和組
[root@guohui ~]# groupadd -r -g 306 mysql
[root@guohui ~]# useradd -M -s /sbin/nologin -g 306 -u 306 mysql
下載二進制格式的mysql軟件包
[root@localhost ~]# cd /usr/src/
[root@guohui src]# wget https://downloads.mysql.com/archives/get/file/mysql-5.7.22-linux-glibc2.12-x86_64.tar.gz
解壓軟件至/usr/local/
[root@localhost ~]# cd /usr/src/
[root@localhost src]# ls
debug  kernels  mysql-5.7.22-linux-glibc2.12-x86_64.tar.gz  nginx-1.14.0  nginx-1.14.0.tar.gz

[root@localhost src]# tar xf mysql-5.7.22-linux-glibc2.12-x86_64.tar.gz -C /usr/local/
[root@localhost src]# ls  /usr/local/
bin  etc  games  include  lib  lib64  libexec  mysql-5.7.22-linux-glibc2.12-x86_64  nginx  sbin  share  src

[root@localhost src]# cd  /usr/local/
[root@localhost local]# ln -sv mysql-5.7.22-linux-glibc2.12-x86_64/ mysql
"mysql" -> "mysql-5.7.22-linux-glibc2.12-x86_64/"

//修改屬主
[root@localhost local]# chown -R mysql.mysql /usr/local/mysql
[root@localhost local]# ll /usr/local/mysql -d
lrwxrwxrwx. 1 mysql mysql 36 8月  24 16:13 /usr/local/mysql -> mysql-5.7.22-linux-glibc2.12-x86_64/

//設置環境變量
[root@localhost local]# echo 'export PATH=/usr/local/mysql/bin:$PATH' > /etc/profile.d/mysql.sh
[root@localhost local]# . /etc/profile.d/mysql.sh
[root@localhost local]# echo $PATH
/usr/local/mysql/bin:/usr/local/nginx/sbin:/usr/local/sbin:/usr/local/bin:/usr/sbin:/usr/bin:/root/bin

//建立數據存放目錄
[root@localhost local]# cd /usr/local/mysql
[root@localhost mysql]# mkdir /opt/data
[root@localhost mysql]# chown -R mysql.mysql /opt/data/

//初始化數據庫,最後生成的是一個臨時密碼
[root@localhost mysql]# /usr/local/mysql/bin/mysqld --initialize --user=mysql --datadir=/opt/data/
2018-09-05T09:17:21.026072Z 1 [Note] A temporary password is generated for root@localhost: ?3/(1tqF=gwu
配置mysql
[root@localhost mysql]# ln -sv /usr/local/mysql/include/ /usr/local/include/mysql
"/usr/local/include/mysql" -> "/usr/local/mysql/include/"
[root@localhost mysql]# echo '/usr/local/mysql/lib' > /etc/ld.so.conf.d/mysql.conf
[root@localhost mysql]# ldconfig -v

//生成配置文件
[root@guohui ~]# cat > /etc/my.cnf <<EOF
[mysqld]
basedir = /usr/local/mysql
datadir = /opt/data
socket = /tmp/mysql.sock
port = 3306
pid-file = /opt/data/mysql.pid
user = mysql
skip-name-resolve
EOF
配置啓動腳本
root@localhost mysql]# cp -a /usr/local/mysql/support-files/mysql.server /etc/init.d/mysqld
[root@localhost mysql]# sed -ri 's#^(basedir=).*#\1/usr/local/mysql#g' /etc/init.d/mysqld
[root@localhost mysql]# sed -ri 's#^(datadir=).*#\1/opt/data#g' /etc/init.d/mysqld
啓動mysql
[root@localhost mysql]# service mysqld start
Starting MySQL.Logging to '/opt/data/localhost.localdomain.err'.
SUCCESS!
[root@localhost mysql]# ps -ef|grep mysql
root      24348      1  0 16:25 pts/0    00:00:00 /bin/sh /usr/local/mysql/bin/mysqld_safe --datadir=/opt/data --pid-file=/opt/data/mysql.pid
mysql     24526  24348  2 16:25 pts/0    00:00:00 /usr/local/mysql/bin/mysqld --basedir=/usr/local/mysql --datadir=/opt/data --plugin-dir=/usr/local/mysql/lib/plugin --user=mysql --log-error=localhost.localdomain.err --pid-file=/opt/data/mysql.pid --socket=/tmp/mysql.sock --port=3306
root      24556   2316  0 16:25 pts/0    00:00:00 grep --color=auto mysql
[root@localhost mysql]# ss -antl
State      Recv-Q Send-Q      Local Address:Port                     Peer Address:Port
LISTEN     0      128                     *:111                                 *:*
LISTEN     0      128                     *:80                                  *:*
LISTEN     0      5           192.168.122.1:53                                  *:*
LISTEN     0      128                     *:22                                  *:*
LISTEN     0      128             127.0.0.1:631                                 *:*
LISTEN     0      100             127.0.0.1:25                                  *:*
LISTEN     0      1        ::ffff:127.0.0.1:8015                               :::*
LISTEN     0      128                    :::111                                :::*
LISTEN     0      100                    :::8080                               :::*
LISTEN     0      100                    :::8081                               :::*
LISTEN     0      100                    :::8019                               :::*
LISTEN     0      128                    :::22                                 :::*
LISTEN     0      128                   ::1:631                                :::*
LISTEN     0      100                   ::1:25                                 :::*
LISTEN     0      1        ::ffff:127.0.0.1:8005                               :::*
LISTEN     0      100                    :::8009                               :::*
LISTEN     0      80                     :::3306                               :::*
修改臨時密碼
[root@localhost mysql]# mysql -uroot -p
Enter password:
mysql> set password = password('guohui123');
Query OK, 0 rows affected, 1 warning (0.00 sec)
mysql> quit
[root@localhost nginx-1.14.0]# cd /usr/local/nginx/
配置nginx實現動靜分離
[root@localhost nginx]# vim conf/nginx.conf
keepalive_timeout 65;
upstream web {
server 192.168.56.11:8080; //設置web設置集羣,實行負載均衡,tomcat網站192.168.56.11:8080和tomcat網站192.168.56.11:8081
server 192.168.56.11:8081;
}
server {
listen 80;
server_name localhost;
access_log logs/host.access.log main;
location ~* \.(do|jsp)$ {
proxy_pass http://web;
}
location ~* tomcat\.(png|css)$ {
proxy_pass http://web;
}
location / {
root html;
index index.html index.htm;
}
}//測試 [root@localhost nginx]# nginx -t
nginx: the configuration file /usr/local/nginx/conf/nginx.conf syntax is ok
nginx: configuration file /usr/local/nginx/conf/nginx.conf test is successful
[root@localhost nginx]# nginx -s reload瀏覽器測試,負載均衡達成,如需要每個ip訪問的網頁不變,則可以在 upstream web中加入ip_hash
靜態資源訪問nginx
動態資源訪問tomcat
之前創建的test
刷新