


一. 開始
接上一篇 ServerBootstrap的初始化
http://blog.51cto.com/483181/2119149
二. bind過程
2.1 代碼
先看下調用的源代碼
public void bind(int port) throws Exception {
        ...
        try {
            ...

            ChannelFuture f = b.bind(port).sync(); //bind過程
            ...
        } catch (Exception e) {
            e.printStackTrace();
        } finally {
            bossGroup.shutdownGracefully();
            workerGroup.shutdownGracefully();
        }
    }
2.2 bind
public ChannelFuture bind(int inetPort) {
        return bind(new InetSocketAddress(inetPort));
    }

public ChannelFuture bind(SocketAddress localAddress) {
        validate();
        if (localAddress == null) {
            throw new NullPointerException("localAddress");
        }
        return doBind(localAddress);
}
從上面代碼可以看出幾點:
- bind方法邏輯很簡單,經過一系列的判斷後最後調用doBind()方法
- 發現Netty代碼裏面,從外面調用進去後,內部方法一般用doxxx,xxx0這種命名;以前自己看安卓源代碼的時候,安卓一般喜歡用xxxInner的命名。風格而已,也許自己以後寫代碼可以參考(看源代碼除了瞭解原理外,學習別人的代碼架構方法也是一種收穫)。
繼續看doBind
2.3 doBind
private ChannelFuture doBind(final SocketAddress localAddress) {
        final ChannelFuture regFuture = initAndRegister(); //1. init和register
        final Channel channel = regFuture.channel();
        if (regFuture.cause() != null) {
            return regFuture;
        }

        if (regFuture.isDone()) {
            // At this point we know that the registration was complete and successful.
            ChannelPromise promise = channel.newPromise();
            doBind0(regFuture, channel, localAddress, promise);
            return promise;
        } else {
            // Registration future is almost always fulfilled already, but just in case it's not.
            final PendingRegistrationPromise promise = new PendingRegistrationPromise(channel);
            regFuture.addListener(new ChannelFutureListener() {
                @Override
                public void operationComplete(ChannelFuture future) throws Exception {
                    Throwable cause = future.cause();
                    if (cause != null) {
                        // Registration on the EventLoop failed so fail the ChannelPromise directly to not cause an
                        // IllegalStateException once we try to access the EventLoop of the Channel.
                        promise.setFailure(cause);
                    } else {
                        // Registration was successful, so set the correct executor to use.
                        // See https://github.com/netty/netty/issues/2586
                        promise.registered();

                        doBind0(regFuture, channel, localAddress, promise);
                    }
                }
            });
            return promise;
        }
    }
上面這一段代碼包含的東西就比較多了,先來看 initAndRegister
2.4 initAndRegister
顧名思義,這個方法包含初始化和註冊兩個步驟,代碼如下:
final ChannelFuture initAndRegister() {
        Channel channel = null;
        try {
            channel = channelFactory.newChannel();
            init(channel);
        } catch (Throwable t) {
            ...
        }

        ChannelFuture regFuture = config().group().register(channel);
        if (regFuture.cause() != null) {
            if (channel.isRegistered()) {
                channel.close();
            } else {
                channel.unsafe().closeForcibly();
            }
        }
        return regFuture;
    }
從上面代碼,我們可以看到幾點:
- channel = channelFactory.newChannel();
channelFactory是什麼?它的類型是ReflectiveChannelFactory,如果大家不記得了,可以看看上一篇channel設置那個地方。
http://blog.51cto.com/483181/2119149
public B channel(Class<? extends C> channelClass) {
        return channelFactory(new ReflectiveChannelFactory<C>(channelClass));
    }

public class ReflectiveChannelFactory<T extends Channel> implements ChannelFactory<T> {
    @Override
    public T newChannel() {
        try {
            return clazz.getConstructor().newInstance();
        } catch (Throwable t) {

        }
    }
}
它的newChannel方法也是非常的簡單,直接實例化傳入的channel對象,也就是NioServerSocketChannel (可以看上一篇初始化的分析)
代碼如下:
ServerBootstrap b = new ServerBootstrap();
            b.group(bossGroup, workerGroup)
                .channel(NioServerSocketChannel.class)
我們先看看NioServerSocketChannel的實現
2.5 NioServerSocketChannel
先看下NioServerSocketChannel的繼承關係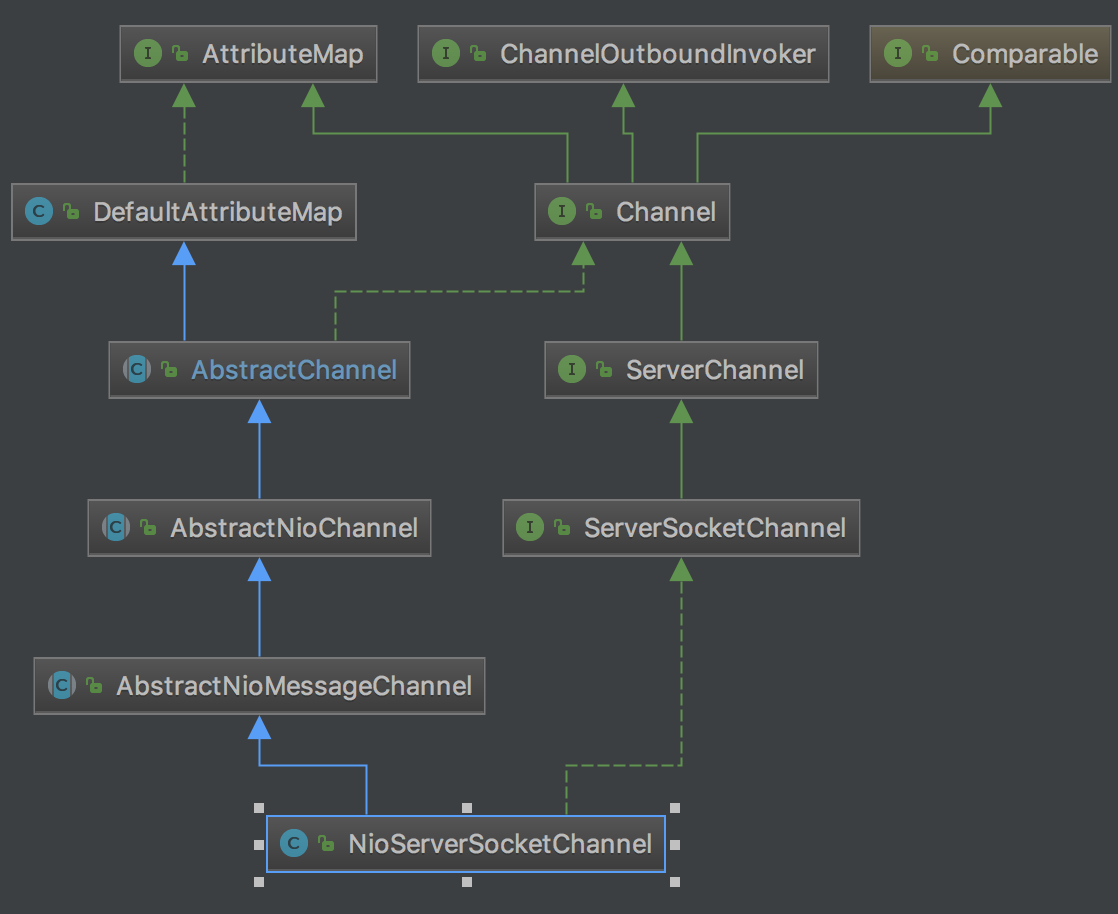
NioServerSocketChannel提供了一個無參構造函數,然後分別有SelectorProvider,ServerSocketChannel的構造函數,如下:
private static final SelectorProvider DEFAULT_SELECTOR_PROVIDER = SelectorProvider.provider();

    private static ServerSocketChannel newSocket(SelectorProvider provider) {
        try {
            return provider.openServerSocketChannel();
        } catch (IOException e) {
        }
    }

    private final ServerSocketChannelConfig config;

    /**
     * Create a new instance
     */
    public NioServerSocketChannel() {
        this(newSocket(DEFAULT_SELECTOR_PROVIDER));
    }

    /**
     * Create a new instance using the given {@link ServerSocketChannel}.
     */
    public NioServerSocketChannel(ServerSocketChannel channel) {
        super(null, channel, SelectionKey.OP_ACCEPT);
        config = new NioServerSocketChannelConfig(this, javaChannel().socket());
    }
無參構造函數裏面調用newSocket(xx),參數是SelectorProvider DEFAULT_SELECTOR_PROVIDER = SelectorProvider.provider();
先看看SelectorProvider.provider()
private static SelectorProvider provider = null;
public static SelectorProvider provider() {
        synchronized (lock) {
            if (provider != null)
                return provider;
                ...
        }
    }
可以看到provider是個單例,不知道大家是否記得上上一篇文章(NioEventLoopGroup實例化)分析的時候也有provider,類型是KQueueSelectorProvider
具體可以看: http://blog.51cto.com/483181/2118817
回到newSocket裏面,調用的是provider.openServerSocketChannel()
代碼是SelectorProviderImpl裏面,返回的是 ServerSocketChannel
public ServerSocketChannel openServerSocketChannel() throws IOException {
        return new ServerSocketChannelImpl(this);
    }
得到ServerSocketChannel之後,繼續調用構造函數
public NioServerSocketChannel(ServerSocketChannel channel) {
        super(null, channel, SelectionKey.OP_ACCEPT);
        config = new NioServerSocketChannelConfig(this, javaChannel().socket());
    }
這個構造方法裏面做了兩件事
- 調用父類的構造方法
- 利用剛剛生成好的ServerSocketChannel實例化了一個NioServerSocketChannelConfig
看它的父類構造函數是怎麼實現的
首先是AbstractNioChannel.java
protected AbstractNioChannel(Channel parent, SelectableChannel ch, int readInterestOp) {
        super(parent);
        this.ch = ch;
        this.readInterestOp = readInterestOp;
        try {
            ch.configureBlocking(false);
        } catch (IOException e) {
        }
}- 繼續調用父類的構造方法
- 首先吧傳入的ServerSocketChannel保存起來,變量是ch
- 然後把readInterestOp存起來,變量是readInterestOp,值是SelectionKey.OP_ACCEPT
- 調用ch.configureBlocking(false);把channel設置成非阻塞。
這裏稍微介紹下SelectionKey.OP_ACCEPT
SelectionKey有4種類型,是java提供的,分別是
public static final int OP_READ = 1 << 0;

public static final int OP_WRITE = 1 << 2;

public static final int OP_CONNECT = 1 << 3;

public static final int OP_ACCEPT = 1 << 4;
然後繼續看AbstractNioChannel的父類構造方法,也就是AbstractChannel
private final ChannelId id;
protected abstract AbstractUnsafe newUnsafe();
private final DefaultChannelPipeline pipeline;

protected AbstractChannel(Channel parent) {
        this.parent = parent;
        id = newId();
        unsafe = newUnsafe();
        pipeline = newChannelPipeline();
}
可以看到這幾點:
- Channel parent變量,null
- 初始化ChannelId id
- 初始化unsafe
- 初始化pipeline
先看unsafe的初始化
2.6 newUnsafe
在AbstractChannel裏面,它是一個抽象類
protected abstract AbstractUnsafe newUnsafe();實現類在子類AbstractNioMessageChannel裏面,如下,類型是NioMessageUnsafe
@Override
    protected AbstractNioUnsafe newUnsafe() {
        return new NioMessageUnsafe();
    }
NioMessageUnsafe代碼後面再看。
繼續看pipeline的初始化,初始化了一個 DefaultChannelPipeline
protected DefaultChannelPipeline newChannelPipeline() {
        return new DefaultChannelPipeline(this);
    }
protected DefaultChannelPipeline(Channel channel) {
this.channel = ObjectUtil.checkNotNull(channel, "channel");
succeededFuture = new SucceededChannelFuture(channel, null);
voidPromise = new VoidChannelPromise(channel, true);
tail = new TailContext(this);
head = new HeadContext(this);
head.next = tail;
tail.prev = head;
}在DefaultChannelPipeline裏面初始化了一個head和tail,分別是HeadContext和TailConext類型,而且head和tail組成雙向鏈表。
head和tail的區別之一就是inbound和outbound值是相反的,如下:
| 節點 | inbound | outbound |
|---|---|---|
| head | false | true |
| tail | true | false |
HeadContext(DefaultChannelPipeline pipeline) {
            super(pipeline, null, HEAD_NAME, false, true);
            unsafe = pipeline.channel().unsafe();
            setAddComplete();
        }

TailContext(DefaultChannelPipeline pipeline) {
            super(pipeline, null, TAIL_NAME, true, false);
            setAddComplete();
        }
借一張圖顯示下ChannelInBound和ChannelOutBound,如下。head是發送出去的入口,tail是接收消息的入口。

另外我們來看一下添加一個ChannelHandler的流程,比如addLast
public final ChannelPipeline addLast(EventExecutorGroup group, String name, ChannelHandler handler) {
        final AbstractChannelHandlerContext newCtx;
        synchronized (this) {
            checkMultiplicity(handler);

            newCtx = newContext(group, filterName(name, handler), handler);

            addLast0(newCtx);

            ...
                    return this;
    }

private AbstractChannelHandlerContext newContext(EventExecutorGroup group, String name, ChannelHandler handler) {
        return new DefaultChannelHandlerContext(this, childExecutor(group), name, handler);
    }

private void addLast0(AbstractChannelHandlerContext newCtx) {
        AbstractChannelHandlerContext prev = tail.prev;
        newCtx.prev = prev;
        newCtx.next = tail;
        prev.next = newCtx;
        tail.prev = newCtx;
} -
首先它初始化了一個DefaultChannelHandlerContext對象,裏面封裝了要add的channelHandler,這個很重要,在Netty的pipeLine裏面,都是通過ChannelHandlerContext來描述的,不是直接添加channelHandler。
- addLast0()裏面就是簡單的雙向鏈表添加的方法,把封裝了channelHandler的ChannelHandlerContext對象添加到tail的前一個節點。
那,我們來總結下NioServerSocketChannel的初始化過程:
1. NioServerSocketChannel提供了一個無參構造函數,裏面SelectorProvider DEFAULT_SELECTOR_PROVIDER,它是一個單例,類型是KQueueSelectorProvider。
2. 我們調用KQueueSelectorProvider.openServerSocketChannel()方法,得到一個ServerSocketChannel
3. 我們用生成的ServerSocketChannel對象創建了一個ServerSocketChannelConfig config,具體是NioServerSocketChannelConfig對象,存在NioServerSocketChannel裏面
4. 我們用生成的ServerSocketChannel調用它的父類構造函數,先來到了AbstractNioChannel
5. 在AbstractNioChannel會把ServerSocketChannel存起來,變量是ch,然後把channel設置成非阻塞。
6. AbstractNioChannel還會把readInterestOp存起來,類型是SelectionKey.OP_ACCEPT
7. 繼續調用父類構造函數,來到AbstractChannel
8. AbstractChannel裏面的parent設置成null
9. AbstractChannel初始化channel id
10. AbstractChannel初始化unsafe,類型是NioMessageUnsafe.
11. AbstractChannel初始化pipeline,類型是DefaultChannelPipeline, 每個Channel都有一個自己的Pipeline
看完NioServerSocketChannel的實例化方法後,我們繼續往下看init
2.7 init
abstract void init(Channel channel) throws Exception;AbstractBootstrap裏面的init(channel)方法是一個抽象方法,參數是Channel類型,其實就是上一步實例化好的NioServerSocketChannel對象。
具體實現方法在它的子類ServerBootstrap和Bootstrap(給客戶端啓動使用的),那我們是分析服務端的代碼,所以看ServerBootstrap裏面的實現。
void init(Channel channel) throws Exception {
        final Map<ChannelOption<?>, Object> options = options0();
        synchronized (options) { //1. 設置options
            setChannelOptions(channel, options, logger);
        }

        final Map<AttributeKey<?>, Object> attrs = attrs0();
        synchronized (attrs) {
            for (Entry<AttributeKey<?>, Object> e: attrs.entrySet()) { //設置attr屬性
                @SuppressWarnings("unchecked")
                AttributeKey<Object> key = (AttributeKey<Object>) e.getKey();
                channel.attr(key).set(e.getValue());
            }
        }

        ChannelPipeline p = channel.pipeline();

        final EventLoopGroup currentChildGroup = childGroup;
        final ChannelHandler currentChildHandler = childHandler;
        final Entry<ChannelOption<?>, Object>[] currentChildOptions;
        final Entry<AttributeKey<?>, Object>[] currentChildAttrs;
        synchronized (childOptions) {
            currentChildOptions = childOptions.entrySet().toArray(newOptionArray(childOptions.size()));
        }
        synchronized (childAttrs) {
            currentChildAttrs = childAttrs.entrySet().toArray(newAttrArray(childAttrs.size()));
        }

        p.addLast(new ChannelInitializer<Channel>() {
            @Override
            public void initChannel(final Channel ch) throws Exception {
                final ChannelPipeline pipeline = ch.pipeline();
                ChannelHandler handler = config.handler();
                if (handler != null) {
                    pipeline.addLast(handler);
                }

                ch.eventLoop().execute(new Runnable() {
                    @Override
                    public void run() {
                        pipeline.addLast(new ServerBootstrapAcceptor(
                                ch, currentChildGroup, currentChildHandler, currentChildOptions, currentChildAttrs));
                    }
                });
            }
        });
    }
先來看設置options
2.8 setOptions
final Map<ChannelOption<?>, Object> options = options0();
        synchronized (options) { //1. 設置options
            setChannelOptions(channel, options, logger);
        }

static void setChannelOptions(
            Channel channel, Map<ChannelOption<?>, Object> options, InternalLogger logger) {
        for (Map.Entry<ChannelOption<?>, Object> e: options.entrySet()) {
            setChannelOption(channel, e.getKey(), e.getValue(), logger);
        }
    }

private static void setChannelOption(
            Channel channel, ChannelOption<?> option, Object value, InternalLogger logger) {
        try {
            if (!channel.config().setOption((ChannelOption<Object>) option, value)) {
            }
        } catch (Throwable t) {}
    }
這段代碼我們這樣看
- options是哪來的?
options是一個map,服務器代碼是這樣設置的
 b.xxxx.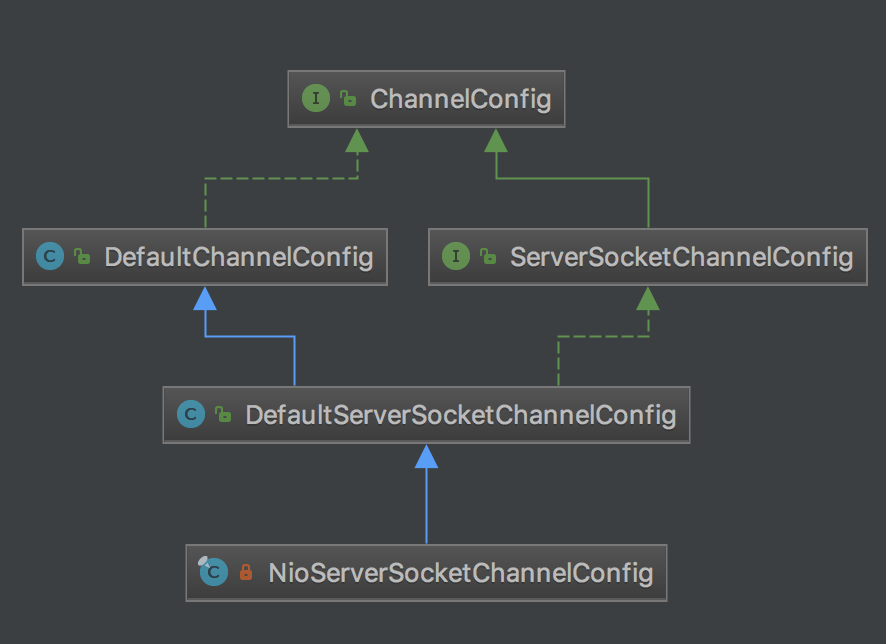
.option(ChannelOption.SO_BACKLOG, 100)- 它其實調用的是channel.config()對象去設置option,那config對象是什麼呢?這個上面分析Channel初始化的時候說過,它是NioServerSocketChannelConfig對象,NioServerSocketChannelConfig的類繼承關係如下:
 `
`
- 所以setOption的實現在DefaultServerSocketChannelConfig裏面
@Override
    public <T> boolean setOption(ChannelOption<T> option, T value) {
        validate(option, value);

        if (option == SO_RCVBUF) {
            setReceiveBufferSize((Integer) value);
        } else if (option == SO_REUSEADDR) {
            setReuseAddress((Boolean) value);
        } else if (option == SO_BACKLOG) {
            setBacklog((Integer) value);
        } else {
            return super.setOption(option, value);
        }

        return true;
    }

父類 DefaultChannelConfig.java

public <T> boolean setOption(ChannelOption<T> option, T value) {
        validate(option, value);

        if (option == CONNECT_TIMEOUT_MILLIS) {
            setConnectTimeoutMillis((Integer) value);
        } else if (option == MAX_MESSAGES_PER_READ) {
            setMaxMessagesPerRead((Integer) value);
        } else if (option == WRITE_SPIN_COUNT) {
            setWriteSpinCount((Integer) value);
        } else if (option == ALLOCATOR) {
            setAllocator((ByteBufAllocator) value);
        } else if (option == RCVBUF_ALLOCATOR) {
            setRecvByteBufAllocator((RecvByteBufAllocator) value);
        } else if (option == AUTO_READ) {
            setAutoRead((Boolean) value);
        } else if (option == AUTO_CLOSE) {
            setAutoClose((Boolean) value);
        } else if (option == WRITE_BUFFER_HIGH_WATER_MARK) {
            setWriteBufferHighWaterMark((Integer) value);
        } else if (option == WRITE_BUFFER_LOW_WATER_MARK) {
            setWriteBufferLowWaterMark((Integer) value);
        } else if (option == WRITE_BUFFER_WATER_MARK) {
            setWriteBufferWaterMark((WriteBufferWaterMark) value);
        } else if (option == MESSAGE_SIZE_ESTIMATOR) {
            setMessageSizeEstimator((MessageSizeEstimator) value);
        } else if (option == SINGLE_EVENTEXECUTOR_PER_GROUP) {
            setPinEventExecutorPerGroup((Boolean) value);
        } else {
            return false;
        }

        return true;
    }
根據傳入的屬性不行,用不同的方法進行設置,這些屬性的值大家可以去單獨百度,可能不同的環境配置不同的值對服務器性能有好處。
那繼續往下面看,設置attr
2.9 setAttr
setAttr是封裝了一個Attribute的類,然後存儲key,value,大傢俱體要看的話,可以看DefaultAttributeMap.java
繼續往下看
2.10 addLast
p.addLast(new ChannelInitializer<Channel>() {
            @Override
            public void initChannel(final Channel ch) throws Exception {
                final ChannelPipeline pipeline = ch.pipeline();
                ChannelHandler handler = config.handler();
                if (handler != null) {
                    pipeline.addLast(handler);
                }

                ch.eventLoop().execute(new Runnable() {
                    @Override
                    public void run() {
                        pipeline.addLast(new ServerBootstrapAcceptor(
                                ch, currentChildGroup, currentChildHandler, currentChildOptions, currentChildAttrs));
                    }
                });
            }
        });
上面這段代碼,我們一步步看
- 首先,config.handler()是哪裏來的?其實就是我們設置的handler,這一點可以從上一篇分析看到
http://blog.51cto.com/483181/2119149
b..handler(new LoggingHandler(LogLevel.INFO));所以 pipeline.addLast(handler); 就是把我們設置的handler添加到pipeline裏面。
- 然後又實例化了一個ServerBootstrapAcceptor,把childHandler那些參數都傳了進去,具體在ServerBootstrapAcceptor裏面怎麼使用這些childHandler的.
ch.eventLoop().execute(new Runnable() {
                    @Override
                    public void run() {
                        pipeline.addLast(new ServerBootstrapAcceptor(
                                ch, currentChildGroup, currentChildHandler, currentChildOptions, currentChildAttrs));
                    }
                });
ServerBootstrapAcceptor是把客戶端連接的channel從bossGroup轉移到workGroup,代碼如下:
ServerBootstrap.java
@Override
        @SuppressWarnings("unchecked")
        public void channelRead(ChannelHandlerContext ctx, Object msg) {
            final Channel child = (Channel) msg;

            child.pipeline().addLast(childHandler);

            setChannelOptions(child, childOptions, logger);

            try {
                childGroup.register(child).addListener(new ChannelFutureListener() {
                    @Override
                    public void operationComplete(ChannelFuture future) throws Exception {
                        if (!future.isSuccess()) {
                            forceClose(child, future.cause());
                        }
                    }
                });
            } catch (Throwable t) {
                forceClose(child, t);
            }
        }
上面這段代碼把客戶端的channel讀進來轉換成一個channel類型,然後調用childGroup,然後把channel註冊進去,這樣workGroup就接手了channel後面的事情。
那init就看完了,總結一下init做的事情
- 設置options,參數有很多,不同的服務器業務可以用不用的參數。
- 設置attr
- 把handler添加到pipeLine的尾部
- 初始化了一個ServerBootstrapAcceptor,裏面封裝了childHandler的那些參數。
其實看到這裏,我們會發現init還只是初始化參數,把handler添加到pipeLine裏面,做好一切準備,並沒有bind服務器端口。
那我們繼續看
ChannelFuture regFuture = config().group().register(channel);
2.12 register
先繼續貼一下initAndRegister的代碼,因爲上面講的東西有點多,大家可能忘記initAndRegister裏面的代碼了。
final ChannelFuture initAndRegister() {
        Channel channel = null;
        try {
            channel = channelFactory.newChannel(); //1. NioServerSocketChannel的初始化已經講了
            init(channel); //2. init過程已經講了
        } catch (Throwable t) {
        }

        ChannelFuture regFuture = config().group().register(channel); //3. 現在講register
        if (regFuture.cause() != null) {
            if (channel.isRegistered()) {
                channel.close();
            } else {
                channel.unsafe().closeForcibly();
            }
        }

        return regFuture;
    }
如同上面的註釋,我們講register過程
- config.group()是什麼呢?參考我們上一篇的ServerBootstrap初始化,config.group()指的bossGroup,類型是NioEventLoopGroup
ServerBootstrap初始化
EventLoopGroup bossGroup = new NioEventLoopGroup();
        EventLoopGroup workerGroup = new NioEventLoopGroup();
        try {
            ServerBootstrap b = new ServerBootstrap();
            b.group(bossGroup, workerGroup)
由於NioEventLoopGroup繼承自MultithreadEventLoopGroup,所以調用的是MultithreadEventLoopGroup的register(channel)方法,如下:
public ChannelFuture register(Channel channel) {
        return next().register(channel);
    }

@Override
    public EventExecutor next() {
        return chooser.next();
    }
那next()又是什麼呢?在上篇 NioEventLoopGroup實例化 裏面我們分析了,NioEventLoopGroup裏面初始化了跟傳入線程數目相同的NioEventLoop對象,而next()方法有兩種算法選出下一個NioEventLoop對象是什麼。
這兩種算法是PowerOfTwoEventExecutorChooser和GenericEventExecutorChooser,所以我們就可以知道繼續會調用NioEventLoop對象的register(channel)對象。
而NioEventLoop類並沒有實現register(channel)方法,它繼承自SingleThreadEventLoop,它裏面有實現register(channel)方法,如下:
public ChannelFuture register(Channel channel) {
        return register(new DefaultChannelPromise(channel, this));
    }
這個方法裏面實例化了一個DefaultChannelPromise對象,它其實就是保存channel和當前的NioEventLoop對象,做了一層封裝而已,如下:
public DefaultChannelPromise(Channel channel, EventExecutor executor) {
        super(executor);
        this.channel = checkNotNull(channel, "channel");
    }

public DefaultPromise(EventExecutor executor) {
        this.executor = checkNotNull(executor, "executor");
    }
所以我們可以暫時不管它,繼續往下面走.
@Override
    public ChannelFuture register(final ChannelPromise promise) {
        ObjectUtil.checkNotNull(promise, "promise");
        promise.channel().unsafe().register(this, promise);
        return promise;
    }
調用的是unsafe.register(this, promise)
那unsafe是什麼對象呢?從上面2.6可以看到unsafe()初始化的是NioMessageUnsafe對象
protected AbstractNioUnsafe newUnsafe() {
        return new NioMessageUnsafe();
    }
由於NioMessageUnsafe並沒有重寫register(EventLoop eventLoop, ChannelPromise promise)方法,所以追蹤它的父類,最後在AbstractUnsafe裏面看到了register(EventLoop eventLoop, ChannelPromise promise),如下:
先附上NioMessageUnsafe的繼承關係圖: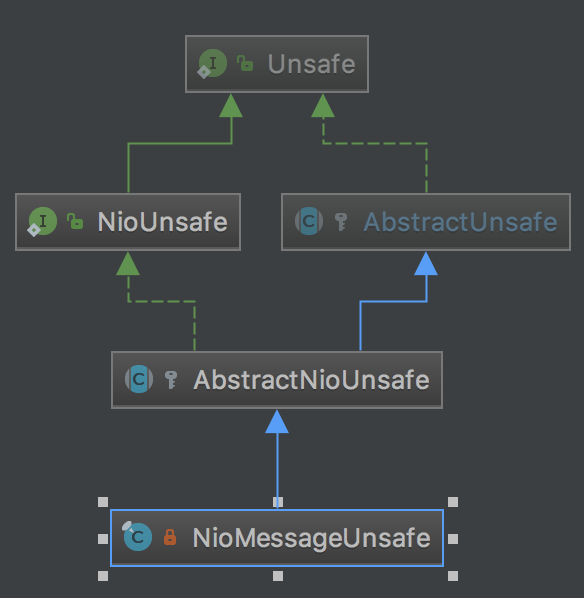
AbstractUnsafe.java
public final void register(EventLoop eventLoop, final ChannelPromise promise) {
            ...

            AbstractChannel.this.eventLoop = eventLoop;

            if (eventLoop.inEventLoop()) {
                register0(promise);
            } else {
                try {
                    eventLoop.execute(new Runnable() {
                        @Override
                        public void run() {
                            register0(promise);
                        }
                    });
                } catch (Throwable t) {
                    ...
                }
            }
        }
都會走到register0(promise)這個方法裏面,繼續看register0(promise)
private void register0(ChannelPromise promise) {
            try {
                ...

                boolean firstRegistration = neverRegistered;
                doRegister(); //1.
                neverRegistered = false;
                registered = true;

                // Ensure we call handlerAdded(...) before we actually notify the promise. This is needed as the
                // user may already fire events through the pipeline in the ChannelFutureListener.
                pipeline.invokeHandlerAddedIfNeeded();

                safeSetSuccess(promise);
                pipeline.fireChannelRegistered();
                // Only fire a channelActive if the channel has never been registered. This prevents firing
                // multiple channel actives if the channel is deregistered and re-registered.
                if (isActive()) {
                    if (firstRegistration) {
                        pipeline.fireChannelActive();
                    } else if (config().isAutoRead()) {
                        // This channel was registered before and autoRead() is set. This means we need to begin read
                        // again so that we process inbound data.
                        //
                        // See https://github.com/netty/netty/issues/4805
                        beginRead();
                    }
                }
            } catch (Throwable t) {
                ...
            }
        }
先看doRegister
2.13 doRegister
這個方法在AbstractChannel裏面,是個空實現
/**
     * Is called after the {@link Channel} is registered with its {@link EventLoop} as part of the register process.
     *
     * Sub-classes may override this method
     */
    protected void doRegister() throws Exception {
        // NOOP
    }
在AbstractNioChannel裏面有重寫
@Override
    protected void doRegister() throws Exception {
        boolean selected = false;
        for (;;) {
            try {
                selectionKey = javaChannel().register(eventLoop().unwrappedSelector(), 0, this);
                return;
            } catch (CancelledKeyException e) {
                ...
            }
        }
    }

protected SelectableChannel javaChannel() {
        return ch;
} - 首先,ch是ServerSocketChannelImpl類型,這個可以從上面 2.5 NioServerSocketChannel的初始化可以看出來來
public ServerSocketChannel openServerSocketChannel() throws IOException {
        return new ServerSocketChannelImpl(this);
}
ServerSocketChannelImpl是JDK提供的類,那javaChannel().register(xxx)就是調用JDK nio的方法實現register,那就不繼續深入下去了。
- 但是這裏有個疑惑,調用register的時候傳入的ops是0,並沒有使用上面4種監聽類型的任何一種,這個先記下來。
public static final int OP_READ = 1 << 0;

public static final int OP_WRITE = 1 << 2;

public static final int OP_CONNECT = 1 << 3;

public static final int OP_ACCEPT = 1 << 4;- eventLoop().unwrappedSelector()是什麼呢?
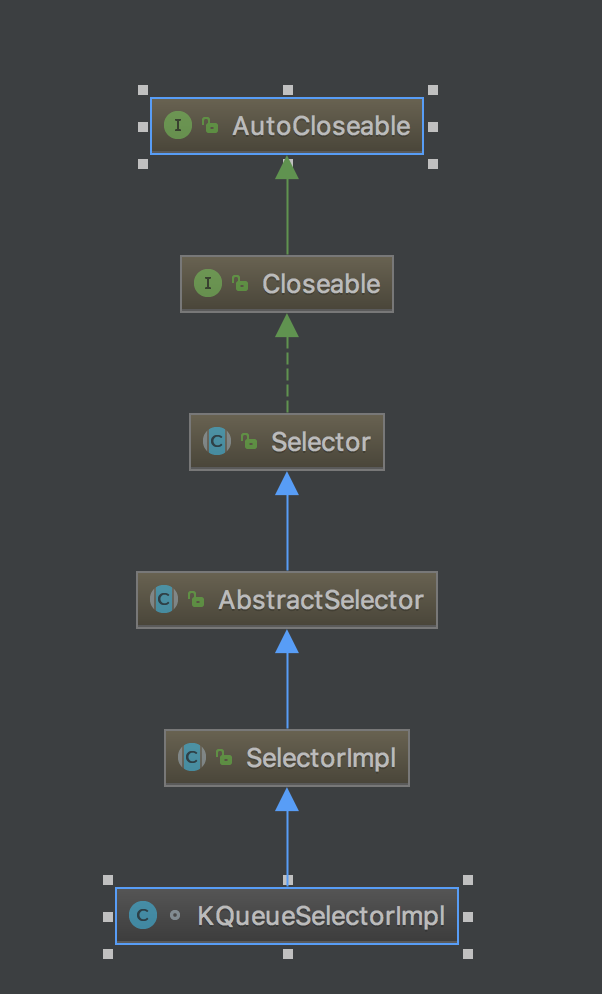
從上一篇NioEventGroupLoop初始化 2.2.3分析可以知道,它是一個KQueueSelectorImpl,繼承自Selector
那我們可以這樣理解,上面這段代碼是把一個Selector對象註冊到Java的 Channel裏面,這個Channel和我們上面講的Netty Channel不是一個東西。
繼續看register0()
2.14 pipeline.fireChannelRegistered()
private void register0(ChannelPromise promise) {
            try {
                ...
                doRegister(); //1. 把selector註冊到Java channel, ops = 0
                ...
                pipeline.fireChannelRegistered(); //2. 通知handler channel已經註冊

                                if (isActive()) {
                    if (firstRegistration) {
                        pipeline.fireChannelActive();
                    } else if (config().isAutoRead()) {
                        // This channel was registered before and autoRead() is set. This means we need to begin read
                        // again so that we process inbound data.
                        //
                        // See https://github.com/netty/netty/issues/4805
                        beginRead();
                    }
                }
                ...
            } catch (Throwable t) {
                ...
            }
        }
pipeline裏面維護channelHandler的列表,通過鏈表的方法,如DefaultChannelPipeline.java裏面
final AbstractChannelHandlerContext head;
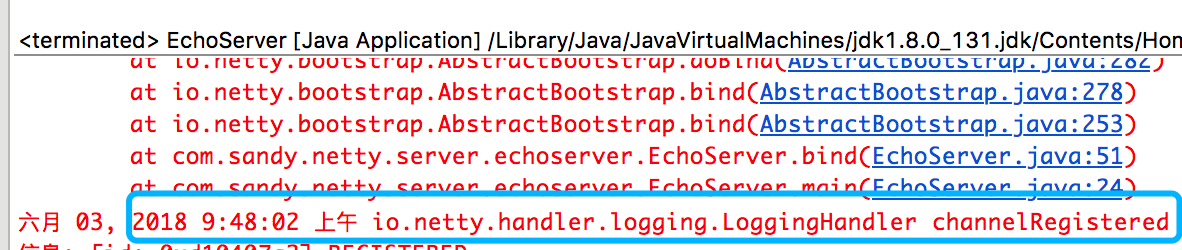
final AbstractChannelHandlerContext tail;然後通知channel registered,如果channelHandler有重寫channelRegitstered(ChannelHandlerContext ctx)的話,就會被回調。如LoggingHandler就會打印
然後判斷isActive(),isActive()是一個多態方法,對於服務器,它是判斷監聽是否啓動;
NioServerSocketChannle.java
@Override
    public boolean isActive() {
        return javaChannel().socket().isBound();
    }
對於客戶端,它是判斷TCP連接是否完成
NioSocketChannel.java
@Override
    public boolean isActive() {
        SocketChannel ch = javaChannel();
        return ch.isOpen() && ch.isConnected();
    }
我們這裏直講服務器,如果isActive(),那麼就會調用 pipeline.fireChannelActive(); 通知channelHander已經active,這樣就會回調他們的channelActive方法。
繼續看pipeline.fireChannelActive();
DefaultChannelPipeline.java
@Override
    public final ChannelPipeline fireChannelActive() {
        AbstractChannelHandlerContext.invokeChannelActive(head);
        return this;
    }
AbstractChannelHandlerContext.invokeChannelActive方法就不看了,就是調用參數的channelActive。由於參數是head,那麼我們去看channelActive方法。
DefaultChannelPipeline.java
@Override
        public void channelActive(ChannelHandlerContext ctx) throws Exception {
            ctx.fireChannelActive();

            readIfIsAutoRead();
        }

private void readIfIsAutoRead() {
            if (channel.config().isAutoRead()) {
                channel.read();
            }
        }
調用的是channel.read(),channel是NioServerSocketChannel,它的實現是在父類AbstractChannel.java裏面
@Override
    public Channel read() {
        pipeline.read();
        return this;
    }
DefaultChannelPipeline.java
@Override
    public final ChannelPipeline read() {
        tail.read();
        return this;
    }
AbstractChannelHandlerContext.java
@Override
    public ChannelHandlerContext read() {
        final AbstractChannelHandlerContext next = findContextOutbound();
        EventExecutor executor = next.executor();
        if (executor.inEventLoop()) {
            next.invokeRead();
        } else {
            ...
        }

        return this;
    }

private AbstractChannelHandlerContext findContextOutbound() {
        AbstractChannelHandlerContext ctx = this;
        do {
            ctx = ctx.prev;
        } while (!ctx.outbound);
        return ctx;
    }
首先要尋找findContextOutbound,由於head的inbound=false,outbound=true,所以next=head,那麼就是調用head的read方法,如下:
DefaultChannelPipeline.java
@Override
        public void read(ChannelHandlerContext ctx) {
            unsafe.beginRead();
        }
AbstractChannel.java
@Override
        public final void beginRead() {
            assertEventLoop();

            if (!isActive()) {
                return;
            }

            try {
                doBeginRead();
            } catch (final Exception e) {
                ...
            }
        }
直接看doBeginRead()
AbstractNioChannel.java
@Override
    protected void doBeginRead() throws Exception {
        // Channel.read() or ChannelHandlerContext.read() was called
        final SelectionKey selectionKey = this.selectionKey;
        if (!selectionKey.isValid()) {
            return;
        }

        readPending = true;

        final int interestOps = selectionKey.interestOps();
        if ((interestOps & readInterestOp) == 0) {
            selectionKey.interestOps(interestOps | readInterestOp);
        }
    }
還記得我們初始化NioServerSocketChannel的時候,我們傳給父類的readInterestOp嗎?沒錯,就是SelectionKey.OP_ACCEPT,如下:
public NioServerSocketChannel(ServerSocketChannel channel) {
        super(null, channel, SelectionKey.OP_ACCEPT);
        config = new NioServerSocketChannelConfig(this, javaChannel().socket());
    }

protected AbstractNioChannel(Channel parent, SelectableChannel ch, int readInterestOp) {
        super(parent);
        this.ch = ch;
        this.readInterestOp = readInterestOp;

                ...
}
上面doReadBegin就是把我們設置的readInterestOp重新設置到java selector上面,代表我們監聽的類型是SelectionKey.OP_ACCEPT,不在是最開始的0了。
到這裏,initAndRegister方法就基本講完了,再貼一次它的代碼,加深下印象。
final ChannelFuture initAndRegister() {
        Channel channel = null;
        try {
            channel = channelFactory.newChannel(); //1. 實例化NioServerSocketChannel
            init(channel); //2. 初始化
        } catch (Throwable t) {
        }

        ChannelFuture regFuture = config().group().register(channel); //3. 註冊selector到Java channel上面,註冊類型是0
        if (regFuture.cause() != null) {
            if (channel.isRegistered()) {
                channel.close();
            } else {
                channel.unsafe().closeForcibly();
            }
        }

        return regFuture;
    }
我們再來回憶一下initAndRegister方法
1. 實例化NioServerSocketChannel對象,channelFactory.newChannel()
a. 傳入父類的ops是SelectionKey.OP_ACCEPT
b. 它的父類AbstractNioChannel把channel設置成非阻塞,然後把SelectionKey.OP_ACCEPT存起來
c. 父類AbstractChannel初始化了ChannelId
d. AbstractChannel初始化了unsafe,類型是NioMessageUnsafe。
e. AbstractChannel初始化了pipeline,類型是DefaultChannelPipeline,每個channel都有自己的pipleline,它維護了channelHandler列表,如果有事件發生,那麼pipeline就負責把事件從頭傳到尾。
2. init方法
a. 它是在子類ServerBootstrap裏面實現,子類Bootstrap實現的是客戶端的。
b. setOptions()設置屬性,類型有很多,不同的業務場景可以設置不同的屬性。
c. addLast把我們設置的channelHandler添加到pipeline
d. 實例化了一個ServerBootstrapAcceptor,裏面封裝了childChannel,也添加到pipeline裏面
3. register
a. register調用的是bossGroup NioEventLoopGroup的register方法,NioEventLoopGroup regitster方法調用的next().regitster,next()調用chooser.next.
b. chooser有兩種PowerOfTwoEventExecutorChooser和GenericEventExecutorChooser,它們負責選擇NioEventLoopGroup裏面下一個NioEventLoop(NioEventLoopGroup裏面有nThreads個NioEventLoop,nThreads表示線程數,默認是cpu*2)
c. NioEventLoop.register調用的是它的父類SingleThreadEventLoop.register,所以它調用的是unsafe.register。從上面的初始化就可以知道,unsafe指的是NioMessageUnsafe,所以調用的是NioMessageUnsafe.register
d. NioMessageUnsafe並沒有實現register,所以調用的是它的父類AbstractUnsafe.regitster,然後調用register0
e. 在doRegitster裏面把selector註冊到Java的channel,key=0
f. 調用pipeline.fireChannelRegistered(),通知pipeline維護的channelHander,channel已經註冊了,回調了它們的channelRegitstered方法。
那initAndRegister就講完了,bind過程還沒有結束,因爲篇幅有點多了,下一篇繼續介紹doBind0:
private ChannelFuture doBind(final SocketAddress localAddress) {
        final ChannelFuture regFuture = initAndRegister(); //1. 這一篇的內容
        final Channel channel = regFuture.channel();
        if (regFuture.cause() != null) {
            return regFuture;
        }

        if (regFuture.isDone()) {
            // At this point we know that the registration was complete and successful.
            ChannelPromise promise = channel.newPromise();
            doBind0(regFuture, channel, localAddress, promise); //2. 下一篇講doBind0()
            return promise;
        } else {
            ...
            });
            return promise;
        }
    }