安裝mariadb到/usr/local/下
解壓到該目錄
# tar xf mariadb-5.5.36-linux-x86_64.tar.gz -C /usr/local/
爲後期方便升級使用給mariadb-5.5.36-linux-x86_64創個鏈接
# ln -sv mariadb-5.5.36-linux-x86_64/ mysql
mysql的數據庫文件默認是在/usr/local/mysql/data/下的,隨着數據的增加,放這裏不妥。創建邏輯捲來存放數據,以便後期隨時擴展,創建好邏輯卷後掛載到/mydata/data/下。
mysql是由root啓動後以普通用戶mysql的身份來運行的,故添加系統組,系統用戶:mysql,mysql。
修改/mydata/data/目錄的屬主屬組
# chown -R mysql.mysql /mydata/data/
# cd /usr/local/mysql
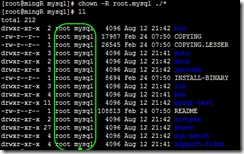
修改裏面的所有文件屬主root屬組mysql:
# chown -R root.mysql ./*
mysql的初始化:
因爲在/etc/下已存在 my.cnf。所有新建
# mkdir /etc/mysql。
複製配置文件
# cp support-files/my-large.cnf /etc/mysql/my.cnf並編輯# vim /etc/mysql/my.cnf
cd到/usr/local/mysql /下,要依賴此目錄下的./bin。初始化數據庫的腳本執行
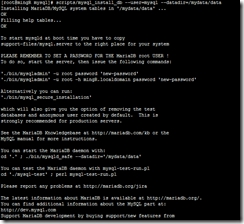
# scripts/mysql_install_db --user=mysql --datadir=/mydata/data
數據庫已經生成
# ls /mydata/data
複製服務腳本
# cp support-files/mysql.server /etc/rc.d/init.d/mysqld
加到服務列表中
# chkconfig --add mysqld
啓動服務
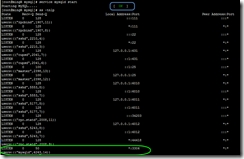
# service mysqld start
此時還不能用mysql客戶端,因爲沒有添加環境變量
# vim /etc/profile.d/mysql.sh
# source /etc/profile.d/mysql.sh
導出頭文件
# ln -sv /usr/local/mysql/include/ /usr/include/mysql
更新版本客戶端庫
# vim /etc/ld.so.conf.d/mysql.conf
編譯安裝httpd,httpd程序依賴於apr和apr-util,故下載源碼httpd-2.4.9.tar.bz2和apr-1.5.0.tar.bz2 ,apr-util-1.5.3.tar.bz2
先安裝apr,解壓
# tar xf apr-1.5.0.tar.bz2
cd到apr-1.5.0
執行
# ./configure –prefix=/usr/local/apr
# make && make install;
然後安裝apr-util
# tar apr-util-1.5.3.tar.bz2
# cd apr-util-1.5.3
# ./configure –prefix=/usr/local/apr-util –with-apr=/usr/local/apr
# make && make install;
編譯安裝httpd
# tar xf httpd-2.4.9.tar.bz2
# cd httpd-2.4.9
#  ./configure --prefix=/usr/local/apache --sysconfdir=/etc/httpd24
--enable-so --enable-ssl --enable-cgi --enable-rewrite --with-zlib --with-pcre
--with-apr=/usr/local/apr --with-apr-util=/usr/local/apr-util
--enable-modules=most --enable-mpms-shared=all --with-mpm=event
#  make && make install。
配置http的啓動;
# cd /etc/httpd24
爲保險備份一份httpd.conf
# cp httpd.conf httpd.conf.bak
編輯httpd.conf
# vim httpd.conf
編輯
# vim /etc/rc.d/init.d/httpd24
提供SysV服務腳本到/etc/rc.d/init.d/httpd24
爲其加執行權限
# chmod +x /etc/rc.d/init.d/httpd24
添加至服務列表中
# chkconfig --add httpd24
啓動
# service http24 start.
編譯安裝php:
首先解決依賴關係,安裝各包組和包
# yum -y groupinstall "Desktop Platform Development" # yum -y install
bzip2-devel libmcrypt-devel
# cd php-5.4.26
# ./configure --prefix=/usr/local/php --with-mysql=/usr/local/mysql
--with-openssl --with-mysqli=/usr/local/mysql/bin/mysql_config --enable-mbstring
--with-freetype-dir --with-jpeg-dir --with-png-dir --with-zlib
--with-libxml-dir=/usr --enable-xml  --enable-sockets
--with-apxs2=/usr/local/apache/bin/apxs --with-mcrypt
--with-config-file-path=/etc --with-config-file-scan-dir=/etc/php.d --with-bz2
--enable-maintainer-zts
# make && make install
# cd /etc/httpd24
# vim httpd.conf
添加
     AddType application/x-httpd-php  .php
     AddType application/x-httpd-php-source  .phps
找到 DirectoryIndex index.html 修改爲 DirectoryIndex index.php index.html
# cp php.ini-production /etc/php.ini
重新載入
# service httpd24 reload即可
測試下php
# cd /usr/local/apache/htdocs/
# vim index.html
# mv index.html index.php


