


一、Supervisor簡介
supervisor是一個Linux/Unix系統上的進程監控工具,supervisor是一個Python開發的通用的進程管理程序,可以管理和監控Linux上面的進程,能將一個普通的命令行進程變爲後臺daemon,並監控進程狀態,異常退出時能自動重啓。不過同daemontools一樣,它不能監控daemon進程

1. yum安裝supervisor

    yum install -y epel-release supervisor

2. 生成配置文件

    echo_supervisord_conf > /etc/supervisord.conf

3. 編輯配置文件
```
    [unix_http_server]
file=/var/run/supervisor/supervisor.sock   ; (the path to the socket file)
[inet_http_server]         ; inet (TCP) server disabled by default
port=*:9001        ; (ip_address:port specifier, *:port for all iface)
[supervisord]
logfile=/var/log/supervisor/supervisord.log  ; (main log file;default $CWD/supervisord.log)
logfile_maxbytes=50MB       ; (max main logfile bytes b4 rotation;default 50MB)
logfile_backups=10          ; (num of main logfile rotation backups;default 10)
loglevel=info               ; (log level;default info; others: debug,warn,trace)
pidfile=/var/run/supervisord.pid ; (supervisord pidfile;default supervisord.pid)
nodaemon=false              ; (start in foreground if true;default false)
minfds=1024                 ; (min. avail startup file descriptors;default 1024)
minprocs=200                ; (min. avail process descriptors;default 200)
[rpcinterface:supervisor]
supervisor.rpcinterface_factory = supervisor.rpcinterface:make_main_rpcinterface
[supervisorctl]
serverurl=unix:///var/run/supervisor/supervisor.sock ; use a unix:// URL  for a unix socket
[include]
files = /etc/supervisord.d/*.conf                    ; 注意寫絕對路徑
```
4. 啓動supervisord,設置開機啓動

    supervisord -c /etc/supervisord.conf

    echo "supervisord -c /etc/supervisord.conf" >> /etc/rc.local
    chmod +x /etc/rc.d/rc.local

5. 訪問supervisor的web界面

    http://ip:9001

6. 添加管理進程的配置文件,存放在/etc/supervisord.d/
```
    [program:elasticsearch]
command = /usr/local/elasticsearch/bin/elasticsearch            ; 程序的啓動目錄
user=elk                               ; 使用什麼用戶啓動
priority=10                            ; 優先級,默認999 數字越小優先級越高
numprocs=1                             ; 啓動幾個進程
autostart=true                         ; 隨着supervisord的啓動而啓動
autorestart=true                       ; 異常退出後,自動重啓
startrestries=3                        ; 啓動失敗時的最多重試次數
redirect_stderr=true                   ; 重定向stderr到stdout
stdout_logfile_maxbytes = 20MB         ; stdout 日誌文件大小,默認 50MB
stdout_logfile_backups = 10            ; stdout 日誌文件備份數
stdout_logfile = /home/logs/supervisor/elasticsearch_stdout.log   ; 日誌文件
```
展示圖: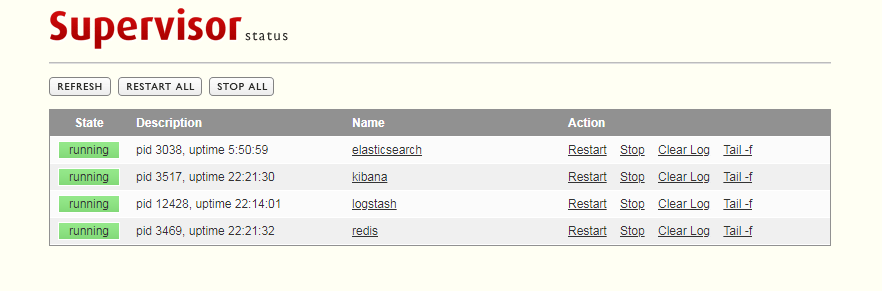
二、Cesi 簡介

CeSi 是 Supervisor 官方推薦的集中化管理 Supervisor 實例的 Web UI,該工具是用 Python 編寫,基於 Flask Web 框架 。

Superviosr 自帶的 Web UI 不支持跨機器管理
Supervisor 進程,功能比較簡單,通過 CeSi 可以集中管理各個服務器節點的進程,在 Web 界面就可以輕鬆管理各個服務的啓動、關閉、重啓等,很方便使用。

1. 安裝依賴

    yum install -y git wget epel-release python34 python34-pip npm bzip2

    npm install -g n (升級node到最新版)
    n latest
    curl --silent --location https://dl.yarnpkg.com/rpm/yarn.repo | sudo tee /etc/yum.repos.d/yarn.repo
    yum install -y yarn (安裝yarn)

2. 安裝cesi (參考官網教程)
```
    export CESI_SETUP_PATH=/opt/cesi
mkdir ${CESI_SETUP_PATH}
cd ${CESI_SETUP_PATH}
wget https://github.com/gamegos/cesi/releases/download/v2.6.7/cesi-extended.tar.gz -O cesi.tar.gz
tar -xvf cesi.tar.gz
python3 -m venv venv
source venv/bin/activate
pip3 install -r requirements.txt
deactivate
cd ${CESI_SETUP_PATH}/cesi/ui
yarn install
yarn build
注意修改/etc/cesi.conf.toml 和 /etc/systemd/system/cesi.service
cp ${CESI_SETUP_PATH}/defaults/cesi.conf.toml /etc/cesi.conf.toml
vi /etc/cesi.conf.toml
[cesi]
database = "sqlite:///users.db" # Relative path
activity_log = "activity.log" # File path for CeSI logs
admin_username = "admin" # Username of admin user
admin_password = "admin" # Password of admin user
[[nodes]]
name = "node1"
environment = ""
username = ""
password = ""
host = "172.16.16.75"
port = "9001"
[[nodes]]
name = "node2"
environment = ""
username = "admin"
password = "btr2014"
host = "172.16.8.12"
port = "9001"
cp ${CESI_SETUP_PATH}/defaults/cesi.service /etc/systemd/system/cesi.service
vi /etc/systemd/system/cesi.service
[Unit]
Description=cesi
[Service]
Environment=
ExecStart=/root/cesi/venv/bin/python3 /root/cesi/cesi/run.py --config-file /etc/cesi.conf.toml
ExecReload=/bin/kill -HUP $MAINPID
KillSignal=TERM
User=root
WorkingDirectory=/root/cesi
Restart=on-failure
[Install]
WantedBy=multi-user.target
systemctl daemon-reload
systemctl start cesi
展示圖:
