1.在兩臺充當數據庫服務器上安裝mysql並建立主從,添加授權賬戶
1)yum安裝mysql數據庫
[root@localhost ~]# yum install mariadb mariadb-server -y2)修改master數據庫配置文件
[root@localhost ~]# vim /etc/my.cnf
[mysqld]
server_id=1    #主id號
log_bin=/data/binlog/bin  #開啓二進制日誌記錄並指定保存路徑
innodb_file_per_table  #每個表保存在單個文件
datadir=/var/lib/mysql  #數據可路徑
socket=/var/lib/mysql/mysql.sock  #套接字路徑
……
3)開啓主服務數據庫並添加授權用戶
[root@localhost ~]# systemctl start mariadb
[root@localhost ~]# mysql -uroot -h127.0.0.1
    添加從服務授權用戶:
         MariaDB [(none)]> grant replication slave  on *.* to user1@'192.168.1.106' identified by '123456';
    創建wordpress專用數據庫:
        MariaDB [(none)]> create database boss;
    添加wordpress授權用戶:
         MariaDB [(none)]> grant all on boss.* to boss@'192.168.1.%' identified by '123456';
4)修改從服務數據庫配置文件
[mysqld]
server_id=2  #從服務的id號
read_only   #只讀模式不允許修改數據內容
innodb_file_per_table
datadir=/var/lib/mysql
socket=/var/lib/mysql/mysql.sock
…..
5)開啓從mysql數據庫並添加主從關係
[root@localhost ~]# systemctl start mariadb
[root@localhost ~]# msyql
MariaDB [(none)]> change master to
master_host='192.168.1.9',
master_user='user1',
master_password='123456',
master_log_file='bin.000005',
master_log_pos=245;
MariaDB [(none)]> start slave;#開啓從服務
MariaDB [(none)]>show slave status\G; #查看主從建立狀態

 lave_IO_State: Waiting for master to send event
                                    Master_Host: 192.168.1.9
                                    Master_User: user1
                                    Master_Port: 3306
                                Connect_Retry: 60
                            Master_Log_File: bin.000007
                    Read_Master_Log_Pos: 245
                             Relay_Log_File: mariadb-relay-bin.000007
                                Relay_Log_Pos: 523
                Relay_Master_Log_File: bin.000007
                         Slave_IO_Running: Yes
                        Slave_SQL_Running: Yes
                            ……
                            ……
2.在兩臺充當調度服務器主機分別編譯安裝haproxy
1).安裝編譯haproxy需要的包
[root@localhost ~]# yum install gcc gcc-c++ glibc glibc-devel pcre pcre-devel openssl openssl-devel systemd-devel net-tools vim iotop bc zip unzip zlib-devel lrzsz tree screen lsof tcpdump wget ntpdate2)解壓並編譯安裝haproxy-1.8.20.tar.gz
[root@localhost ~]# tar  xvf   /data/tools/haproxy/haproxy-1.8.20.tar.gz  -C /data/tools/haproxy/haproxy/

[root@localhost ~]# cd /data/tools/haproxy/haproxy-1.8.20

[root@localhost haproxy-1.8.20]# make  ARCH=x86_64 TARGET=linux2628 USE_PCRE=1 USE_OPENSSL=1 USE_ZLIB=1 USE_SYSTEMD=1  USE_CPU_AFFINITY=1  PREFIX=/usr/local/haproxy
            編譯註釋:
                            ARCH=x86_64:x86_64平臺
                            TARGET=linux2628: linux的內核版本爲 2.6.28, 3.x及以上版本
                            USE_PCRE=1 :支持正則表達
                            USE_ZLIB=1 :支持壓縮
                            USE_SYSTEMD=1:支持systemd啓動服務管理
                            USE_CPU_AFFINITY=1:CUP核心綁定
                            PREFIX=/usr/local/haproxy:安裝路徑

[root@localhost haproxy-1.8.20]# make install PREFIX=/usr/local/haproxy
3)複製二進制執行程序至/usr/sbin中
[root@localhost haproxy-1.8.20]# cp haproxy /usr/sbin/4)創建systemd啓動腳本
[root@localhost haproxy-1.8.20]# vim /usr/lib/systemd/system/haproxy.service

[Unit]
Description=HAproxy Load Balancer
After=syslog.target network.target

[Service]
 ExecStartPre=/usr/sbin/haproxy -f /etc/haproxy/haproxy.cfg -c -q
 ExecStart=/usr/sbin/haproxy -Ws -f /etc/haproxy/haproxy.cfg -p /run/haproxy.pid
 ExecStop=/bin/kill -USR2 $MAINPID

[Install]
 WantedBy=multi-user.target
5)創建haproxy服務器啓動用戶
[root@localhost ~]# useradd -r -s  /sbin/nologin haproxy -u 88
[root@localhost ~]# groupmod  -g 88  haproxy
6)修改改配置文件
[root@localhost ~]# vim /etc/haproxy/haproxy.cfg
……
uid 88   #執行haproxy的用戶身份
gid 88   #所屬的組
……
listen webpro
bind 192.168.1.23:80  #綁定虛擬VIP及端口
mode tcp
server web1 192.168.1.108:80  #綁定nginx後端服務
server web2 192.168.1.109:80  #綁定nginx後端服務

listen mysql_3306
bind 192.168.1.23:3306
mode tcp
server web3 192.168.1.9:3306  #綁定mysql數據庫
7)啓動haproxy調度服務
[root@localhost ~]# systemctl start haproxy3.在兩臺充當調度服務器主機分別安裝keepalived並配置
1)yum安裝
[root@localhost ~]# yum insatll keepallived -y2)修改配置文件
! Configuration File for keepalived

global_defs {
     notification_email {
         [email protected]
         [email protected]
         [email protected]
     }
     notification_email_from [email protected]
     smtp_server 192.168.200.1
     smtp_connect_timeout 30
     router_id s1
     vrrp_skip_check_adv_addr
     #vrrp_strict
     vrrp_garp_interval 0
     vrrp_gna_interval 0
}

vrrp_instance VIP1 {
        state MASTER                     #另外一臺主機改爲BACKUP
        interface ens33
        virtual_router_id 23
        priority 100                 #另外一臺備份服務優先級改爲80,要不比100低
        advert_int 2
        authentication {
                auth_type PASS
                auth_pass 1111
        }
        virtual_ipaddress {
        192.168.1.23 dev ens33 label ens33:0
             }
        unicast_src_ip 192.168.1.110            #另外一臺備份服務的單播  ip位置與master的ip位置對調
 unicast_peer {
        192.168.1.107
                                    }

}
3) 啓動keepalived
[root@localhost ~]# systemctl start keepalived4.在兩臺後端服務器主機上編譯安裝nginx
1)解壓nginx-1.14.2.tar.gz源碼壓縮文件
[root@localhost tools]# tar xvf nginx-1.14.2.tar.gz
[root@localhost tools]# cd nginx-1.14.2/
2)準備nginx的 編譯環境
 [root@localhost nginx-1.14.2]# yum install -y vim lrzsz tree screen psmisc lsof tcpdump wget  ntpdate  gcc gcc-c++ glibc glibc-devel
pcre pcre-devel openssl  openssl-devel systemd-devel net-tools iotop bc  zip unzip zlib-devel bash-completion
nfs-utils automake libxml2  libxml2-devel libxslt libxslt-devel perl perl-ExtUtils-Embed
     若出現以下不能解決依賴包關係,需要配置yum倉庫,需添加update下載倉庫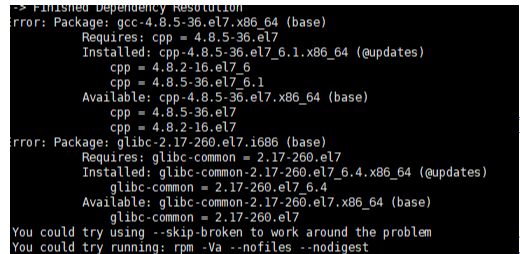
        [root@localhost nginx-1.14.2]# vim /etc/yum.repos.d/base.repo
             ……
             ……
            [update]
            name=aliyun_centos_update
            baseurl=https://mirrors.aliyun.com/centos/7.6.1810/updates/x86_64/
            gpgcheck=0
3)編譯安裝nginx
[root@localhost nginx-1.14.2]# ./configure --prefix=/apps/nginx  --user=nginx   --group=nginx  --with-http_ssl_module --with-http_v2_module
--with-http_realip_module --with-http_stub_status_module   --with-http_gzip_static_module --with-pcre --with-stream
--with-stream_ssl_module --with-stream_realip_module --with--http_perl_module
[root@localhost nginx-1.14.2]#  make&&make install
4)創建nginx的進程啓動用戶
[root@centos7 ~]# useradd -r -s /sbin/nologin nginx -u 235)創建自定義腳本文件
[root@centos7 ~]#vim /usr/lib/systemd/system/nginx.service

[Unit]
Description=The nginx HTTP and reverse proxy server
After=network.target remote-fs.target nss-lookup.target

[Service]
Type=forking
PIDFile=/apps/nginx/logs/nginx.pid
  # Nginx will fail to start if /run/nginx.pid already exists but has the wrong
 # SELinux context. This might   happen when running `nginx -t` from the cmdline.  https://bugzilla.redhat.com/show_bug.cgi?id=1268621
ExecStartPre=/usr/bin/rm -f /apps/nginx/logs/nginx.pid
ExecStartPre=/apps/nginx/sbin/nginx -t
ExecStart=/apps/nginx/sbin/nginx
ExecReload=/bin/kill -s HUP $MAINPID
#KillSignal=SIGQUIT
#TimeoutStopSec=5
KillMode=process
PrivateTmp=true

[Install]
WantedBy=multi-user.target
6)測試nginx是否能啓動
[root@centos7 ~]#systemctl start nginx
[root@centos7 ~]#systemctl status nginx
● nginx.service - The nginx HTTP and reverse proxy server
     Loaded: loaded (/usr/lib/systemd/system/nginx.service; disabled; vendor preset: disabled)
     Active: active (running) since Wed 2019-06-12 10:57:07 CST; 1s ago
    Process: 8875 ExecStart=/apps/nginx/sbin/nginx (code=exited, status=0/SUCCESS)
5.兩臺端服務nginx編譯安裝php-7.3.2.tar.xz
1)安裝php的編譯環境
[root@centos7 ~]#yum install libxml2-devel bzip2-devel libmcrypt-devel2)解壓php-7.3.2.tar.xz
[root@centos7 ~]#cd /data/php
[root@centos7 php]# tar xvf php-7.3.2.tar.xz
3)編譯安裝
[root@centos7 php]# cd php-7.3.5/

[root@centos7 php-7.3.2]# ./configure --prefix=/app/php --enable-mysqlnd --with-mysqli=mysqlnd --with-pdo-mysql=mysqlnd --with-openssl --with-freetype-dir --with-jpeg-dir --with-png-dir --with-zlib --with-libxml-dir=/usr --with-config-file-path=/etc --with-config-file-scan-dir=/etc/php.d --enable-mbstring --enable-xml --enable-sockets --enable-fpm --enable-maintainer-zts --disable-fileinfo

[root@centos7 php-7.3.2]# make  && make install
4)設置fcgi-php的三個配置文件和一個服務腳本文件:
主配置:/app/php/etc/php-fpm.conf
子配置:/app/php/etc/php-fpm.d/ www.conf
修改時區配置文件: /etc/php.ini
腳本文件:/etc/init.d/php-fpm

[root@centos7 php-7.3.2]# cp php.ini-production  /etc/php.ini

[root@centos7 php-7.3.2]# cp sapi/fpm/init.d.php-fpm /etc/init.d/php-fpm

[root@centos7 php-7.3.2]# chmod +x /etc/init.d/php-fpm  #腳本文件添加執行權限

[root@centos7 php-7.3.2]# cd /app/php/etc/
[root@centos7 etc]# cp php-fpm.conf.default    php-fpm.conf  #主配置文件不需要修改
[root@centos7 etc]# cd /app/php/etc/php-fpm.d/    #修改子配置文件

[root@centos7 php-fpm.d]# cp www.conf.default www.conf
[root@centos7 php-fpm.d]# vim www.conf
user = nginx      #進程啓動用戶爲nginx
group =nginx    #屬組爲nginx組
listen = 127.0.0.1:9000  #監聽本地9000端口
5)啓動php-fpm服務
[root@centos7 php-fpm.d]# service php-fpm start6.兩臺後端服務nginx的wordpress初始化
1)將wordpress壓縮文件的wordpress目錄壓到nginx的根域目錄下
[root@centos7 tools]# tar xvf wordpress-5.0.3-zh_CN.tar.gz -C /apps/nginx/html/2)修改屬主和屬組爲nginx用戶
[root@centos7 html]# chown -R nginx.nginx wordpress/3)修改wordpress的配置文件填入數據庫信息
[root@centos7 wordpress]#cp   wp-config-sample.php    wp-config.php
[root@centos7 wordpress]#vim wp-config.php
// ** MySQL 設置 - 具體信息來自您正在使用的主機 ** //
/** WordPress數據庫的名稱 */
define('DB_NAME', 'boss');

/** MySQL數據庫用戶名 */
define('DB_USER', 'boss');

/** MySQL數據庫密碼 */
define('DB_PASSWORD', '123456');

/** MySQL主機 */
define('DB_HOST', '192.168.1.23');    #虛擬VIP

/** 創建數據表時默認的文字編碼 */
define('DB_CHARSET', 'utf8');

/** 數據庫整理類型。如不確定請勿更改 */
define('DB_COLLATE', '');
……
……
4)將wordpress整個目錄複製到另一臺後端服務
[root@centos7 html]# scp -p -r wordpress/* 192.168.1.109:/apps/nginx/html/5)修改nginx的配置文件並重啓nginx
[root@centos7 html]#vim /apps/nginx/conf/nginx.conf
……
location / {
                root  html/wordpress;
                index  index.php index.html index.htm;
                }
                location ~ \.php$ {
                 root        /apps/nginx/html/wordpress;
                 fastcgi_pass  127.0.0.1:9000;
                 fastcgi_index  index.php;
                 fastcgi_param  SCRIPT_FILENAME  $document_root$fastcgi_script_name;
                 include      fastcgi_params;
                 }
……

[root@centos7 html]# systemctl restart nginx
7.在NFS存儲服務器上創建共享文件
1)安裝nfs-utils
[root@localhost ~]# yum install nfs-utils -y2)修改配置文件添加共享文件
[root@localhost ~]# vim /etc/exports
/data/NFS/ 192.168.1.108(rw,no_root_squash) 192.168.1.109(rw,no_root_squash)
3)啓動共享服務
[root@localhost ~]# systemctl start nfs4)查看開啓的共享目錄
[root@localhost ~]# exportfs -v
/data/NFS       192.168.1.108(sync,wdelay,hide,no_subtree_check,sec=sys,rw,secure,no_root_squash,no_all_squash)
/data/NFS       192.168.1.109(sync,wdelay,hide,no_subtree_check,sec=sys,rw,secure,no_root_squash,no_all_squash)
8.將NFS共享文件掛載到兩臺後端的wordpress的uploads目錄下,實現兩臺後端服務圖片文件共享
mount 192.168.1.101/data/NFS /apps/nginx/html/wordpress/wp-content/uploads9.wordpress瀏覽器訪問測試