


Nginx+Lua生成最新文件下載鏈接
背景介紹:
要求Nginx提供一個固定的下載接口,比如:xxx.xxx.com/download,然後這個地址會跳轉的最新版本的軟件包下載地址,這樣的話請求xxx.xxx.com/download就能下載到最新版本的軟件包。
- Nginx編譯安裝添加lua模塊
[root@172-16-1-209 tools]# wget http://luajit.org/download/LuaJIT-2.0.4.tar.gz
[root@172-16-1-209 tools]# tar xf LuaJIT-2.0.5.tar.gz
[root@172-16-1-209 tools]# cd LuaJIT-2.0.5
[root@172-16-1-209 LuaJIT-2.0.5]# make PREFIX=/usr/local/luajit && make install PREFIX=/usr/local/luajit
[root@172-16-1-209 LuaJIT-2.0.5]# cd ..
[root@172-16-1-209 tools]# wget https://github.com/simpl/ngx_devel_kit/archive/v0.3.0.tar.gz
[root@172-16-1-209 tools]# tar xf v0.3.0.tar.gz
[root@172-16-1-209 tools]# mv ngx_devel_kit-0.3.0 /usr/src/
[root@172-16-1-209 tools]# mv lua-nginx-module-0.10.9rc7 /usr/src/上面是lua模塊,下面是Prometheus監控的相關模塊
[root@172-16-1-209 tools]# tar xf nginx-http-concat.tar.gz
[root@172-16-1-209 tools]# tar xf nginx-module-vts.tar.gz
[root@172-16-1-209 tools]# tar xf nginx-vts-exporter-0.10.3.linux-amd64.tar.gz
[root@172-16-1-209 tools]# tar xf ngx_cache_purge.tar.gz
[root@172-16-1-209 tools]# tar xf pcre-8.44.tar.gz
[root@172-16-1-209 tools]# mv {nginx-http-concat,nginx-module-vts,ngx_cache_purge,nginx-vts-exporter-0.10.3.linux-amd64,pcre-8.44} /usr/src/
[root@172-16-1-209 tools]# tar xf echo-nginx-module.tar.gz
[root@172-16-1-209 tools]# mv echo-nginx-module /usr/src/編譯Nginx
[root@172-16-1-209 tools]# tar xf nginx-1.14.2.tar.gz
[root@172-16-1-209 tools]# cd nginx-1.14.2
[root@172-16-1-209 nginx-1.14.2]# export LUAJIT_LIB=/usr/local/luajit/lib
[root@172-16-1-209 nginx-1.14.2]# export LUAJIT_INC=/usr/local/luajit/include/luajit-2.0
[root@172-16-1-209 nginx-1.14.2]# ./configure --prefix=/usr/local/nginx --user=www --group=www --with-http_stub_status_module --with-http_v2_module --with-http_ssl_module --with-http_gzip_static_module --with-http_realip_module --with-http_flv_module --with-http_mp4_module --with-pcre=/usr/src/pcre-8.44 --with-pcre-jit --with-ld-opt=-ljemalloc --with-ipv6 --add-module=/usr/src/echo-nginx-module --add-module=/usr/src/nginx-http-concat --add-module=/usr/src/nginx-module-vts --add-module=/usr/src/ngx_cache_purge --add-module=/usr/local/ngx_devel_kit-0.3.0 --add-module=/usr/local/lua-nginx-module-0.10.9rc7
[root@172-16-1-209 nginx-1.14.2]# make因爲我Nginx安裝過了,所以我這裏不再make install了我需要把Nginx停了然後替換下重啓nginx
[root@172-16-1-209 nginx-1.14.2]# mv /usr/local/nginx/sbin/nginx{,.old}
[root@172-16-1-209 nginx-1.14.2]# cp -f objs/nginx /usr/local/nginx/sbin/
[root@172-16-1-209 nginx-1.14.2]# echo "/usr/local/LuaJIT/lib" >> /etc/ld.so.conf
[root@172-16-1-209 nginx-1.14.2]# ldconfig
[root@172-16-1-209 nginx-1.14.2]# nginx -V
nginx version: nginx/1.14.2
built by gcc 4.8.5 20150623 (Red Hat 4.8.5-39) (GCC)
built with OpenSSL 1.0.2k-fips 26 Jan 2017
TLS SNI support enabled
configure arguments: --prefix=/usr/local/nginx --user=www --group=www --with-http_stub_status_module --with-http_v2_module --with-http_ssl_module --with-http_gzip_static_module --with-http_realip_module --with-http_flv_module --with-http_mp4_module --with-pcre=/usr/src/pcre-8.44 --with-pcre-jit --with-ld-opt=-ljemalloc --with-ipv6 --add-module=/usr/src/echo-nginx-module --add-module=/usr/src/nginx-http-concat --add-module=/usr/src/nginx-module-vts --add-module=/usr/src/ngx_cache_purge --add-module=/usr/local/ngx_devel_kit-0.3.0 --add-module=/usr/local/lua-nginx-module-0.10.9rc7平滑切換
kill -USR2 舊的Nginx進程號
[root@172-16-1-209 nginx-1.14.2]# kill -USR2 18789
kill –WINCH 舊的Nginx進程號
[root@172-16-1-209 nginx-1.14.2]# kill -WINCH 18789
- 安裝sockproc
sockproc 是一個服務器程序, 偵測unix socket 或者 tcp socket , 並把收到的命令,傳遞給子進程執行,執行完畢後,把結果返回給客戶端, 我們就讓sockproc 偵測/tmp/shell.sock 的套接口有沒有數據到來
[root@172-16-1-209 tools]# git clone https://github.com/juce/sockproc
[root@172-16-1-209 tools]# cd sockproc
[root@172-16-1-209 sockproc]# make
cc -Wall -Werror -o sockproc sockproc.c
[root@172-16-1-209 sockproc]# ./sockproc /tmp/shell.sock
[root@172-16-1-209 sockproc]# chmod 0666 /tmp/shell.sock - 安裝lua-resty-shell模塊
它是一個很小的庫, 配合openresty 使用, 目的是提供類似於os.execute 或io.popen的功能, 唯一區別它是非阻塞的, 也就是說即使需要耗時很久的命令,你也可以使用它
[root@172-16-1-209 tools]# git clone https://github.com/juce/lua-resty-shell
[root@172-16-1-209 tools]# cd lua-resty-shell
[root@172-16-1-209 lua-resty-shell]# mkdir /usr/local/nginx/conf/lua
[root@172-16-1-209 lua-resty-shell]# cp lib/resty/shell.lua /usr/local/nginx/conf/lua/ - 創建一個lua腳本調用系統命令生成下載頁
[root@172-16-1-209 lua-resty-shell]# cd /usr/local/nginx/conf/lua/
[root@172-16-1-209 lua]# ls
shell.lua
[root@172-16-1-209 lua]# vim url.lua
local shell = require("shell")
local args = {
socket = "unix:/tmp/shell.sock",
}
local status, out, err = shell.execute("ls -lt /usr/local/nginx/html/downloadfile/ |grep -v 'total'|head -n 1|awk '{print $9}'", args)
local url="http://10.100.31.18/download/"..out
ngx.say(url)
創建存放軟件包目錄拷貝測試包
[root@172-16-1-209 lua]# cd ../
[root@172-16-1-209 conf]# cd ../
[root@172-16-1-209 nginx]# mkdir html/downloadfile
[root@172-16-1-209 nginx]# cp temp-20200421.ta.gz html/downloadfile/
- 編輯Nginx配置文件增加下載接口
在HTTP便籤下添加如下配置
lua_package_path "/usr/local/nginx/conf/lua/?.lua;;";
增加下載接口
location /test {
content_by_lua_file conf/lua/url.lua;
} - Nginx重新加載配置文件測試
[root@172-16-1-209 nginx]# nginx -t
nginx: the configuration file /usr/local/nginx/conf/nginx.conf syntax is ok
nginx: configuration file /usr/local/nginx/conf/nginx.conf test is successful
[root@172-16-1-209 nginx]# nginx -s reload
訪問的話會把test下載下來打開看下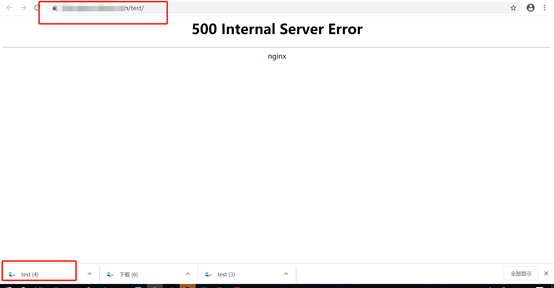


是我們需要的地址,剩下來就簡單了,只要跳轉到這個地址就可以了
- 將url.lua文件中ngx.say改成跳轉
![Nginx+Lua生成最新文件下載鏈接]()
ngx.redirect(url,'302')這裏注意一定要是302做臨時跳轉,因爲軟件包更新鏈接會變化,跳轉地址也要變化,如果301客戶端需要清瀏覽器緩存才能獲取到最新的地址。
- 配置下載鏈接url測試下載
![Nginx+Lua生成最新文件下載鏈接]()
![Nginx+Lua生成最新文件下載鏈接]()


