


根據ES的官方文檔,可以簡單定義以下3點:
1 .一個分佈式的實施文檔存儲,每個字段可以被索引與搜索
2 .一個分佈式實時分析搜索引擎
3 .可以勝任上百個服務節點的擴展,並支持PB級別的結構化或者非結構化數據。
Elasticsearch請求和HTTP請求類似,由以下幾個相同的部件構成
curl -X<VERB>'<PROTOCOL>://<HOST>:<PORT>/<PATH>?<QUERY_STRING>'-d '<BODY>'
|
VERB |
適當的 HTTP 方法 或 謂詞 : GET`、 `POST`、 `PUT`、 `HEAD 或者 `DELETE`。 |
|
PROTOCOL |
http 或者 https`(如果你在 Elasticsearch 前面有一個 `https 代理) |
|
HOST |
Elasticsearch 集羣中任意節點的主機名,或者用 localhost 代表本地機器上的節點。 |
|
PORT |
運行 Elasticsearch HTTP 服務的端口號,默認是 9200 。 |
|
PATH |
API 的終端路徑(例如 _count 將返回集羣中文檔數量)。Path 可能包含多個組件,例如:_cluster/stats 和 _nodes/stats/jvm 。 |
|
QUERY_STRING |
任意可選的查詢字符串參數 (例如 ?pretty 將格式化地輸出 JSON 返回值,使其更容易閱讀) |
|
BODY |
一個 JSON 格式的請求體 (如果請求需要的話) |
以下內容轉載於:https://blog.csdn.net/laoyang360/article/details/51931981
ES Restful API GET、POST、PUT、DELETE、HEAD含義:
1)GET:獲取請求對象的當前狀態。
2)POST:改變對象的當前狀態。
3)PUT:創建一個對象。
4)DELETE:銷燬對象。
5)HEAD:請求獲取對象的基礎信息。
Mysql與Elasticsearch核心概念對比示意圖

以上表爲依據,
ES中的新建文檔(在Index/type下)相當於Mysql中(在某Database的Table)下插入一行數據。
1、新建文檔(類似mysql insert插入操作)
http://localhost:9200/blog/ariticle/1 put
{
"title":"New version of Elasticsearch released!",
"content":"Version 1.0 released today!",
"tags":["announce","elasticsearch","release"]
}
創建成功如下顯示:
{

- "_index": "blog",
- "_type": "ariticle",
- "_id": "1 -d",
- "_version": 1,
- "_shards": {
    - "total": 2,
    - "successful": 1,
    - "failed": 0
- },
- "created": true

}

2、檢索文檔(類似mysql search 搜索select*操作)
http://localhost:9200/blog/ariticle/1/ GET
檢索結果如下:
{

- "_index": "blog",
- "_type": "ariticle",
- "_id": "1",
- "_version": 1,
- "found": true,
- "_source": {
    - "title": "New version of Elasticsearch released!",
    - "content": "Version 1.0 released today!",
    - "tags": [
        - "announce"
        - ,
        - "elasticsearch"
        - ,
        - "release"
    - ]
- }

}
如果未找到會提示:
{

- "_index": "blog",
- "_type": "ariticle",
- "_id": "11",
- "found": false

}
查詢全部文檔如下: 
具體某個細節內容檢索,
查詢舉例1:查詢cotent列包含版本爲1.0的信息。
http://localhost:9200/blog/
_search?pretty&q=content:1.0
{

- "took": 2,
- "timed_out": false,
- "_shards": {
    - "total": 5,
    - "successful": 5,
    - "failed": 0
- },
- "hits": {
    - "total": 1,
    - "max_score": 0.8784157,
    - "hits": [
        - {
            - "_index": "blog",
            - "_type": "ariticle",
            - "_id": "6",
            - "_score": 0.8784157,
            - "_source": {
                - "title": "deep Elasticsearch!",
                - "content": "Version 1.0!",
                - "tags": [
                    - "deep"
                    - ,
                    - "elasticsearch"
                - ]
            - }
        - }
    - ]
- }

}
查詢舉例2:查詢書名title中包含“enhance”字段的數據信息:
[root@5b9dbaaa1a ~]# curl -XGET 10.200.1.121:9200/blog/ariticle/_search?pretty -d ‘
> { "query" : {
> "term" :
> {"title" : "enhance" }
> }
> }'
{
  "took" : 189,
  "timed_out" : false,
  "_shards" : {
  "total" : 5,
  "successful" : 5,
  "failed" : 0
  },
  "hits" : {
  "total" : 2,
  "max_score" : 0.8784157,
  "hits" : [ {
  "_index" : "blog",
  "_type" : "ariticle",
  "_id" : "4",
  "_score" : 0.8784157,
  "_source" : {
  "title" : "enhance Elasticsearch!",
  "content" : "Version 4.0!",
  "tags" : [ "enhance", "elasticsearch" ]
  }
  }, {
  "_index" : "blog",
  "_type" : "ariticle",
  "_id" : "5",
  "_score" : 0.15342641,
  "_source" : {
  "title" : "enhance Elasticsearch for university!",
  "content" : "Version 5.0!",
  "tags" : [ "enhance", "elasticsearch" ]
  }
  } ]
  }
}
查詢舉例3:查詢ID值爲3,5,7的數據信息:
[root@5b9dbaaa148a ~]# curl -XGET 10.200.1.121:9200/blog/ariticle/_search?pretty -d ‘
{ "query" : {
"terms" :
{"_id" : [ "3", "5", "7" ] }
}
}'
{
  "took" : 5,
  "timed_out" : false,
  "_shards" : {
  "total" : 5,
  "successful" : 5,
  "failed" : 0
  },
  "hits" : {
  "total" : 3,
  "max_score" : 0.19245009,
  "hits" : [ {
  "_index" : "blog",
  "_type" : "ariticle",
  "_id" : "5",
  "_score" : 0.19245009,
  "_source" : {
  "title" : "enhance Elasticsearch for university!",
  "content" : "Version 5.0!",
  "tags" : [ "enhance", "elasticsearch" ]
  }
  }, {
  "_index" : "blog",
  "_type" : "ariticle",
  "_id" : "7",
  "_score" : 0.19245009,
  "_source" : {
  "title" : "deep Elasticsearch for university!",
  "content" : "Version 2.0!",
  "tags" : [ "deep", "elasticsearch", "university" ]
  }
  }, {
  "_index" : "blog",
  "_type" : "ariticle",
  "_id" : "3",
  "_score" : 0.19245009,
  "_source" : {
  "title" : "init Elasticsearch for university!",
  "content" : "Version 3.0!",
  "tags" : [ "initialize", "elasticsearch" ]
  }
  } ]
  }
}
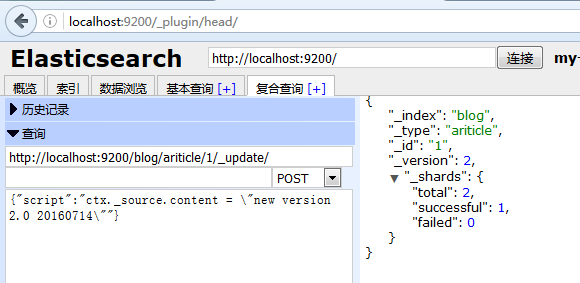
3、更新文檔(類似mysql update操作)
http://localhost:9200/blog/ariticle/1/_update/ POST
{“script”:”ctx._source.content = \”new version 2.0 20160714\”“}
更新後結果顯示:
{
- “_index”: “blog”,
- “_type”: “ariticle”,
- “_id”: “1”,
- “_version”: 2,
- “_shards”: {
- ”total”: 2,
- “successful”: 1,
- “failed”: 0
- }
}
查詢&驗證更新後結果:(對比可知,版本號已經更新完畢)
http://localhost:9200/blog/ariticle/1/
{
- "_index": "blog",
- "_type": "ariticle",
- "_id": "1",
- "_version": 2,
- "found": true,
- "_source": {
- "title": "New version of Elasticsearch released!",
- "content": "new version 2.0 20160714",
- "tags": [
- "announce"
- ,
- "elasticsearch"
- ,
- "release"
- ]
- }
}
```
注意更新文檔需要在elasticsearch_win\config\elasticsearch.yml下新增以下內容:
script.groovy.sandbox.enabled: true
script.engine.groovy.inline.search: on
script.engine.groovy.inline.update: on
script.inline: on
script.indexed: on
script.engine.groovy.inline.aggs: on
index.mapper.dynamic: true
4、刪除文檔(類似mysql delete操作)
http://localhost:9200/blog/ariticle/8/回結果
{

- "found": true,
- "_index": "blog",
- "_type": "ariticle",
- "_id": "8",
- "_version": 2,
- "_shards": {
    - "total": 2,
    - "successful": 1,
    - "failed": 0
- }

}

5、Kibana可視化分析
5.1、在索引blog上查詢包含”university”字段的信息。

5.2、Kibana多維度分析

——————————————————————————————————