from django.shortcuts import render
from django.http import HttpResponse
from django.conf import settings
from django.shortcuts import redirect, reverse
#from .models import User,Article
from datetime import datetime
import argparse
import cv2
import datetime
import grpc
import numpy as np
import os
import sys
import hashlib
from tensorflow import make_tensor_proto, make_ndarray
from tensorflow_serving.apis import predict_pb2
from tensorflow_serving.apis import prediction_service_pb2_grpc
sys.path.append('/root/mysites/goApp')
from client_utils import print_statistics
classes_color_map = [
(150, 150, 150),
(58, 55, 169),
(211, 51, 17),
(157, 80, 44),
(23, 95, 189),
(210, 133, 34),
(76, 226, 202),
(101, 138, 127),
(223, 91, 182),
(80, 128, 113),
(235, 155, 55),
(44, 151, 243),
(159, 80, 170),
(239, 208, 44),
(128, 50, 51),
(82, 141, 193),
(9, 107, 10),
(223, 90, 142),
(50, 248, 83),
(178, 101, 130),
(71, 30, 204)
]
def load_image(file_path):
img = cv2.imread(file_path) # BGR color format, shape HWC
img = cv2.resize(img, (2048, 1024))
img = img.transpose(2,0,1).reshape(1,3,1024,2048)
return img
def index(request):
#users = User.objects.all()
#article = Article.objects.all()
return render(request,'index.html')
def upload(request):
if request.method == 'GET':
return render(request, 'upload.html')
else:
name = request.POST.get('name')
pic = request.FILES.get('avator')
#media_root = settings.MEDIA_ROOT # media
media_root = '/root/mysites/goApp'
allow_upload = settings.ALLOW_UPLOAD # ALLOW_UPLOAD
#path = 'upload/{}_{}_{}/'.format(datetime.datetime.now().year,'{:02d}'.format(datetime.datetime.now().month), '{:02d}'.format(datetime.datetime.now().day))
path = 'upload/'
full_path = media_root + '/' + path
if not os.path.exists(full_path): # 判断路径是否存在
os.makedirs(full_path) # 创建此路径
# 要不要改图片的名字 生成hash
# 这块要不要判断图片类型 .jpg .png .jpeg
# '/../../../myviews/setting.py'
print(pic)
print(full_path)
print(full_path+pic.name)
if pic.name.split('.')[-1] not in allow_upload:
return HttpResponse('fail')
with open(full_path + '/' + pic.name, 'wb') as f:
for c in pic.chunks(): # 相当于切片
f.write(c)
#User.objects.create(name=name, avator=path + pic.name)
#return redirect('index.html')
#return HttpResponse(full_path+pic.name)
return process_detail(request,full_path+pic.name)
def process(request):
options = [('grpc.max_receive_message_length', 100 * 1024 * 1024),('grpc.max_send_message_length', 100 * 1024 * 1024)]
channel = grpc.insecure_channel("{}:{}".format('localhost',9000),options = options)
stub = prediction_service_pb2_grpc.PredictionServiceStub(channel)
batch_size = 1
#TODO
files = os.listdir('/root/mysites/goApp/images')
print(files)
imgs = np.zeros((0,3,1024,2048), np.dtype('<f'))
for i in files:
img = load_image(os.path.join('/root/mysites/goApp/images', i))
imgs = np.append(imgs, img, axis=0) # contains all imported images
iteration = 0
for x in range(0, imgs.shape[0] - batch_size + 1, batch_size):
iteration += 1
request = predict_pb2.PredictRequest()
request.model_spec.name = "semantic-segmentation-adas"
img = imgs[x:(x + batch_size)]
#print("\nRequest shape", img.shape)
request.inputs["data"].CopyFrom(make_tensor_proto(img, shape=(img.shape)))
start_time = datetime.datetime.now()
result = stub.Predict(request, 10.0) # result includes a dictionary with all model outputs print(img.shape)
output = make_ndarray(result.outputs["4455.1"])
for y in range(0,img.shape[0]): # iterate over responses from all images in the batch
img_out = output[y,:,:,:]
print("image in batch item",y, ", output shape",img_out.shape)
img_out = img_out.transpose(1,2,0)
print("saving result to",os.path.join('/root/mysites/goApp/results',str(iteration)+"_"+str(y)+'.jpg'))
out_h, out_w,_ = img_out.shape
#print(out_h)
#print(out_w)
for batch, data in enumerate(output):
classes_map = np.zeros(shape=(out_h, out_w, 3), dtype=np.int)
for i in range(out_h):
for j in range(out_w):
if len(data[:, i, j]) == 1:
pixel_class = int(data[:, i, j])
else:
pixel_class = np.argmax(data[:, i, j])
classes_map[i, j, :] = classes_color_map[min(pixel_class, 20)]
output_str = os.path.join('/root/mysites/goApp/results',str(iteration)+"_"+str(batch)+'.jpg')
cv2.imwrite(output_str,classes_map)
return HttpResponse(output_str)
def process_detail(request,param1):
options = [('grpc.max_receive_message_length', 100 * 1024 * 1024),('grpc.max_send_message_length', 100 * 1024 * 1024)]
channel = grpc.insecure_channel("{}:{}".format('localhost',9000),options = options)
stub = prediction_service_pb2_grpc.PredictionServiceStub(channel)
batch_size = 1
#TODO filepath
output_str='filepath'
imgfile = os.path.join('/root/mysites/goApp/images',param1)
print(imgfile)
img = load_image(imgfile)
imgs = np.zeros((0,3,1024,2048), np.dtype('<f'))
imgs = np.append(imgs, img, axis=0)
request = predict_pb2.PredictRequest()
request.model_spec.name = "semantic-segmentation-adas"
print("\nRequest shape", img.shape)
img = imgs[0:1]
request.inputs["data"].CopyFrom(make_tensor_proto(img, shape=(img.shape)))
result = stub.Predict(request, 10.0) # result includes a dictionary with all model outputs print(img.shape)
output = make_ndarray(result.outputs["4455.1"])
for y in range(0,img.shape[0]): # iterate over responses from all images in the batch
img_out = output[y,:,:,:]
print("image in batch item",y, ", output shape",img_out.shape)
img_out = img_out.transpose(1,2,0)
print("saving result to",os.path.join('/root/mysites/goApp/results',param1+'.result.jpg'))
out_h, out_w,_ = img_out.shape
print(out_h)
print(out_w)
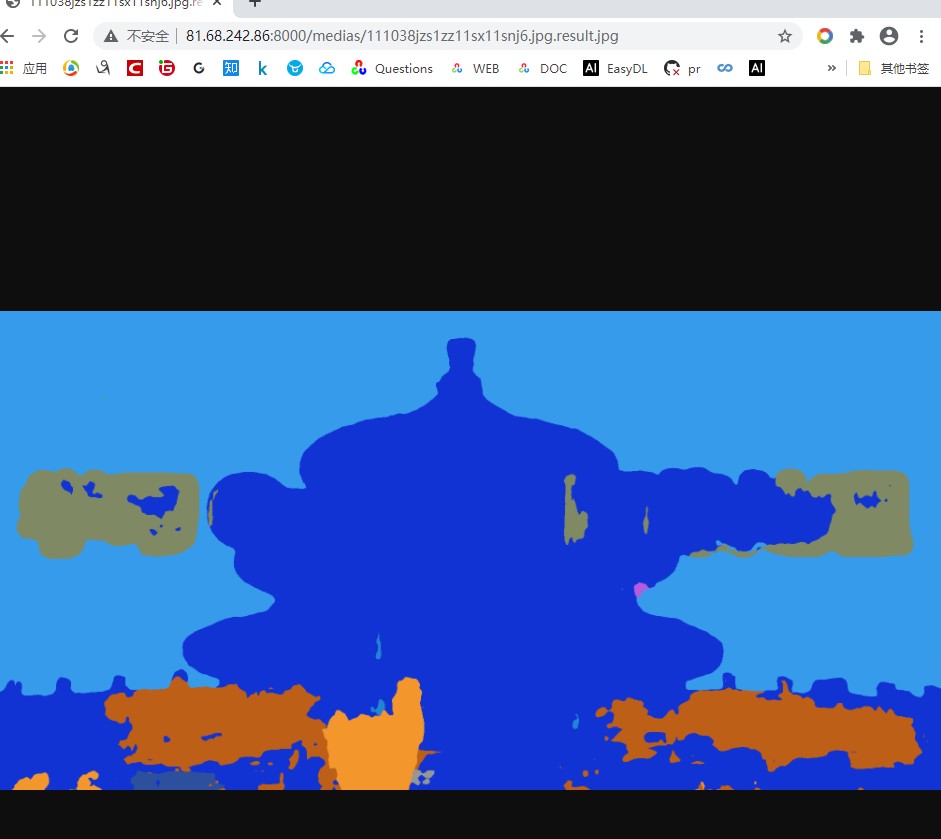
for batch, data in enumerate(output):
classes_map = np.zeros(shape=(out_h, out_w, 3), dtype=np.int)
for i in range(out_h):
for j in range(out_w):
if len(data[:, i, j]) == 1:
pixel_class = int(data[:, i, j])
else:
pixel_class = np.argmax(data[:, i, j])
classes_map[i, j, :] = classes_color_map[min(pixel_class, 20)]
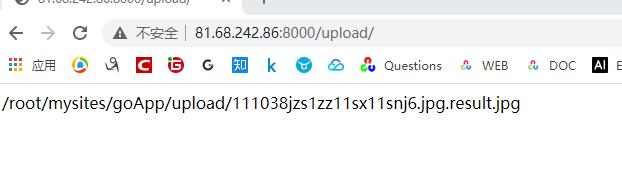
output_str = os.path.join('/root/mysites/goApp/results',param1+'.result.jpg')
cv2.imwrite(output_str,classes_map)
return HttpResponse(output_str)