


一、系統環境:
RedHat6.4(JDK1.8+MySQL5.7.12+SonarQube7.4),win10(SonarScanner4.2)
二、安裝並配置MySQL
1.下載
http://dev.mysql.com/get/Downloads/MySQL-5.7/mysql-5.7.12-1.el6.x86_64.rpm-bundle.tar
2.安裝
安裝前檢查服務器是否已安裝MySQL,如已安裝則將其卸載:
[root@otms_mq04 ~]# rpm -qa|grep mysqlmysql-libs-5.1.71-1.el6.x86_64[root@otms_mq04 ~]# rpm -e --nodeps mysql-libs-5.1.66-2.el6_3.x86_64
將下載的文件解壓:
[root@otms_mq04 ~]# tar -xf mysql-5.7.12-1.el6.x86_64.rpm-bundle.tar
[otms@otms_mq04 software]$ ll
total 960712
-rw-r--r-- 1 otms otms 457492480 Dec 2 11:17 mysql-5.7.12-1.el6.x86_64.rpm-bundle.tar
-rw-r--r-- 1 otms otms 23672176 Mar 29 2016 mysql-community-client-5.7.12-1.el6.x86_64.rpm
-rw-r--r-- 1 otms otms 334040 Mar 29 2016 mysql-community-common-5.7.12-1.el6.x86_64.rpm
-rw-r--r-- 1 otms otms 3765324 Mar 29 2016 mysql-community-devel-5.7.12-1.el6.x86_64.rpm
-rw-r--r-- 1 otms otms 38736700 Mar 29 2016 mysql-community-embedded-5.7.12-1.el6.x86_64.rpm
-rw-r--r-- 1 otms otms 133956388 Mar 29 2016 mysql-community-embedded-devel-5.7.12-1.el6.x86_64.rpm
-rw-r--r-- 1 otms otms 2174152 Mar 29 2016 mysql-community-libs-5.7.12-1.el6.x86_64.rpm
-rw-r--r-- 1 otms otms 1720844 Mar 29 2016 mysql-community-libs-compat-5.7.12-1.el6.x86_64.rpm
-rw-r--r-- 1 otms otms 149101172 Mar 29 2016 mysql-community-server-5.7.12-1.el6.x86_64.rpm
-rw-r--r-- 1 otms otms 104017276 Mar 29 2016 mysql-community-test-5.7.12-1.el6.x86_64.rpm
按照順序依次安裝:
- rpm -ivh mysql-community-common-5.7.12-1.el6.x86_64.rpm
- rpm -ivh mysql-community-libs-5.7.12-1.el6.x86_64.rpm
- rpm -ivh mysql-community-devel-5.7.12-1.el6.x86_64.rpm
- rpm -ivh mysql-community-client-5.7.12-1.el6.x86_64.rpm
- rpm -ivh mysql-community-server-5.7.12-1.el6.x86_64.rpm
不出意外,MySQL應該已經安裝成功。
3.環境變量配置
1)啓動MySQL:service mysqld start
(圖片源自網絡,侵刪)
2)登錄:mysql -u root -p,初次登錄密碼爲空,直接回車:
爲什麼會出現這個錯誤,原因是因爲MySQL5.7中的mysql.user 表中沒有Password字段,所以要以安全方式登錄,然後修改密碼。
解決方法如下:
修改MySQL配置文件:vim /etc/my.cnf,在文件末尾加上:skip-grant-tables,保存後重啓MySQL服務:service mysqld restart,然後重新登錄。

3)修改密碼,用戶密碼是在名爲mysql的database下面:
依次執行以下指令:
mysql> use mysql
mysql> update user set password_expired='N' where user='root’;
mysql> update user set authentication_string=password('root') where user=‘root’;
mysql> flush privileges;
4)注意:一定要將my.cnf配置文件之前加的跳過密碼檢測內容去掉,重啓服務;
5)創建數據庫並授權(爲下面的SonarQube做準備)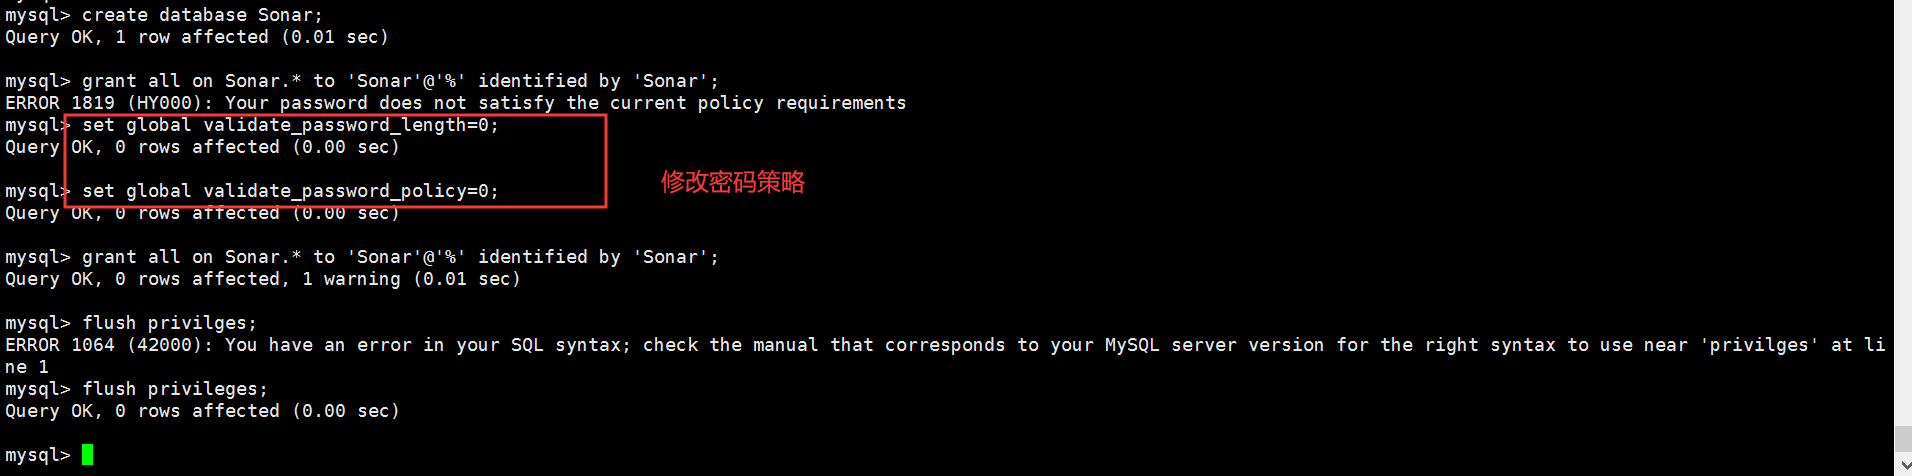
MySQL配置完成。
三、安裝並配置SonarQube
1.下載
https://www.sonarqube.org/downloads/
2.修改環境變量
[root@otms_mq04 ~]# vim /etc/profile
export SONAR_HOME=/home/sonarqube-7.4
[root@otms_mq04 ~]# source /etc/profile
3.修改配置文件
../sonarqube-7.4/conf/sonar.properties
添加以下配置:
sonar.jdbc.username=Sonar
sonar.jdbc.password=Sonar
sonar.jdbc.url=jdbc:mysql://ip:3306/Sonar?useUnicode=true&characterEncoding=utf8&rewriteBatchedStatements=true&useConfigs=maxPerformance&useSSL=false
sonar.web.host=0.0.0.0
sonar.web.port=9000
配置完成後啓動即可,啓動文件:
../sonarqube-7.4/bin/linux-x86-64/sonar.sh
啓動完成後顯示如下信息證明啓動成功。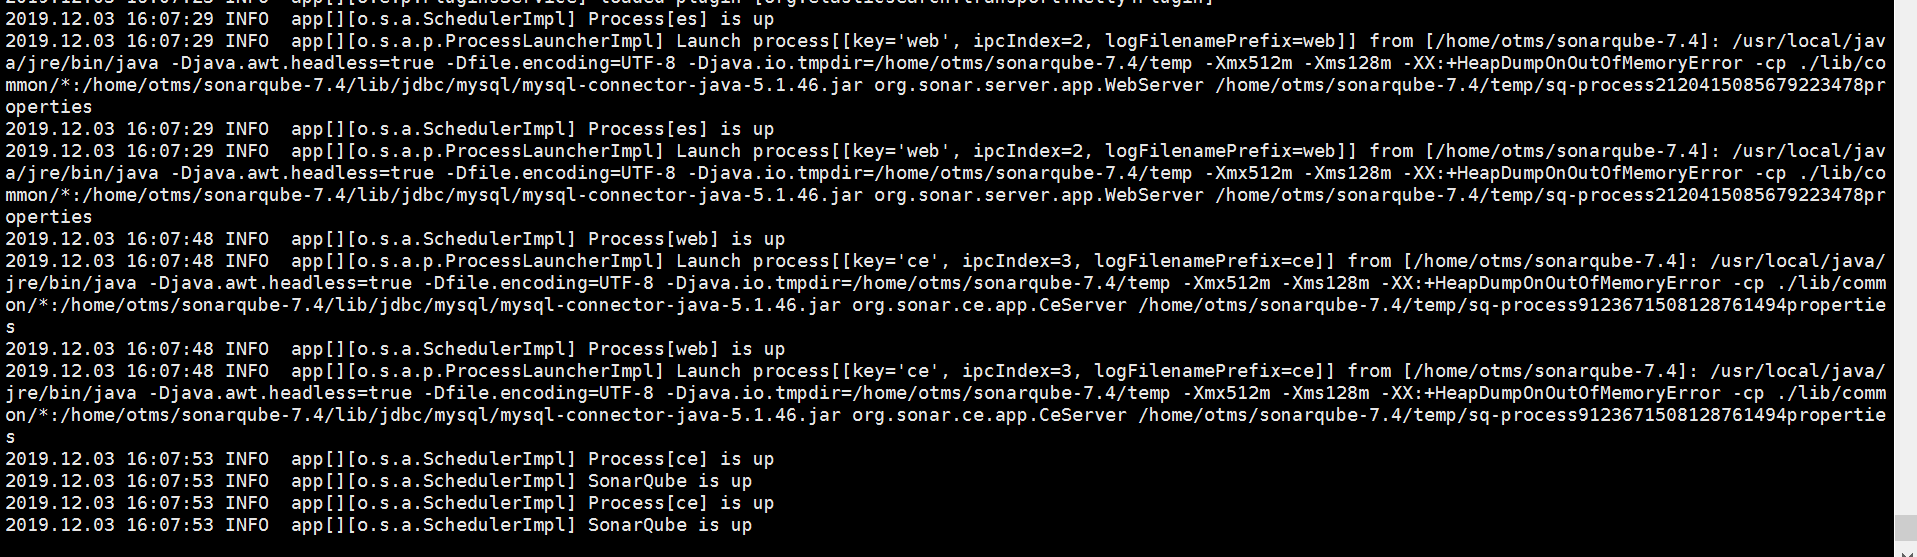
訪問鏈接:http://localhost:9000/ ,默認用戶名密碼:admin/admin
4.中文插件地址(注意安裝版本要和sonar對應):
https://github.com/SonarQubeCommunity/sonar-l10n-zh/releases/tag/sonar-l10n-zh-plugin-1.24
四、安裝並配置SonarScanner
1.下載:
https://docs.sonarqube.org/latest/analysis/scan/sonarscanner/
2.修改環境變量
環境變量→系統變量→Path→新建→scanner路徑(C:\Software\sonar-scanner-cli-4.2.0.1873-windows\sonar-scanner-4.2.0.1873-windows\bin)→保存退出
3.修改配置文件
C:\Software\sonar-scanner-cli-4.2.0.1873-windows\sonar-scanner-4.2.0.1873-windows\conf\sonar-scanner.properties
#Configure here general information about the environment, such as SonarQube server connection details for example
#No information about specific project should appear here#----- Default SonarQube server
#sonar.host.url=http://localhost:9000#----- Default source code encoding
#sonar.sourceEncoding=UTF-8
4.在要分析的項目根目錄下添加sonar-project.properties文件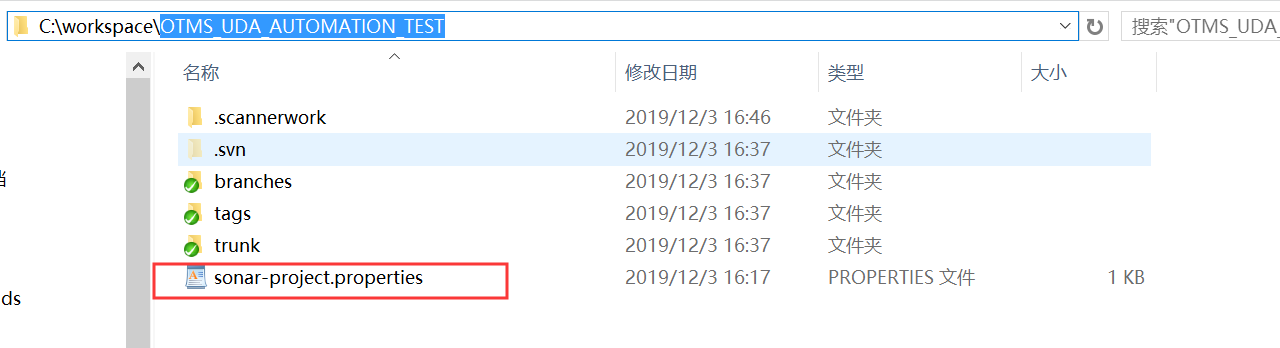
文件內容:
sonar.projectKey=OTMS_UDA_AUTOMATION_TEST
sonar.jdbc.url=jdbc:mysql://ip:3306/Sonar?useUnicode=true&characterEncoding=utf8
sonar.jdbc.username=Sonar
sonar.jdbc.password=Sonarsonar.login=admin
sonar.password=admin#sonar.projectName=My project
#sonar.projectVersion=1.0
#sonar.sources=.
sonar.sourceEncoding=UTF-8
5.啓動SonarScanner分析代碼(此處命令以分析Python代碼爲例)
sonar-scanner.bat -Dsonar.projectKey=OTMS_UDA_AUTOMATION_TEST -Dsonar.sources=C:\workspace\OTMS_UDA_AUTOMATION_TEST -Dsonar.host.url=http://ip:9000 -Dsonar.login=admin -Dsonar.password=admin
完成。