


爲了美化UI,想實現如下圖的效果:點擊高亮
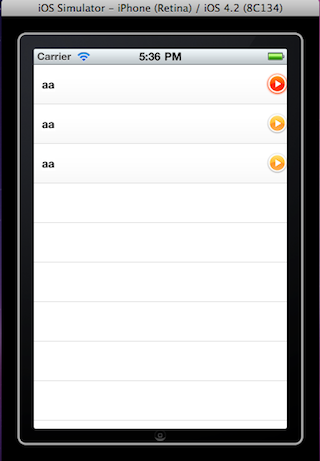
出發點是好的。沒想到,出現了下圖的連帶問題:選擇一行的時候,竟然連帶的出現了高亮效果

這個如何是好?經過網絡搜索,發現我不是第一個遇到這樣的問題:custom-accessory-button-highlight-triggered-by-didselectrowatindexpath
- UIButton *accessoryButton = [UIButton buttonWithType:UIButtonTypeCustom];
- accessoryButton.frame = CGRectMake(0, 0, 32, 32);
- [accessoryButton setImage:[UIImage p_w_picpathNamed:@"AccessoryButtonNormal.png"] forState:UIControlStateNormal];
- [accessoryButton setImage:[UIImage p_w_picpathNamed:@"AccessoryButtonInverse.png"] forState:UIControlStateHighlighted];
- [accessoryButton addTarget:self action:@selector(doAction:) forControlEvents:UIControlEventTouchUpInside];
- cell.accessoryView = accessoryButton;
連使用方法都是一樣的,看來我不是第一個這麼幹的。這哥哥也不給解決辦法,不知道最後搞定沒問題。困惑了一天以後,終於讓我找到了一條小縫隙,實現了下圖的效果:

這個點擊行的時候,整行高亮是系統自帶的功能,沒辦法改變,怎麼辦呢?釜底抽薪,在它高亮完以後再把效果取消!這個出發點是對的,可是浪費了大把的時間以後發現還是達不到預期的效果,怎麼呢?查sdk的時候無意間發現UITablview有個willSelectRowAtIndexPath的方法吧。好吧,這個willSelectRowAtIndexPath比didSelectRowAtIndexPath應該靠前吧,在這裏面試一下
- - (NSIndexPath *)tableView:(UITableView *)tableView willSelectRowAtIndexPath:(NSIndexPath *)indexPath{
- UITableViewCell *Cell = [tableView cellForRowAtIndexPath:indexPath];
- [(UIButton *)Cell.accessoryView setHighlighted:NO];
- return indexPath;
- }
開始直接用的上面的代碼,發現好使靠人品,後來想想即然在這個地方可以,那就延時執行一下,於是用了:
- - (void)mySelectRow:(UIButton *)actionBtn{
- [actionBtn setHighlighted:NO];
- }
- - (NSIndexPath *)tableView:(UITableView *)tableView willSelectRowAtIndexPath:(NSIndexPath *)indexPath{
- UITableViewCell *Cell = [tableView cellForRowAtIndexPath:indexPath];
- [self performSelector:@selector(mySelectRow:) withObject:(UIButton *)Cell.accessoryView afterDelay:0];
- return indexPath;
- }
於是乎,好使了!
哎,一個小效果浪費了一天整的時間!