大綱
一、前言
二、Cobbler 命令詳解
三、導入要安裝的鏡像文件
四、客戶端安裝操作系統
注,操作系統 CentOS 6.4 x86_64,軟件版本 Cobbler-2.4.0-1。(目前最新版)
一、前言
在上一篇博客中(http://freeloda.blog.51cto.com/2033581/1320090)我們詳細的講解了Cobbler安裝與基本配置,在最後的實驗中我們已經安裝好了Cobbler。在這一篇博客中我們來主要講解一下Cobbler命令的使用與相關配置目錄的說明。好了,下面廢話不多說直接上乾貨。(注,這一篇博客的內容是跟着上一篇博客的內容寫的,對安裝不瞭解的博友可以先參考上一篇博客。)
二、Cobbler 命令詳解
1.查看一下Cobbler命令
[root@node2 ~]# cobbler
usage
=====
cobbler <distro|profile|system|repo|p_w_picpath|mgmtclass|package|file> ...
    [add|edit|copy|getks*|list|remove|rename|report] [options|--help]
cobbler <aclsetup|buildiso|import|list|replicate|report|reposync|sync|validateks|version> [options|--help]
注,大家可以在上面的顯示中可以看到cobbler命令有很多的選項,想獲得相關選項的幫助只需要加--help即可。
[root@node2 ~]# cobbler profile --help
usage
=====
cobbler profile add
cobbler profile copy
cobbler profile dumpvars
cobbler profile edit
cobbler profile find
cobbler profile getks
cobbler profile list
cobbler profile remove
cobbler profile rename
cobbler profile report
[root@node2 ~]# cobbler profile add --help
Usage: cobbler [options]
Options:
 -h, --help      show this help message and exit
 --name=NAME      Name (Ex: F10-i386-webserver)
 --uid=UID
 --owners=OWNERS    Owners (Owners list for authz_ownership (space
            delimited))
 --distro=DISTRO    Distribution (Parent distribution)
 --parent=PARENT    Parent Profile
 --enable-gpxe=ENABLE_GPXE
            Enable gPXE? (Use gPXE instead of PXELINUX for
            advanced booting options)
 --enable-menu=ENABLE_MENU
            Enable PXE Menu? (Show this profile in the PXE menu?)
 --kickstart=KICKSTART
            Kickstart (Path to kickstart template)
 --kopts=KERNEL_OPTIONS
            Kernel Options (Ex: selinux=permissive)
 --kopts-post=KERNEL_OPTIONS_POST
            Kernel Options (Post Install) (Ex: clocksource=pit
            noapic)
 --ksmeta=KS_META   Kickstart Metadata (Ex: dog=fang agent=86)
 --proxy=PROXY     Proxy (Proxy URL)
 --repos=REPOS     Repos (Repos to auto-assign to this profile)
 --comment=COMMENT   Comment (Free form text description)
 --virt-auto-boot=VIRT_AUTO_BOOT
            Virt Auto Boot (Auto boot this VM?)
 --virt-cpus=VIRT_CPUS
            Virt CPUs (integer)
 --virt-file-size=VIRT_FILE_SIZE
            Virt File Size(GB)
 --virt-disk-driver=VIRT_DISK_DRIVER
            Virt Disk Driver Type (The on-disk format for the
            virtualization disk)
 --virt-ram=VIRT_RAM  Virt RAM (MB)
 --depth=DEPTH
 --virt-type=VIRT_TYPE
            Virt Type (Virtualization technology to use) (valid
            options: xenpv,xenfv,qemu,kvm,vmware,openvz)
 --virt-path=VIRT_PATH
            Virt Path (Ex: /directory OR VolGroup00)
 --virt-bridge=VIRT_BRIDGE
            Virt Bridge
 --dhcp-tag=DHCP_TAG  DHCP Tag (See manpage or leave blank)
 --server=SERVER    Server Override (See manpage or leave blank)
 --ctime=CTIME
 --mtime=MTIME
 --name-servers=NAME_SERVERS
            Name Servers (space delimited)
 --name-servers-search=NAME_SERVERS_SEARCH
            Name Servers Search Path (space delimited)
 --mgmt-classes=MGMT_CLASSES
            Management Classes (For external configuration
            management)
 --mgmt-parameters=MGMT_PARAMETERS
            Management Parameters (Parameters which will be handed
            to your management application (Must be valid YAML
            dictionary))
 --boot-files=BOOT_FILES
            TFTP Boot Files (Files copied into tftpboot beyond the
            kernel/initrd)
 --fetchable-files=FETCHABLE_FILES
            Fetchable Files (Templates for tftp or wget)
 --template-files=TEMPLATE_FILES
            Template Files (File mappings for built-in config
            management)
 --redhat-management-key=REDHAT_MANAGEMENT_KEY
            Red Hat Management Key (Registration key for RHN,
            Spacewalk, or Satellite)
 --redhat-management-server=REDHAT_MANAGEMENT_SERVER
            Red Hat Management Server (Address of Spacewalk or
            Satellite Server)
 --template-remote-kickstarts=TEMPLATE_REMOTE_KICKSTARTS
 --clobber       allow add to overwrite existing objects
 --in-place      edit items in kopts or ksmeta without clearing the
            other items
2.Cobbler 常用命令詳解
cobbler check #檢查cobbler配置
cobbler sync #同步配置到dhcp/pxe和數據目錄
cobbler list #列出所有的cobbler元素
cobbler import #導入安裝的系統鏡像
cobbler report #列出各元素的詳細信息
cobbler distro #查看導入的發行版系統信息
cobbler profile #查看配置信息
cobbler system #查看添加的系統信息
cobbler reposync #同步yum倉庫到本地
(1).cobbler check
[root@node2 ~]# cobbler check
No configuration problems found. All systems go.
注,主要用於檢查cobbler配置是否有錯。
(2).cobbler sync
[root@node2 ~]# cobbler sync
task started: 2013-11-11_133827_sync
task started (id=Sync, time=Mon Nov 11 13:38:27 2013)
running pre-sync triggers
cleaning trees
removing: /var/lib/tftpboot/pxelinux.cfg/default
removing: /var/lib/tftpboot/grub/grub-x86_64.efi
removing: /var/lib/tftpboot/grub/p_w_picpaths
removing: /var/lib/tftpboot/grub/efidefault
removing: /var/lib/tftpboot/grub/grub-x86.efi
removing: /var/lib/tftpboot/s390x/profile_list
copying bootloaders
trying hardlink /var/lib/cobbler/loaders/grub-x86_64.efi -> /var/lib/tftpboot/grub/grub-x86_64.efi
trying hardlink /var/lib/cobbler/loaders/grub-x86.efi -> /var/lib/tftpboot/grub/grub-x86.efi
copying distros to tftpboot
copying p_w_picpaths
generating PXE configuration files
generating PXE menu structure
rendering DHCP files
generating /etc/dhcp/dhcpd.conf
rendering TFTPD files
generating /etc/xinetd.d/tftp
cleaning link caches
running post-sync triggers
running python triggers from /var/lib/cobbler/triggers/sync/post/*
running python trigger cobbler.modules.sync_post_restart_services
running: dhcpd -t -q
received on stdout:
received on stderr:
running: service dhcpd restart
received on stdout: 關閉 dhcpd:[確定]
正在啓動 dhcpd:[確定]
received on stderr:
running shell triggers from /var/lib/cobbler/triggers/sync/post/*
running python triggers from /var/lib/cobbler/triggers/change/*
running python trigger cobbler.modules.scm_track
running shell triggers from /var/lib/cobbler/triggers/change/*
*** TASK COMPLETE ***
注,同步cobbler配置到數據目錄中,更改某些配置後得執行一下,同步一下配置。
(3).cobbler list
[root@node2 ~]# cobbler list
distros: #導入的發行版本
profiles: #安裝的配置信息
systems: #增加的系統信息
repos: #yum倉庫
p_w_picpaths: #存儲所有導入發行版的Kernel和initrd鏡像用於遠程網絡啓動
mgmtclasses:
packages:
files:
注,用cobbler list 命令可以列出cobbler所有元素。
(4).cobbler import
[root@node2 ~]# cobbler import --help
Usage: cobbler [options]
Options:
 -h, --help      show this help message and exit
 --arch=ARCH      OS architecture being imported
 --breed=BREED     the breed being imported
 --os-version=OS_VERSION
            the version being imported
 --path=PATH      local path or rsync location
 --name=NAME      name, ex 'RHEL-5'
 --available-as=AVAILABLE_AS
            tree is here, don't mirror
 --kickstart=KICKSTART_FILE
            assign this kickstart file
 --rsync-flags=RSYNC_FLAGS
            pass additional flags to rsync
注,cobbler import 命令可以導入我們要安裝的鏡像文件(ISO文件)。
(5).cobbler report
[root@node2 ~]# cobbler report
distros:
==========
profiles:
==========
systems:
==========
repos:
==========
p_w_picpaths:
==========
mgmtclasses:
==========
packages:
==========
files:
==========
注,由於我們還沒有導入任何的系統鏡像文件,所以這裏顯示爲空。一會我們導入完系統鏡像後,就可以看到詳細信息。
(6).cobbler distro
[root@node2 ~]# cobbler distro
usage
=====
cobbler distro add
cobbler distro copy
cobbler distro edit
cobbler distro find
cobbler distro list
cobbler distro remove
cobbler distro rename
cobbler distro report
注,cobbler distro 命令不但可以查看導入的發行版系統信息還可以增加與修改等。
(7).cobbler profile
[root@node2 ~]# cobbler profile
usage
=====
cobbler profile add
cobbler profile copy
cobbler profile dumpvars
cobbler profile edit
cobbler profile find
cobbler profile getks
cobbler profile list
cobbler profile remove
cobbler profile rename
cobbler profile report
注,cobbler profile命令不但可以查看Kickstart文件而且還可以編輯與刪除此文件。
(8).cobbler system
[root@node2 ~]# cobbler system
usage
=====
cobbler system add
cobbler system copy
cobbler system dumpvars
cobbler system edit
cobbler system find
cobbler system getks
cobbler system list
cobbler system poweroff
cobbler system poweron
cobbler system powerstatus
cobbler system reboot
cobbler system remove
cobbler system rename
cobbler system report
注,cobbler system 命令可以將cobbler的配置安裝文件與客戶端相關聯。下面是具體的案例,
[root@node2 ~]# cobbler system add --name=desktop-xfce-1 \
                   --profile=Fedora17-xfce \
                   --mac=52:54:00:b8:5e:8f \
                   --ip-address=192.168.122.10
[root@node2 ~]# cobbler system add --name=desktop-gnome-1 \
                   --profile=Fedora17-gnome \
                   --mac=52:54:00:88:f3:44 \
                   --ip-address=192.168.122.11
[root@node2 ~]# cobbler system report
(9).cobbler reposync
[root@node2 ~]# cobbler reposync
task started: 2013-11-11_144127_reposync
task started (id=Reposync, time=Mon Nov 11 14:41:27 2013)
hello, reposync
run, reposync, run!
*** TASK COMPLETE ***
注,cobbler reposync命令可以同步遠程的yum源到本地。
三、導入要安裝的鏡像文件
1.鏡像文件
CentOS-5.5-x86_64-bin-DVD-1of2.iso
CentOS-6.4-x86_64-bin-DVD1.iso
注,這裏我們主要演示兩個系統。一個是CentOS 5.5,另一個是CentOS6.4。這兩個系統是現在比較常用的兩個,重點給大家演示一下怎麼導入系統。(在上篇博客中我們已經安裝好Cobbler,並修改好相關配置,但是沒有導入任何系統,不清楚的博友可以先參考一下上一篇博客:http://freeloda.blog.51cto.com/2033581/1320090。下面我們就來具體演示一下!)
2.導入CentOS 5.5鏡像
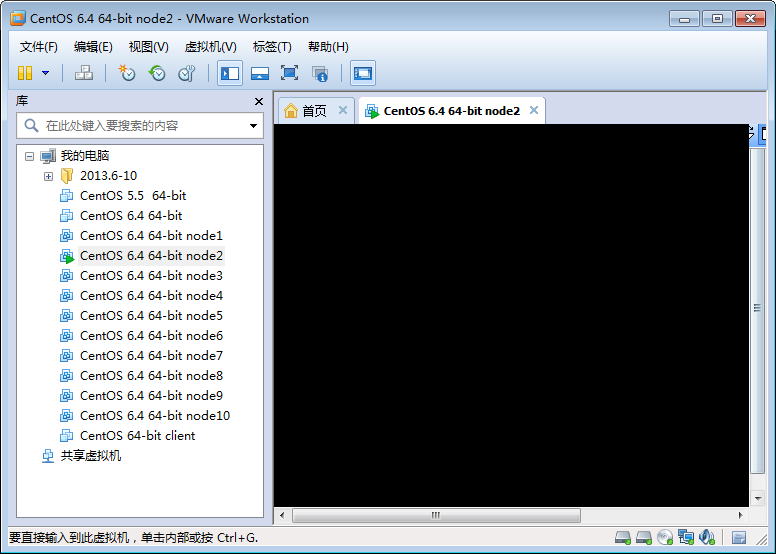
(1).選擇CentOS 5.5鏡像
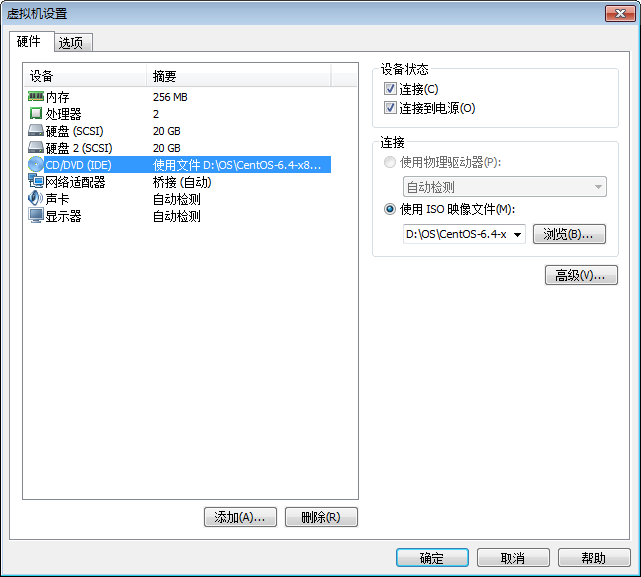
(2).選擇 “使用ISO映像文件”
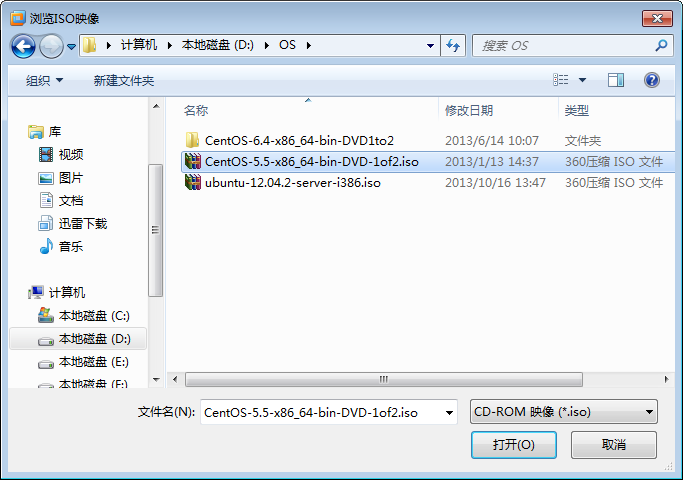
(3).選擇 “CentOS-5.5-x86_64-bin-DVD-1of2.iso”,並確定。
(4).掛載鏡像
[root@node2 ~]# mount /dev/cdrom /mnt
mount: block device /dev/sr0 is write-protected, mounting read-only
[root@node2 ~]# cd /mnt/
[root@node2 mnt]# ls
CentOS  RELEASE-NOTES-cs    RELEASE-NOTES-en_US    RELEASE-NOTES-ja     RELEASE-NOTES-ro
EULA   RELEASE-NOTES-cs.html RELEASE-NOTES-en_US.html RELEASE-NOTES-ja.html   RELEASE-NOTES-ro.html
GPL    RELEASE-NOTES-de    RELEASE-NOTES-es     RELEASE-NOTES-nl     repodata
p_w_picpaths  RELEASE-NOTES-de.html RELEASE-NOTES-es.html   RELEASE-NOTES-nl.html   RPM-GPG-KEY-beta
isolinux RELEASE-NOTES-en    RELEASE-NOTES-fr     RELEASE-NOTES-pt_BR    RPM-GPG-KEY-CentOS-5
NOTES   RELEASE-NOTES-en.html RELEASE-NOTES-fr.html   RELEASE-NOTES-pt_BR.html TRANS.TBL
(5).使用cobbler import命令導入鏡像
[root@node2 mnt]# cobbler import --help
Usage: cobbler [options]
Options:
 -h, --help      show this help message and exit
 --arch=ARCH      OS architecture being imported
 --breed=BREED     the breed being imported
 --os-version=OS_VERSION
            the version being imported
 --path=PATH      local path or rsync location
 --name=NAME      name, ex 'RHEL-5'
 --available-as=AVAILABLE_AS
            tree is here, don't mirror
 --kickstart=KICKSTART_FILE
            assign this kickstart file
 --rsync-flags=RSYNC_FLAGS
            pass additional flags to rsync
注,主要有以下幾個參數--path 指定導入鏡像的路徑,--name 指定導入鏡像的名稱,--arch 指定導入鏡像的架構(32位還是64位)。還有需要說明的是這裏導入的時間相對較長大概在5-10分鐘左右,請大家耐心等待。下面是具體的導入過程,
[root@node2 ~]# cobbler import --path=/mnt/ --name=CentOS-5.5 --arch=x86_64
task started: 2013-11-11_154941_import
task started (id=Media import, time=Mon Nov 11 15:49:41 2013)
Found a candidate signature: breed=redhat, version=rhel5
Found a matching signature: breed=redhat, version=rhel5
Adding distros from path /var/www/cobbler/ks_mirror/CentOS-5.5-x86_64:
creating new distro: CentOS-5.5-x86_64
trying symlink: /var/www/cobbler/ks_mirror/CentOS-5.5-x86_64 -> /var/www/cobbler/links/CentOS-5.5-x86_64
creating new profile: CentOS-5.5-x86_64
creating new distro: CentOS-5.5-xen-x86_64
trying symlink: /var/www/cobbler/ks_mirror/CentOS-5.5-x86_64 -> /var/www/cobbler/links/CentOS-5.5-xen-x86_64
creating new profile: CentOS-5.5-xen-x86_64
associating repos
checking for rsync repo(s)
checking for rhn repo(s)
checking for yum repo(s)
starting descent into /var/www/cobbler/ks_mirror/CentOS-5.5-x86_64 for CentOS-5.5-x86_64
processing repo at : /var/www/cobbler/ks_mirror/CentOS-5.5-x86_64
need to process repo/comps: /var/www/cobbler/ks_mirror/CentOS-5.5-x86_64
looking for /var/www/cobbler/ks_mirror/CentOS-5.5-x86_64/repodata/*comps*.xml
running: createrepo -c cache -s sha --groupfile /var/www/cobbler/ks_mirror/CentOS-5.5-x86_64/repodata/comps.xml /var/www/cobbler/ks_mirror/CentOS-5.5-x86_64
received on stdout: Spawning worker 0 with 3392 pkgs
Workers Finished
Gathering worker results
Saving Primary metadata
Saving file lists metadata
Saving other metadata
Generating sqlite DBs
Sqlite DBs complete
received on stderr:
starting descent into /var/www/cobbler/ks_mirror/CentOS-5.5-x86_64 for CentOS-5.5-xen-x86_64
processing repo at : /var/www/cobbler/ks_mirror/CentOS-5.5-x86_64
need to process repo/comps: /var/www/cobbler/ks_mirror/CentOS-5.5-x86_64
looking for /var/www/cobbler/ks_mirror/CentOS-5.5-x86_64/repodata/*comps*.xml
*** TASK COMPLETE ***
注,從上面顯示信息所知,cobbler會將鏡像中的拷貝到本地一份,放在/var/www/cobbler/ks_mirrors下的CentOS-5.5-x86_64目錄下。同時會創建一個名字爲CentOS-5.5-x86_64的一個發佈版本,以及一個名字爲CentOS-5.5-x86_64的profile文件。下面我們來具體查看一下,
[root@node2 cobbler]# cobbler list
distros:
  CentOS-5.5-x86_64
  CentOS-5.5-xen-x86_64
profiles:
  CentOS-5.5-x86_64
  CentOS-5.5-xen-x86_64
systems:
repos:
p_w_picpaths:
mgmtclasses:
packages:
files:
(6).cobbler report 查看一下詳細信息
[root@node2 ks_mirror]# cobbler report
distros:
==========
Name              : CentOS-5.5-x86_64
Architecture          : x86_64
TFTP Boot Files        : {}
Breed             : redhat
Comment            :
Fetchable Files        : {}
Initrd             : /var/www/cobbler/ks_mirror/CentOS-5.5-x86_64/p_w_picpaths/pxeboot/initrd.img
Kernel             : /var/www/cobbler/ks_mirror/CentOS-5.5-x86_64/p_w_picpaths/pxeboot/vmlinuz
Kernel Options         : {}
Kernel Options (Post Install) : {}
Kickstart Metadata       : {'tree': 'http://@@http_server@@/cblr/links/CentOS-5.5-x86_64'}
Management Classes       : []
OS Version           : rhel5
Owners             : ['admin']
Red Hat Management Key     : <<inherit>>
Red Hat Management Server   : <<inherit>>
Template Files         : {}
Name              : CentOS-5.5-xen-x86_64
Architecture          : x86_64
TFTP Boot Files        : {}
Breed             : redhat
Comment            :
Fetchable Files        : {}
Initrd             : /var/www/cobbler/ks_mirror/CentOS-5.5-x86_64/p_w_picpaths/xen/initrd.img
Kernel             : /var/www/cobbler/ks_mirror/CentOS-5.5-x86_64/p_w_picpaths/xen/vmlinuz
Kernel Options         : {}
Kernel Options (Post Install) : {}
Kickstart Metadata       : {'tree': 'http://@@http_server@@/cblr/links/CentOS-5.5-xen-x86_64'}
Management Classes       : []
OS Version           : rhel5
Owners             : ['admin']
Red Hat Management Key     : <<inherit>>
Red Hat Management Server   : <<inherit>>
Template Files         : {}
profiles:
==========
Name              : CentOS-5.5-x86_64
TFTP Boot Files        : {}
Comment            :
DHCP Tag            : default
Distribution          : CentOS-5.5-x86_64
Enable gPXE?          : 0
Enable PXE Menu?        : 1
Fetchable Files        : {}
Kernel Options         : {}
Kernel Options (Post Install) : {}
Kickstart           : /var/lib/cobbler/kickstarts/sample.ks
Kickstart Metadata       : {}
Management Classes       : []
Management Parameters     : <<inherit>>
Name Servers          : []
Name Servers Search Path    : []
Owners             : ['admin']
Parent Profile         :
Proxy             :
Red Hat Management Key     : <<inherit>>
Red Hat Management Server   : <<inherit>>
Repos             : []
Server Override        : <<inherit>>
Template Files         : {}
Virt Auto Boot         : 1
Virt Bridge          : xenbr0
Virt CPUs           : 1
Virt Disk Driver Type     : raw
Virt File Size(GB)       : 5
Virt Path           :
Virt RAM (MB)         : 512
Virt Type           : kvm
Name              : CentOS-5.5-xen-x86_64
TFTP Boot Files        : {}
Comment            :
DHCP Tag            : default
Distribution          : CentOS-5.5-xen-x86_64
Enable gPXE?          : 0
Enable PXE Menu?        : 1
Fetchable Files        : {}
Kernel Options         : {}
Kernel Options (Post Install) : {}
Kickstart           : /var/lib/cobbler/kickstarts/sample.ks
Kickstart Metadata       : {}
Management Classes       : []
Management Parameters     : <<inherit>>
Name Servers          : []
Name Servers Search Path    : []
Owners             : ['admin']
Parent Profile         :
Proxy             :
Red Hat Management Key     : <<inherit>>
Red Hat Management Server   : <<inherit>>
Repos             : []
Server Override        : <<inherit>>
Template Files         : {}
Virt Auto Boot         : 1
Virt Bridge          : xenbr0
Virt CPUs           : 1
Virt Disk Driver Type     : raw
Virt File Size(GB)       : 5
Virt Path           :
Virt RAM (MB)         : 512
Virt Type           : xenpv
systems:
==========
repos:
==========
p_w_picpaths:
==========
mgmtclasses:
==========
packages:
==========
files:
==========
好了,到這裏我們的CentOS5.5的鏡像文件就導入完成了,同樣的CentOS 6.4導入方法與CentOS5.5是一樣的,在下面我們會爲大傢俱體演示。下面我們爲大家演示一下,用客戶端安裝操作系統!
四、客戶端安裝操作系統
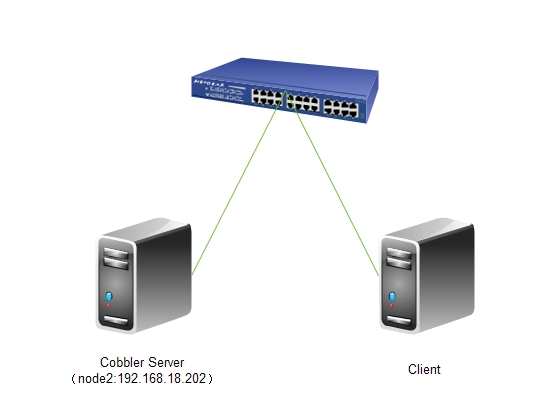
1.實驗拓撲
2.在VMWare中新建客戶端
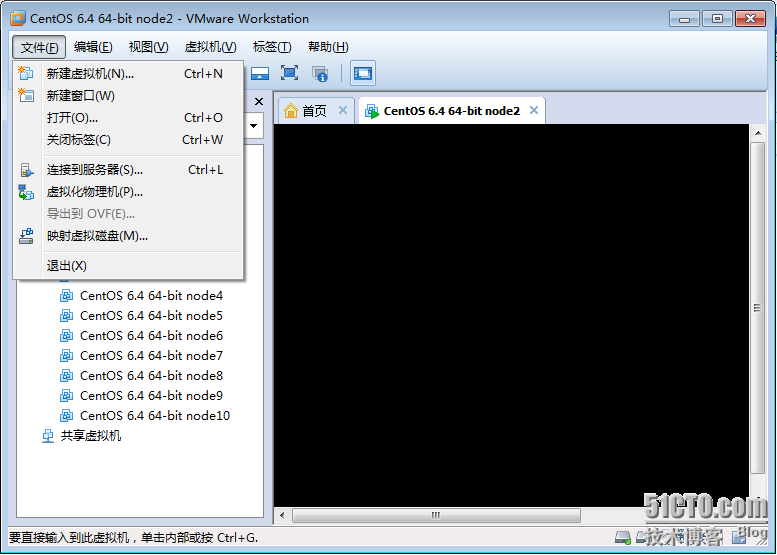
(1).新建虛擬機
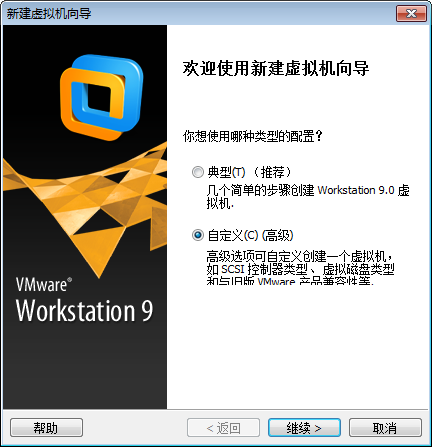
(2).這裏我們選擇自定義
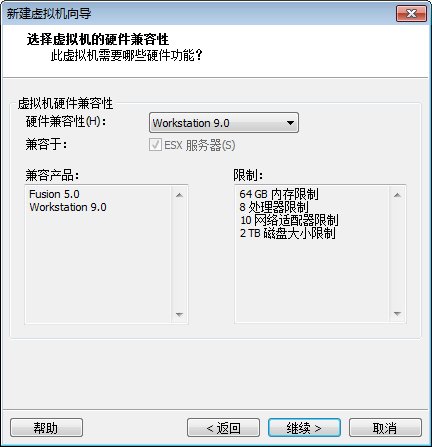
(3). 這裏默認就好,選擇“下一步”。
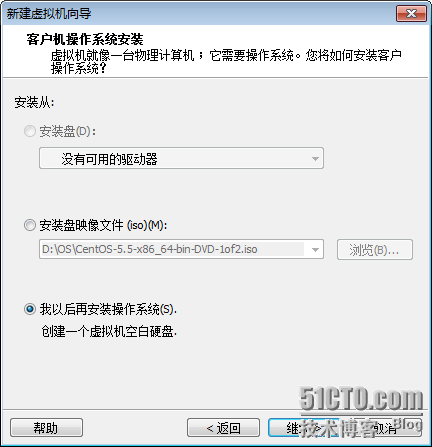
(4).這裏選擇“以後安裝操作系統”
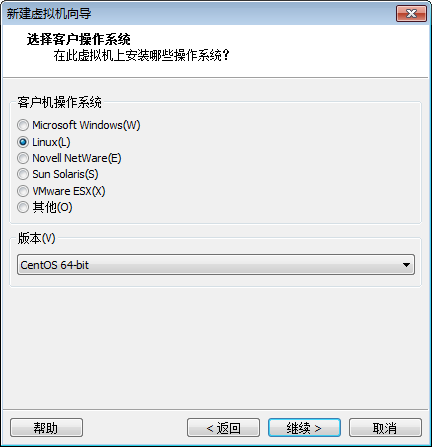
(5).這裏我們選擇“CentOS 64-bit”
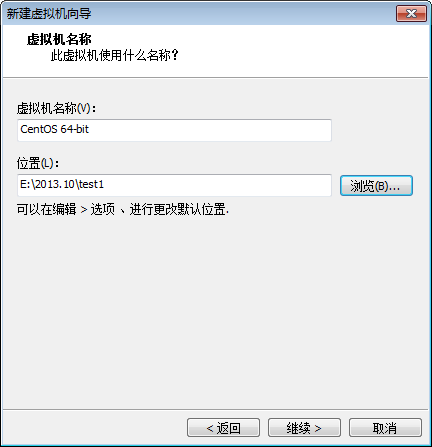
(6).這裏我們設置虛擬機名稱與存放位置
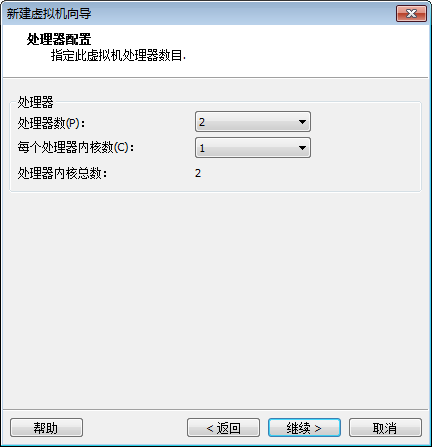
(7).這裏我們設置CPU個數
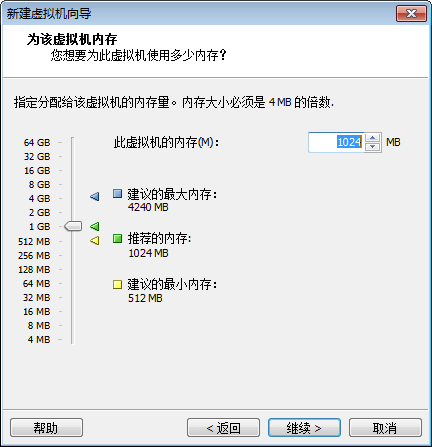
(8).這裏我們設置虛擬機的內存
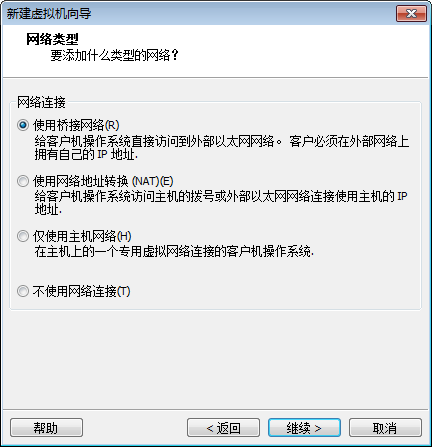
(9).這裏我們設置一下網絡連接,這裏我們設置的“橋接”
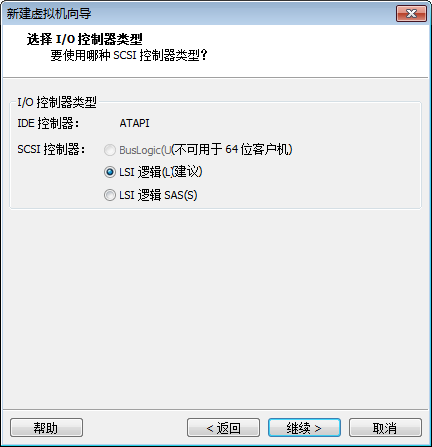
(10).這裏我們選擇一下I/O設備的控制器
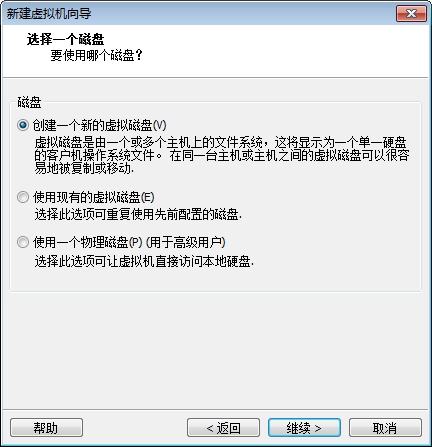
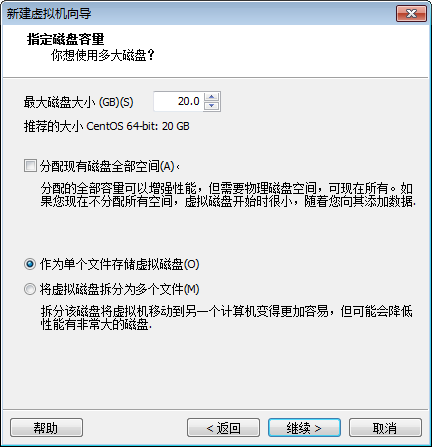
(11).創建一個磁盤
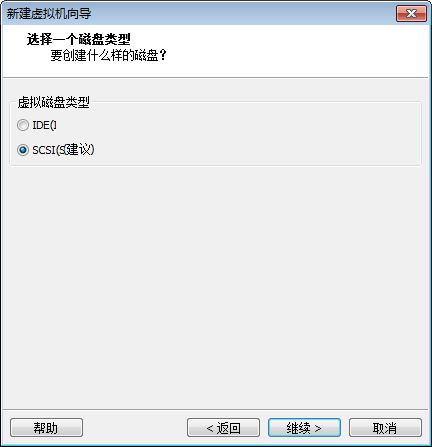
(12).選擇磁盤類型
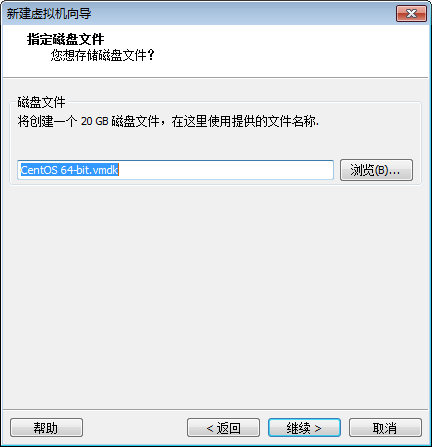
(13).選擇磁盤存放的位置
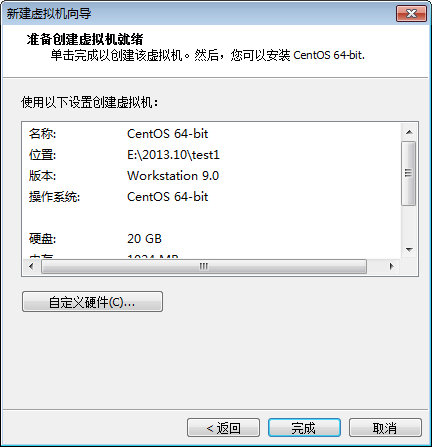
(14).到這裏我們虛擬機就新建完成
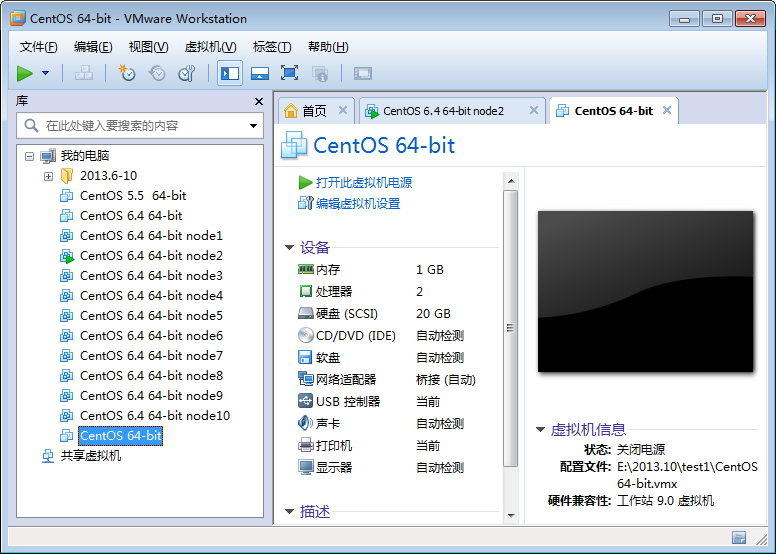
(15).結果如下
3.具體的安裝過程
(1).安裝前檢查
[root@node2 ~]# cobbler check
No configuration problems found. All systems go.
[root@node2 ~]# cobbler sync
task started: 2013-11-11_170434_sync
task started (id=Sync, time=Mon Nov 11 17:04:34 2013)
running pre-sync triggers
cleaning trees
removing: /var/www/cobbler/p_w_picpaths/CentOS-5.5-x86_64
removing: /var/www/cobbler/p_w_picpaths/CentOS-5.5-xen-x86_64
removing: /var/lib/tftpboot/pxelinux.cfg/default
removing: /var/lib/tftpboot/grub/grub-x86_64.efi
removing: /var/lib/tftpboot/grub/p_w_picpaths
removing: /var/lib/tftpboot/grub/efidefault
removing: /var/lib/tftpboot/grub/grub-x86.efi
removing: /var/lib/tftpboot/p_w_picpaths/CentOS-5.5-x86_64
removing: /var/lib/tftpboot/p_w_picpaths/CentOS-5.5-xen-x86_64
removing: /var/lib/tftpboot/s390x/profile_list
copying bootloaders
trying hardlink /var/lib/cobbler/loaders/grub-x86_64.efi -> /var/lib/tftpboot/grub/grub-x86_64.efi
trying hardlink /var/lib/cobbler/loaders/grub-x86.efi -> /var/lib/tftpboot/grub/grub-x86.efi
copying distros to tftpboot
copying files for distro: CentOS-5.5-x86_64
trying hardlink /var/www/cobbler/ks_mirror/CentOS-5.5-x86_64/p_w_picpaths/pxeboot/vmlinuz -> /var/lib/tftpboot/p_w_picpaths/CentOS-5.5-x86_64/vmlinuz
trying hardlink /var/www/cobbler/ks_mirror/CentOS-5.5-x86_64/p_w_picpaths/pxeboot/initrd.img -> /var/lib/tftpboot/p_w_picpaths/CentOS-5.5-x86_64/initrd.img
copying files for distro: CentOS-5.5-xen-x86_64
trying hardlink /var/www/cobbler/ks_mirror/CentOS-5.5-x86_64/p_w_picpaths/xen/vmlinuz -> /var/lib/tftpboot/p_w_picpaths/CentOS-5.5-xen-x86_64/vmlinuz
trying hardlink /var/www/cobbler/ks_mirror/CentOS-5.5-x86_64/p_w_picpaths/xen/initrd.img -> /var/lib/tftpboot/p_w_picpaths/CentOS-5.5-xen-x86_64/initrd.img
copying p_w_picpaths
generating PXE configuration files
generating PXE menu structure
copying files for distro: CentOS-5.5-x86_64
trying hardlink /var/www/cobbler/ks_mirror/CentOS-5.5-x86_64/p_w_picpaths/pxeboot/vmlinuz -> /var/www/cobbler/p_w_picpaths/CentOS-5.5-x86_64/vmlinuz
trying hardlink /var/www/cobbler/ks_mirror/CentOS-5.5-x86_64/p_w_picpaths/pxeboot/initrd.img -> /var/www/cobbler/p_w_picpaths/CentOS-5.5-x86_64/initrd.img
Writing template files for CentOS-5.5-x86_64
copying files for distro: CentOS-5.5-xen-x86_64
trying hardlink /var/www/cobbler/ks_mirror/CentOS-5.5-x86_64/p_w_picpaths/xen/vmlinuz -> /var/www/cobbler/p_w_picpaths/CentOS-5.5-xen-x86_64/vmlinuz
trying hardlink /var/www/cobbler/ks_mirror/CentOS-5.5-x86_64/p_w_picpaths/xen/initrd.img -> /var/www/cobbler/p_w_picpaths/CentOS-5.5-xen-x86_64/initrd.img
Writing template files for CentOS-5.5-xen-x86_64
rendering DHCP files
generating /etc/dhcp/dhcpd.conf
rendering TFTPD files
generating /etc/xinetd.d/tftp
cleaning link caches
running post-sync triggers
running python triggers from /var/lib/cobbler/triggers/sync/post/*
running python trigger cobbler.modules.sync_post_restart_services
running: dhcpd -t -q
received on stdout:
received on stderr:
running: service dhcpd restart
received on stdout: 關閉 dhcpd:[確定]
正在啓動 dhcpd:[確定]
received on stderr:
running shell triggers from /var/lib/cobbler/triggers/sync/post/*
running python triggers from /var/lib/cobbler/triggers/change/*
running python trigger cobbler.modules.scm_track
running shell triggers from /var/lib/cobbler/triggers/change/*
*** TASK COMPLETE ***
(2).查看一下啓動的服務端口
[root@node2 mnt]# netstat -ntulp
Active Internet connections (only servers)
Proto Recv-Q Send-Q Local Address        Foreign Address       State    PID/Program name
tcp    0   0 0.0.0.0:22         0.0.0.0:*          LISTEN   1031/sshd
tcp    0   0 127.0.0.1:25        0.0.0.0:*          LISTEN   1108/master
tcp    0   0 127.0.0.1:6010       0.0.0.0:*          LISTEN   1143/sshd
tcp    0   0 127.0.0.1:25151       0.0.0.0:*          LISTEN   2015/python
tcp    0   0 :::80            :::*            LISTEN   2030/httpd
tcp    0   0 :::22            :::*            LISTEN   1031/sshd
tcp    0   0 ::1:25           :::*            LISTEN   1108/master
tcp    0   0 ::1:6010          :::*            LISTEN   1143/sshd
tcp    0   0 :::873           :::*            LISTEN   1990/xinetd
udp    0   0 0.0.0.0:67         0.0.0.0:*                1974/dhcpd
udp    0   0 0.0.0.0:69         0.0.0.0:*                1990/xinetd
udp    0   0 0.0.0.0:69         0.0.0.0:*                1905/in.tftpd
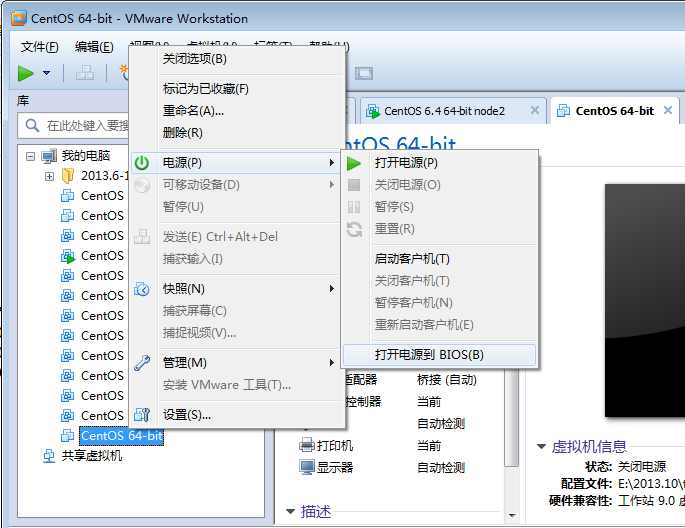
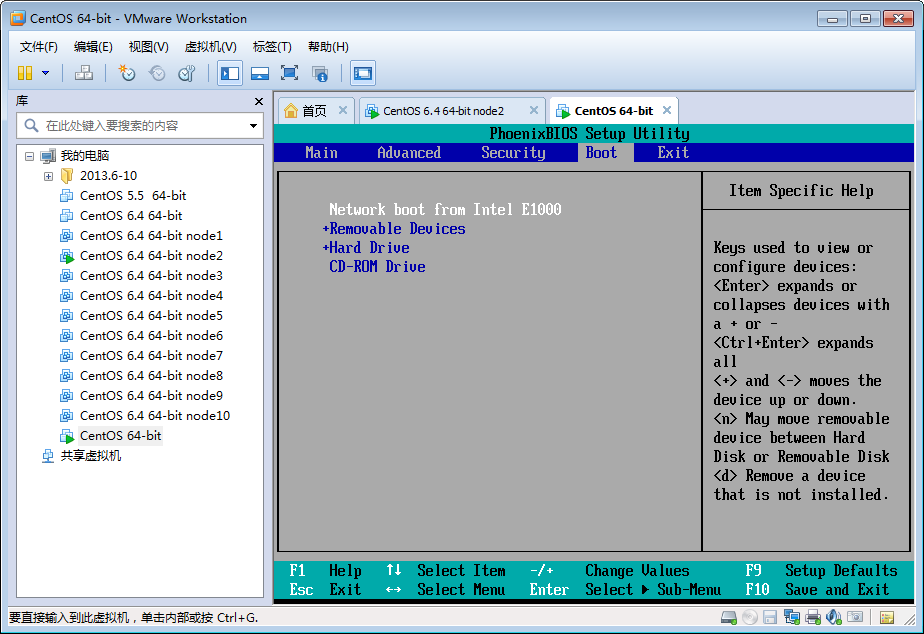
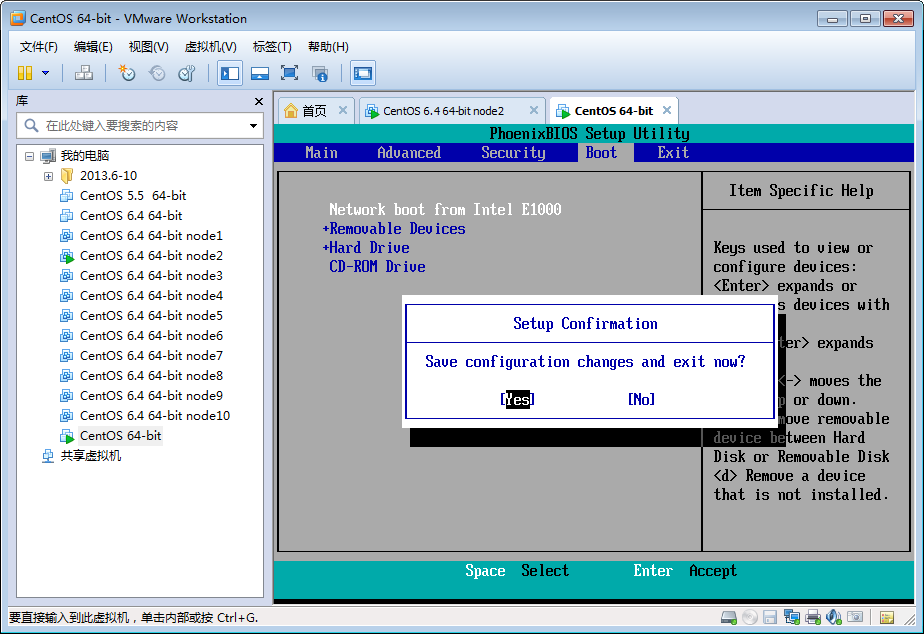
(3).啓動客戶端(設置爲網絡啓動)
(4).下面是具體安裝過程
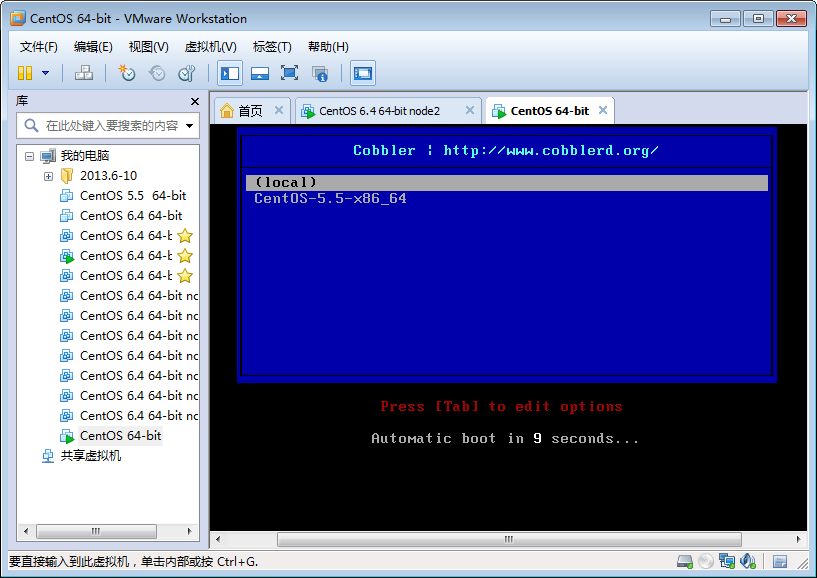
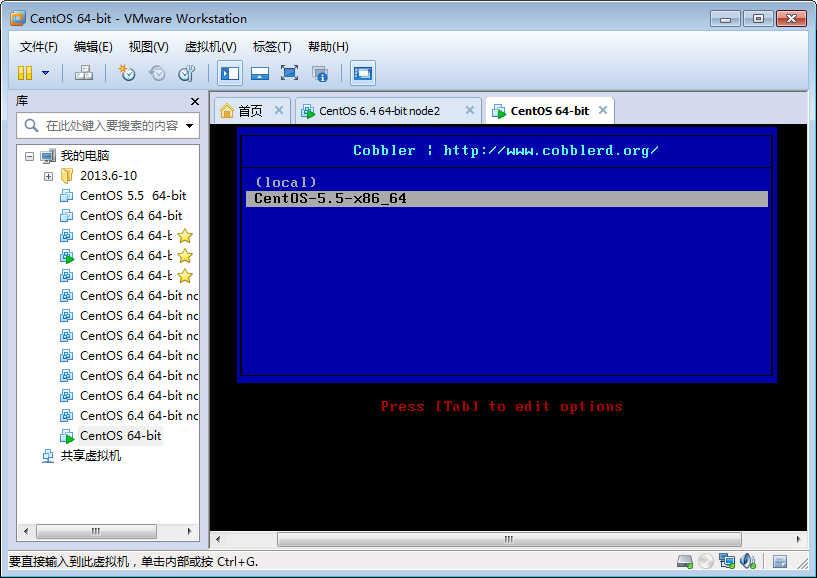
注,重新啓動直接進入安裝界面。
注,我們選擇CentOS-5.5-x86_64。
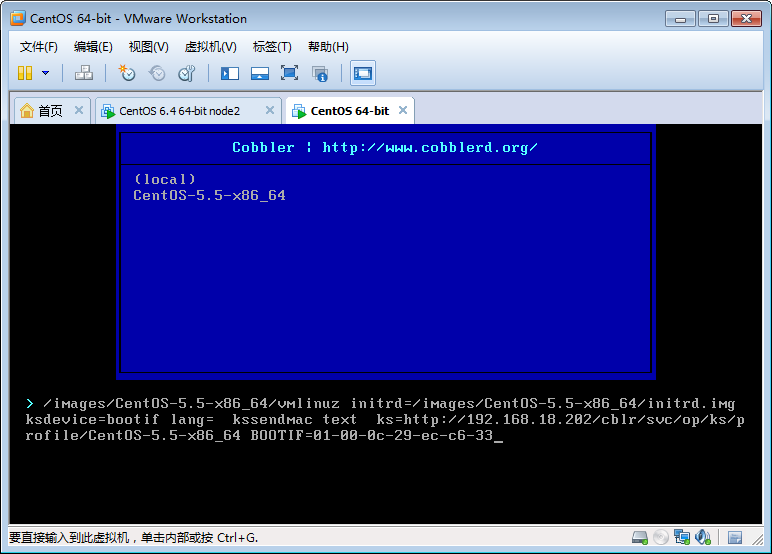
注,我們點擊 “Tab”鍵查看具體參數。
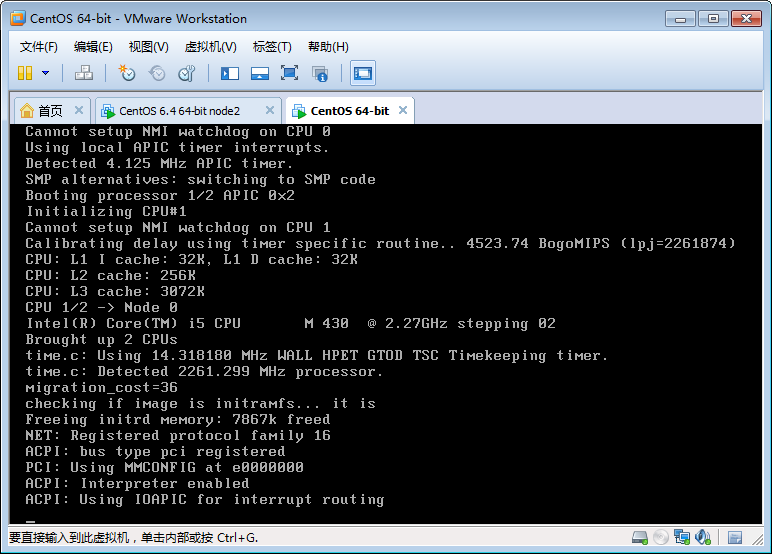
注,直接敲“回車”鍵進行安裝。
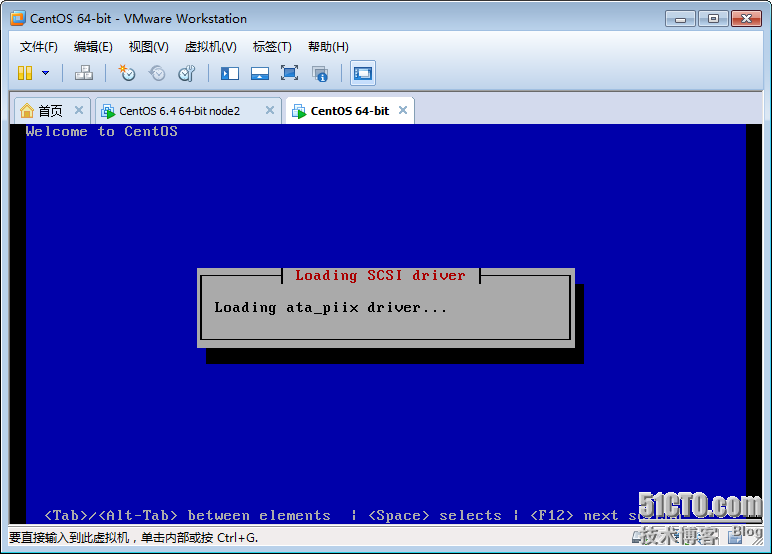
注,下面是加載驅動界面。
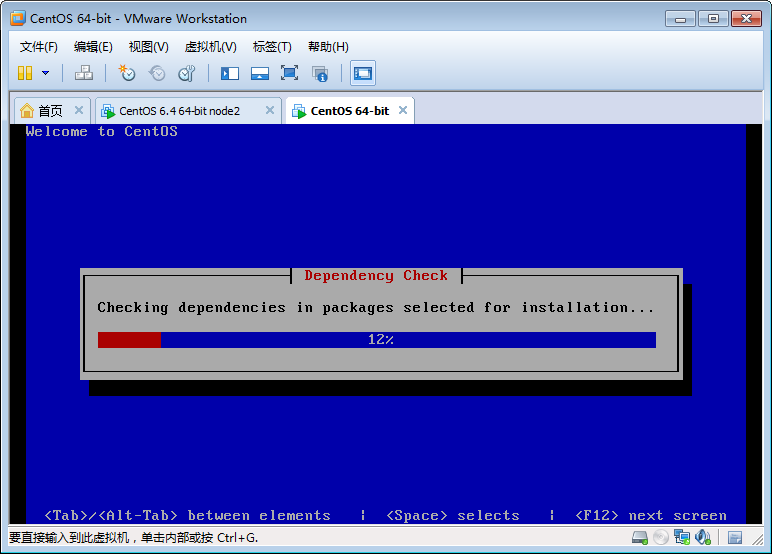
注,下面是檢查安裝的依賴關係。
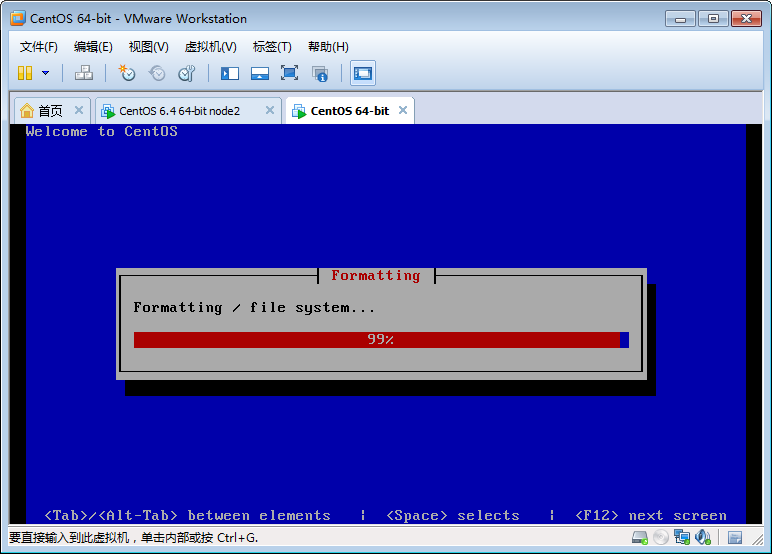
注,下面是進行格式化。
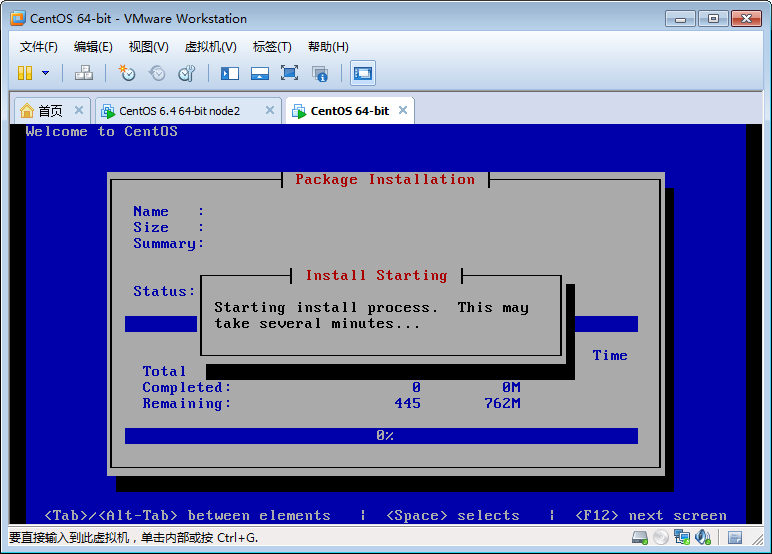
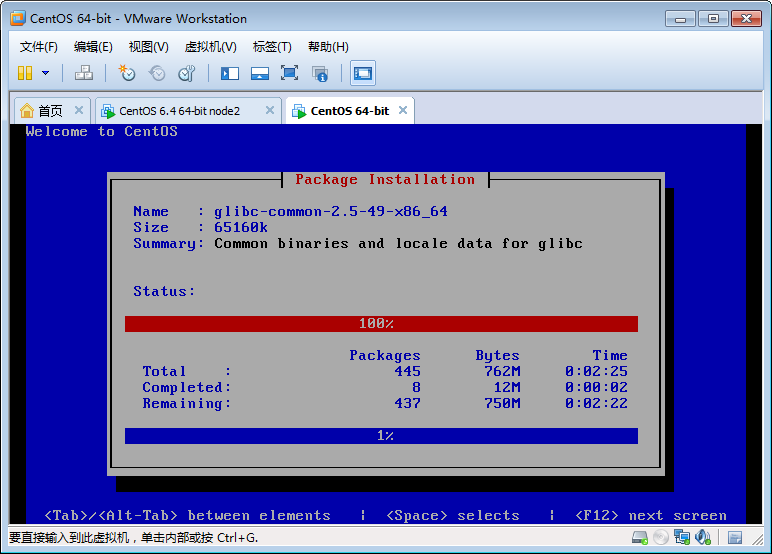
注,下面進行軟件包的安裝 。
注,下面是軟件包安裝完成界面。安裝完成後自動重啓!
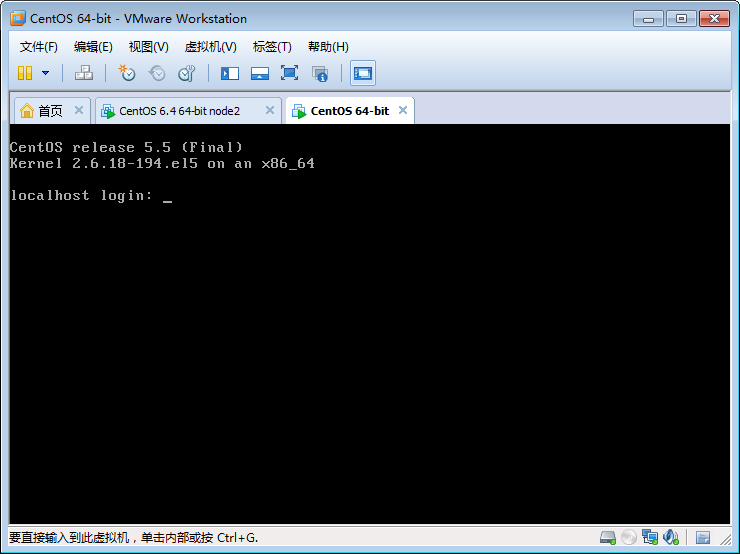
注,安裝完成重啓以後進行登錄界面。
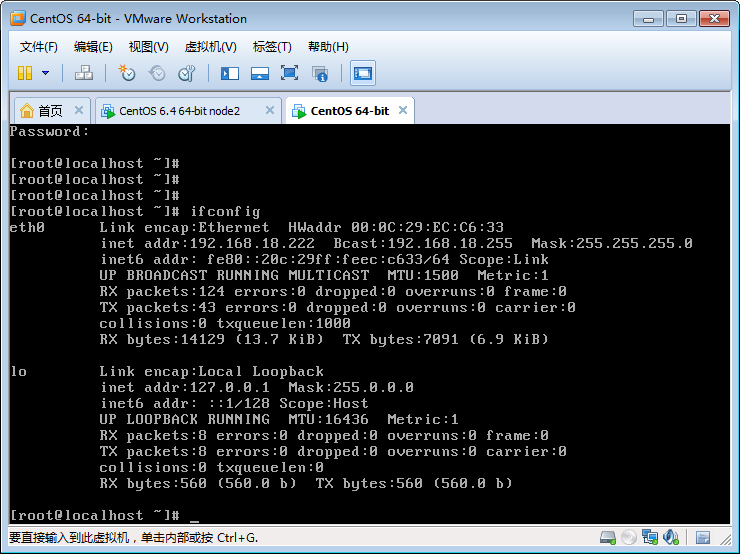
注,輸入用戶名和密碼,我這裏的用戶是root,密碼爲123456。
好了,到這裏我們的CentOS 5.5就安裝完成了。在下篇博客中我們爲大家講解Cobbler安裝CentOS6.4以及各種問題彙總解答。最後,希望大家有所收穫^_^……

